Selecting devices to mount
To select the devices to mount to the host operating system use the information in this topic.
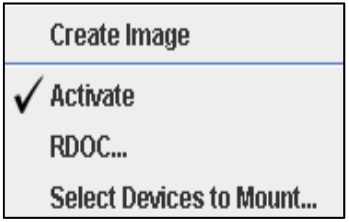
The Virtual Media session must be activated for you to mount a drive or image file to the host operating system, (as shown in the following illustration).
To select the devices to mount, complete the following steps:
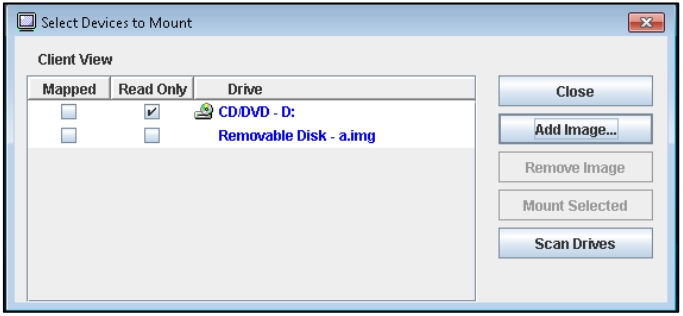
- Click the Select Devices to Mount option under the Virtual Media tab in the Video Viewer window. The Select Devices to Mount window is displayed, (as shown in the following illustration).
- Click the check box of the device or devices that you want to mount or map.
- Click the Mount Selected button.
The Select Devices to Mount window contains a list of the current local devices that are available for mounting. This window contains the following fields and buttons:
- The Mapped field contains the check box that allows you to select the devices to mount or map.
- The Read Only field contains the check box that allows you to select the mapped or mounted devices that will be read-only on the host server.
- The Drive field contains the device path on the local machine.
- Click the Close button to close the Select Devices to Mount window and return to the Video Viewer page.
- Click the Add Image button to browse for the diskette image and ISO image file in your local file system that you want to add to the list of devices.
- Click the Remove Image button to remove an image that has been added to the list of devices.
- Click the Mount Selected button to mount or map all devices that are checked for mounting or mapping in the Mapped field.
- Click the Scan Drives button to refresh the list of local devices.
Give documentation feedback