Install the WLAN antennas
Follow instructions in this section to install the WLAN antennas.
About this task
Read Installation Guidelines and Safety inspection checklist to ensure that you work safely.
Touch the static-protective package that contains the component to any unpainted metal surface on the server; then, remove it from the package and place it on a static-protective surface.
Procedure
- Locate the corresponding connector to install the WLAN antenna.Figure 1. Locations of WLAN antennas
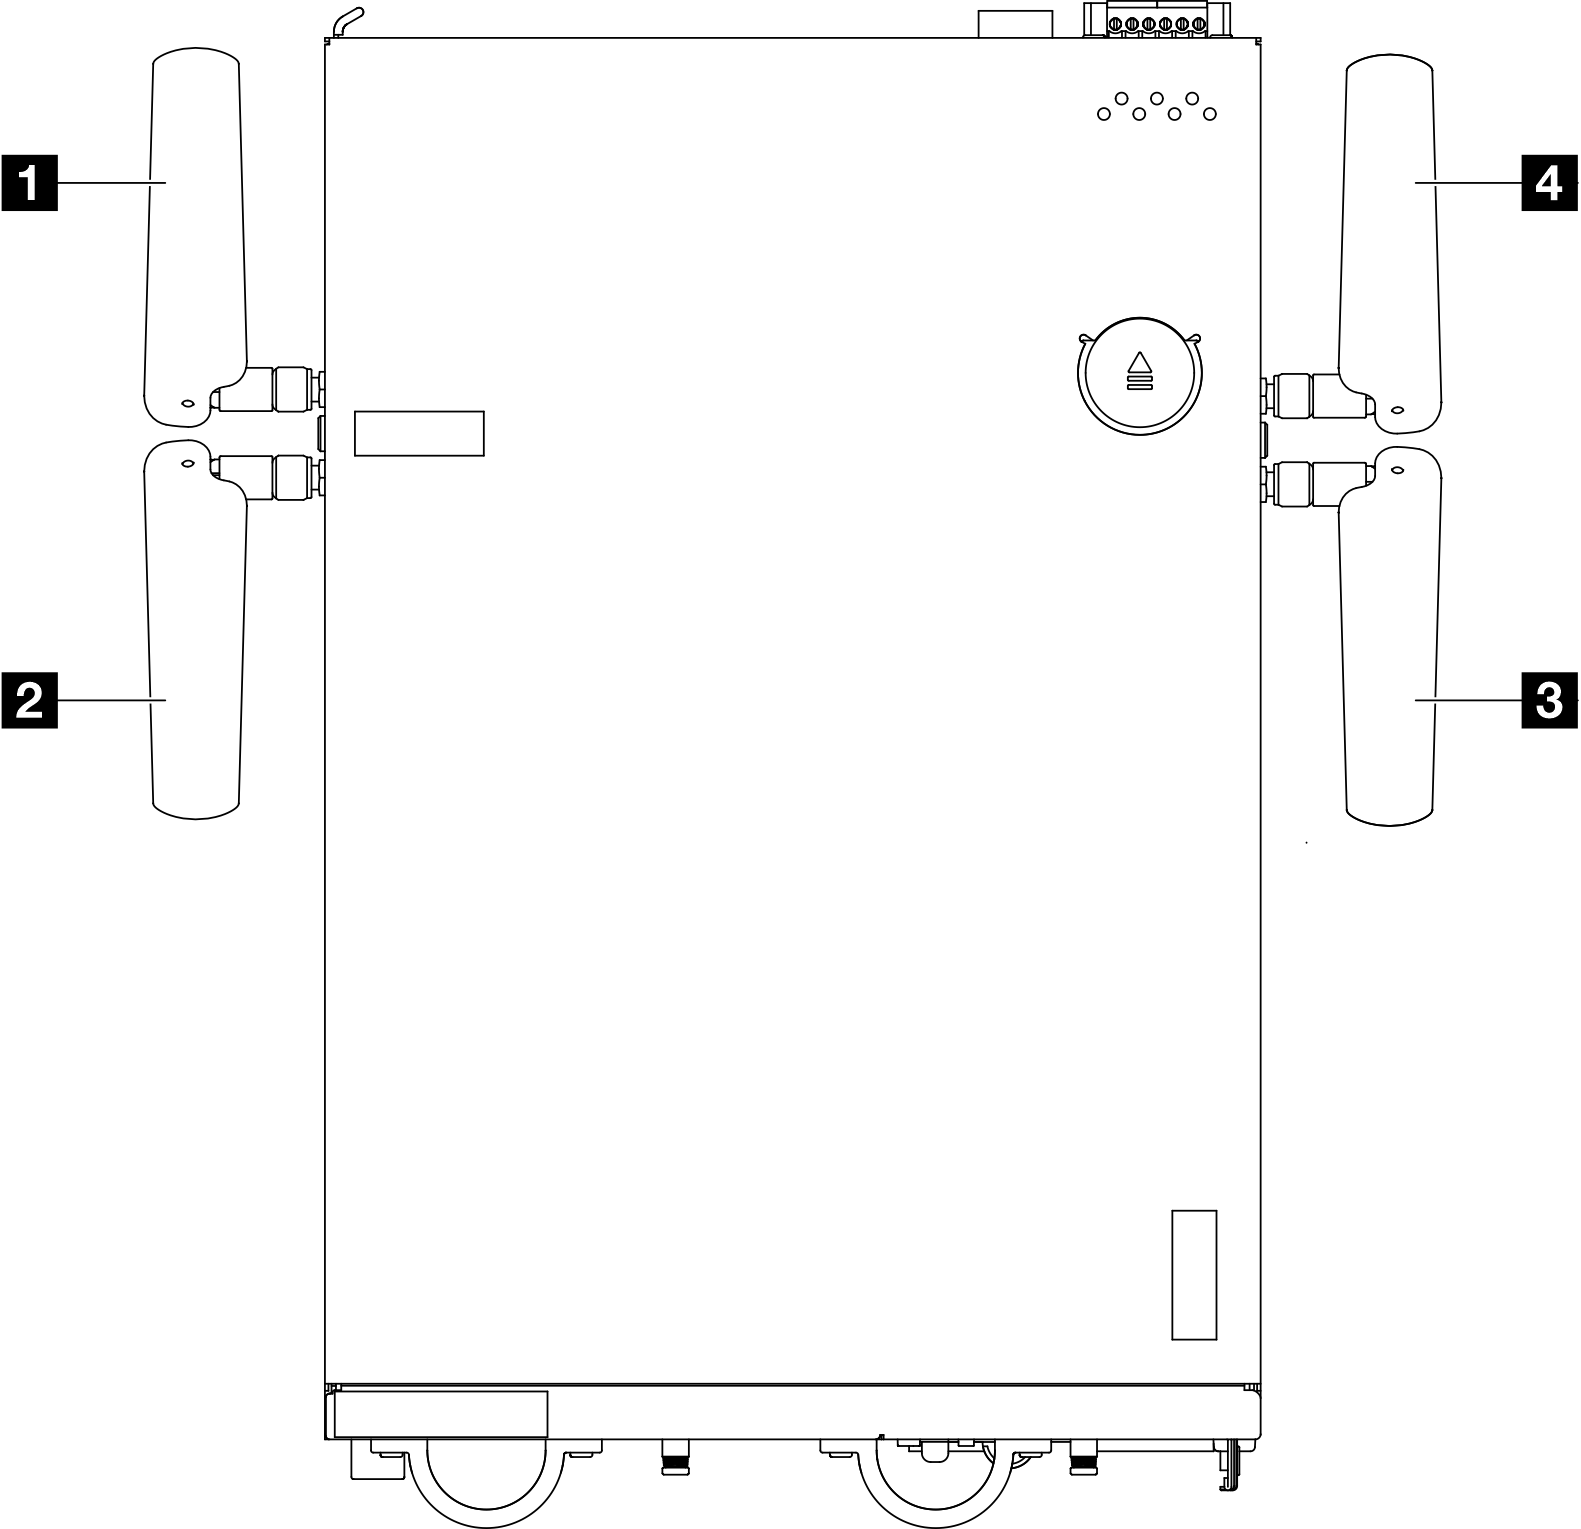 NoteThe orientation of the following table aligns with the above illustration.
1 Antenna 1 (XCC WLAN) 4 Antenna 4 (x86 WLAN) 2 Antenna 2 (XCC WLAN) 3 Antenna 3 (x86 WLAN) - Make sure the SMA connectors are fully extended. If necessary, turn the screw between the two SMA connectors counterclockwise to extend the SMA connectors.ImportantWhen the SMA connectors are fully extended as shown in the following illustration,
STOP turning the screw counterclockwise. Turning the screw excessively might cause damage to the components. Figure 2. Extending the SMA connectors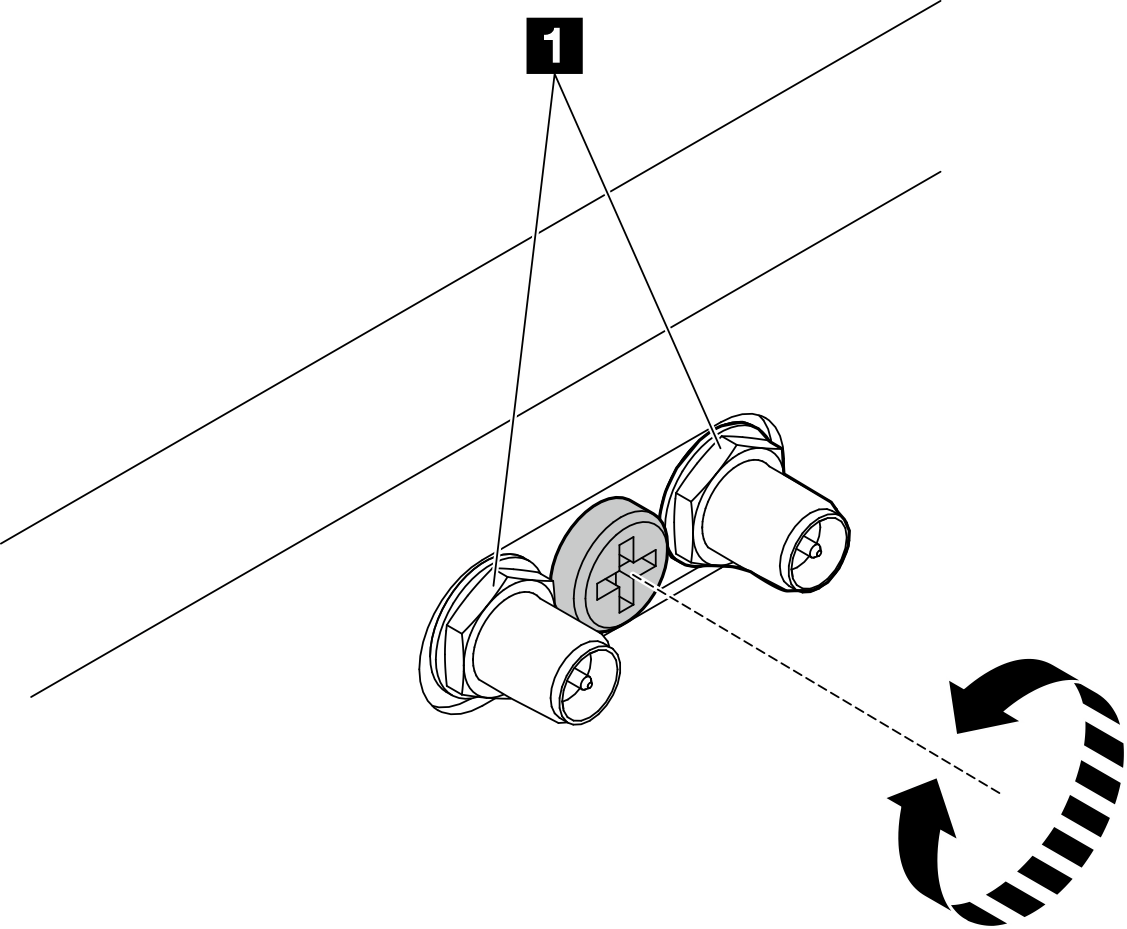
- Place a washer between the antenna and the server if necessary; then, rotate the antenna clockwise until it is firmly secured to the chassis.NoteThe suggested fastening torque is 3.5 Kgf-cm.Figure 3. Installing a WLAN antenna
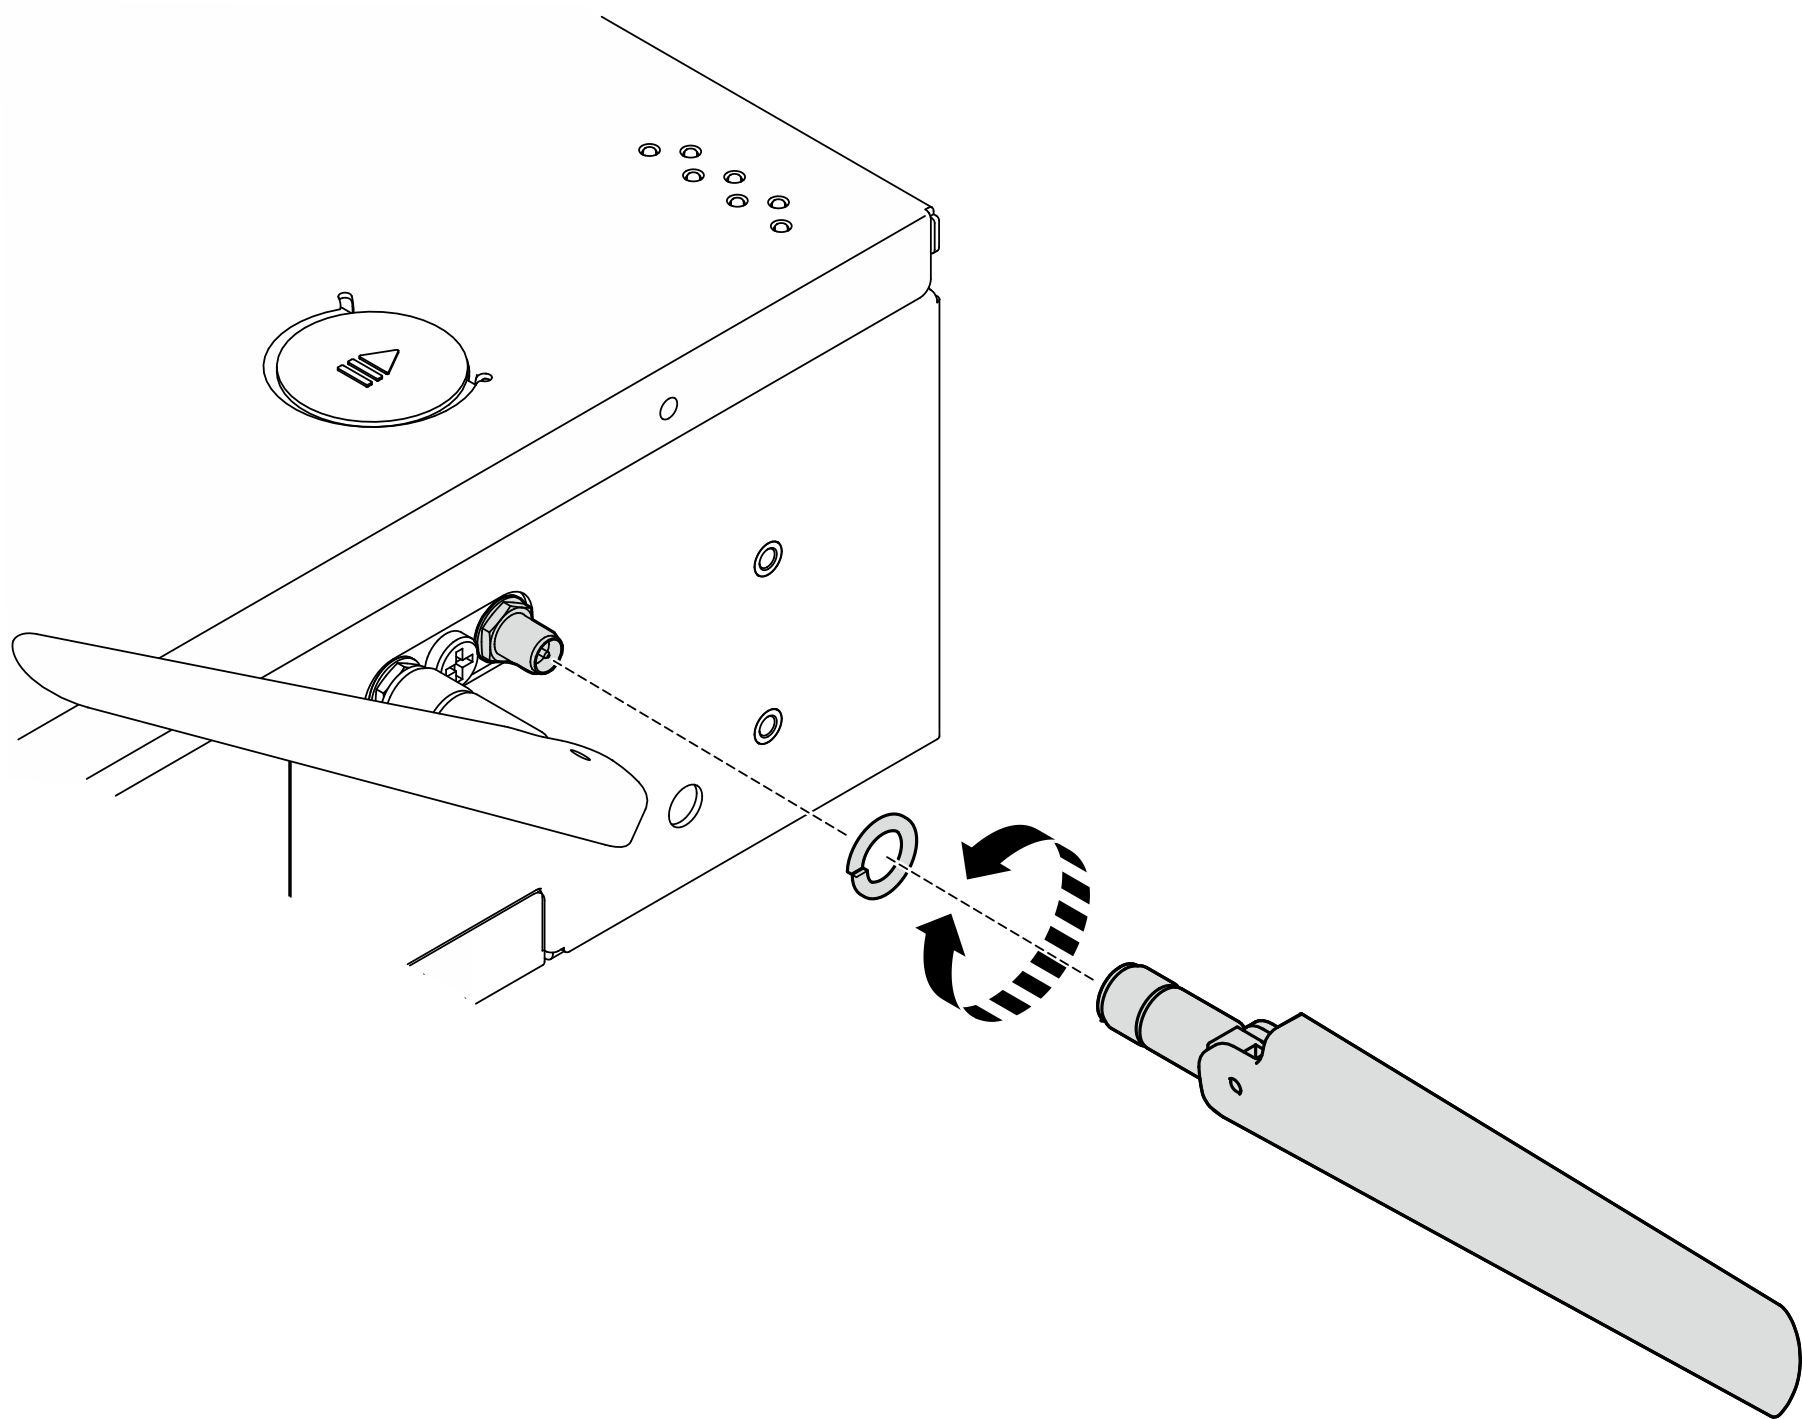 NoteThe optional kit of antenna comes with a washer. However, the washer is an optional part that enhances friction, and is not required in general scenarios. Consider applying it when necessary.
After this task is completed
Adjust the angle of the antennas according to the operating environment for better performance.
Minimal requirement Recommended angle 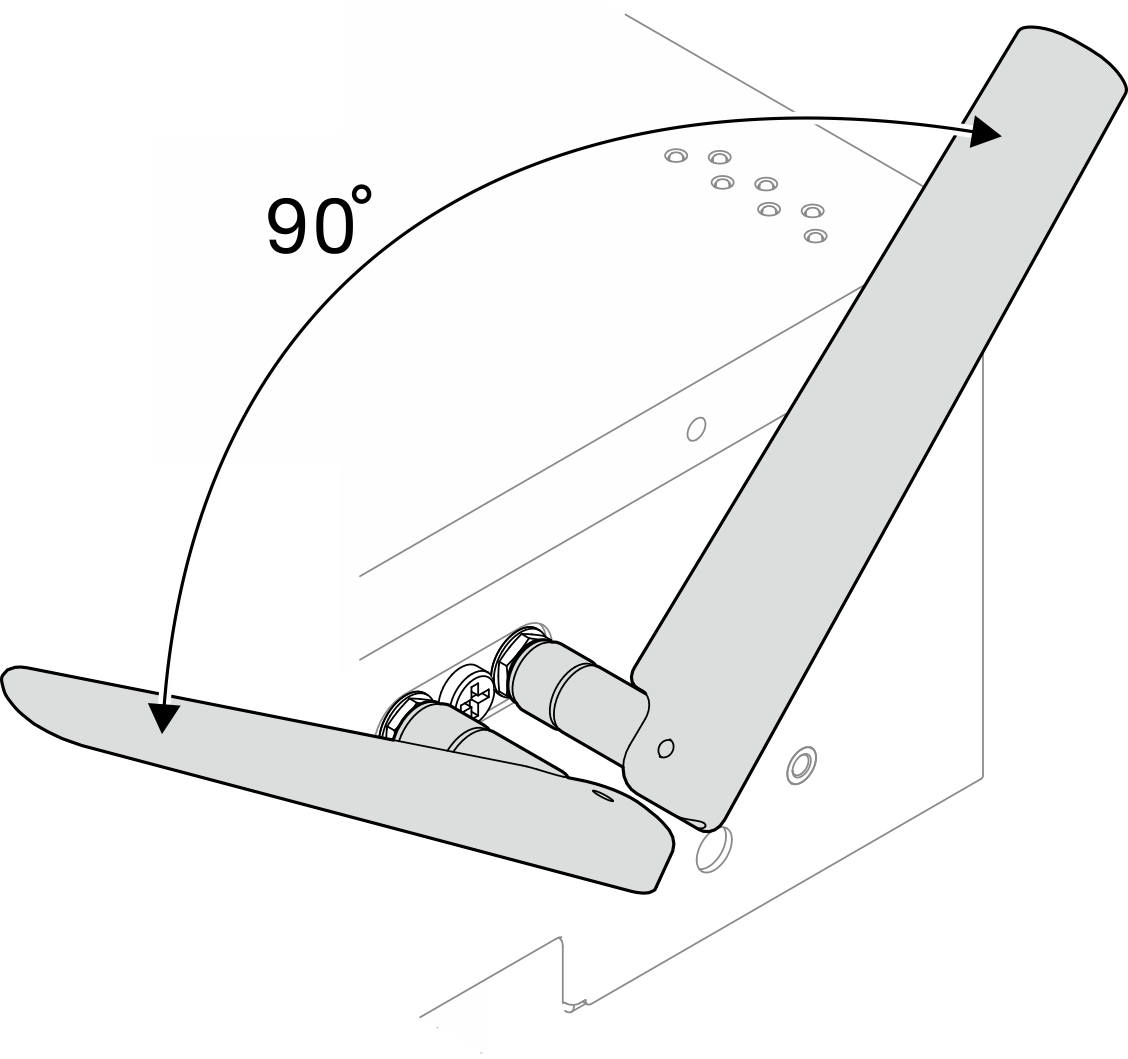
Keep two WLAN antennas away from each other at an angle not less than 90° to avoid signal interference.

For better performance, adjust the antennas away from the chassis at a 45° angle.
Complete the parts replacement. See Complete the parts replacement.
Demo Video