After you replace a component within the controller module, you must reinstall the controller module in the system chassis and boot it.
A video for this task is available at:
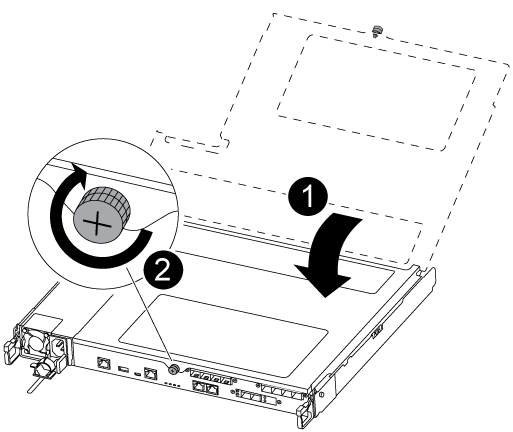
- Close the controller module cover and tighten the thumbscrew.

 | Controller module cover |
 | Thumbscrew |
- Insert the controller module into the chassis:
- Ensure the latching mechanism arms are locked in the fully extended position.
- Using both hands, align and gently slide the controller module into the latching mechanism arms until it stops.
- Cross your arms and place your index fingers through the finger holes from the inside of the latching mechanism.
- Press your thumbs down on the orange tabs on top of the latching mechanism and gently push the controller module over the stop.
- Release your thumbs from the top of the latching mechanisms and continue pushing until the latching mechanisms snap into place.
The controller module begins to boot as soon as it is fully seated in the chassis. Be prepared to interrupt the boot process.
The controller module should be fully inserted and flush with the edges of the chassis.
- Recable the system, as needed.
- Return the node to normal operation by giving back its storage from the running node: storage failover giveback -ofnode impaired_node_name
This should be done when the impaired node shows "Waiting for giveback..."
- If automatic giveback was disabled, reenable it: storage failover modify -node local -auto-giveback true