DM/DE Series 2U12 rail kit installation instructions
Using this rail kit, a 2U 12-drive enclosure can be installed in a four-post rack.
Before you begin
The rail kit includes the following items:
- A pair of slide rails for four-post racks with alignment screws installed for the square-hole rack
- (Optional) rack alignment guide tool
- Flat-head M5 screws pre-installed in rails, qty 8
Round-head M5 screws pre-installed in rails, qty 2
- Alignment screws
Verify that you have the correct rail type by examining the PN label located on the outer box for the following:
- Four-Post: SM17A38396
The kit includes the following types of screws:
| Type of hardware | Description | Quantity |
| Flat-head M5 screw; 14 mm long | You use six M5 screws for attaching the rails to the rack, and two M5 screws for attaching the brackets at the back of the enclosure to the brackets at the back of the rails. | 8 |
| Round-head M5 screw; 12 mm long | You use these screws to attach the enclosure to the rails. | 2 |
| Alignment screws for racks with square holes 9.4 mm (head) X 7.5 mm (length) | The 9.4mm head screws align the rails in the square-hole rack, 2 in each of 4 corners. Note Alignment screws for square-hole racks come pre-installed in the rails. | 8 |
| Alignment screws for racks with round holes 7 mm (head) X 7.5 mm (length) | 8 |
About this Procedure
- You can install the enclosure in either a square-hole or round-hole rack.
- You must use only the screws that are provided in the kit.
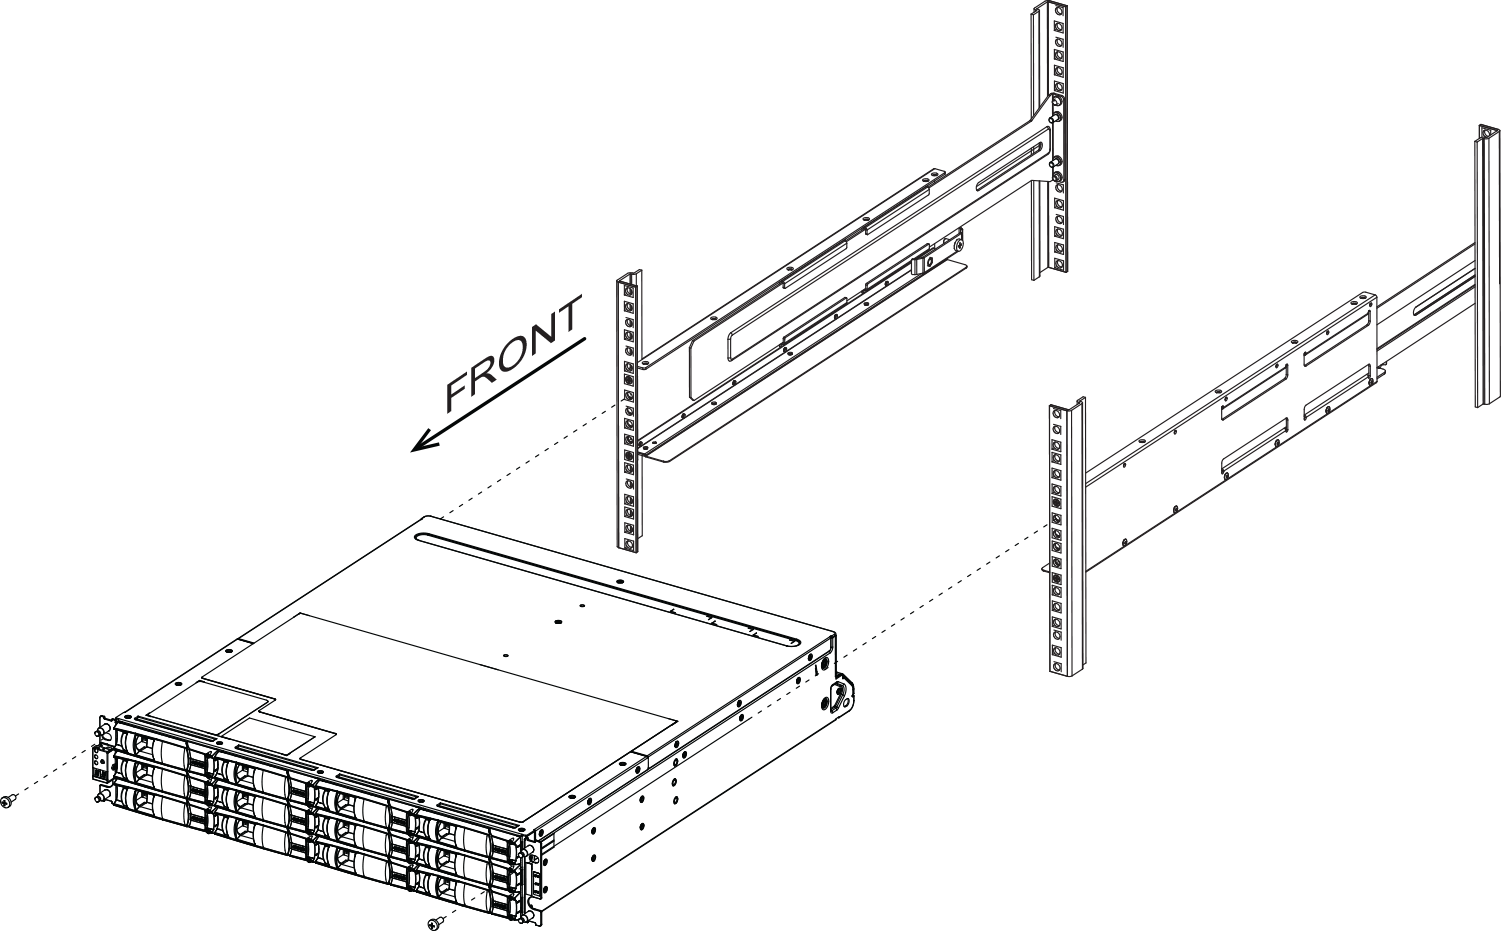
- Remove the M5 screws from each of the rail ends and the side brackets and saved. Make sure to leave the 8 outer alignment screws (9.4mm head for the square-hole rack) in the rail flanges for proper alignment in the rack.
- Insert one flat-head M5 screw through the hole in the front of the rack, and two flat-head M5 screws through the holes at the back of the rack.

- Insert one flat-head M5 screw through the hole in the front of the rack, and two flat-head M5 screws through the holes at the back of the rack.
- Secure the enclosure to the front of the rack and rails by inserting two round-head M5 screws through the mounting brackets (pre-installed on either side of the front of the enclosure), the holes on the rack, and the holes on the front of rails.
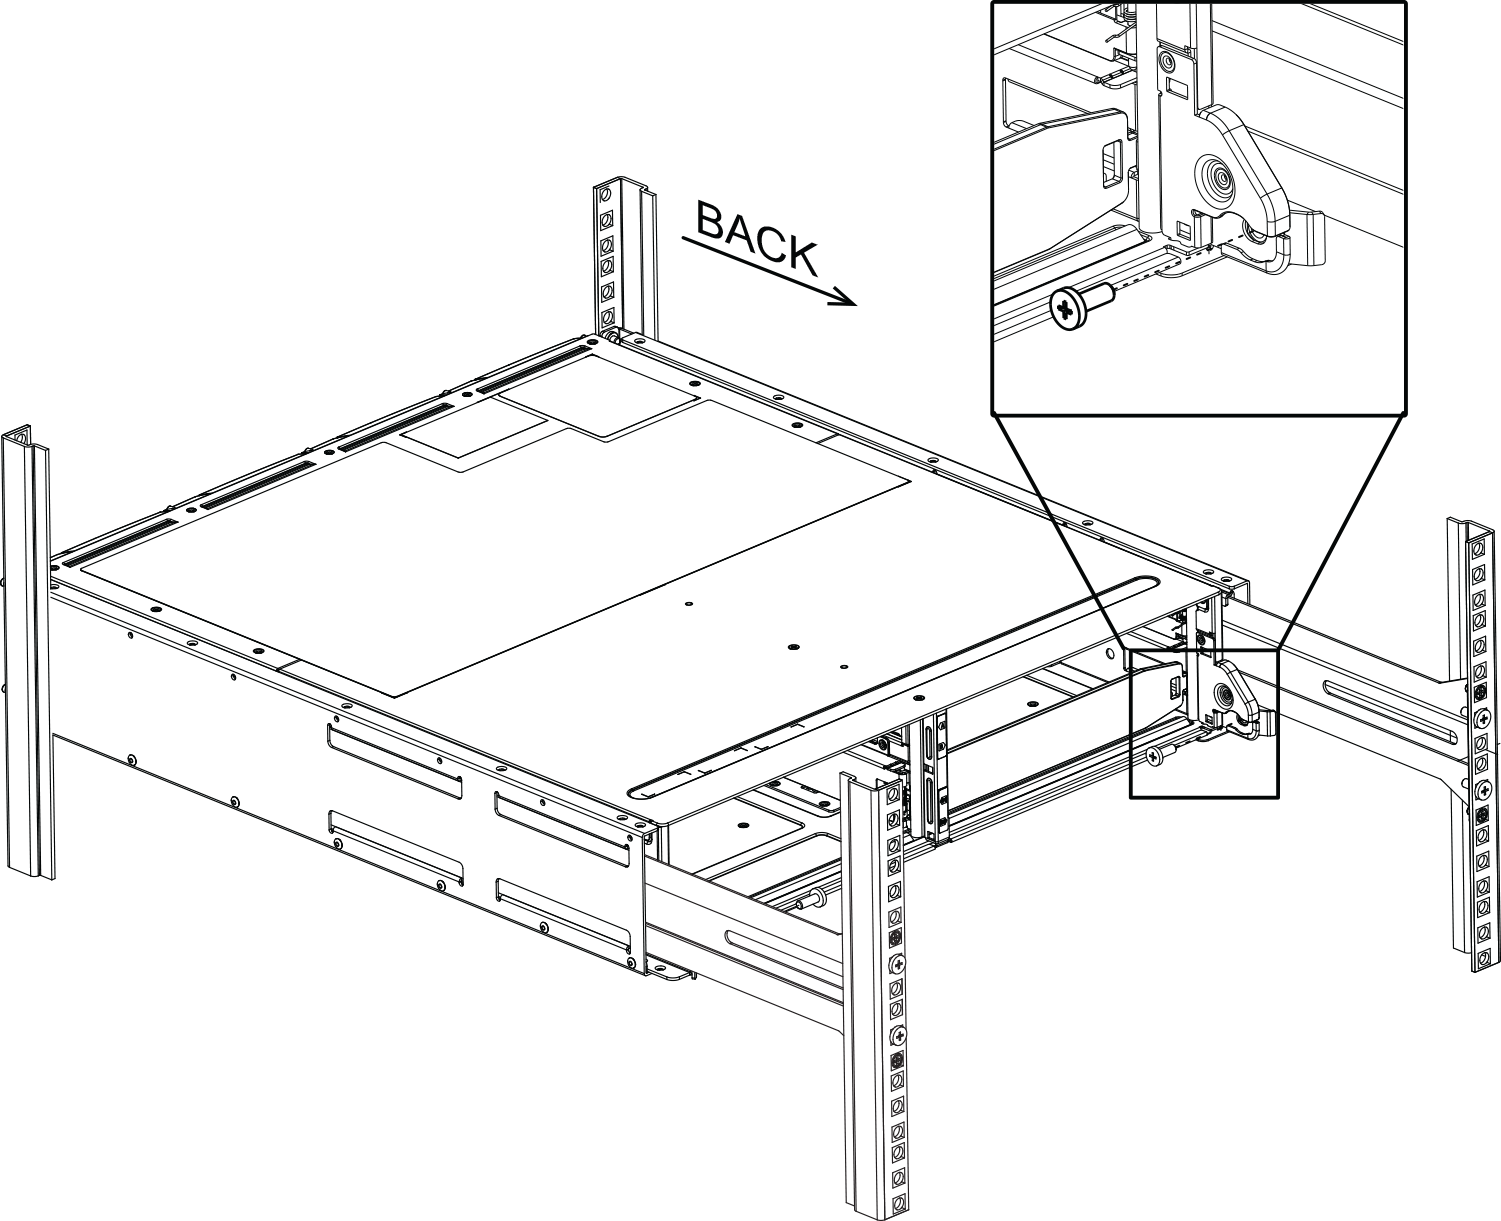
- Secure the enclosure to the back of the rails by inserting two M5 screws through the brackets at the enclosure and the rail kit bracket.
Give documentation feedback