Replacing or adding a caching module

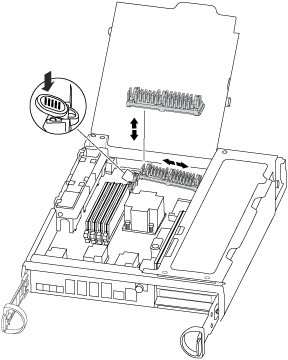
To replace or add a caching module referred to as the M.2 PCIe card on the label on your controller, locate the slots inside the controller and follow the specific sequence of steps.

Before you begin

Your storage system must meet certain criteria depending on your situation:
  • It must have the appropriate operating system for the caching module you are installing.
  • It must support the caching capacity.
  • If you are adding a caching module, it must support the additional capacity as well as the caching module capacity.

    Lenovo Press

  • All other components in the storage system must be functioning properly; if not, you must contact technical support.

About this task

  1. If you are not already grounded, properly ground yourself.
  2. Locate the caching module at the rear of the controller module and remove it.
    1. Press the release tab.
    2. Remove the heatsink.
      The storage system comes with two slots available for the caching module and only one slot is occupied, by default.


  3. If you are adding a caching module, go to the next step; if you are replacing the caching module, gently pull it straight out of the housing.
  4. Align the edges of the caching module with the socket in the housing, and then gently push it into the socket.
  5. Verify that the caching module is seated squarely and completely in the socket.
    If necessary, remove the caching module and reseat it into the socket.
  6. Reseat and push the heatsink down to engage the locking button on the caching module housing.
  7. Repeat the steps if you have a second caching module. Close the controller module cover, as needed.