Install a simple-swap drive
Use this information to install a simple-swap drive.
About this task
- Read the following section(s) to ensure that you work safely.
Turn off the server. Disconnect the power cords and all external cables. See Power off the server.
Touch the static-protective package that contains the drive to any unpainted metal surface on the server; then, remove the drive from the package and place it on a static-protective surface.
To avoid damage to the drive connectors, make sure that the server top cover is in place and fully closed whenever you install or remove a drive.
Make sure you save the data on your drive, especially if it is part of a RAID array.
Before you remove or make changes to drives, drive controllers (including controllers that are integrated on the system board), drive backplates or drive cables, back up all important data that is stored on drives.
For proper system cooling, do not operate the server for more than 2 minutes without either a drive or a filler panel installed in each bay.
Locate the documentation that comes with the drive and follow those instructions in addition to the instructions in this chapter.
The drive bays are numbered to indicate the installation order (starting from number “0”). Follow the installation order when you install a drive. See Front view.
The drives in a single RAID array must be the same type, same size, and same capacity.
For a complete list of supported optional devices for the server, see Lenovo ServerProven website.
Procedure
- Install the simple-swap drive.Figure 1. Simple-swap drive installation
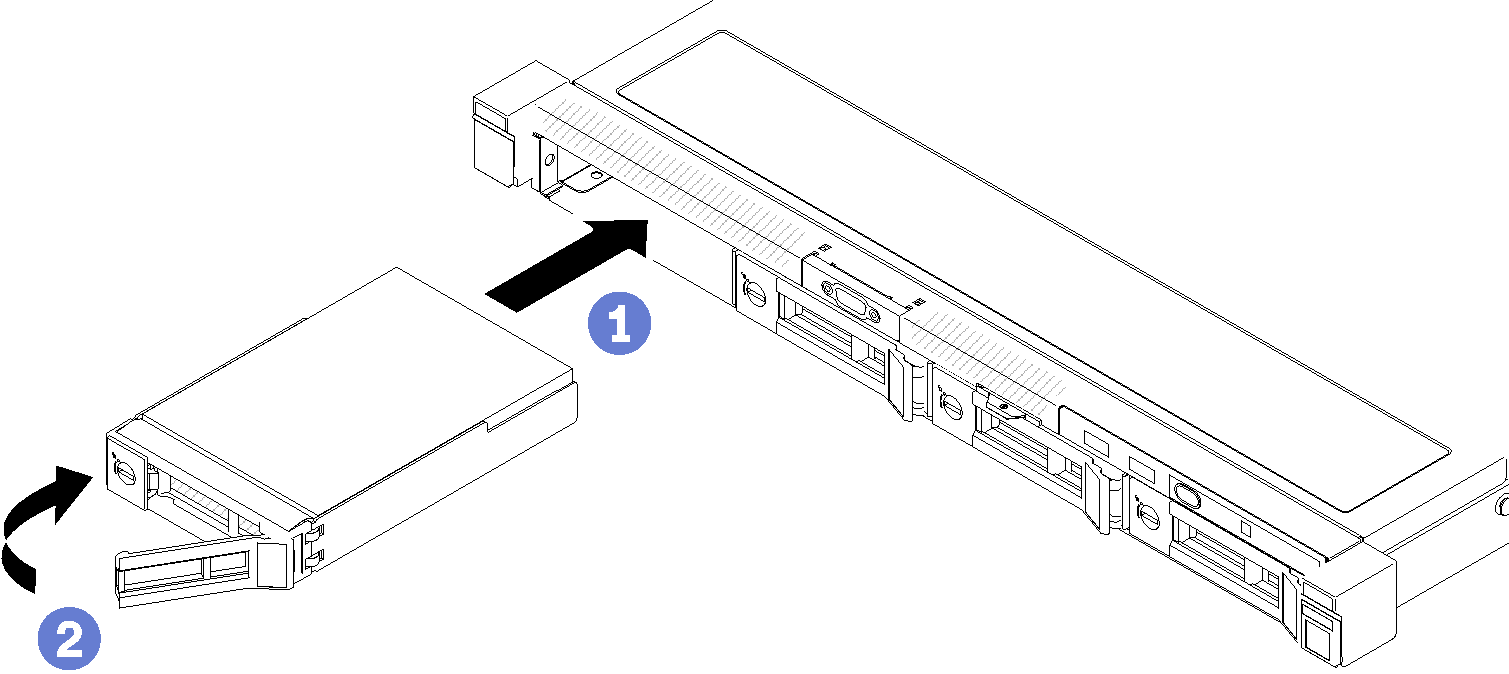
 Make sure the drive handle is in the open position. Slide the drive into the drive bay, and push it until it stops.
 Rotate the drive handle inwards until it clicks and lock the drive in place.
Install other drives or drive fillers if necessary.
Complete the parts replacement. See Complete the parts replacement.
Check the drive activity LED on the front operator panel to verify if the drives are operating correctly. See Front operator panel
If you are instructed to return the component or optional device, follow all packaging instructions, and use any packaging materials for shipping that are supplied to you.
Demo video