Remover uma CMM não hot-swap E3.S
Siga as instruções desta seção para remover um módulo de memória (CMM) CXL E3.S não hot-swap.
Sobre esta tarefa
Leia Diretrizes de instalação e Lista de verificação de inspeção de segurança para garantir que esteja trabalhando de forma segura.
Desligue o servidor e os dispositivos periféricos e desconecte os cabos de alimentação e todos os cabos externos. Consulte Desligar o servidor.
Previna a exposição à eletricidade estática, que pode resultar em encerramento do sistema e perda de dados, mantendo componentes sensíveis em suas embalagens antiestáticas até a instalação, e manipulando esses dispositivos com uma pulseira de descarga eletrostática ou outro sistema de aterramento.
Certifique-se de ter os preenchimentos do compartimento de CMM disponíveis se alguns compartimentos de CMM ficarem vazios após a remoção.
Procedimento
- Remova o painel E3.S.Figura 1. Remoção do painel E3.S
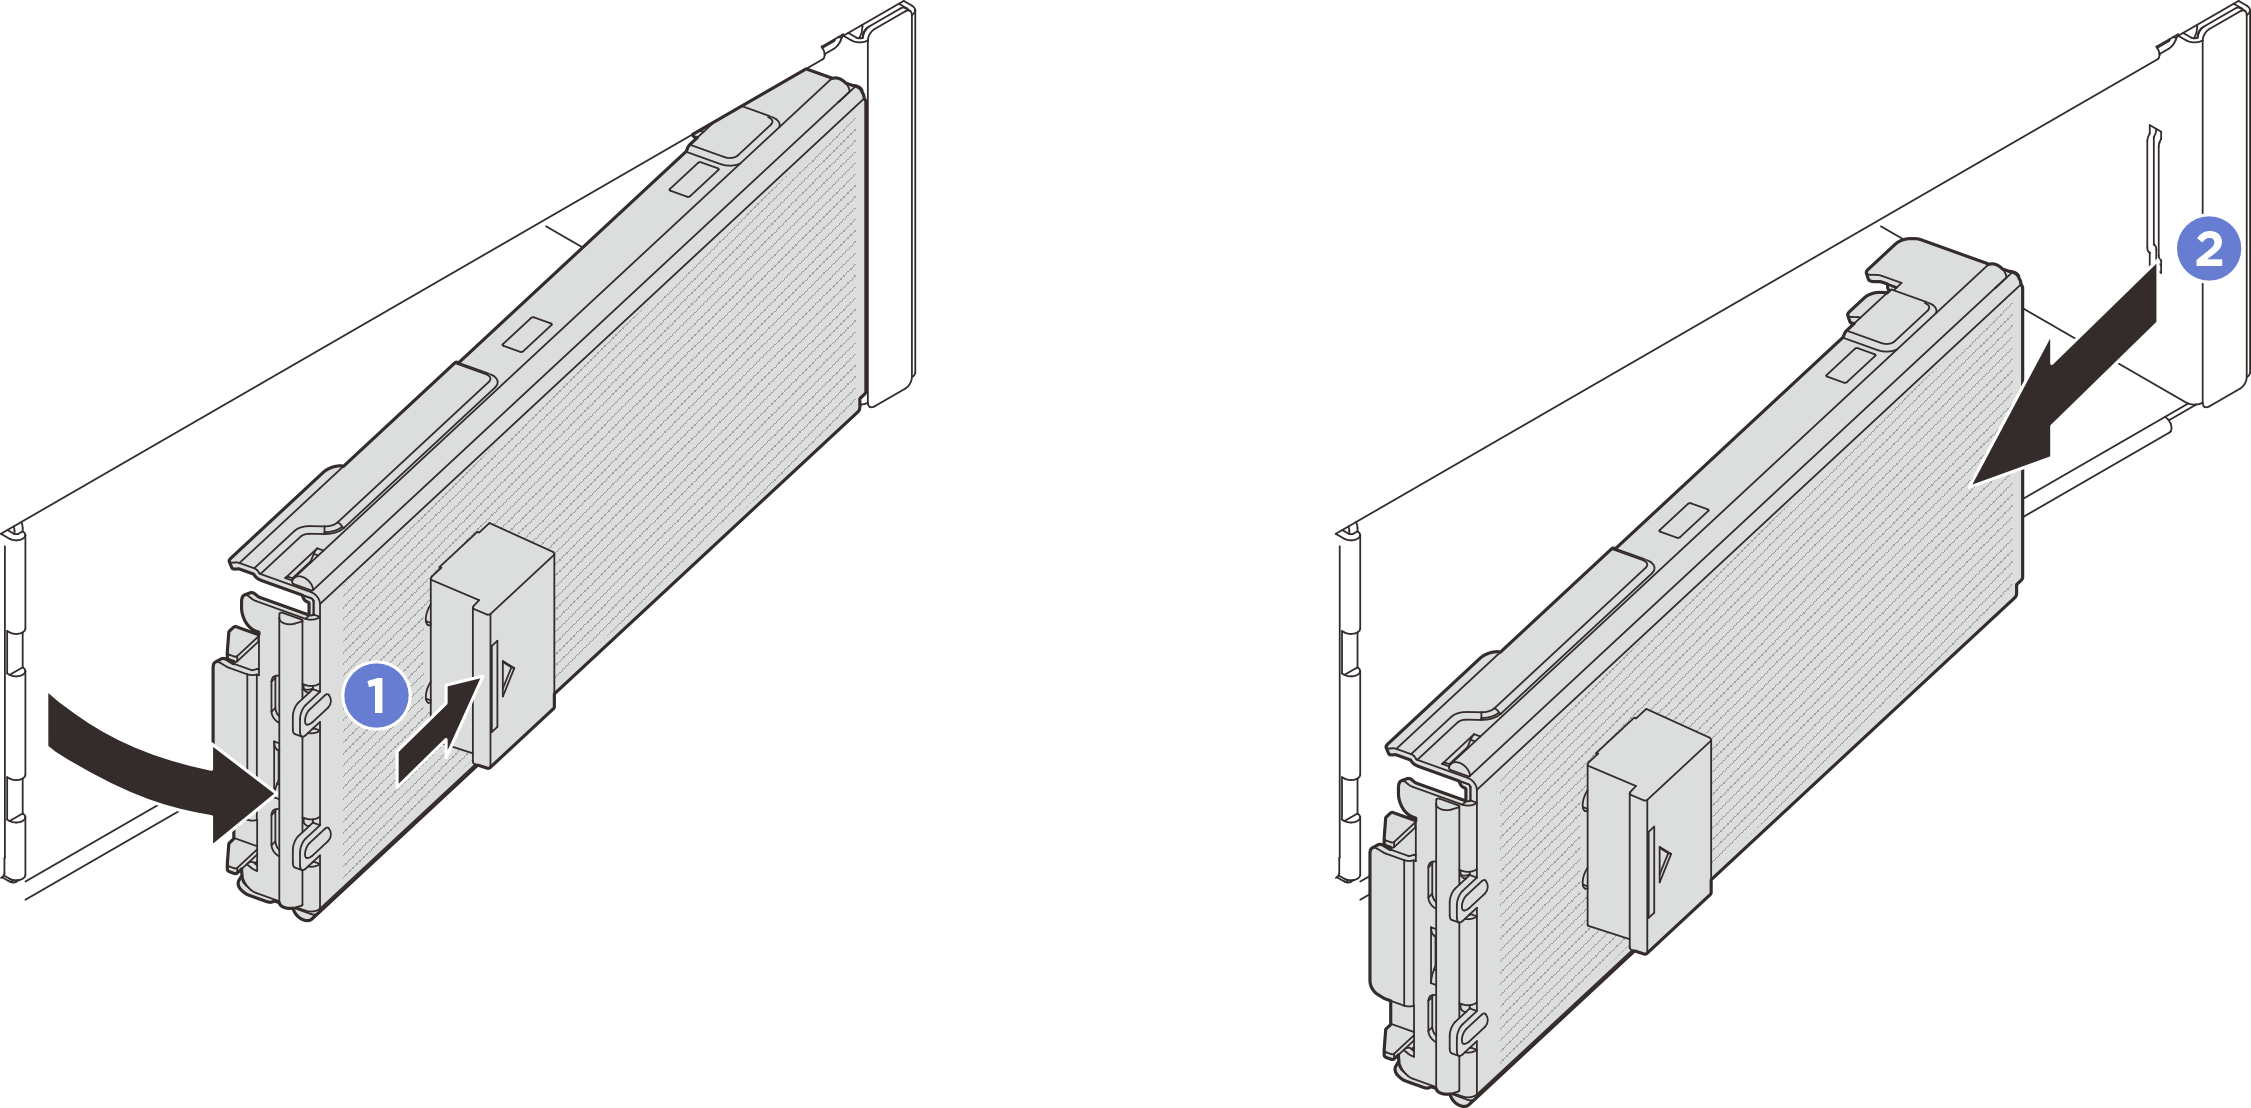
 Pressione o botão no painel E3.S para desencaixar o painel.
 Remova o painel E3.S do servidor.
- Remova a CMM.Figura 2. Remoção da CMM
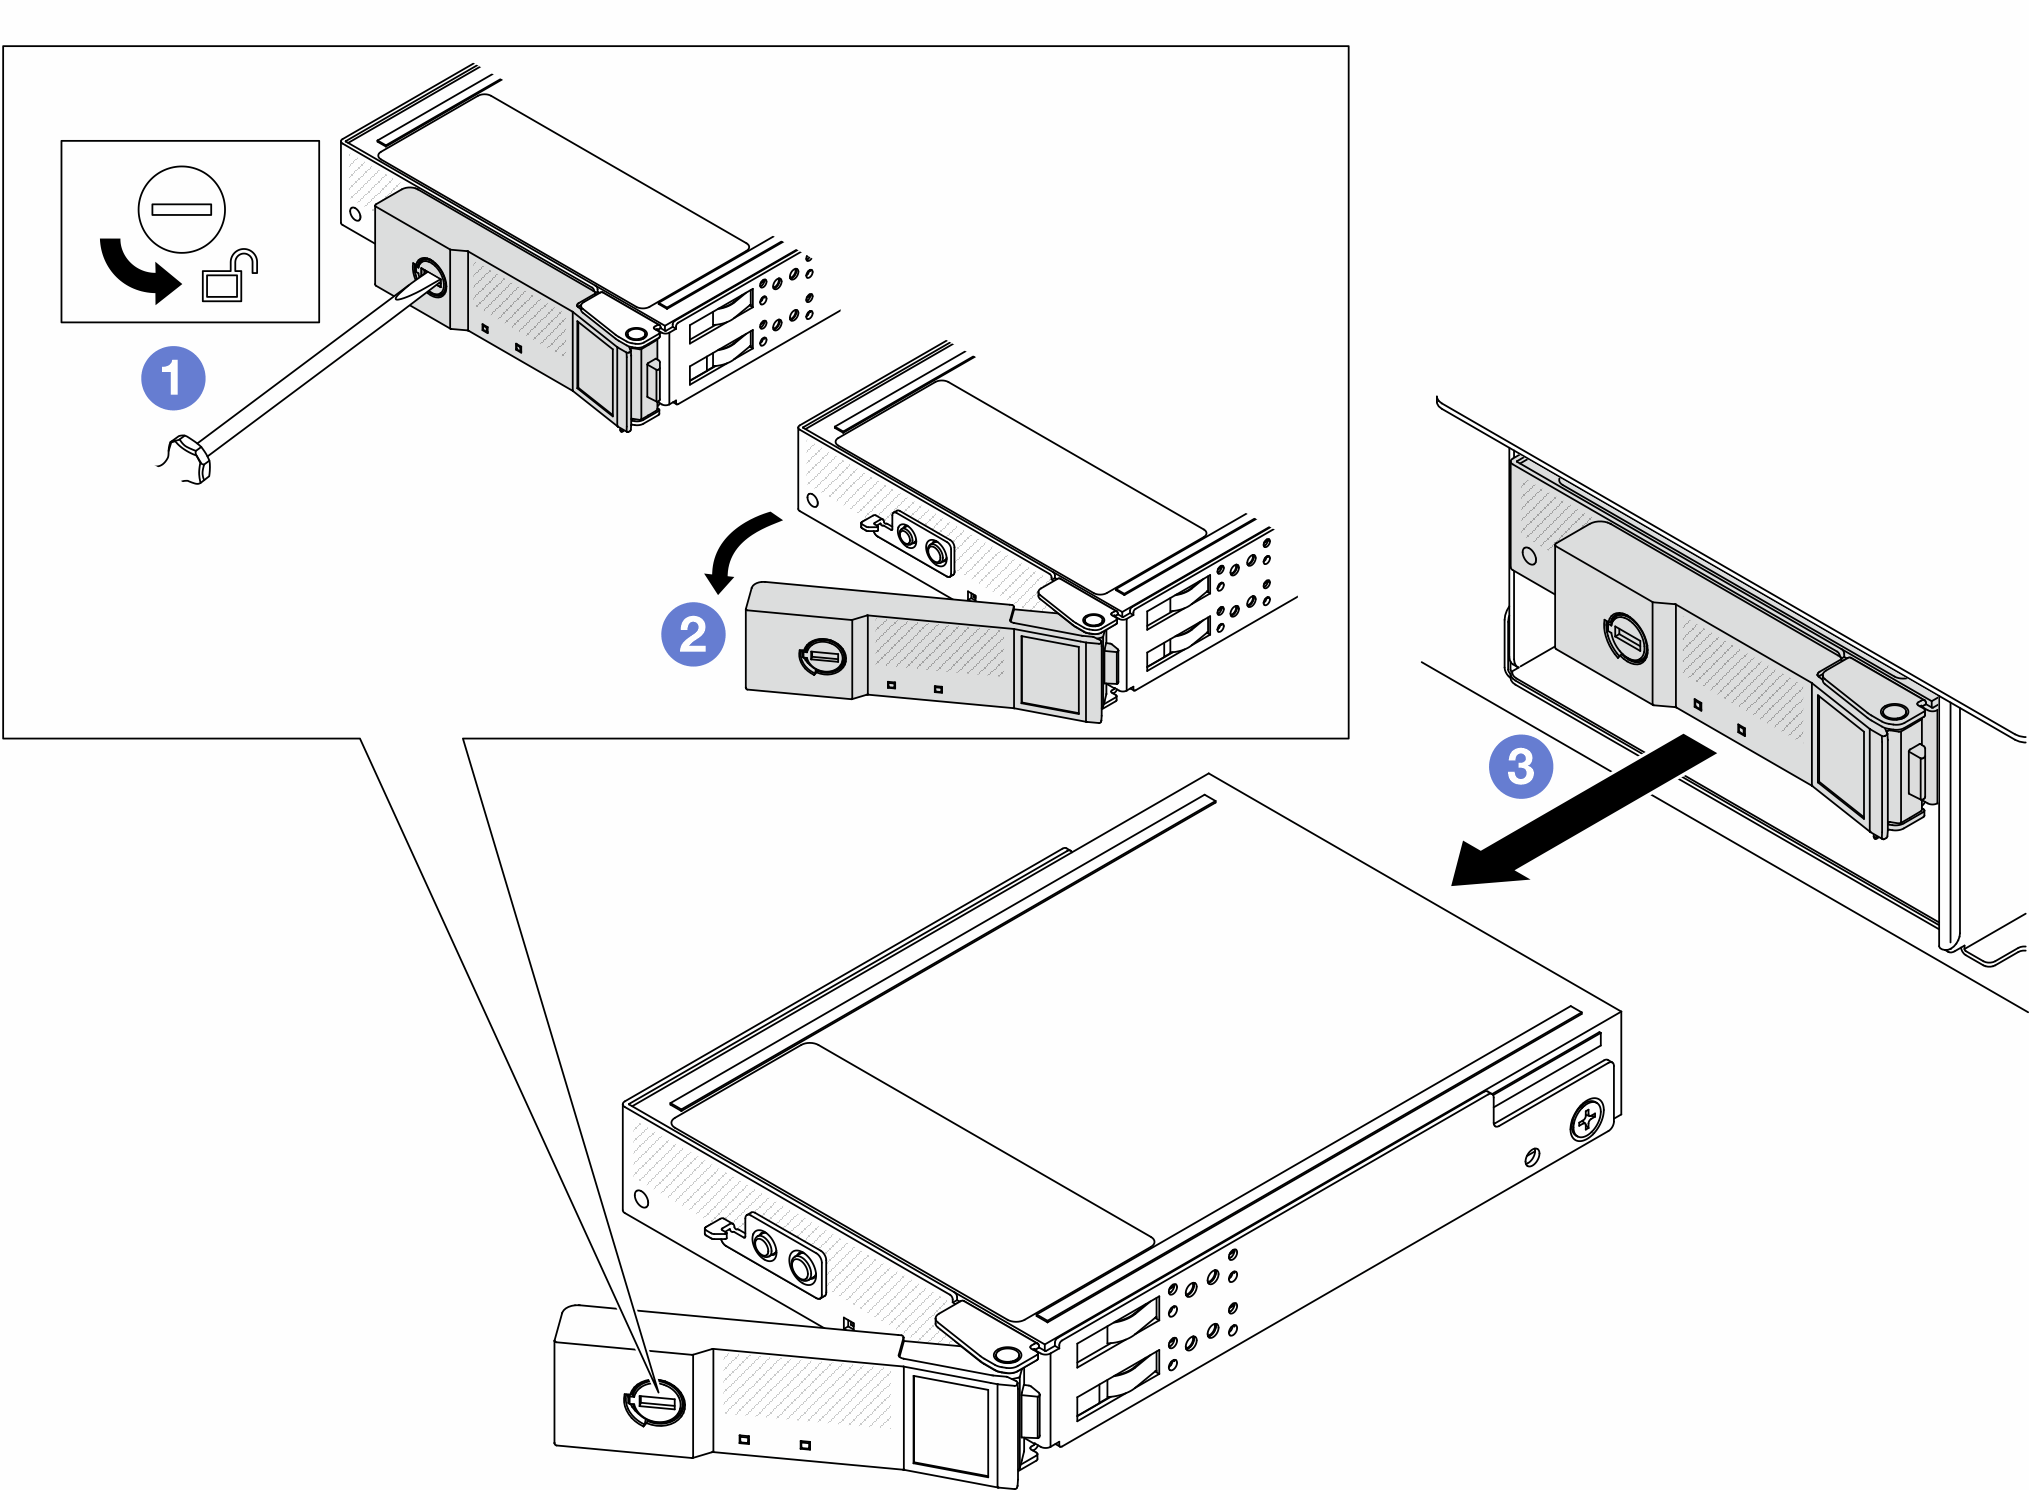
- Gire a trava de liberação para a posição aberta usando uma chave de fenda de 3 milímetros para destravar a alça.
- Gire a alça para a posição aberta.
 Segure a alça e deslize a CMM para fora do compartimento.
NotaInstale um preenchimento de compartimento (consulte a figura abaixo) ou uma unidade de substituição (consulteInstalar uma CMM não hot-swap E3.S) assim que possível. Figura 3. Instalação de um preenchimento de compartimentos de CMM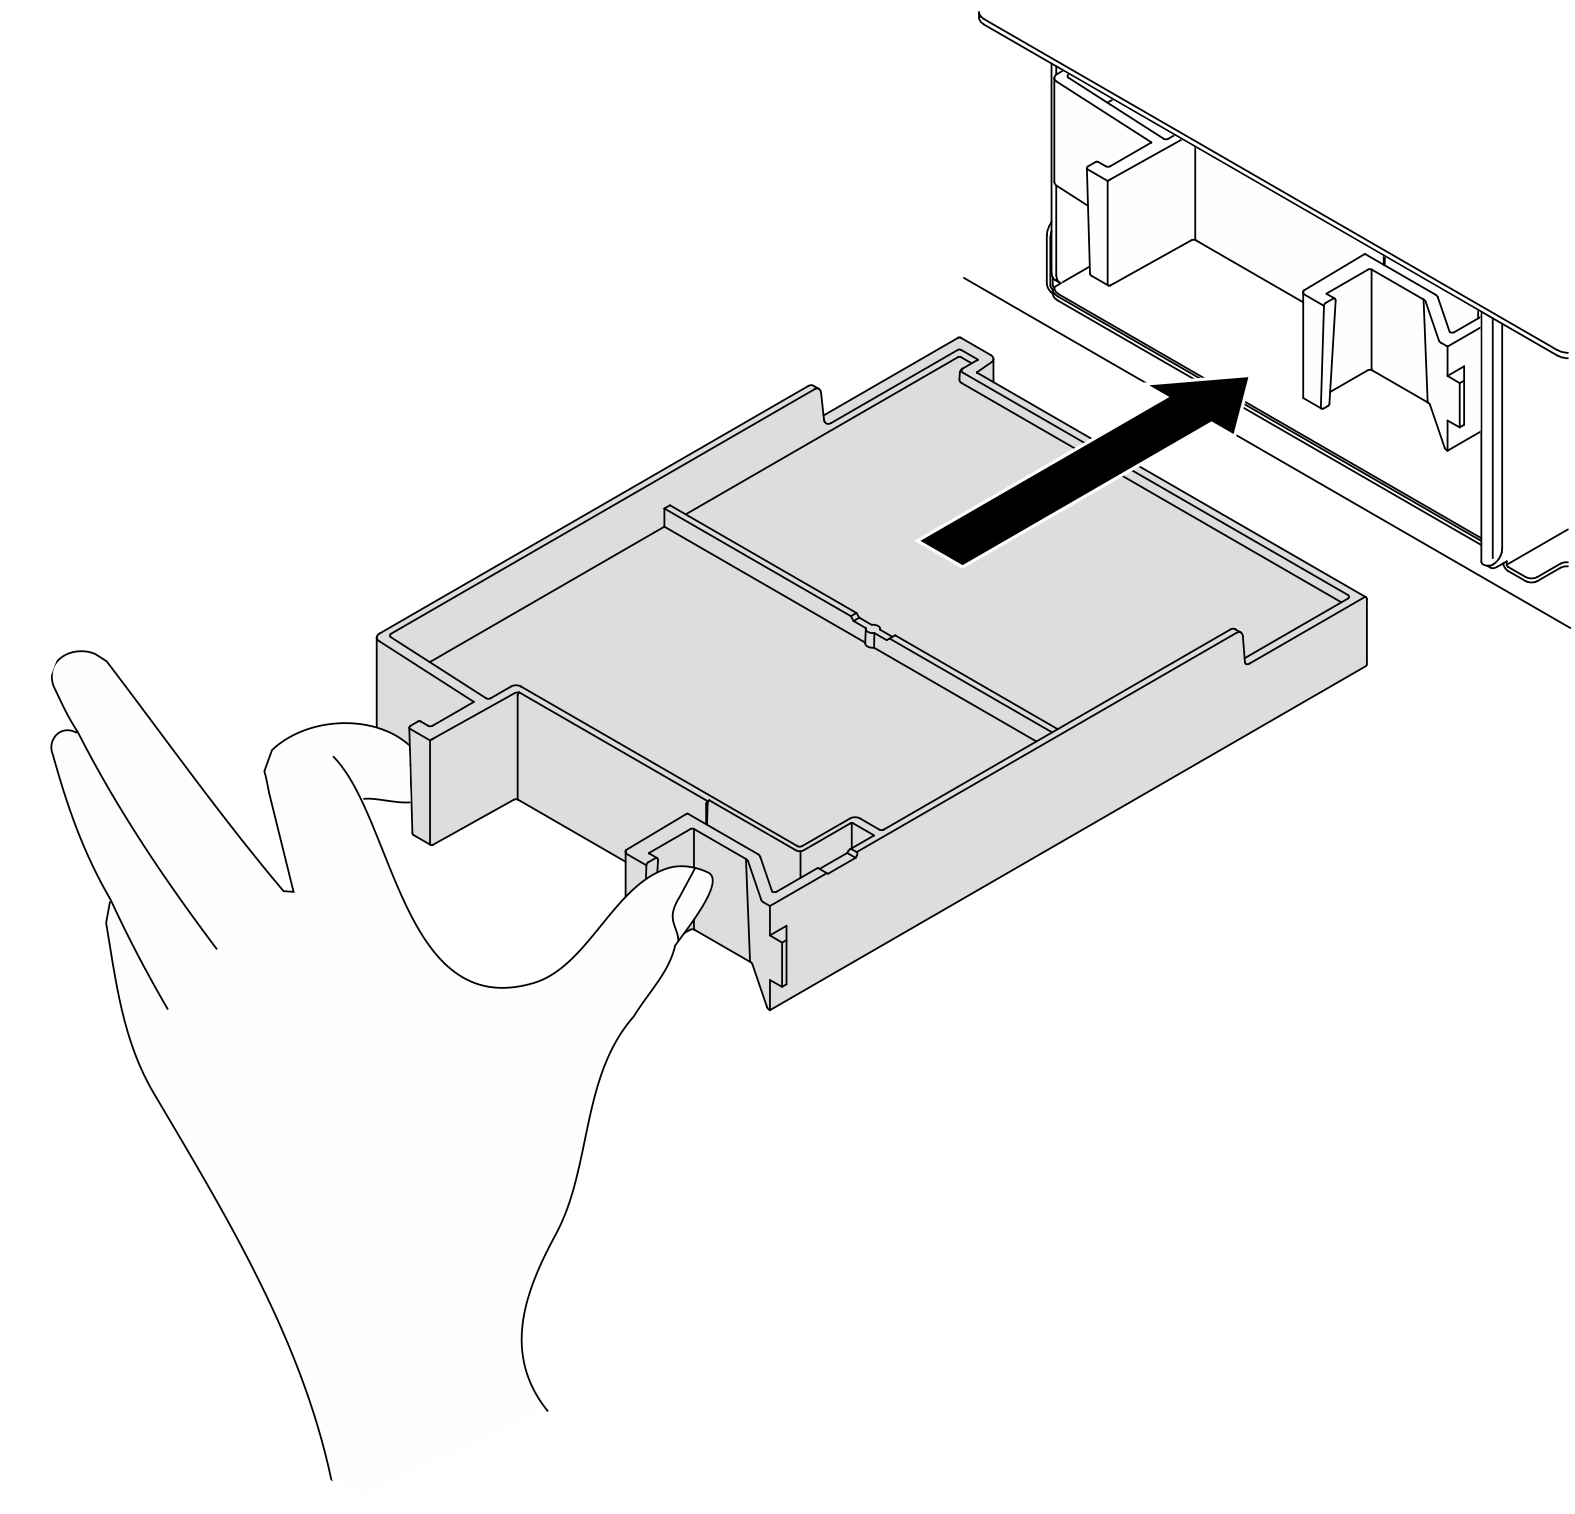
Depois de concluir
Se você receber instruções para retornar o componente ou o dispositivo opcional, siga todas as instruções do pacote e use os materiais do pacote para remessa que foram fornecidos.
Vídeo de demonstração