Install a PCIe adapter on the riser assembly
Use the following information to install a PCIe adapter on the riser assembly.


For NVMe switch adapter:
Number of installed processors PCIe slot selection priority One processor 1 Two processors 1, 5, 6 - For server models with sixteen/twenty/twenty-four NVMe drives (with two processors installed):
Server models PCIe slot selection Sixteen NVMe drives 1, 4, 6, 7 Twenty NVMe drives 1, 4, 5, 6, 7 Twenty-four NVMe drives 1, 2, 4, 6, 7
For 24i RAID adapter:
Number of installed processors PCIe slot selection priority One processor 1, 2, 3 Two processors 1, 2, 3, 5, 6 For 8i or 16i HBA/RAID adapter:
Number of installed processors PCIe slot selection priority One processor 7, 4, 2, 3, 1 Two processors 7, 4, 2, 3, 1, 5, 6 For 440-8e or 440-16e HBA/RAID adapter:
Number of installed processors PCIe slot selection priority One processor 4, 2, 3, 1 Two processors 4, 2, 3, 1, 5 For an Ethernet card or a converged network adapter:
Number of installed processors PCIe slot selection priority One processor 4, 2, 3, 1 Two processors 4, 2, 6, 3, 5, 1
Depending on the specific type, your PCIe adapter and riser card for the riser assembly might look different from the illustration in this topic.
Use any documentation that comes with the PCIe adapter and follow those instructions in addition to the instructions in this topic.
Do not install PCIe adapters with small form factor (SFF) connectors in PCIe slot 6.
- ThinkSystem Xilinx Alveo U50 Data Center Accelerator Adapter is supported only when the following requirement are met:
For server models installed with one CPU, only one adapter is supported and must be installed in PCIe slot 1.
For server models installed with two CPUs, up to two adapters are supported and must be installed in PCIe slot 1 and slot 5.
The maximum supported processor TDP is 165 watts and the ThinkSystem SR630/530/650(GPU) CPU Performance Heatsink must be installed.
The maximum operating temperature is 35°C.
No fan fails.
The P4 GPU air baffle and the large-size air baffle must be installed.
No VMware and Windows preload.
- ThinkSystem Mellanox ConnectX-6 HDR100 QSFP56 1-port PCIe InfiniBand adapter or ThinkSystem Mellanox ConnectX-6 HDR100 QSFP56 2-port PCIe InfiniBand adapter is supported only when the following requirements are met:
The server chassis is the eight 3.5-inch-drive bays chassis, eight 2.5-inch-drive bays chassis, sixteen 2.5- inch- drive bays chassis, or twenty 2.5- inch-drive bays chassis.
The operating temperature is equal to or less than 35°C.
- ThinkSystem Mellanox ConnectX-6 HDR/200GbE QSFP56 1-port PCIe adapter is supported only when the following requirements are met:
The server chassis is the eight 3.5-inch-drive bays chassis, eight 2.5-inch-drive bays chassis, sixteen 2.5- inch- drive bays chassis, or twenty 2.5- inch-drive bays chassis.
The operating temperature is equal to or less than 35°C.
Two processors installed.
The PCIe adapter can only be installed in PCIe slot 1, and the auxiliary connection card can only be installed in PCIe slot 5 or PCIe slot 6.
Touch the static-protective package that contains the new PCIe adapter to any unpainted surface on the outside of the server. Then, take the new PCIe adapter out of the package and place it on a static-protective surface.
Locate an appropriate PCIe slot. See Rear view to identify the PCIe slots of your server.
To install a PCIe adapter on the riser assembly, complete the following steps:
Watch the procedure
A video of this procedure is available at YouTube.
- Align the PCIe adapter with the PCIe slot on the riser card. Then, carefully press the PCIe adapter straight into the slot until it is securely seated and its bracket also is secured.Figure 1. PCIe adapter installation
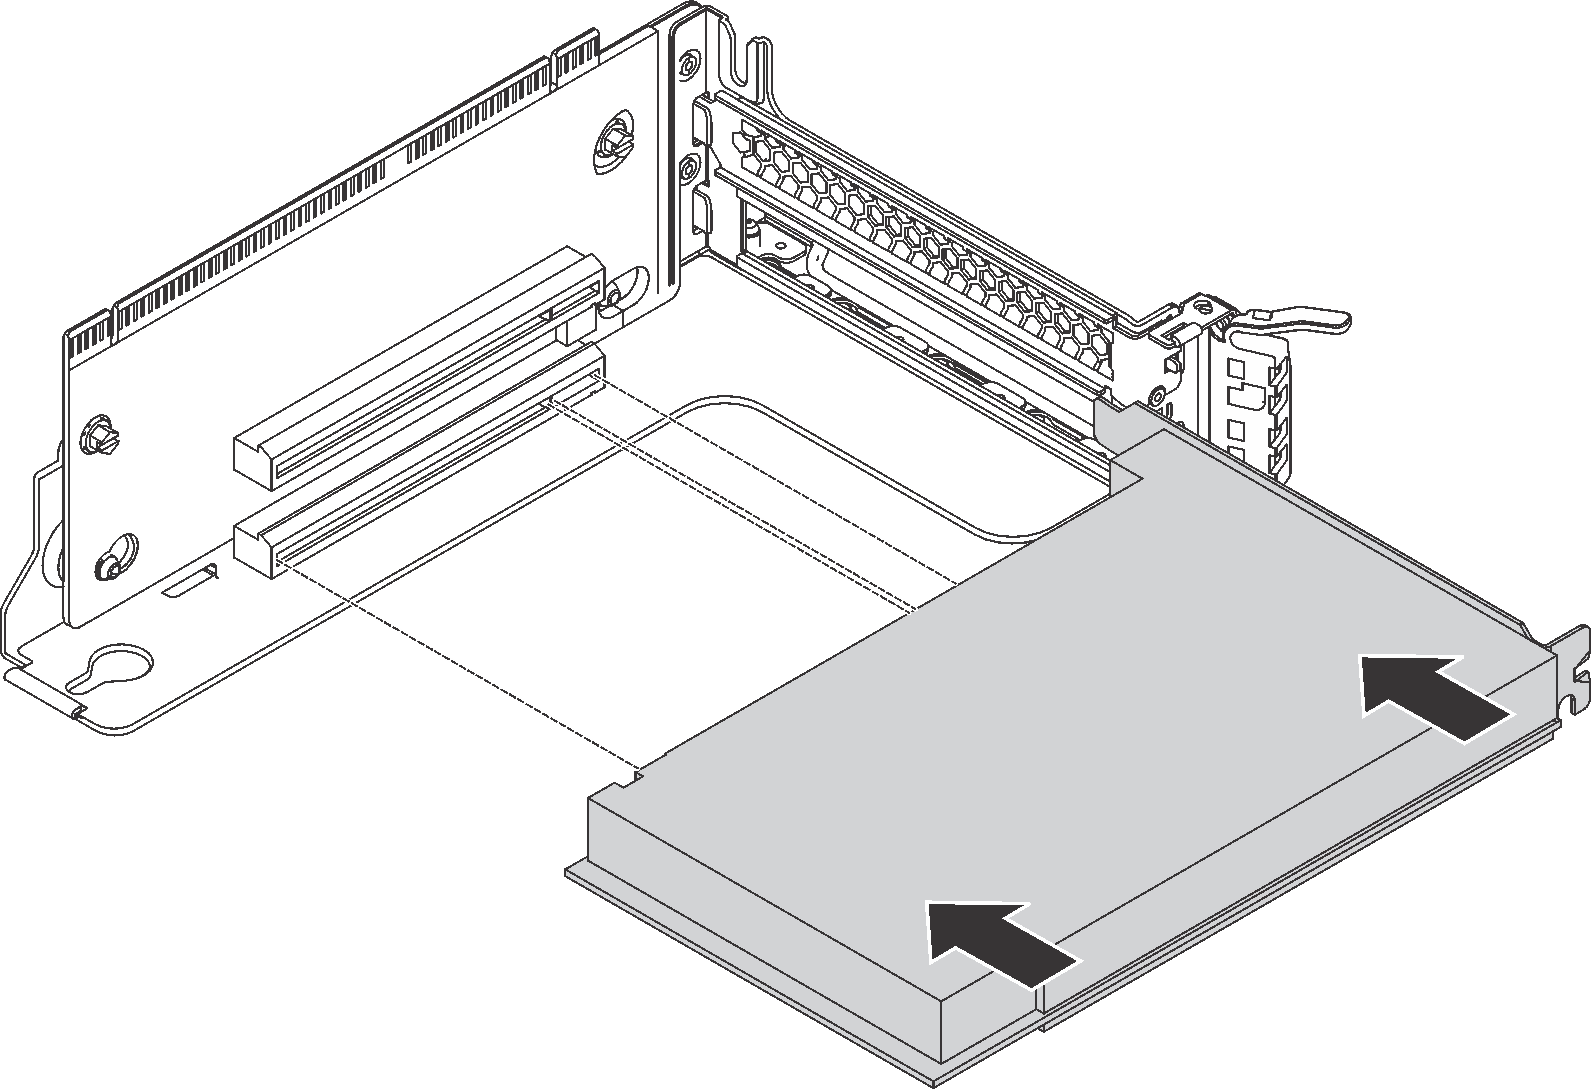 NoteCarefully handle the PCIe adapter by its edges.
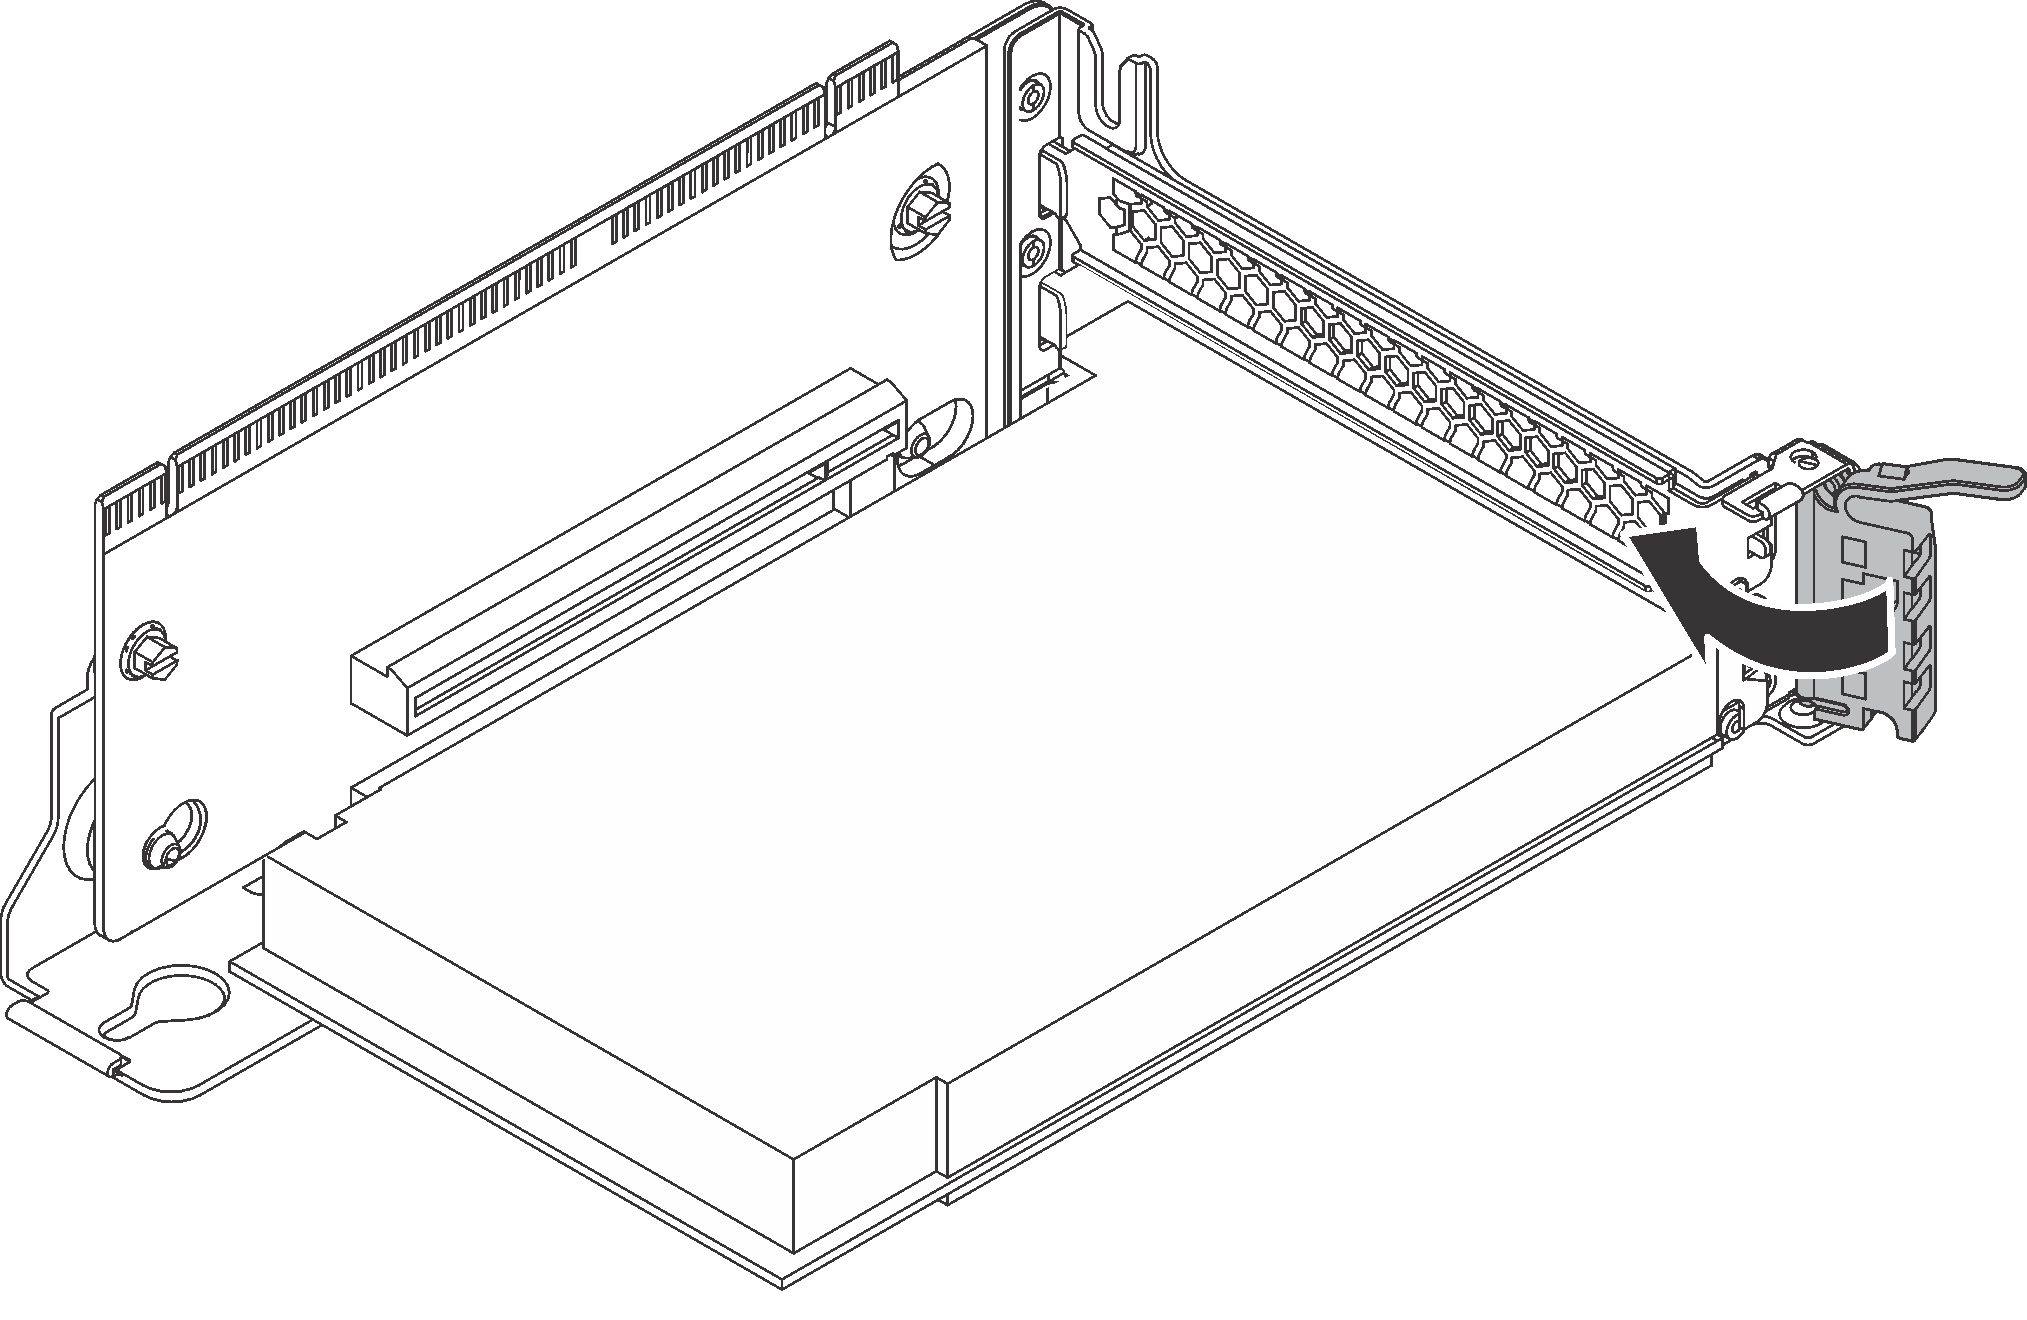
 - Pivot the PCIe adapter retention latch to the closed position.Figure 2. Closing the PCIe adapter retention latch
Refer to your record to reconnect the cables.
Reinstall the riser assembly. See Install a riser card.
Complete the parts replacement. See Complete the parts replacement.