Install the top cover
Use this information to install the top cover.


Before you install the top cover:
Ensure that all cables, adapters, and other components are installed and seated correctly and that you have not left loose tools or parts inside the server.
Ensure that all internal cables are connected and routed correctly. See Internal cable routing.
If you are installing a new top cover, attach the service label to the new top cover first if necessary.
NoteA new top cover comes without a service label attached. If you need a service label, order it together with the new top cover. The service label is free of charge.
To install the top cover, complete the following steps:
Watch the procedure
A video of this procedure is available at YouTube.
Figure 1. Top cover installation
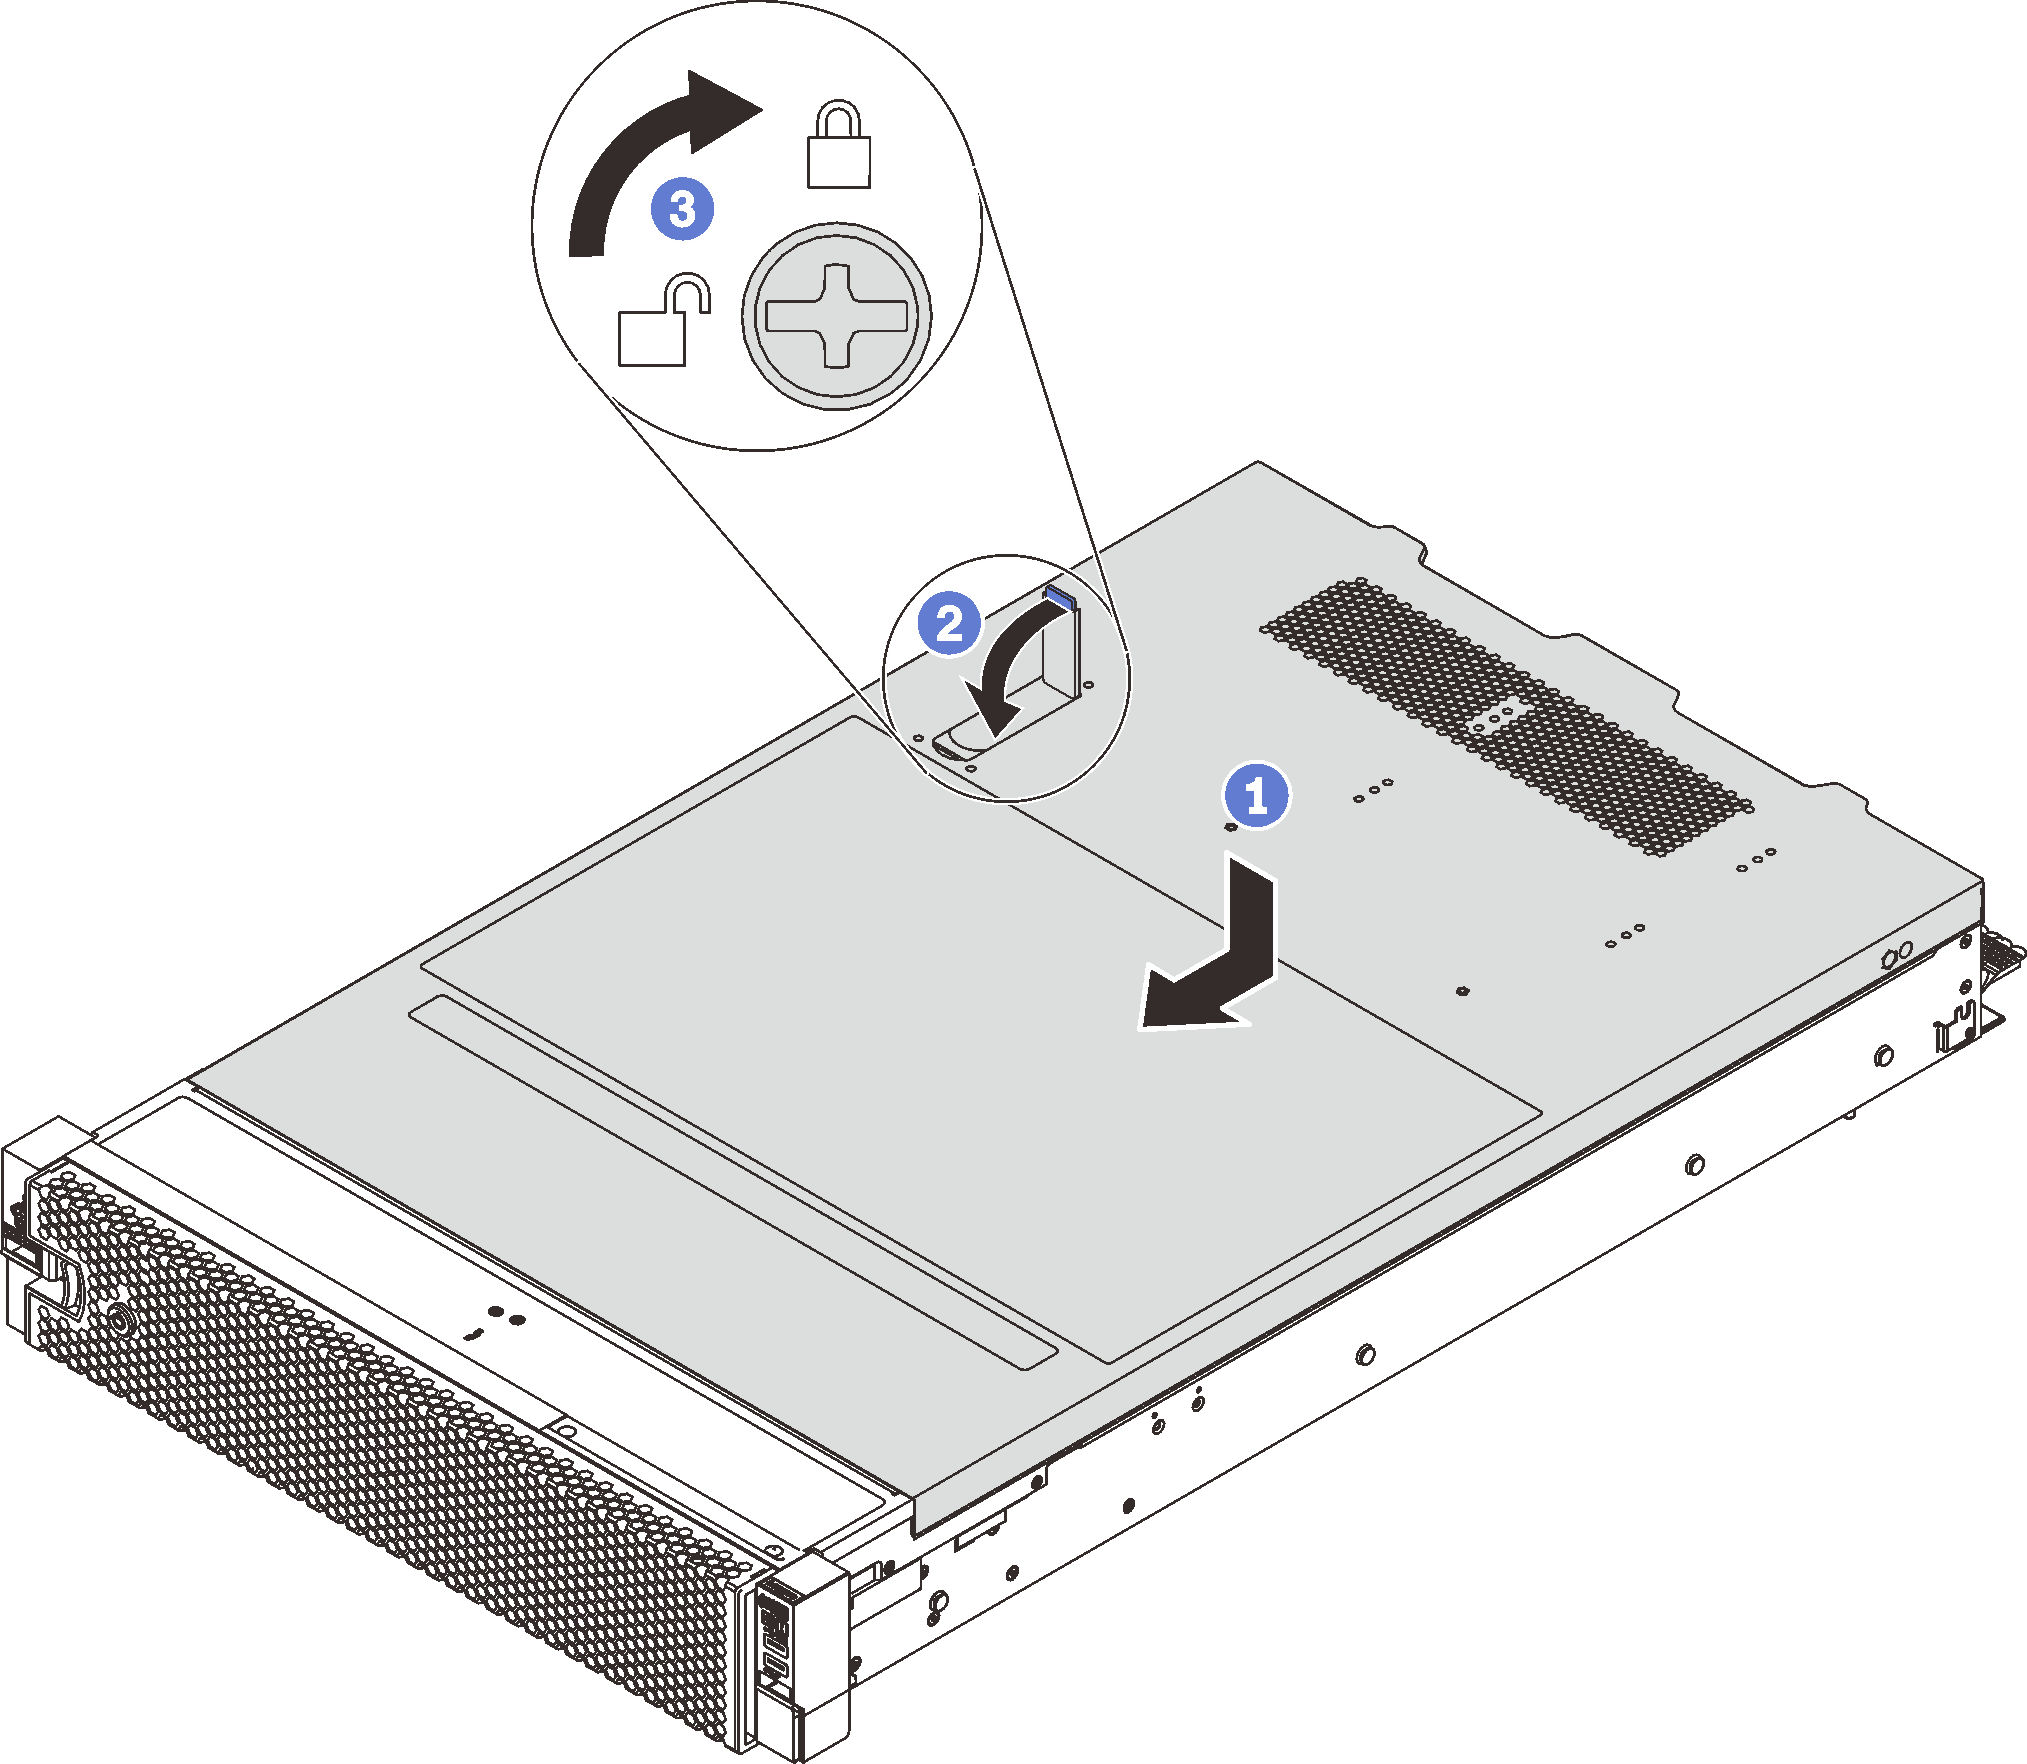
Note
Before you slide the top cover forward, ensure that all the tabs on the top cover engage the chassis correctly. If the tabs do not engage the chassis correctly, it will be very difficult to remove the top cover later.
- Ensure that the cover latch is in the open position. Lower the top cover onto the chassis until both sides of the top cover engage the guides on both sides of the chassis.
- Pivot the cover latch and slide the top cover to the front of the chassis at the same time until the top cover snaps into position. Ensure that the cover latch is closed.
- Use a screwdriver to turn the cover lock to the locked position.
After installing the top cover, complete the parts replacement. See Complete the parts replacement.
Give documentation feedback