Install an adapter into a 4U PCIe riser cage
Follow instructions in this section to install an adapter into a 4U PCIe riser cage.
About this task
Attention
Go over Installation Guidelines to ensure that you work safely.
Touch the static-protective package that contains the component to any unpainted metal surface on the server; then, remove it from the package and place it on a static-protective surface.
Note
To prevent potential thermal issues, change the Misc setting in the BIOS from Option3 (default value) to Option1 if the following two conditions are met:
The server is equipped with a GPU adapter.
The UEFI firmware version is M5E128A or later.
Procedure
- Install the adapter into the 4U PCIe riser cage.Figure 1. Installing the adapter into the 4U PCIe riser cage
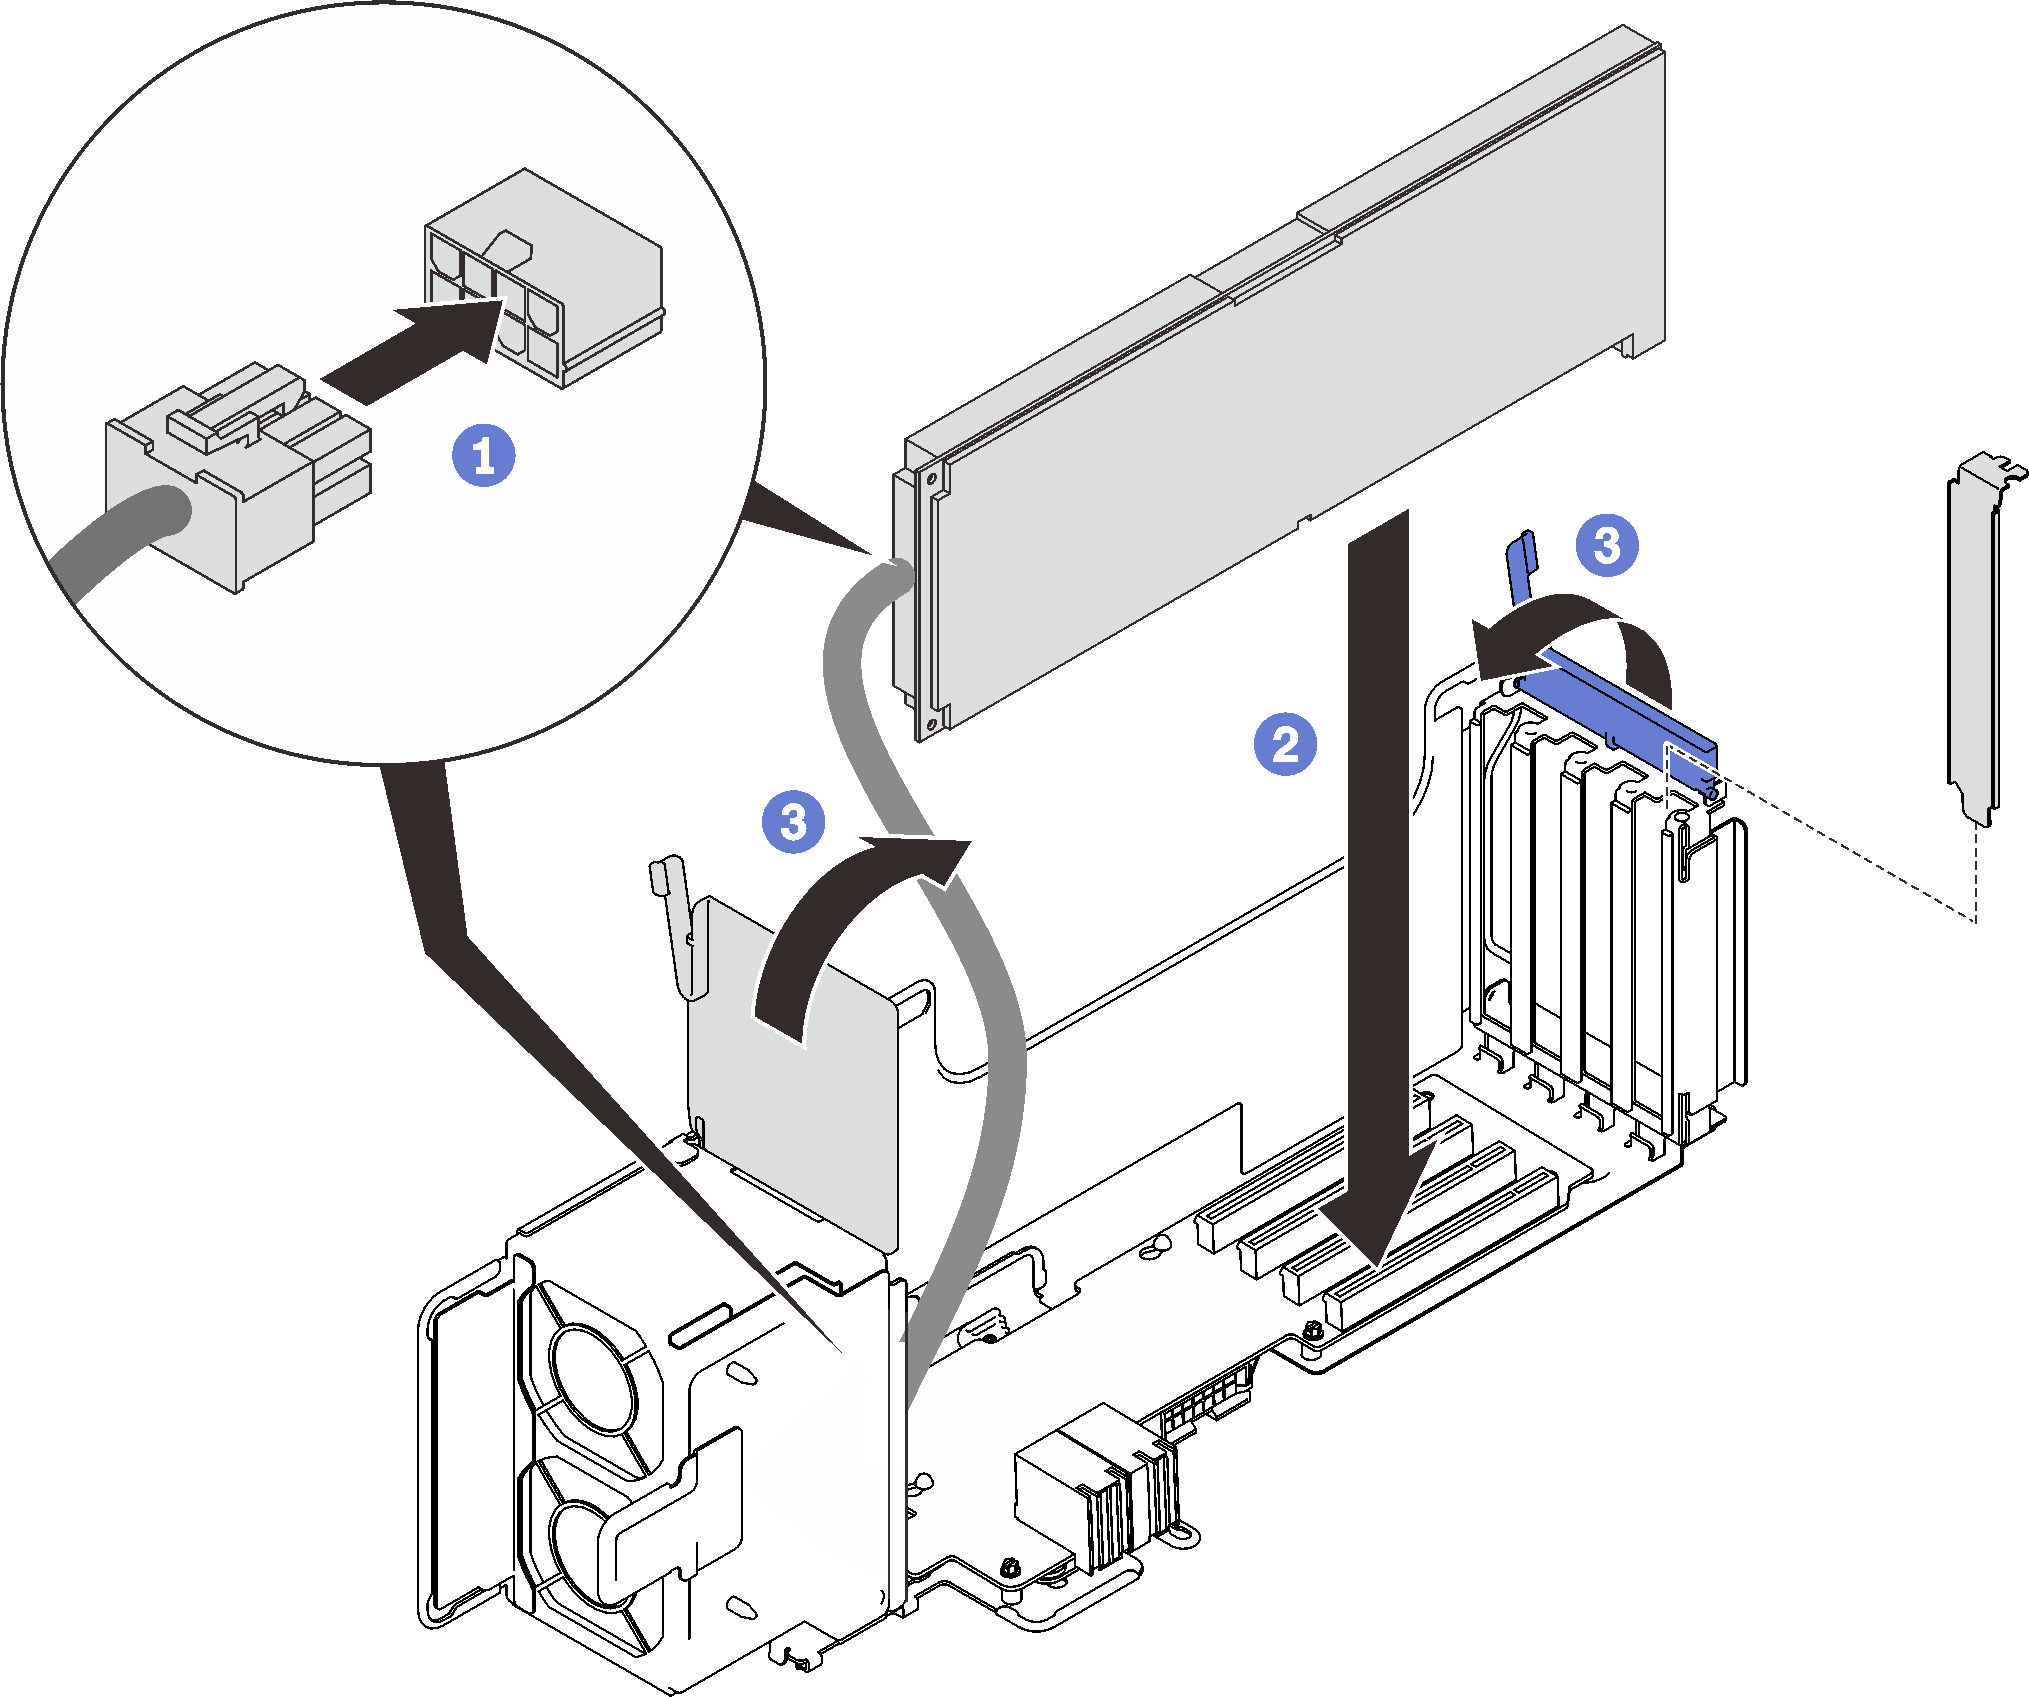
 Connect the power auxiliary cable.
 Insert the adapter into the connector in the riser cage.
 Close both the retaining latches to secure the adapter.
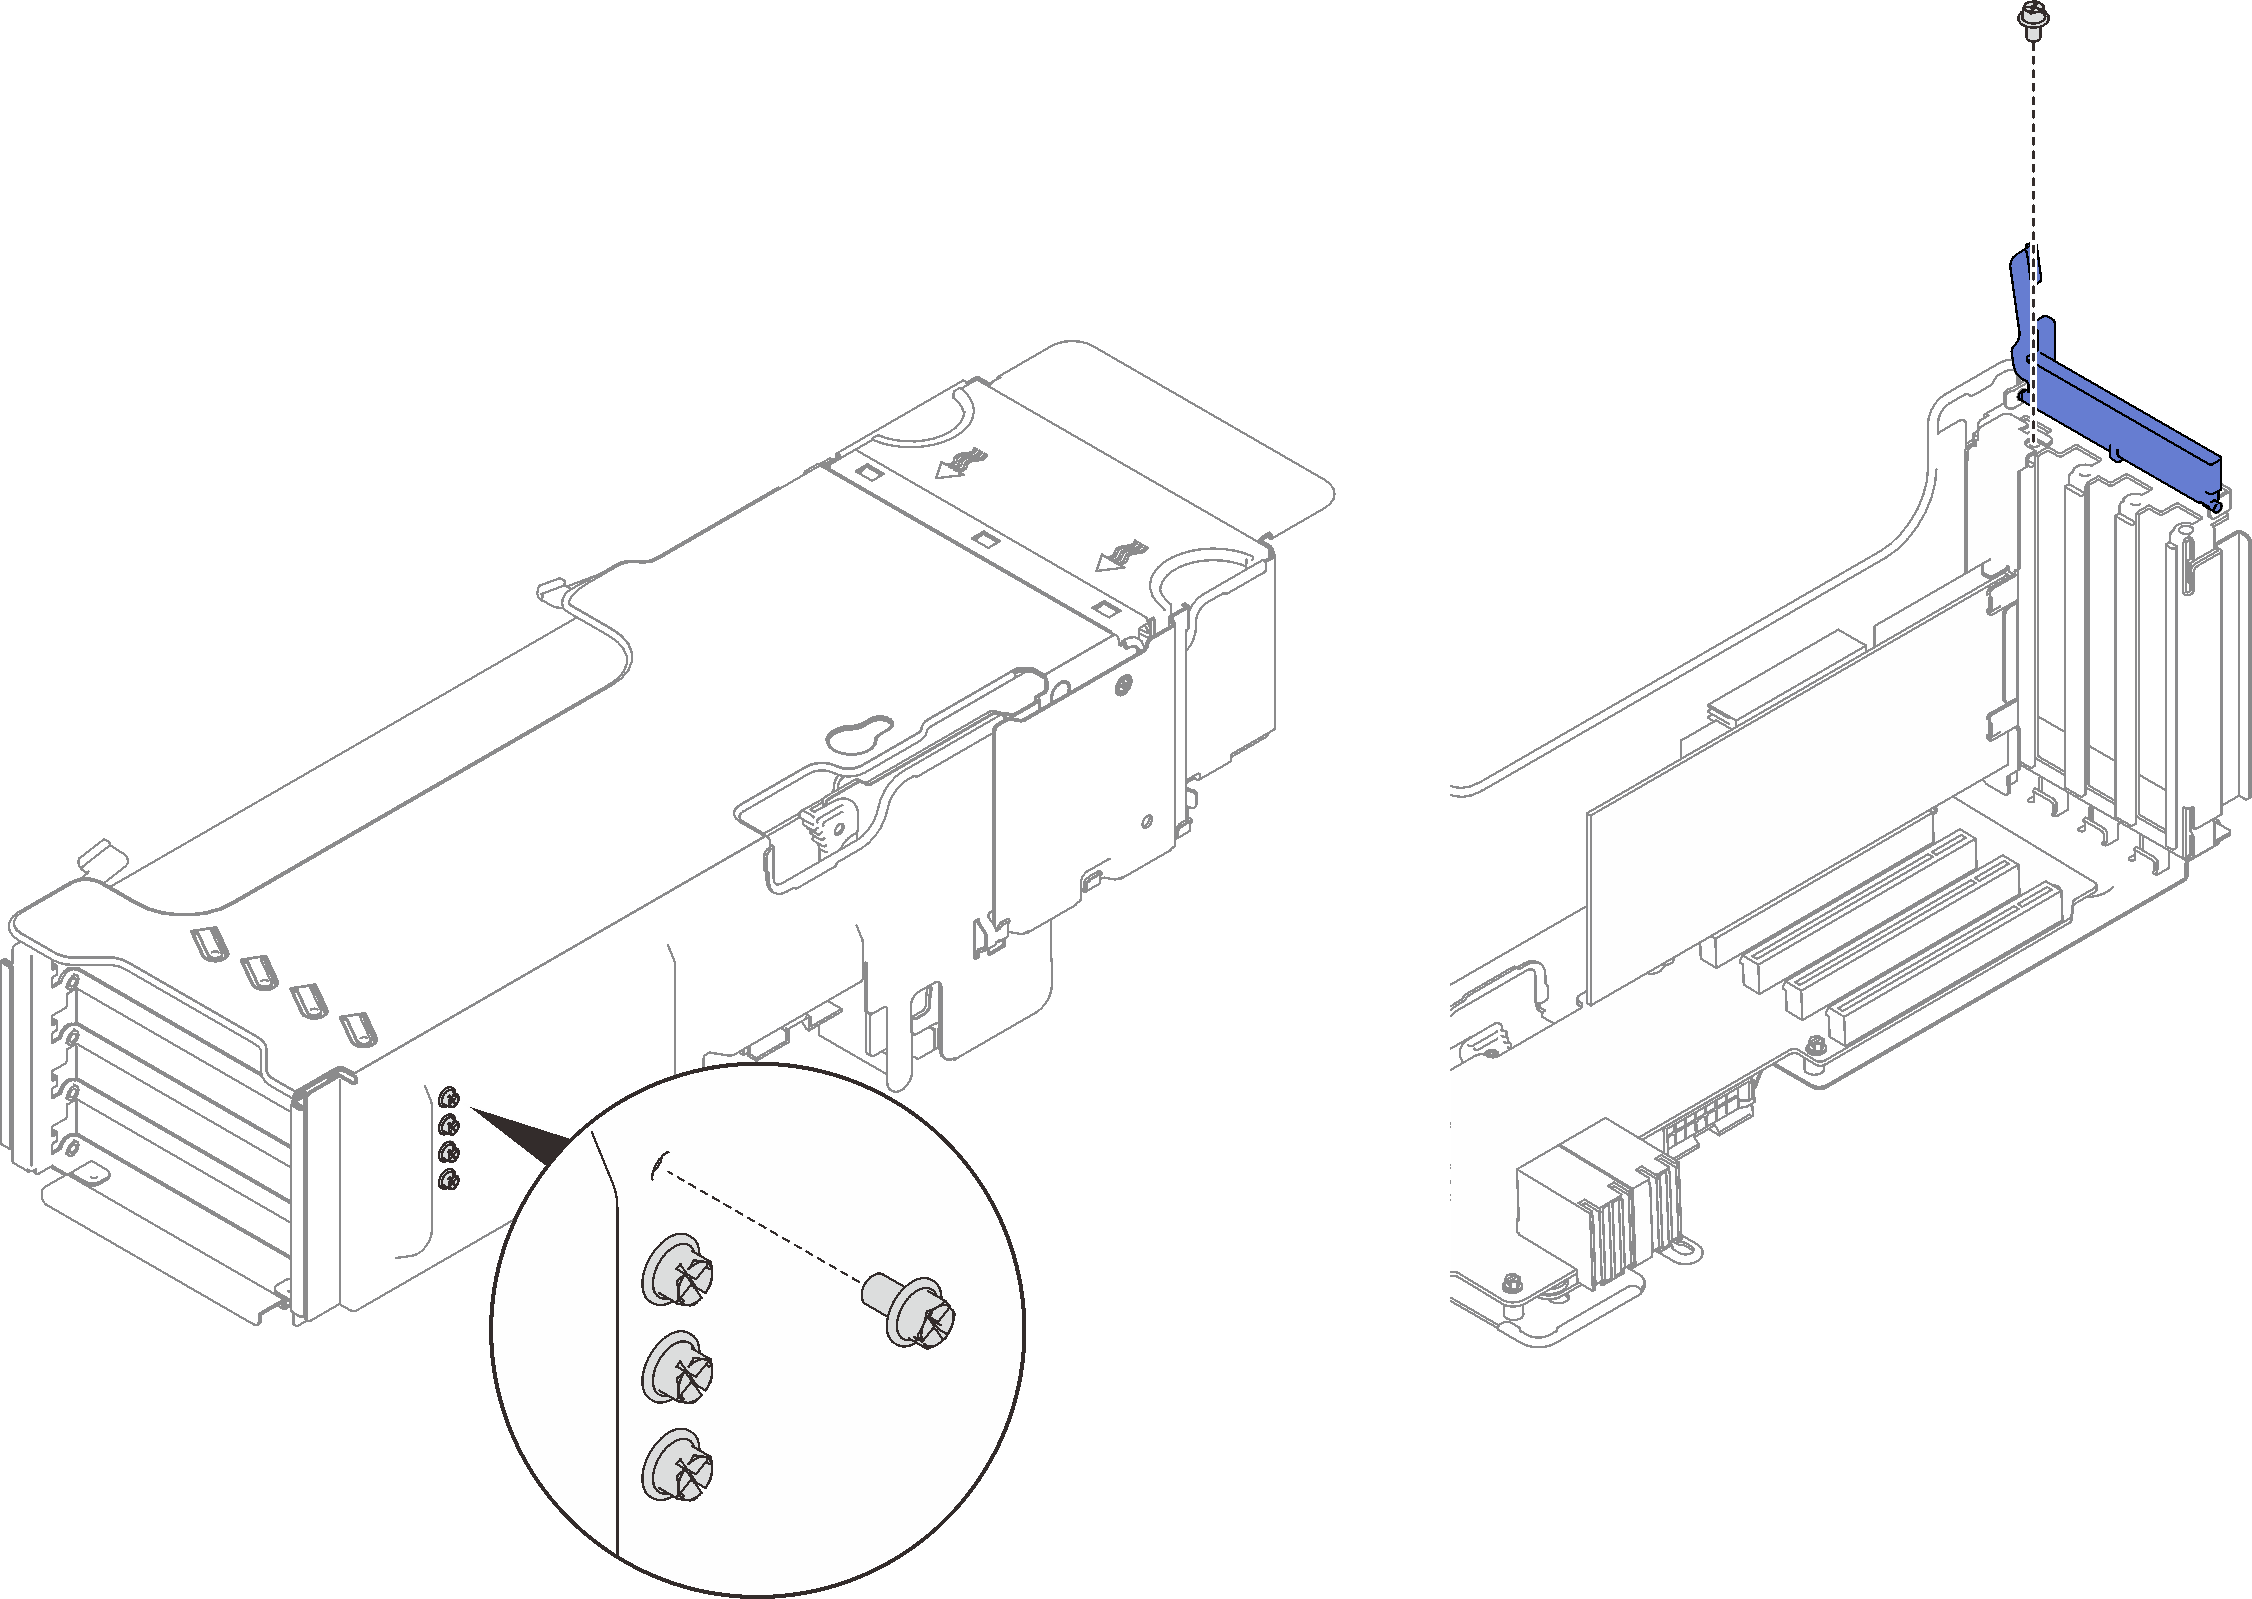
- (Optional) Secure the adapter with one of the four spare screws that come with the 4U PCIe riser cage.Figure 2. Securing the adapter to the 4U PCIe riser cage
After this task is completed
Proceed to complete the parts replacement (see Complete the parts replacement).
Give documentation feedback