Install the front VGA assembly
Use this procedure to install the front VGA assembly.
Before installing the front VGA assembly:
Read the safety information and installation guidelines (see Safety and Installation Guidelines).
Touch the static-protective package that contains the component to any unpainted metal surface on the server; then, remove it from the package and place it on a static-protective surface.
To install the front VGA assembly, complete the following steps:
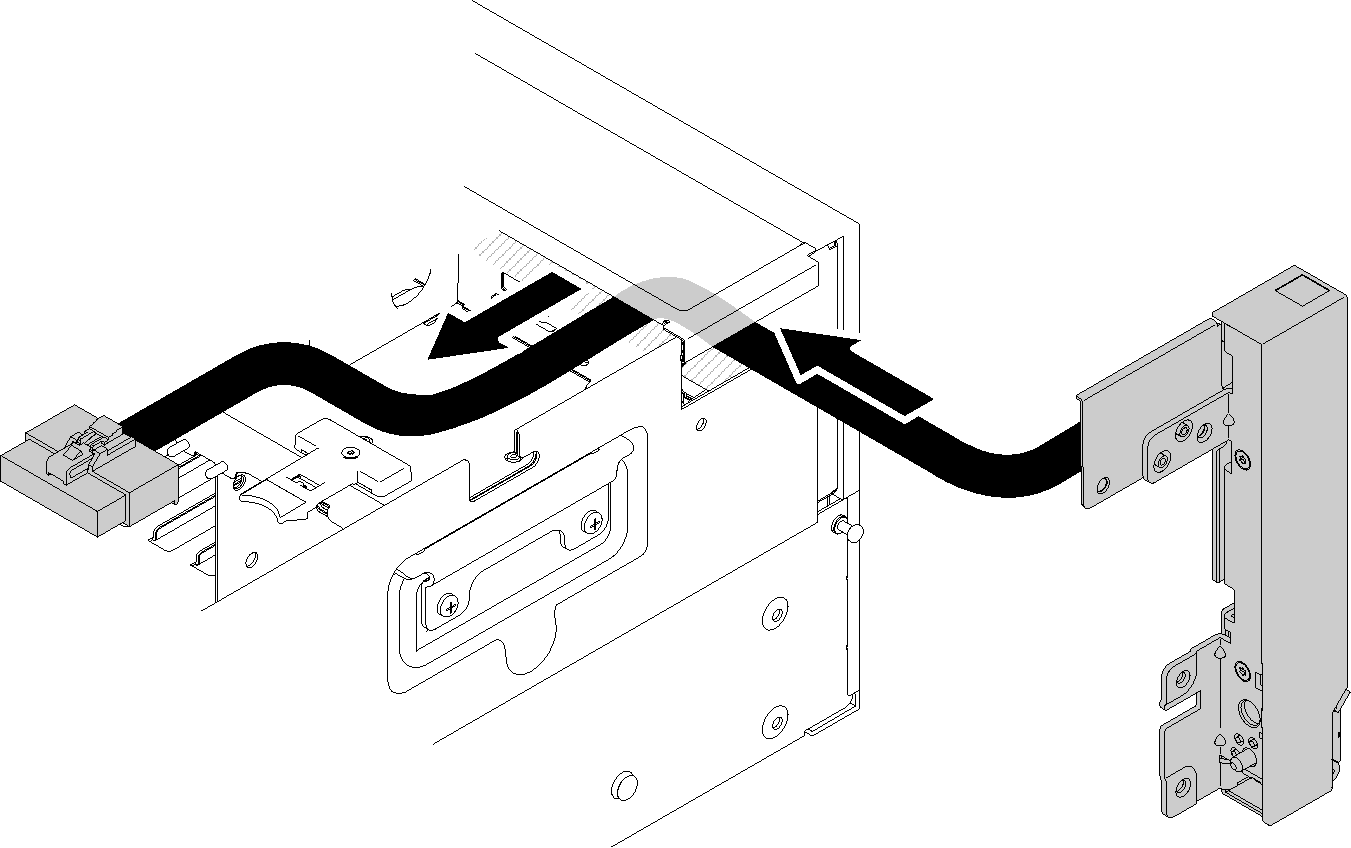
- Route the cable into the slot.Figure 1. Front VGA assembly installation
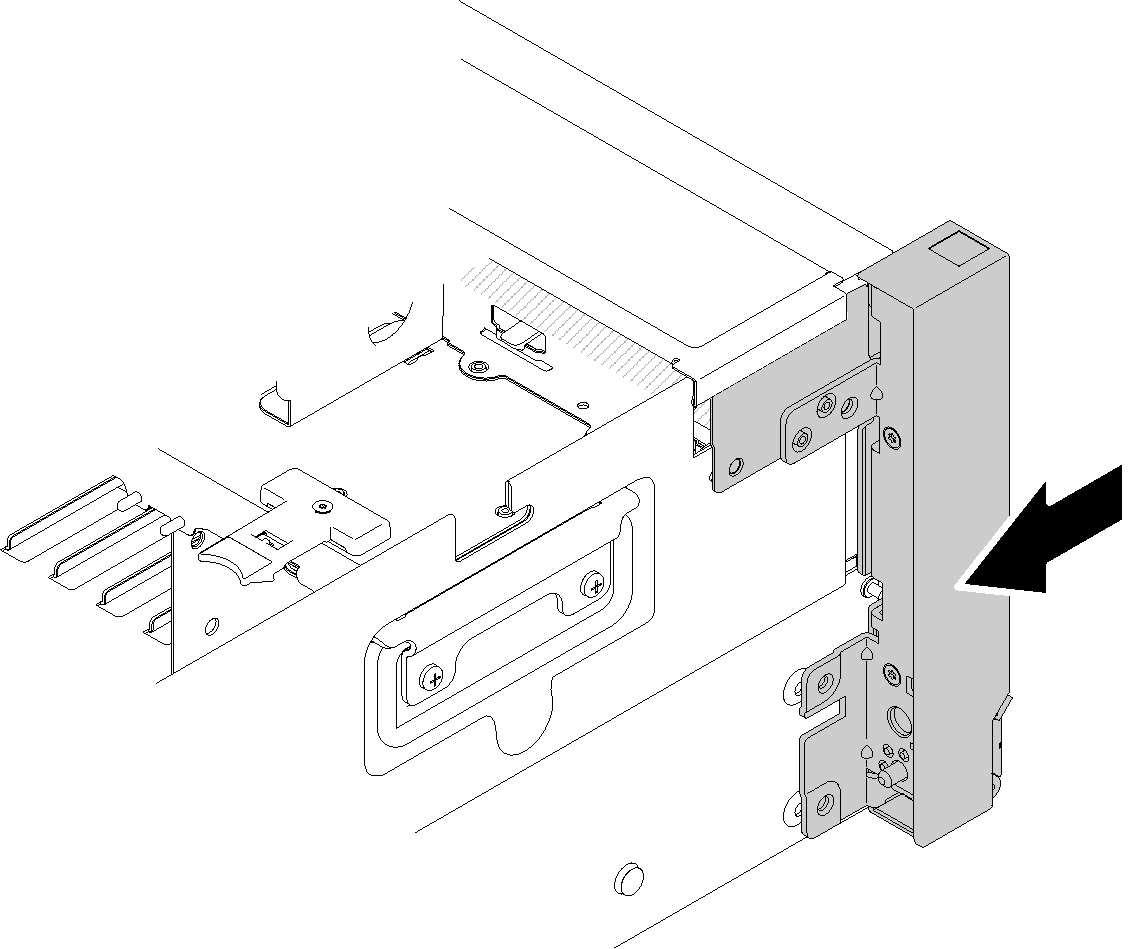
- Slide the front VGA assembly into place. Make sure the screw holes on the front VGA assembly and chassis align with each other.Figure 2. Front VGA assembly installation
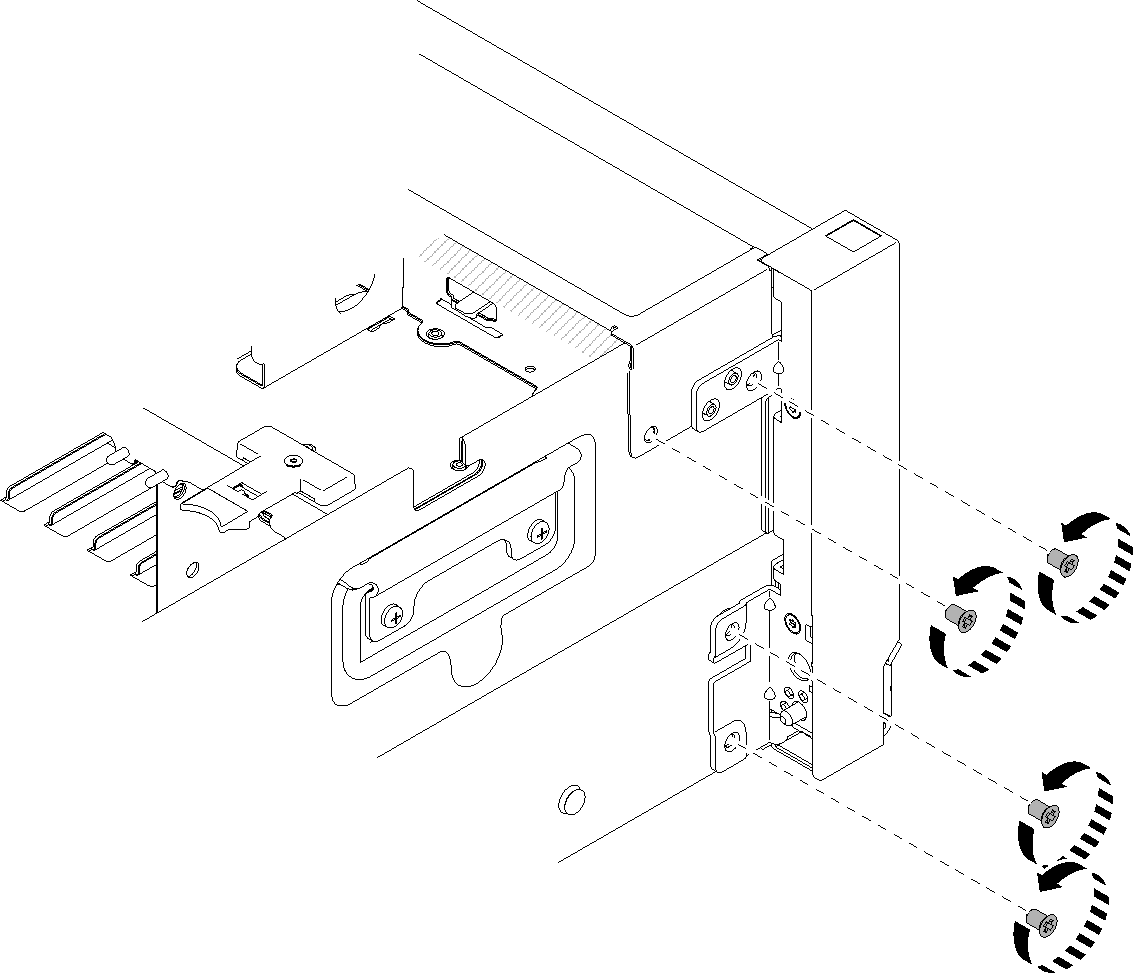
- Fasten the screws.Figure 3. Front VGA assembly installation
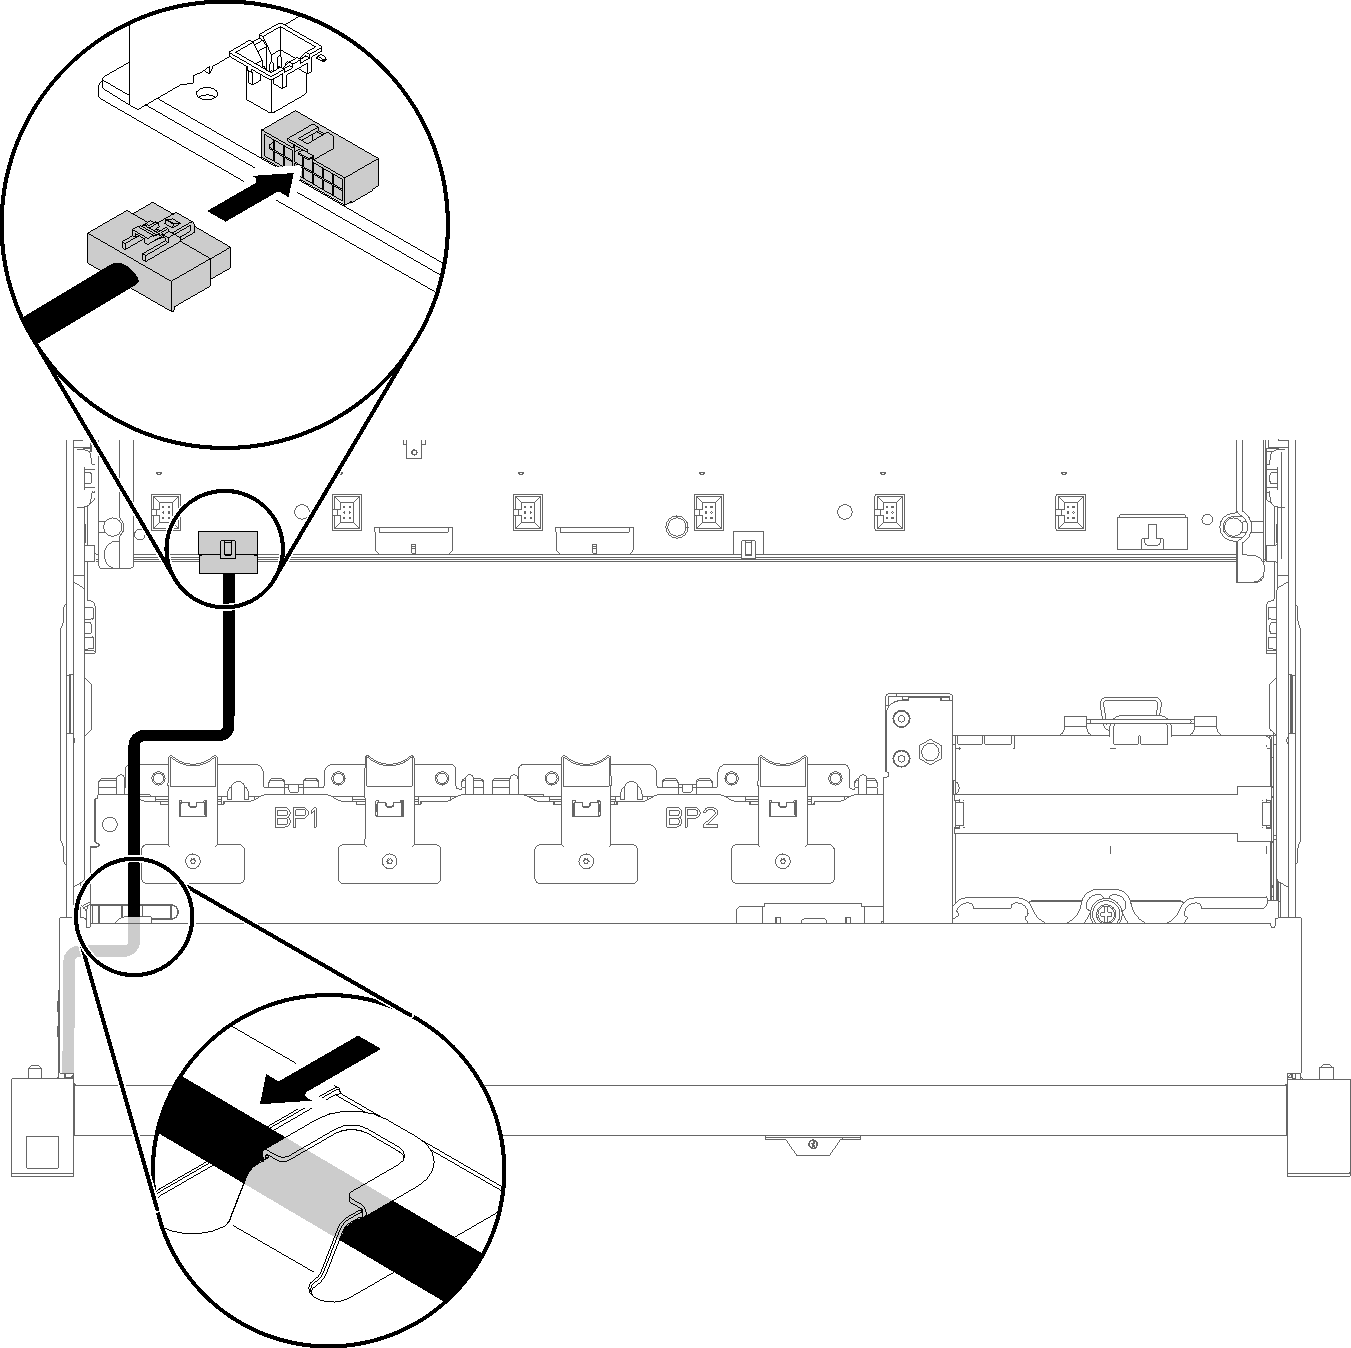
- Connect the front video cable to the system board and route the cable into the clip.Figure 4. Front VGA assembly installation
After installing front VGA assembly, complete the following steps:
Reinstall the fan cage (see Install the fan cage assembly)
Install the top cover (see Install the top cover).
Reconnect the power cords and any cables that you removed.
Power on the server and any peripheral devices.
Demo video
Give documentation feedback