Install a 4U PCIe riser assembly
Use this procedure to install a 4U PCIe riser assembly.
Before installing a 4U PCIe riser assembly:
Read the safety information and installation guidelines (see Safety and Installation Guidelines).
To install a 4U PCIe riser assembly, complete the following steps:
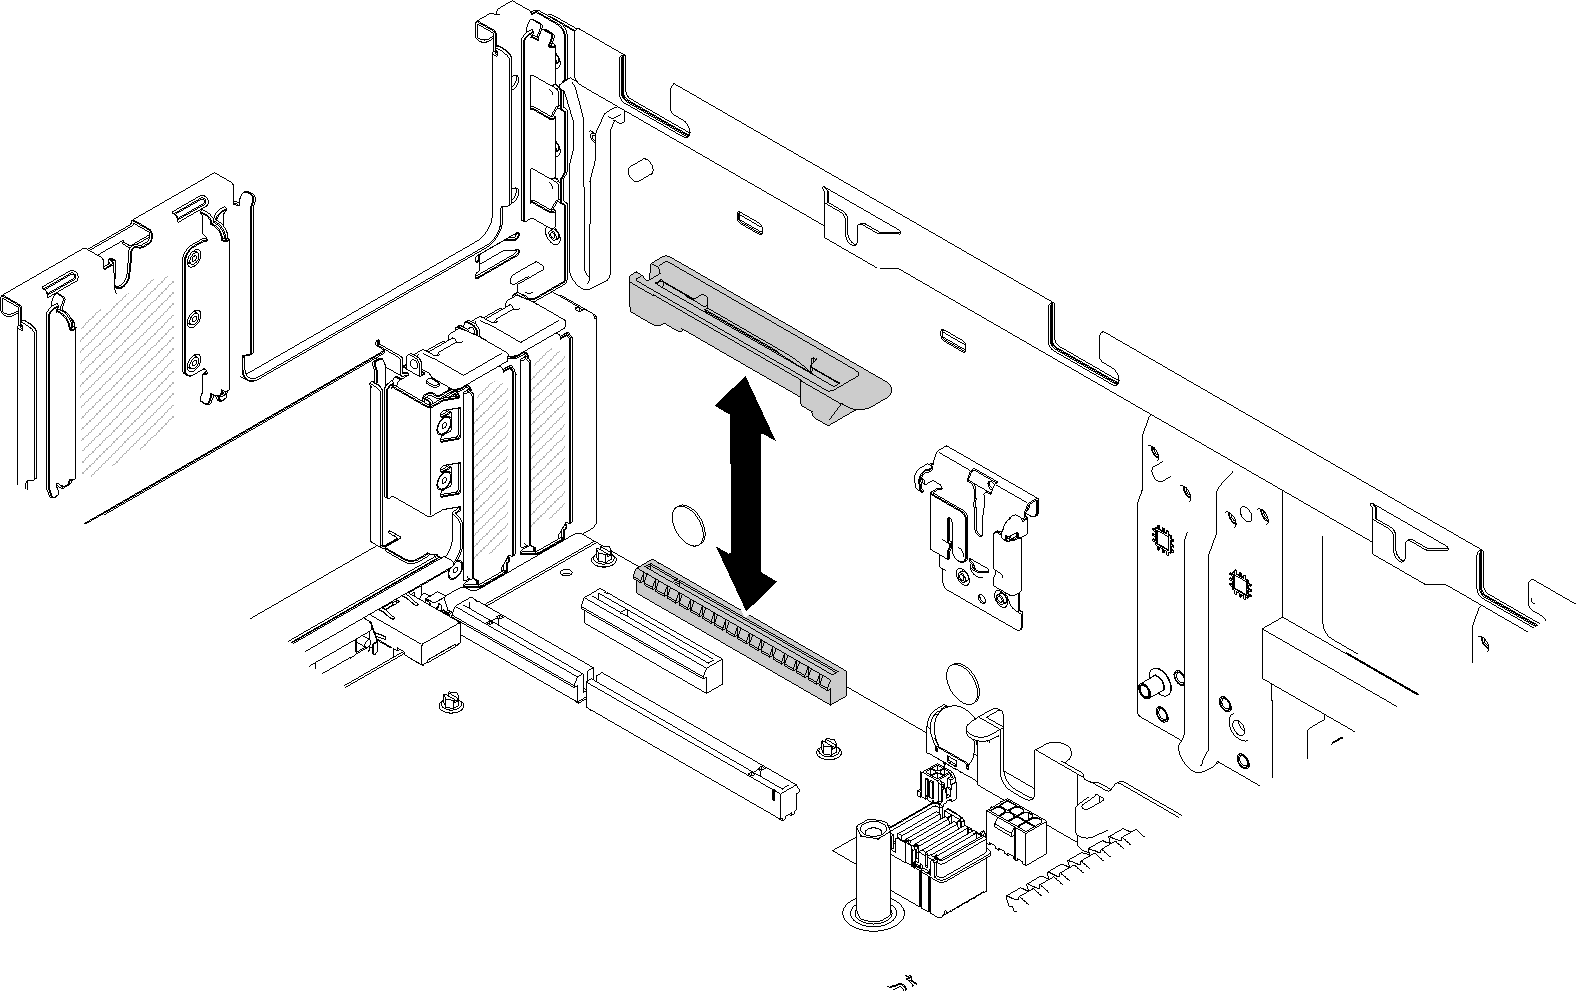
- Remove the PCIe expansion tray (see Remove the PCIe expansion tray) to install the PCIe connector guide.Figure 1. 4U PCIe riser assembly installation
- Rotate the lever downward until it clicks. Make sure the 4U PCIe riser assembly is fully seated into the PCIe expansion tray.NoteTo maintain proper system cooling, if only one
4U PCIe riser assembly is installed, the 4U PCIe riser assembly filler must be installed to operate the server. Figure 2. 4U PCIe riser assembly installation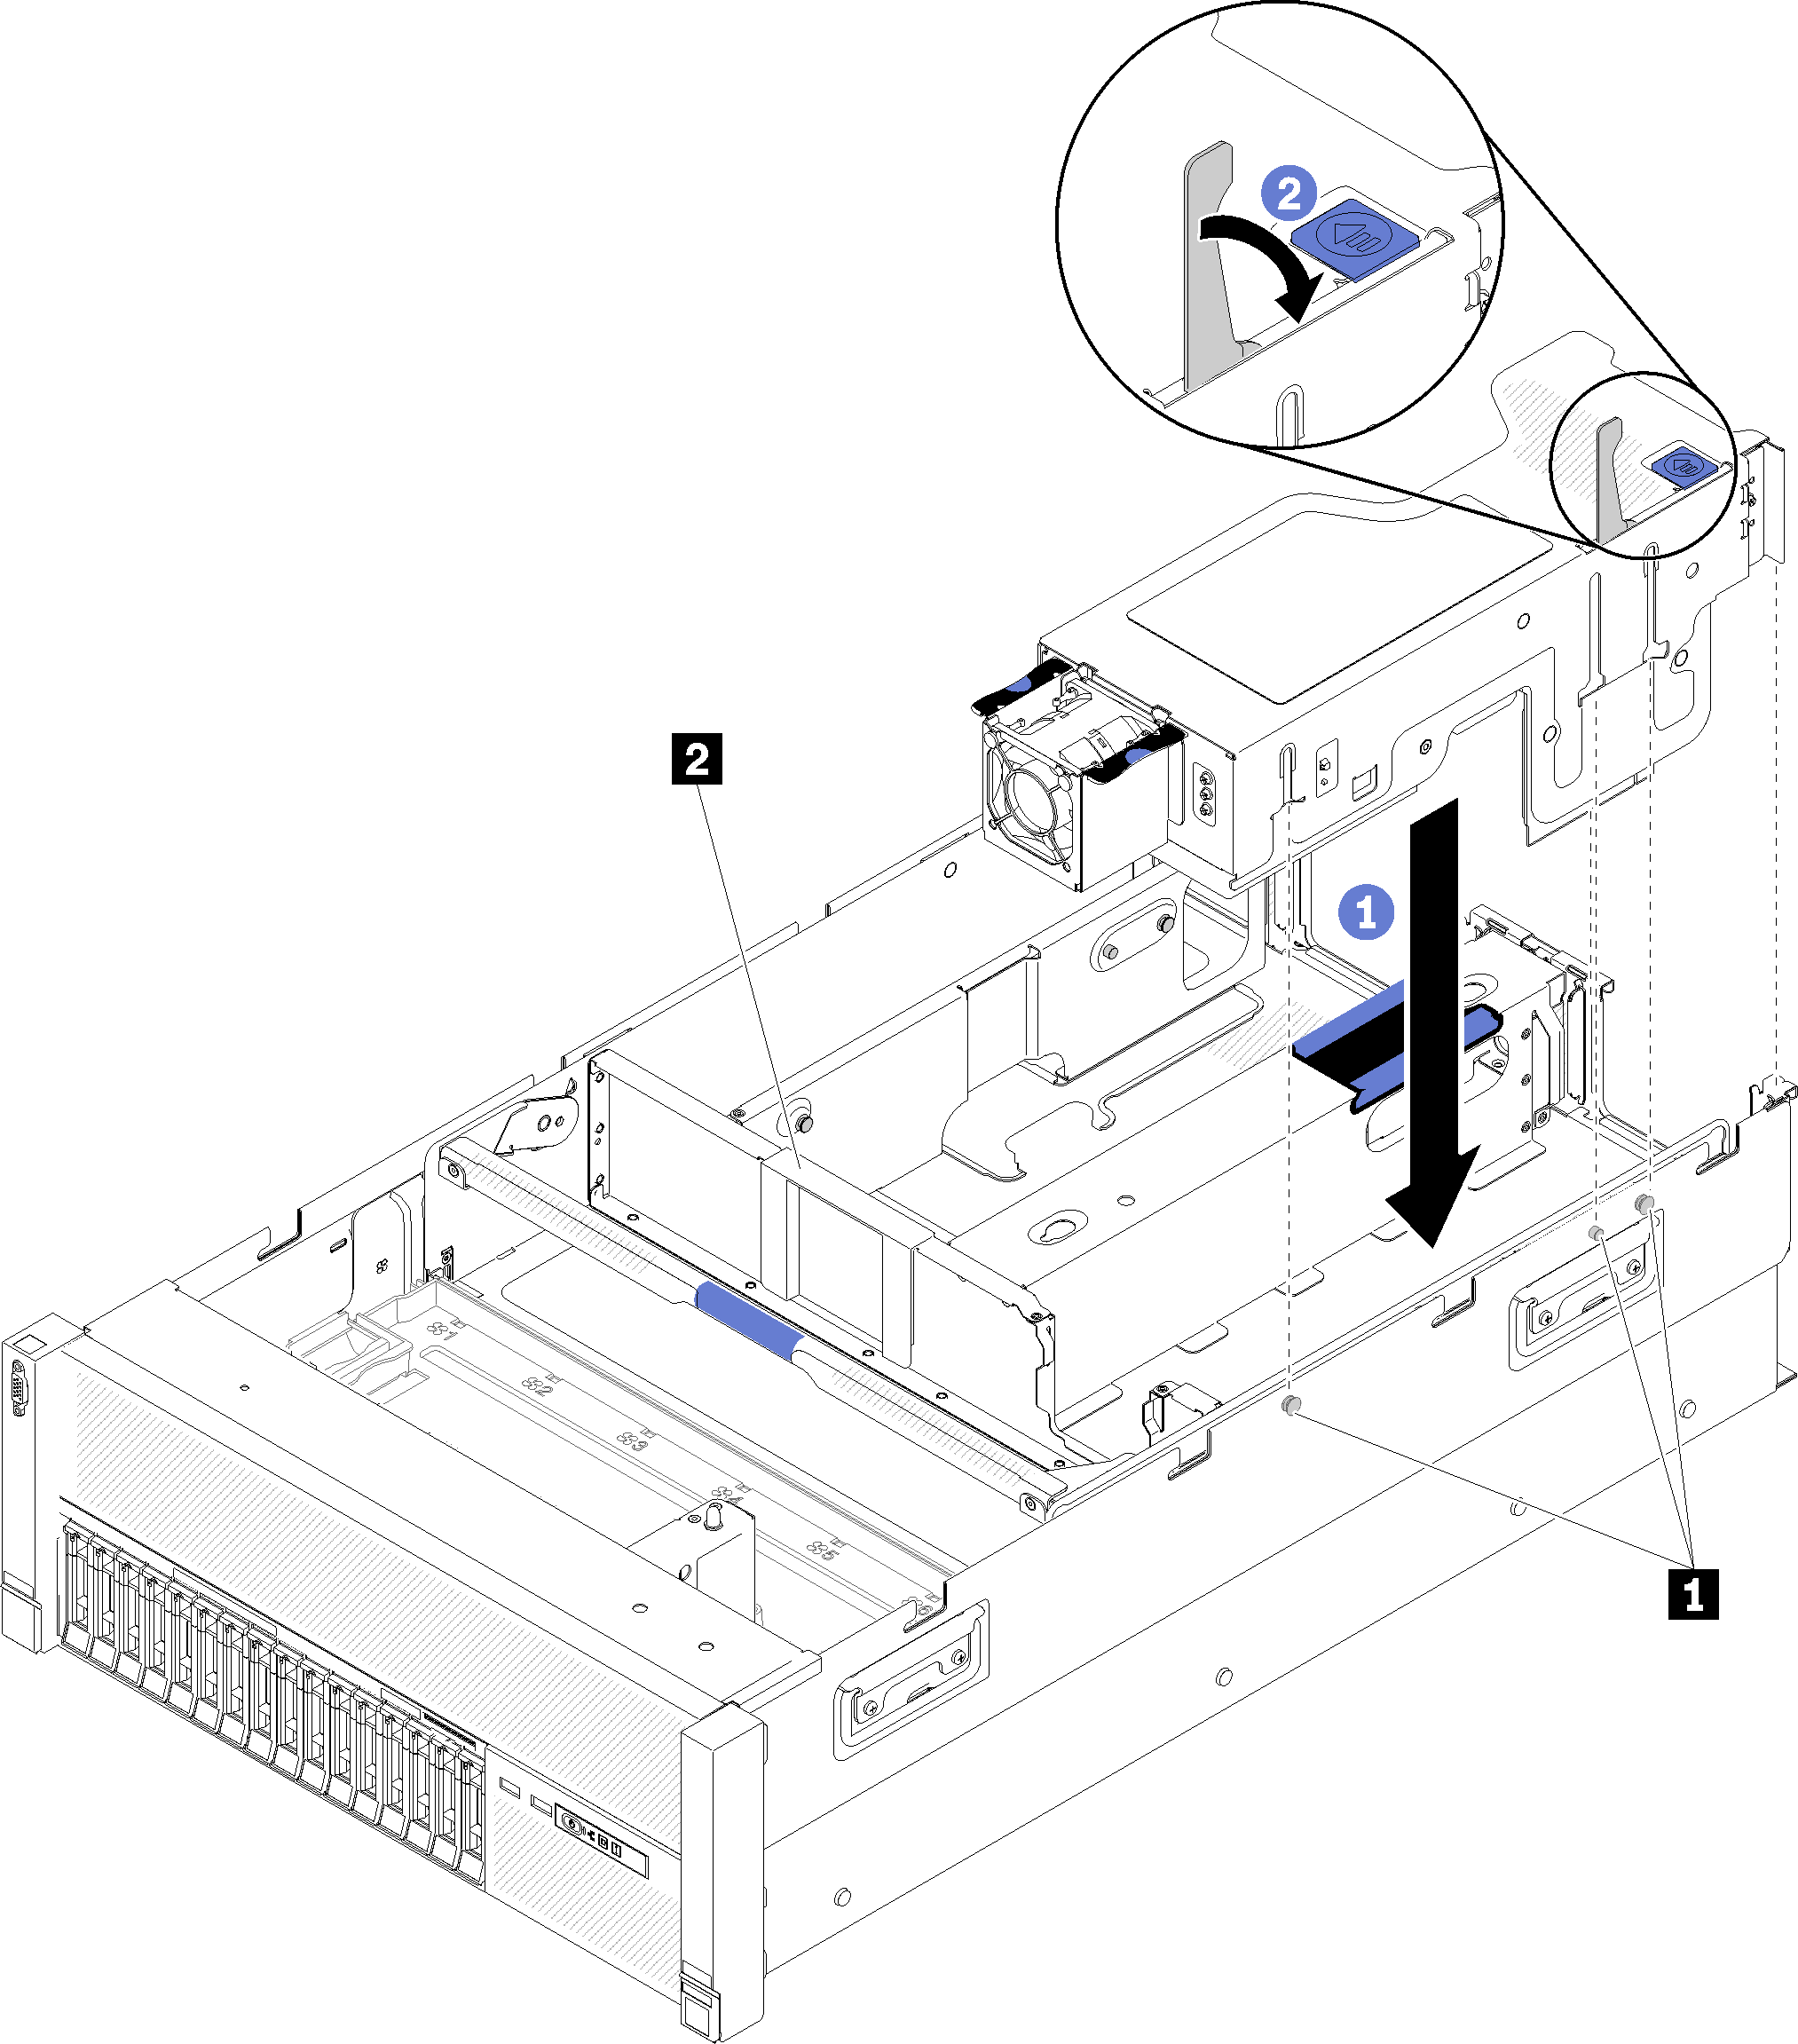
Table 1. Guide pin and assembly filler 1 Guide pin 2 4U PCIe riser assembly filler
After installing a 4U PCIe riser assembly, complete the following steps:
Install the top cover (see Install the top cover).
If the server is installed in a rack, reinstall the server into the rack.
Power on the server and any peripheral devices.
Demo video
Give documentation feedback