Controller-to-stack cabling worksheets and cabling examples for multipath HA configurations with quad-port SAS HBAs
You can use the completed controller-to-stack cabling worksheets and cabling examples to cable common multipath HA configurations that have quad-port SAS HBAs. These controllers do not have onboard SAS ports.
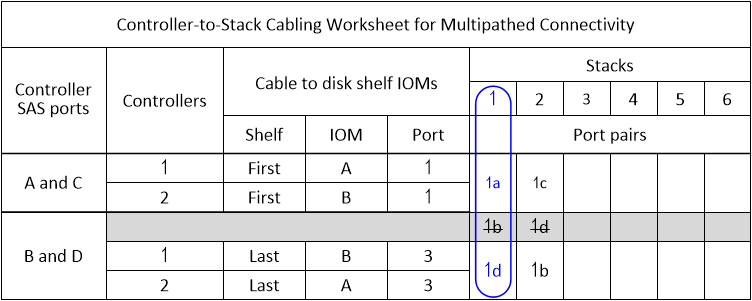
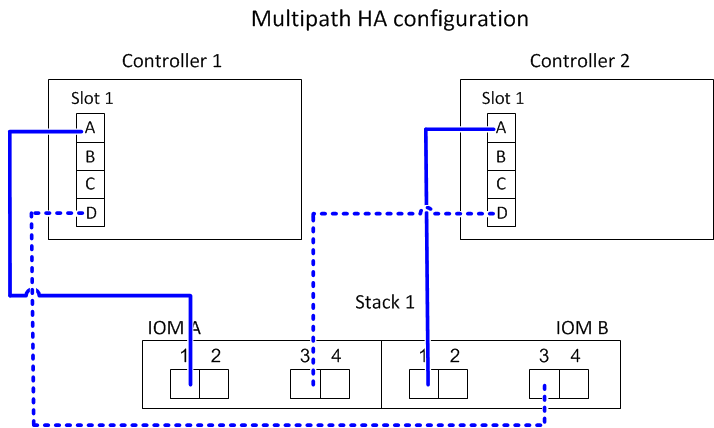
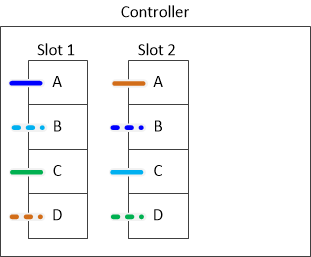
Multipath HA with one quad-port SAS HBA and one single-shelf stack
The following worksheet and cabling example uses port pair 1a/1d:
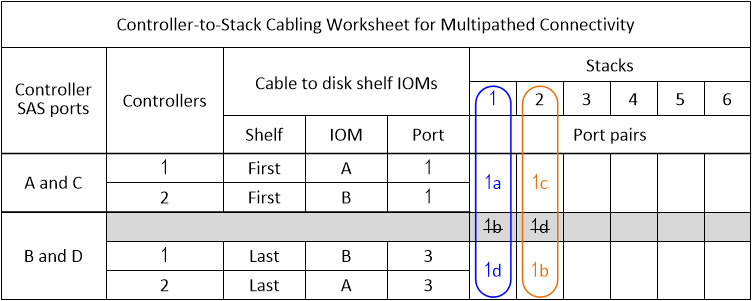
Multipath HA with one quad-port SAS HBA and two single-shelf stacks
The following worksheet and cabling example uses port pairs 1a/1d and 1c/1b:

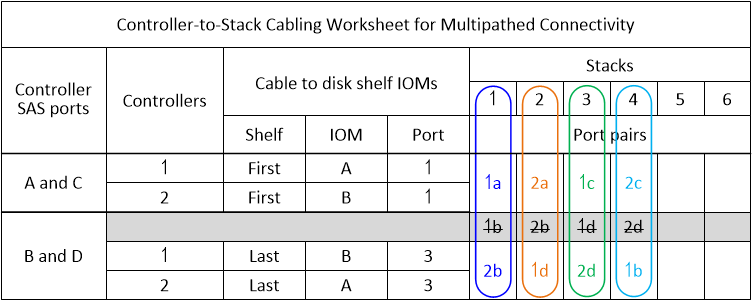
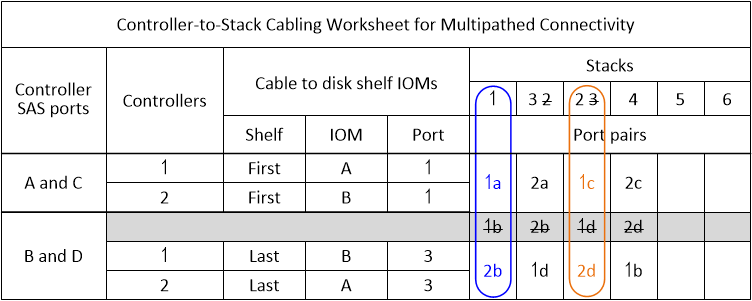
Multipath HA with two quad-port SAS HBAs and two multi-shelf stacks
Four port pairs are available for this configuration: 1a/2b, 2a/1d, 1c/2d, and 2c/1b. You can cable port pairs in the order in which they are identified (listed in the worksheet) or you can cable every other port pair (skip port pairs).
Note
When you have more port pairs than you need to cable the stacks in your system, the best practice is to skip port pairs to optimize the SAS ports on your system. By optimizing SAS ports, you optimize your system's performance.
The following worksheet and cabling example shows port pairs being used in the order in which they are listed in the worksheet: 1a/2b, 2a/1d, 1c/2d, and 2c/1b.
The following worksheet and cabling example shows port pairs being skipped to use every other one in the list: 1a/2b and 1c/2d.

Note
If a third stack is added later, you use the port pair that was skipped.
Give documentation feedback