Installing disk shelves with IOM12 modules for a new system installation
You install the disk shelves in a rack using the rack mount kits that came with the disk shelves.
About this task
For DM120S and DM240S, the video for this task is available at:For DM600S, the video for this task is available at:
- If you are installing a DM600S disk shelf, install the components into the racked disk shelf; otherwise, go to the next step.If you purchased a partially populated disk shelf which does not have a drive in every drive slot, you must ensure that:
- The first four slots (0, 3, 6, and 9) are occupied in each drawer.
This ensures proper airflow in the disk shelf.
- In a shelf with 30 drives, the remaining ten drives are distributed evenly throughout the shelf in slots 1 and 10 of each drawer.
The following illustration shows how the drives are numbered from 0 to 11 in each drive drawer within the shelf. In a shelf containing 30 drives, slots 0, 1, 3, 6, 9, and 10 must contain drives.

- Align the two raised buttons on each side of the drive carrier with the matching gap in the drive channel on the drive drawer.
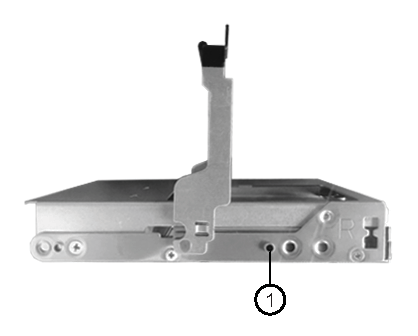
1 Raised button on the right side of the drive carrier - Carefully push the drive drawer back into the enclosure.
 AttentionPossible loss of data access – Never slam the drawer shut. Push the drawer in slowly to avoid jarring the drawer and causing damage to the storage array.
- The first four slots (0, 3, 6, and 9) are occupied in each drawer.
Give documentation feedback