Install a DWC tray in the enclosure
Use this information to install a DWC tray in the enclosure.
About this task
Read Installation Guidelines and Safety inspection checklist to ensure that you work safely.
When installing different DWC trays in the DW612S enclosure, make sure to follow the rules in Guidance on mixing trays configuration for the DW612S enclosure.
Procedure
- Install the tray.
 Make sure that the front cam handles on the DWC tray are in the open position; then, insert the DWC tray into the tray bay until it stops.
  Rotate the front cam handles on the front of the DWC tray to the closed position to secure the tray in the enclosure.
NoteDepending on the model, your solution might look slightly different from the illustration.Figure 1. Tray installation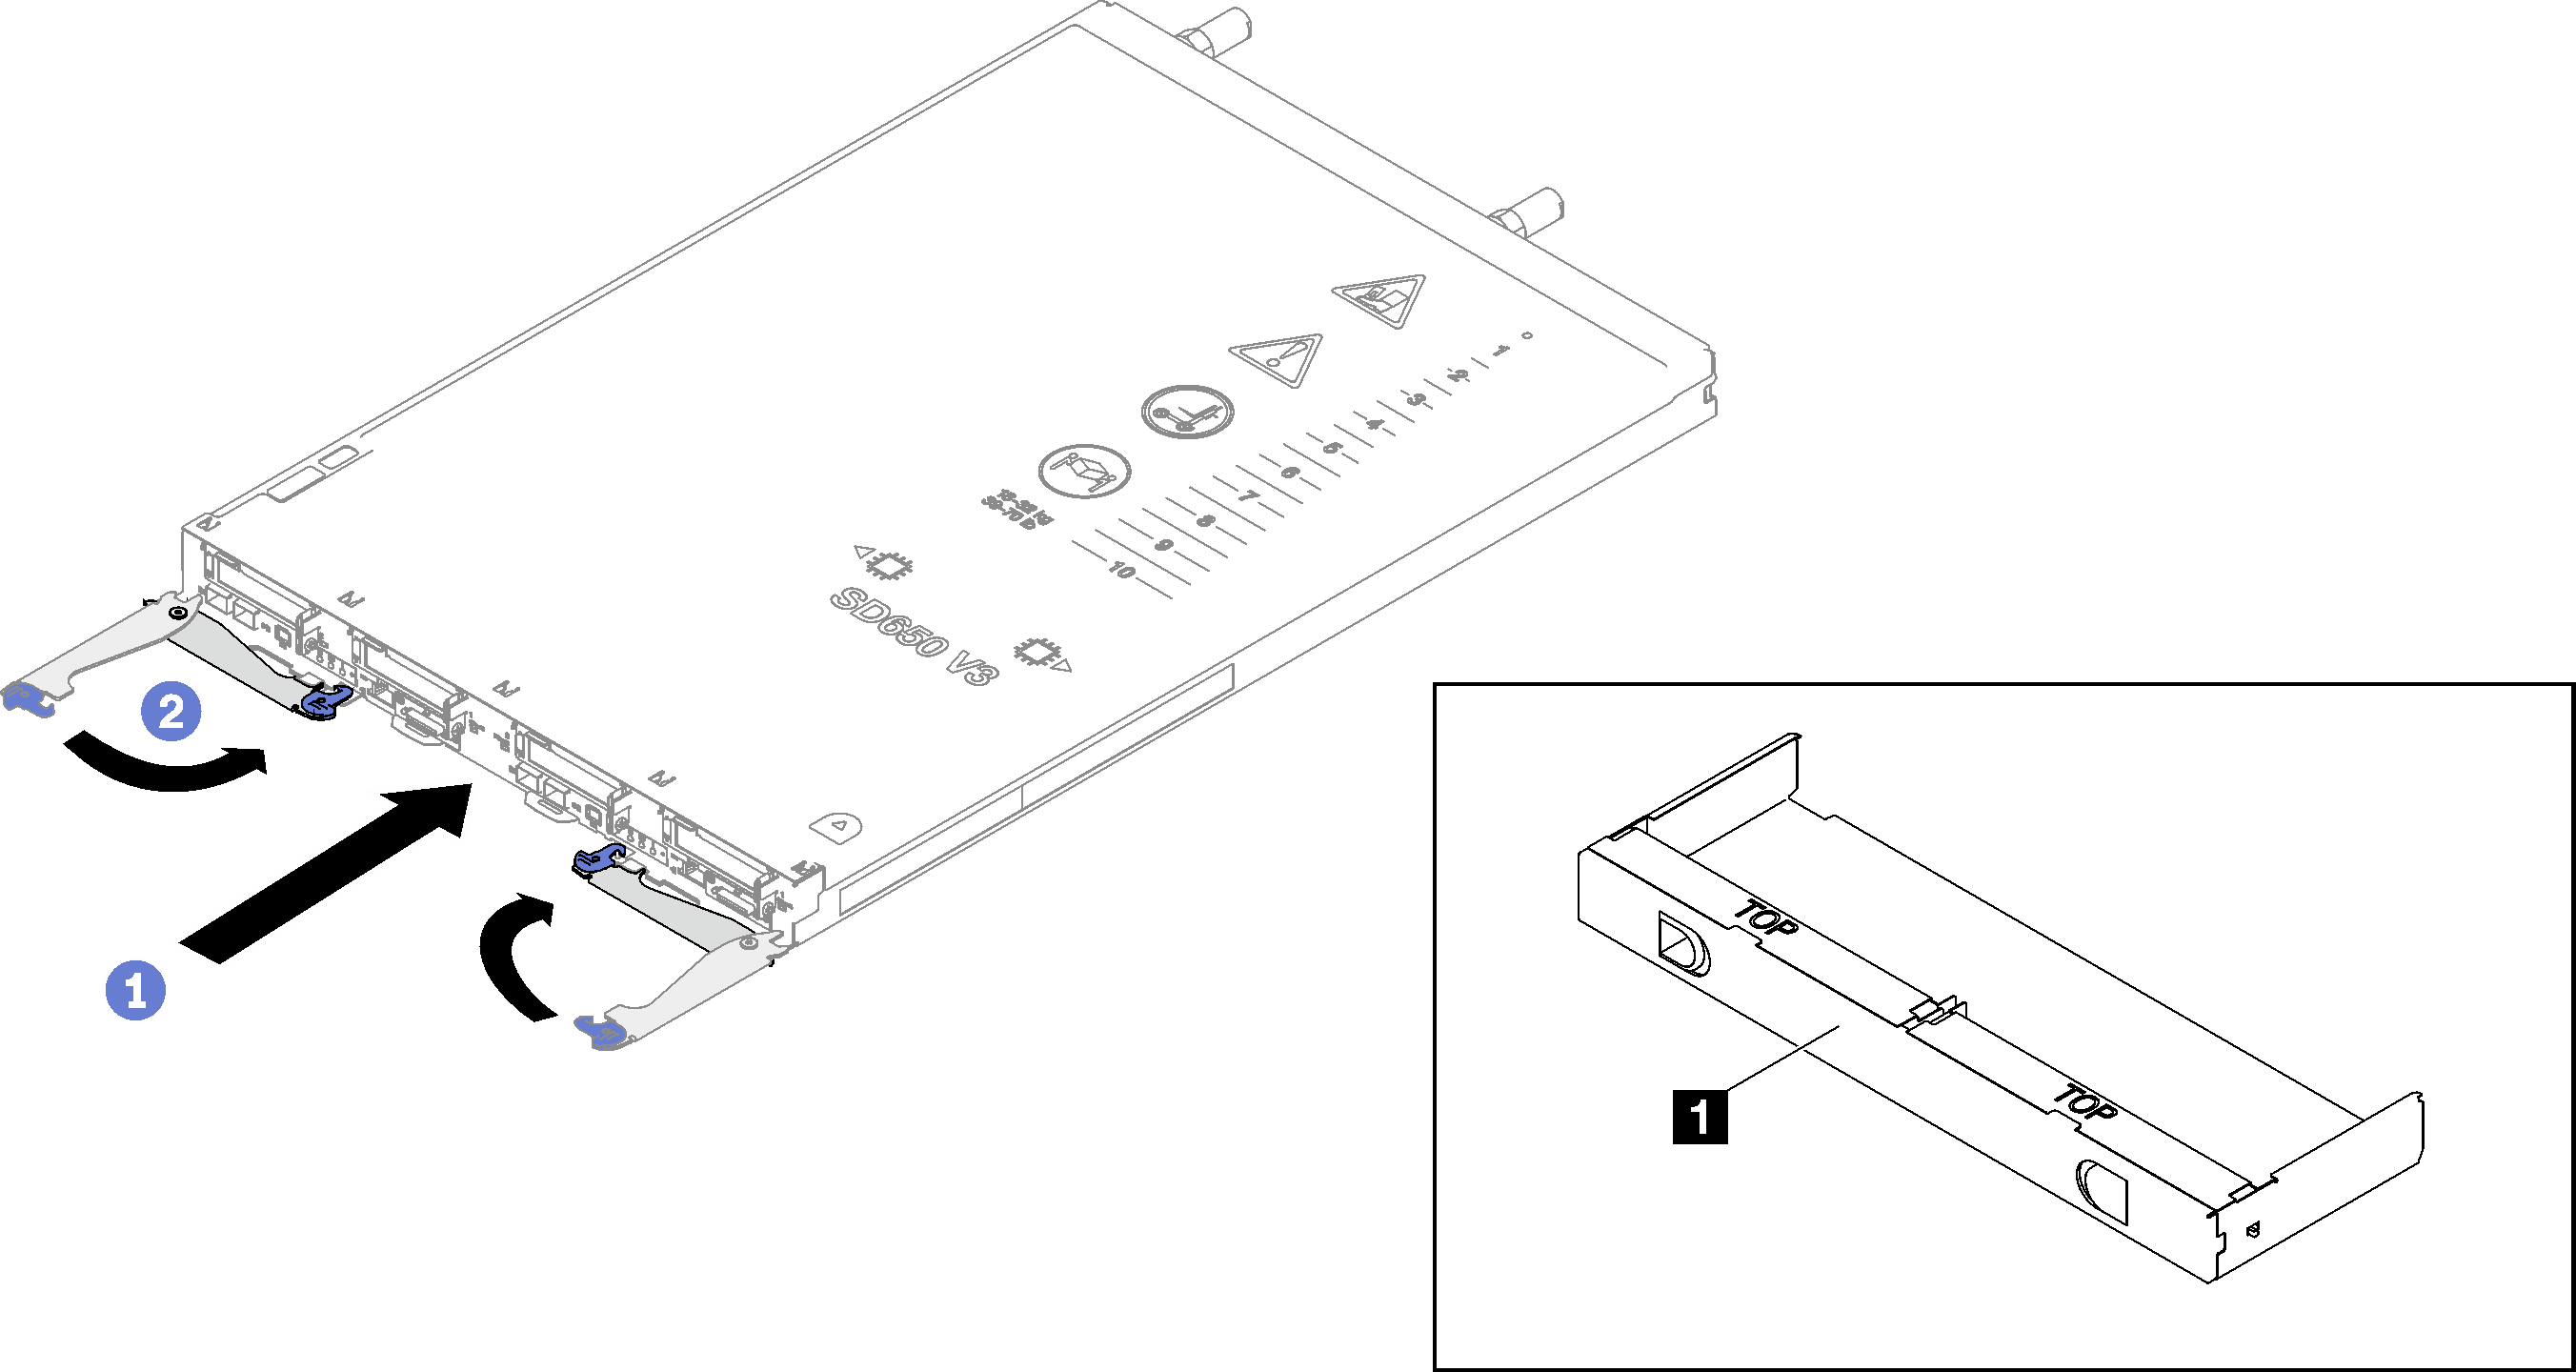
1 Tray bay filler NoteAfter the DWC tray is installed, theXCC in the DWC tray initializes. This process takes approximately 110 seconds. The power LED flashes rapidly, and the power button on the DWC tray does not respond until this process is complete.
After you finish
If this is the initial installation of the DWC tray in the enclosure, you must configure the DWC tray through the Setup Utility and install the DWC tray operating system.
If you have changed the configuration of the DWC tray or if you are installing a different DWC tray from the one that you removed, you must configure the DWC tray through the Setup Utility, and you might have to install the DWC tray operating system.
Demo video