Installing and removing a 1U device in/from the side pocket
See this topic to learn how to install or remove a 1U PDU or console switch in the side pocket.
About this task
Warning
Make sure to complete all the required cable connection and device setup before installing baying kits to the cabinets, as these tasks will be hard to operate afterwards.
Procedure
- Install the device.Figure 1. Installing a 1U PDU or console switch
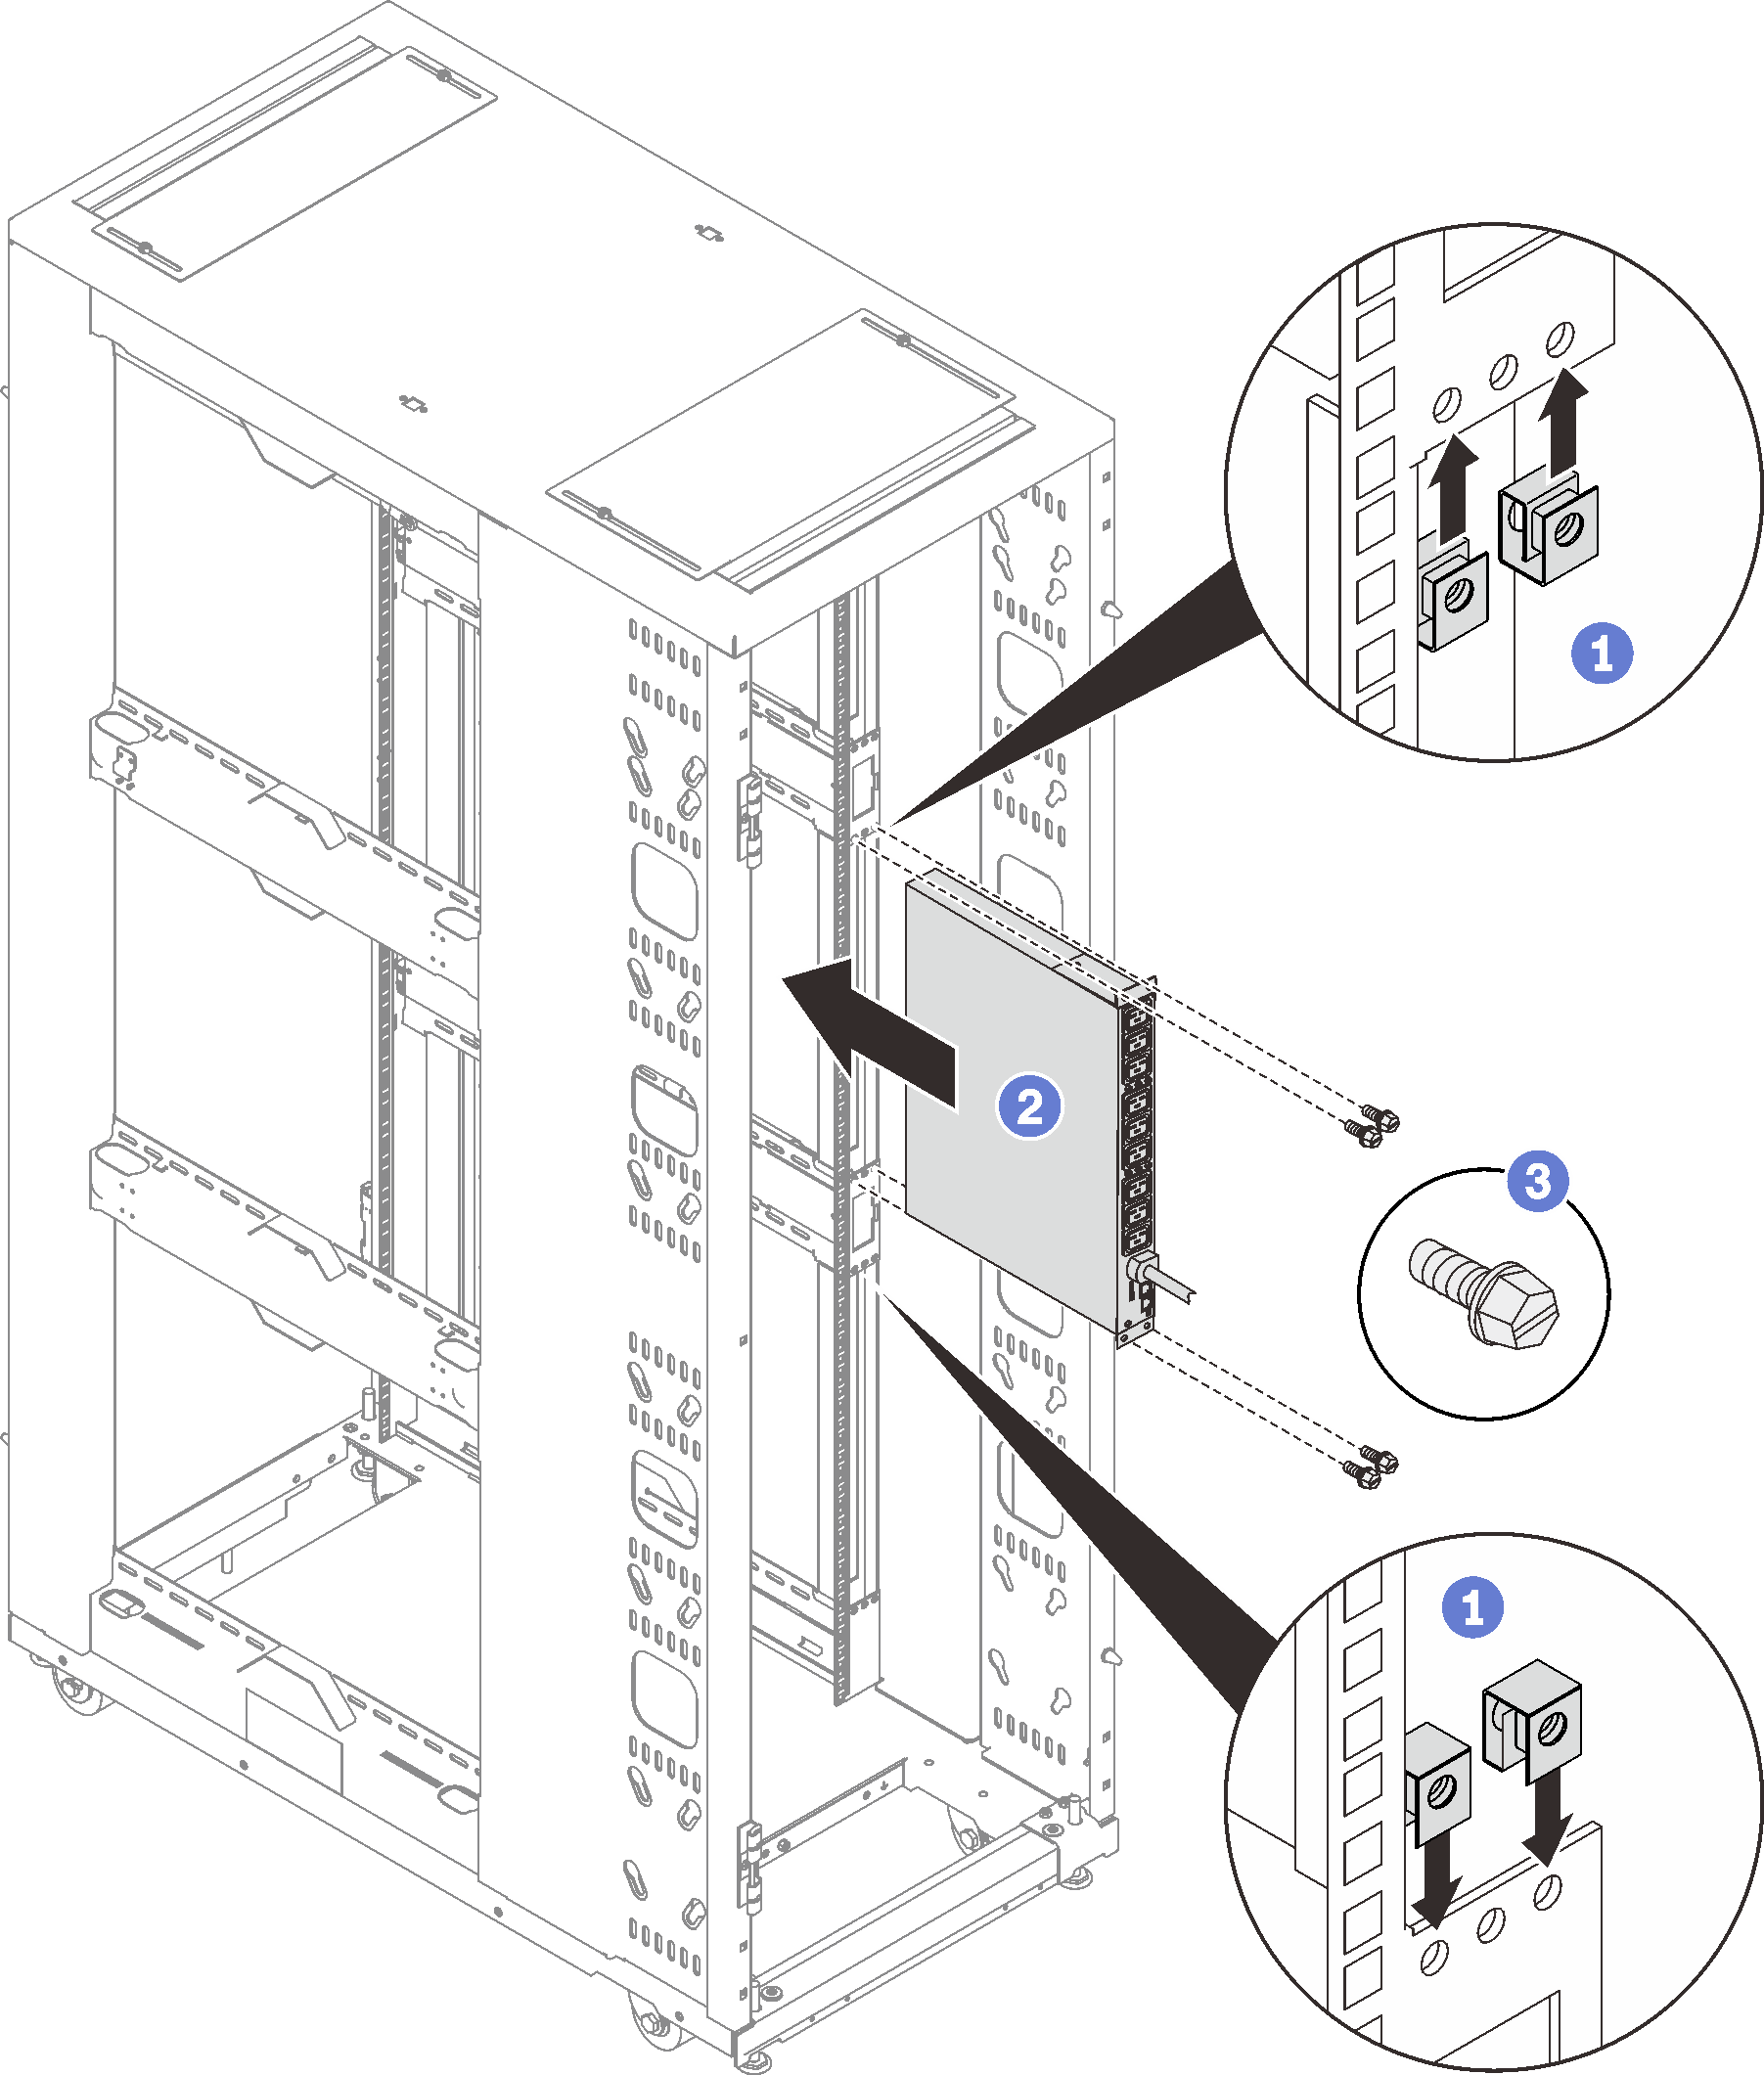
 Install four M6 clip nuts on the rack flanges as shown in the illustration.
 Slide the device all the way into the side pocket.
 Secure the device with four M6 screws.
Remove a 1U device from the side pocket
Procedure
Remove the device.
Figure 2. Removing a 1U PDU or console switch
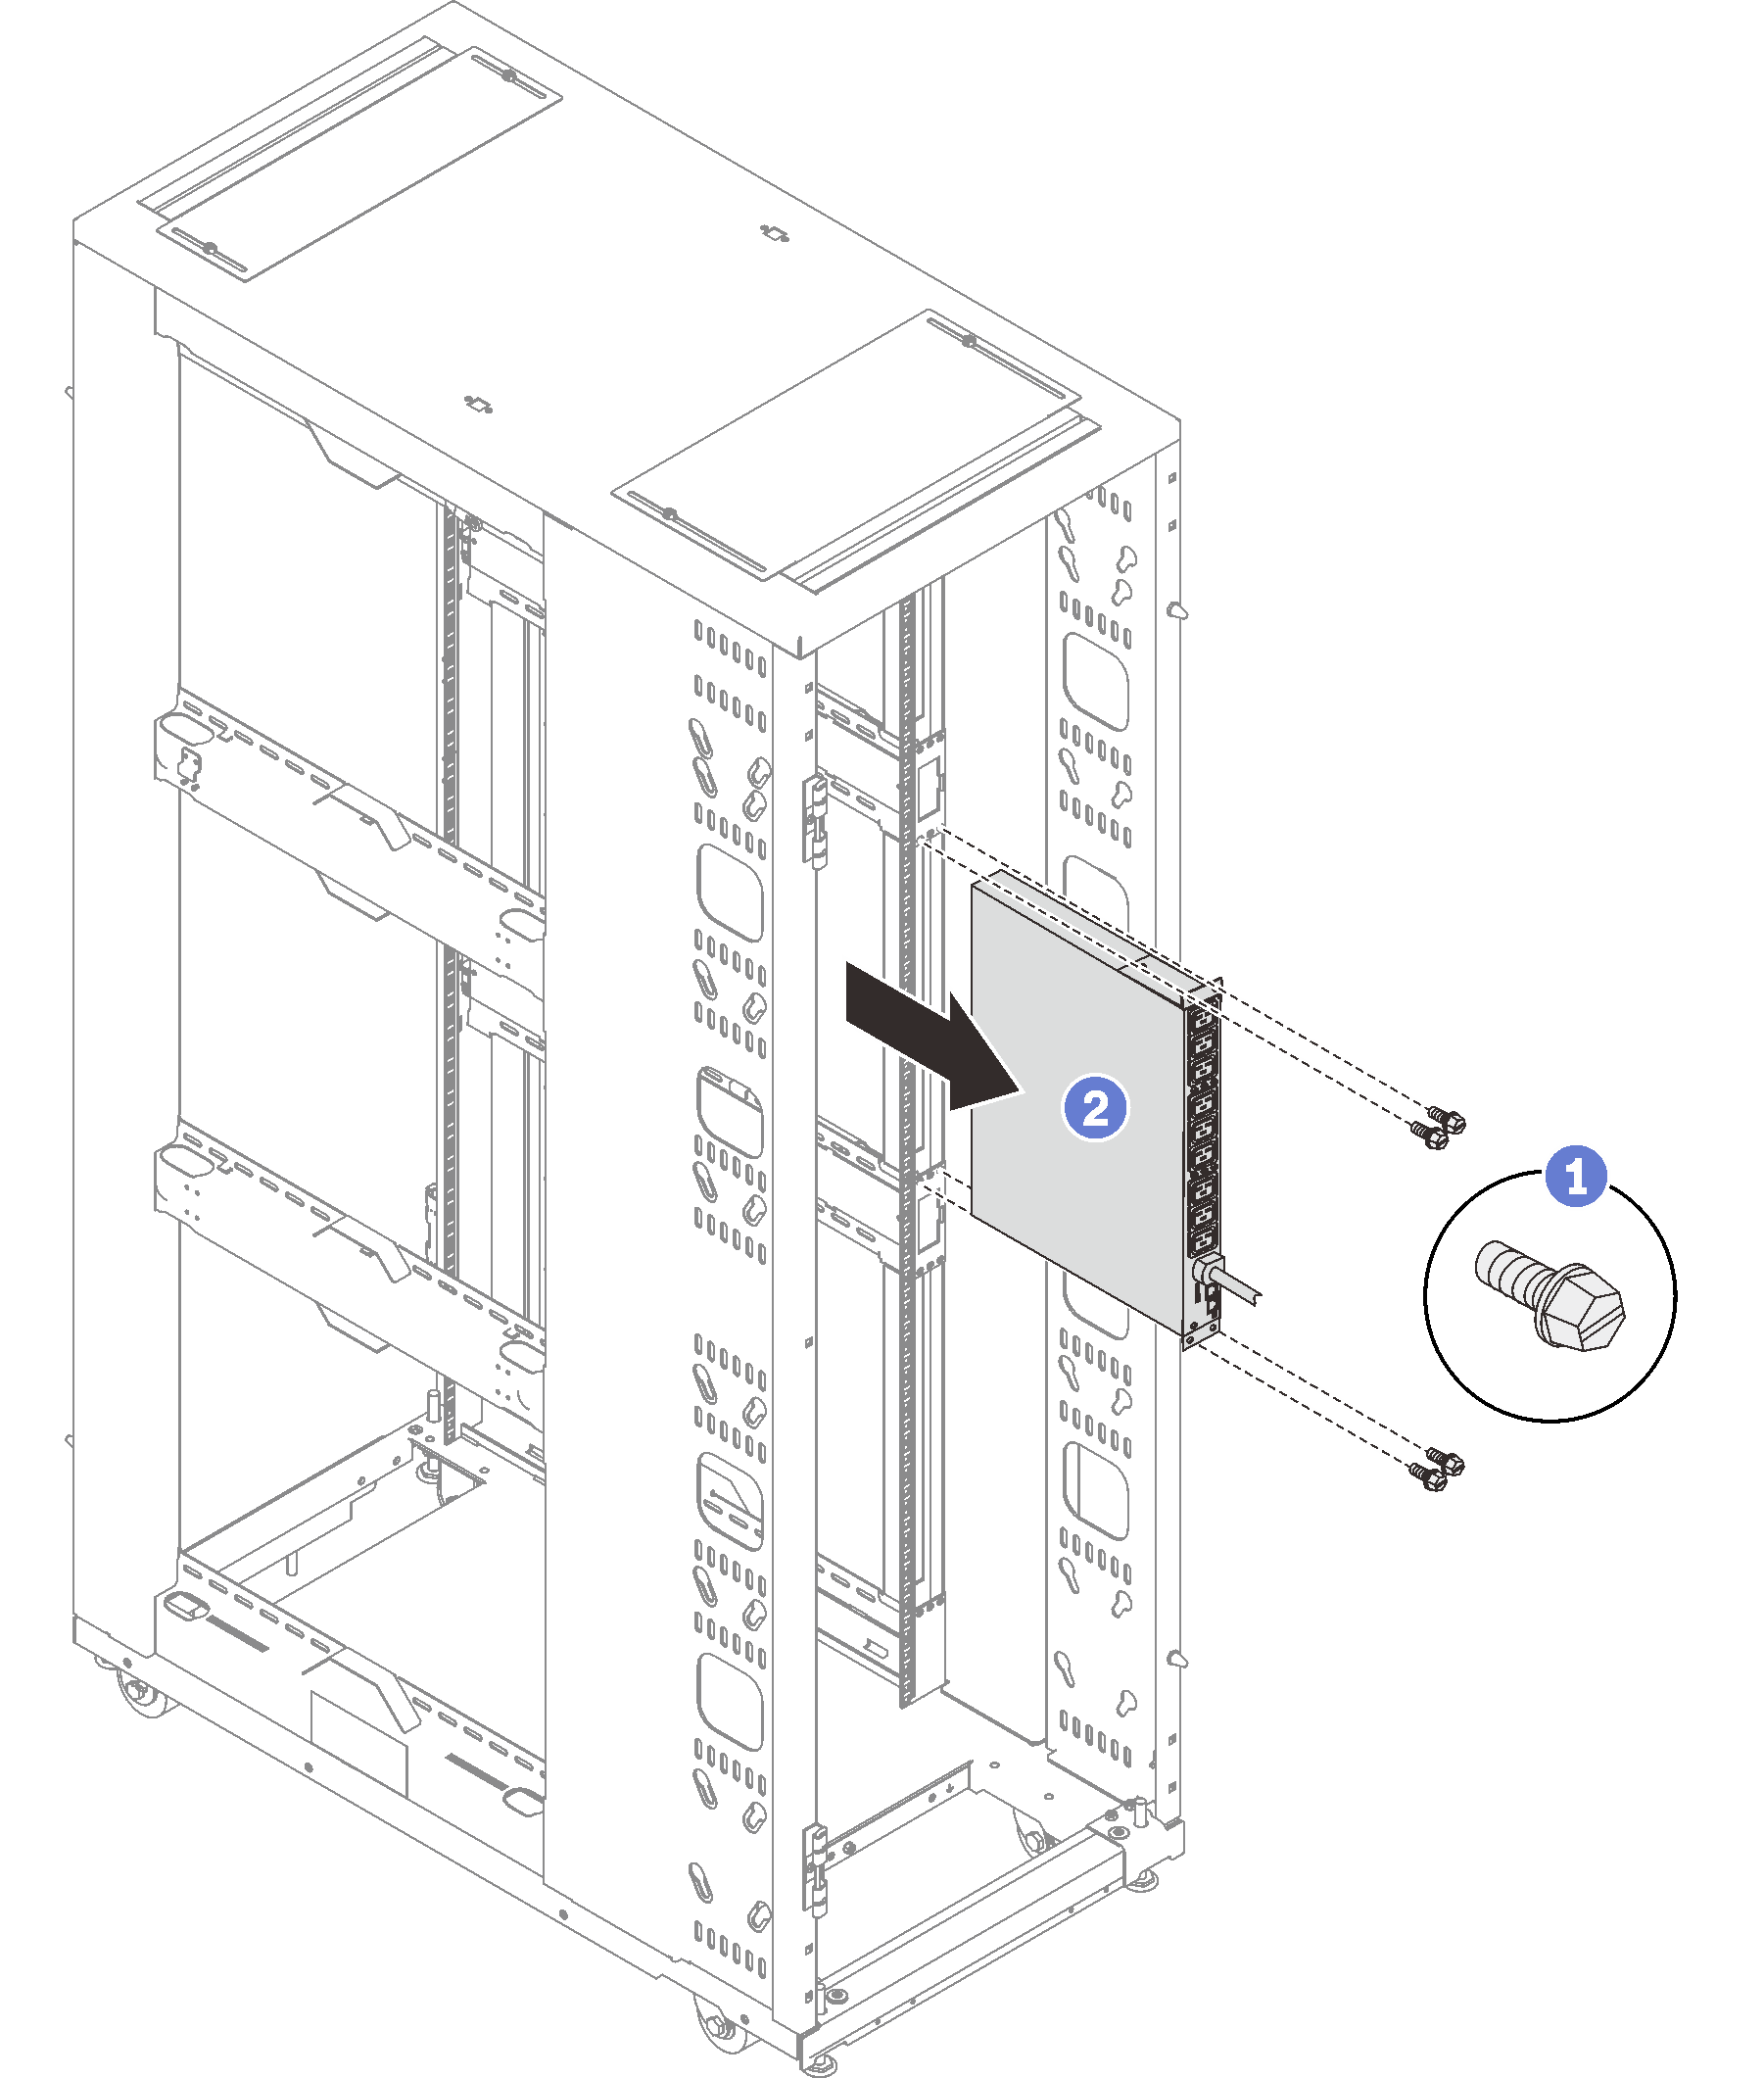
- Remove the four M6 screws.
- Slide the device all the way out from the side pocket.
Give documentation feedback