Configuring RAID through the policy file
Use this topic to configure the task sequence.
Procedure
- Right-click the task sequence and select Edit. A window similar to the one in the following figure is displayed.Figure 1. Editing the task sequence
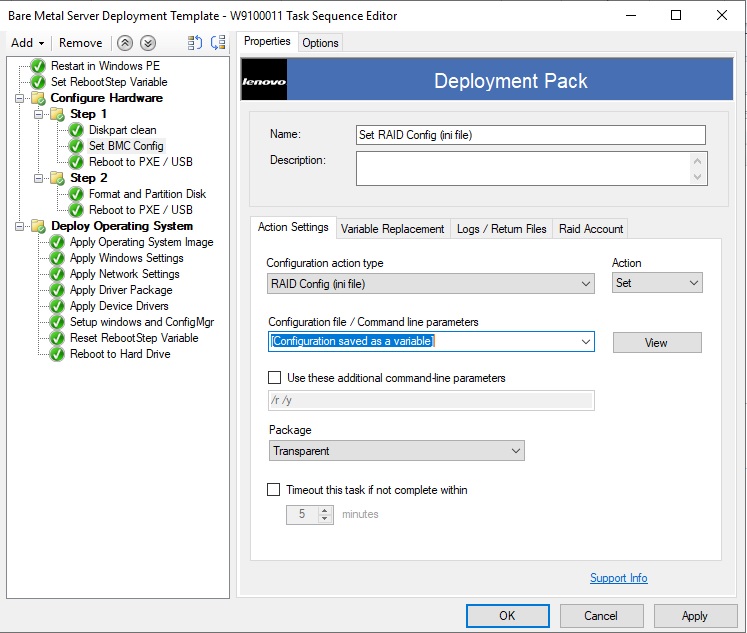
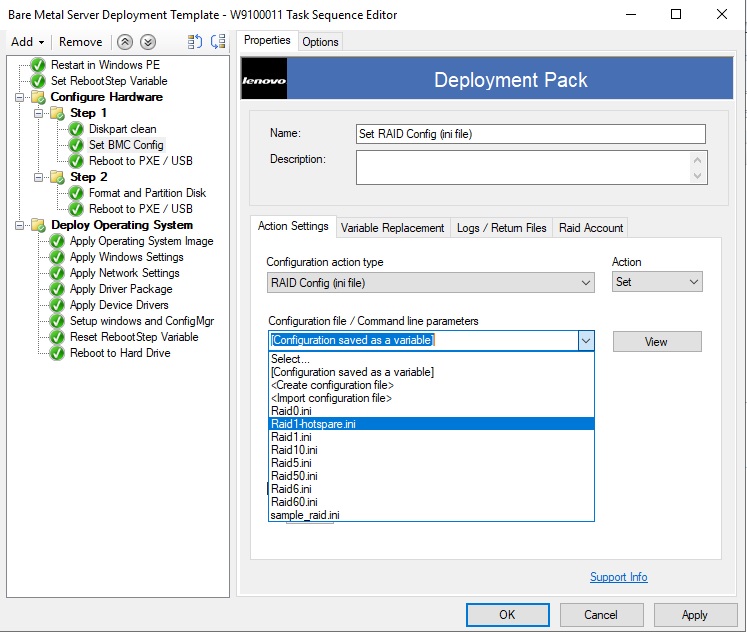
- Edit the task Set RAID Config (ini file). The following window opens.Figure 2. Editing the Set RAID Config (ini file) task
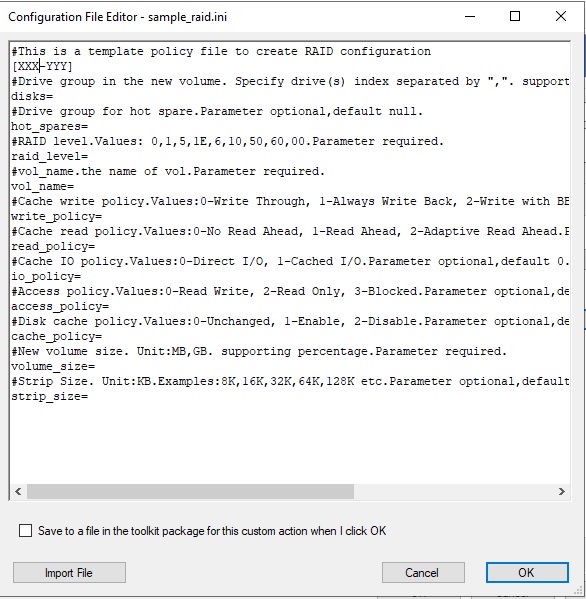
- Click View to customize the policy file.The following window opens.Figure 3. Editing the policy file
 Note
Note“XXX” refers to a RAID ID or a placeholder. A RAID ID is composed of “ctrl” and a slot number. For example, the ID of the RAID in slot one is “ctrl1”, the one of slot two is “ctrl2” and so on. A placeholder can be RAIDID_X or RAID_AllRemaining. “X” refers to the number of the RAID adapter on your machine. For example, RAIDID_1 refers to the first RAID adapter and RAIDID_2 refers to the second one. You can use RAID_AllRemaining to represent all other RAIDs of the same settings.
“YYY” refers to the volume ID. You can name it as vol0, vol1, vol2 and so on.
Follow the descriptions on this page to enter specific information for other parameters.
- Edit RAID account. The following window opens.Figure 4. Editing the RAID account
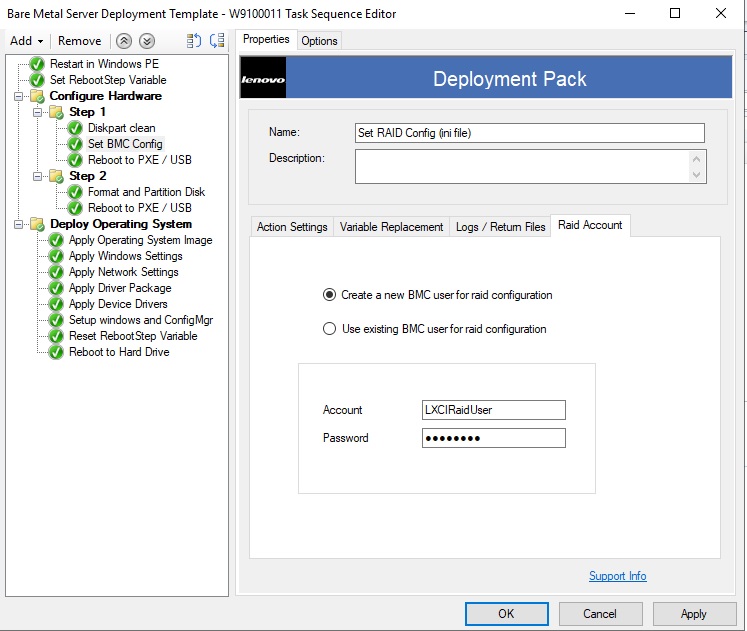
When editing the RAID account, you can enter a supervisor user account existing on all BMCs that need the RAID configuration. If you choose to create a new BMC user account , a default user name “LXCIRaidUser” will be generated. We suggest that you change the user name and password of the new account.
- Make sure that the RAID level is supported by the RAID controller on the target server.
Multiple array configurations are supported in one policy file.