(Trained technicians only) Install the wall mounting kit
Follow the instructions in this section to install the wall mounting kit.
About this task
The kit should be installed by a qualified professional specified by Lenovo service.
The product should be installed where its weight can be fully supported. If the product is installed on a weak surface, the product may fall, causing damage t to components.
When moving or replacing the cabinet after installation, contact a qualified installer specified by Lenovo service. Installation or movement of the product must be carried out by a skilled professional. If an unqualified person moves and installs the product, it may cause safety risks.
See the following table to identify the components that come with the rail kit.
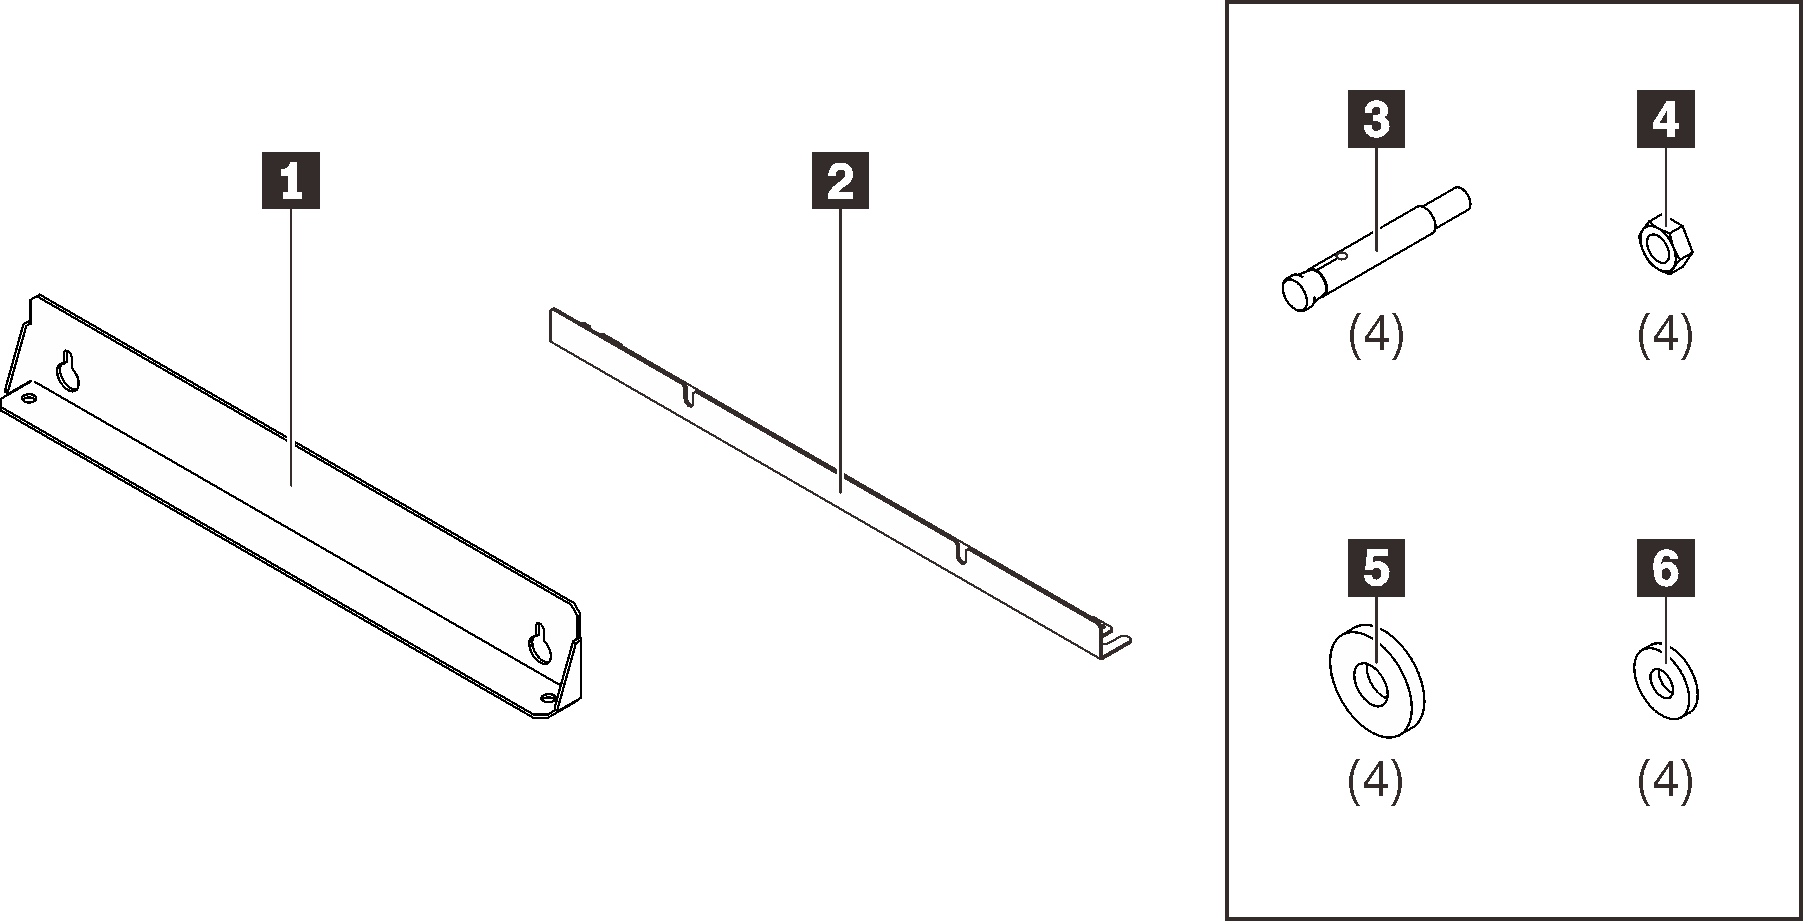
| 1 One upper wall mounting bracket | 4 Four hex nuts |
| 2 One lower wall mounting bracket | 5 Four washers |
| 3 Four mounting bolts | 6 Four washers |
The following tools are required for this procedure:
- One tool with plastic blade/scissors
- One combination wrench
- One hammer drills with Dia. Ø14 bits
Procedure
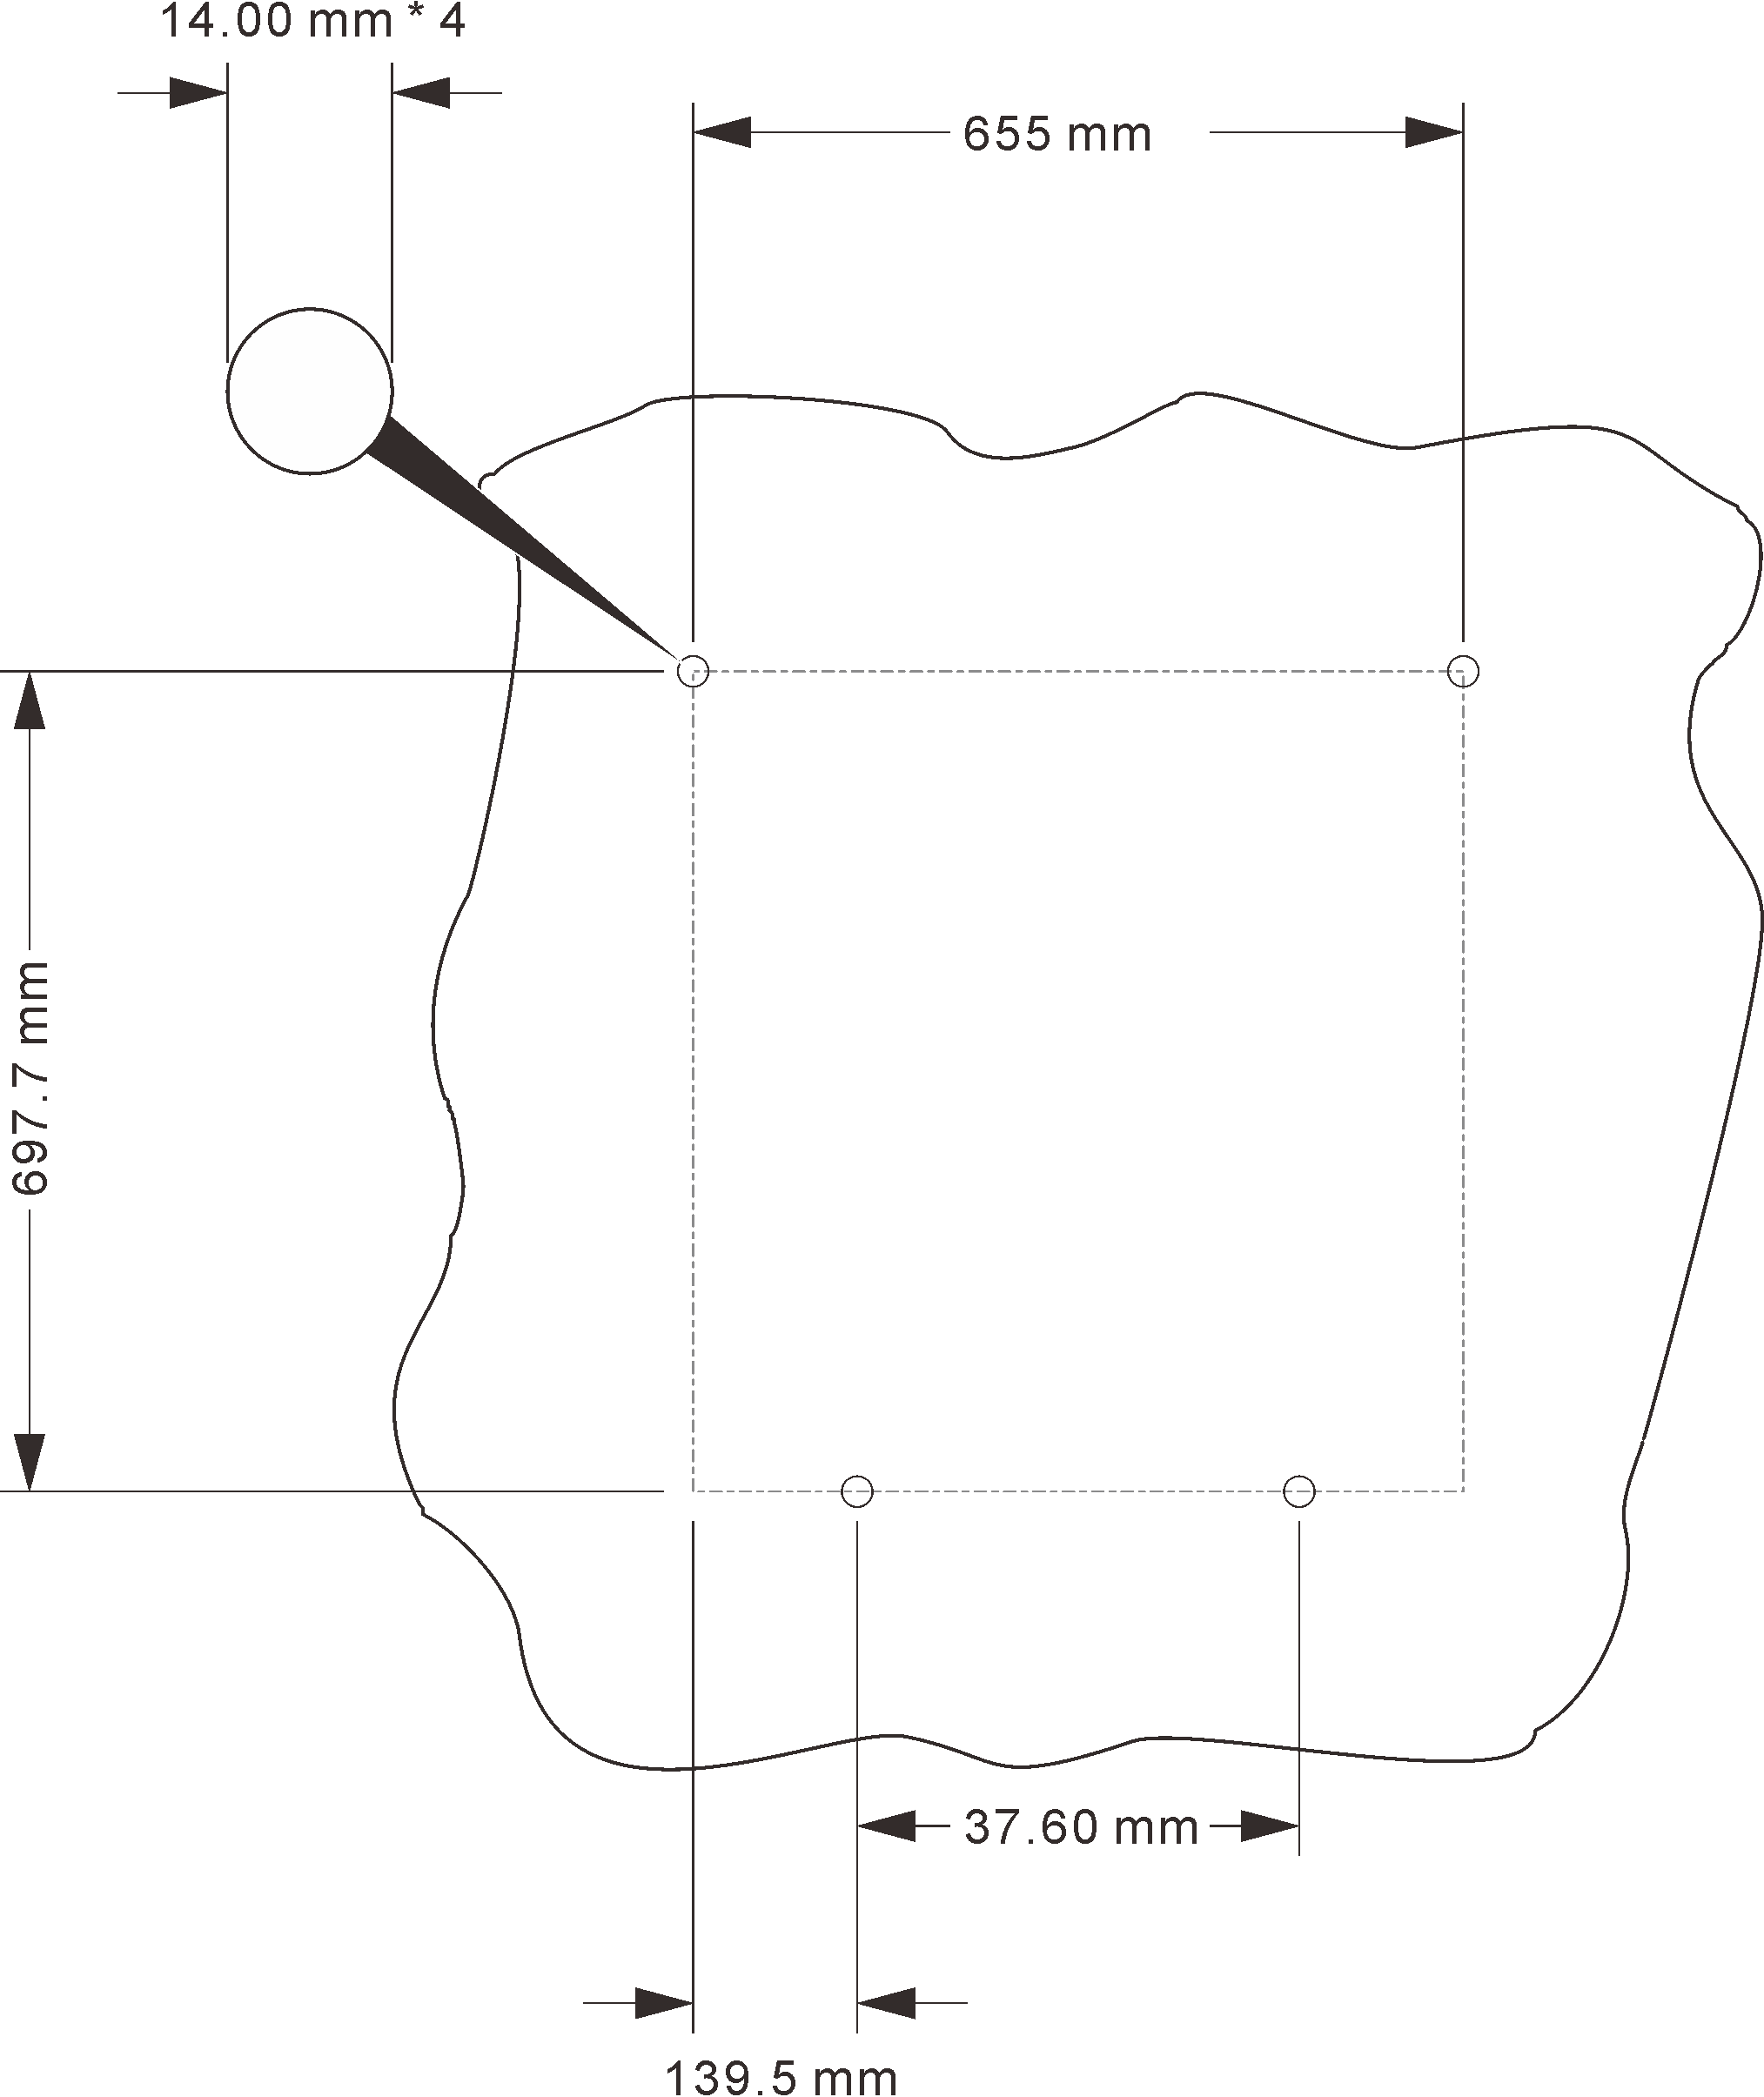
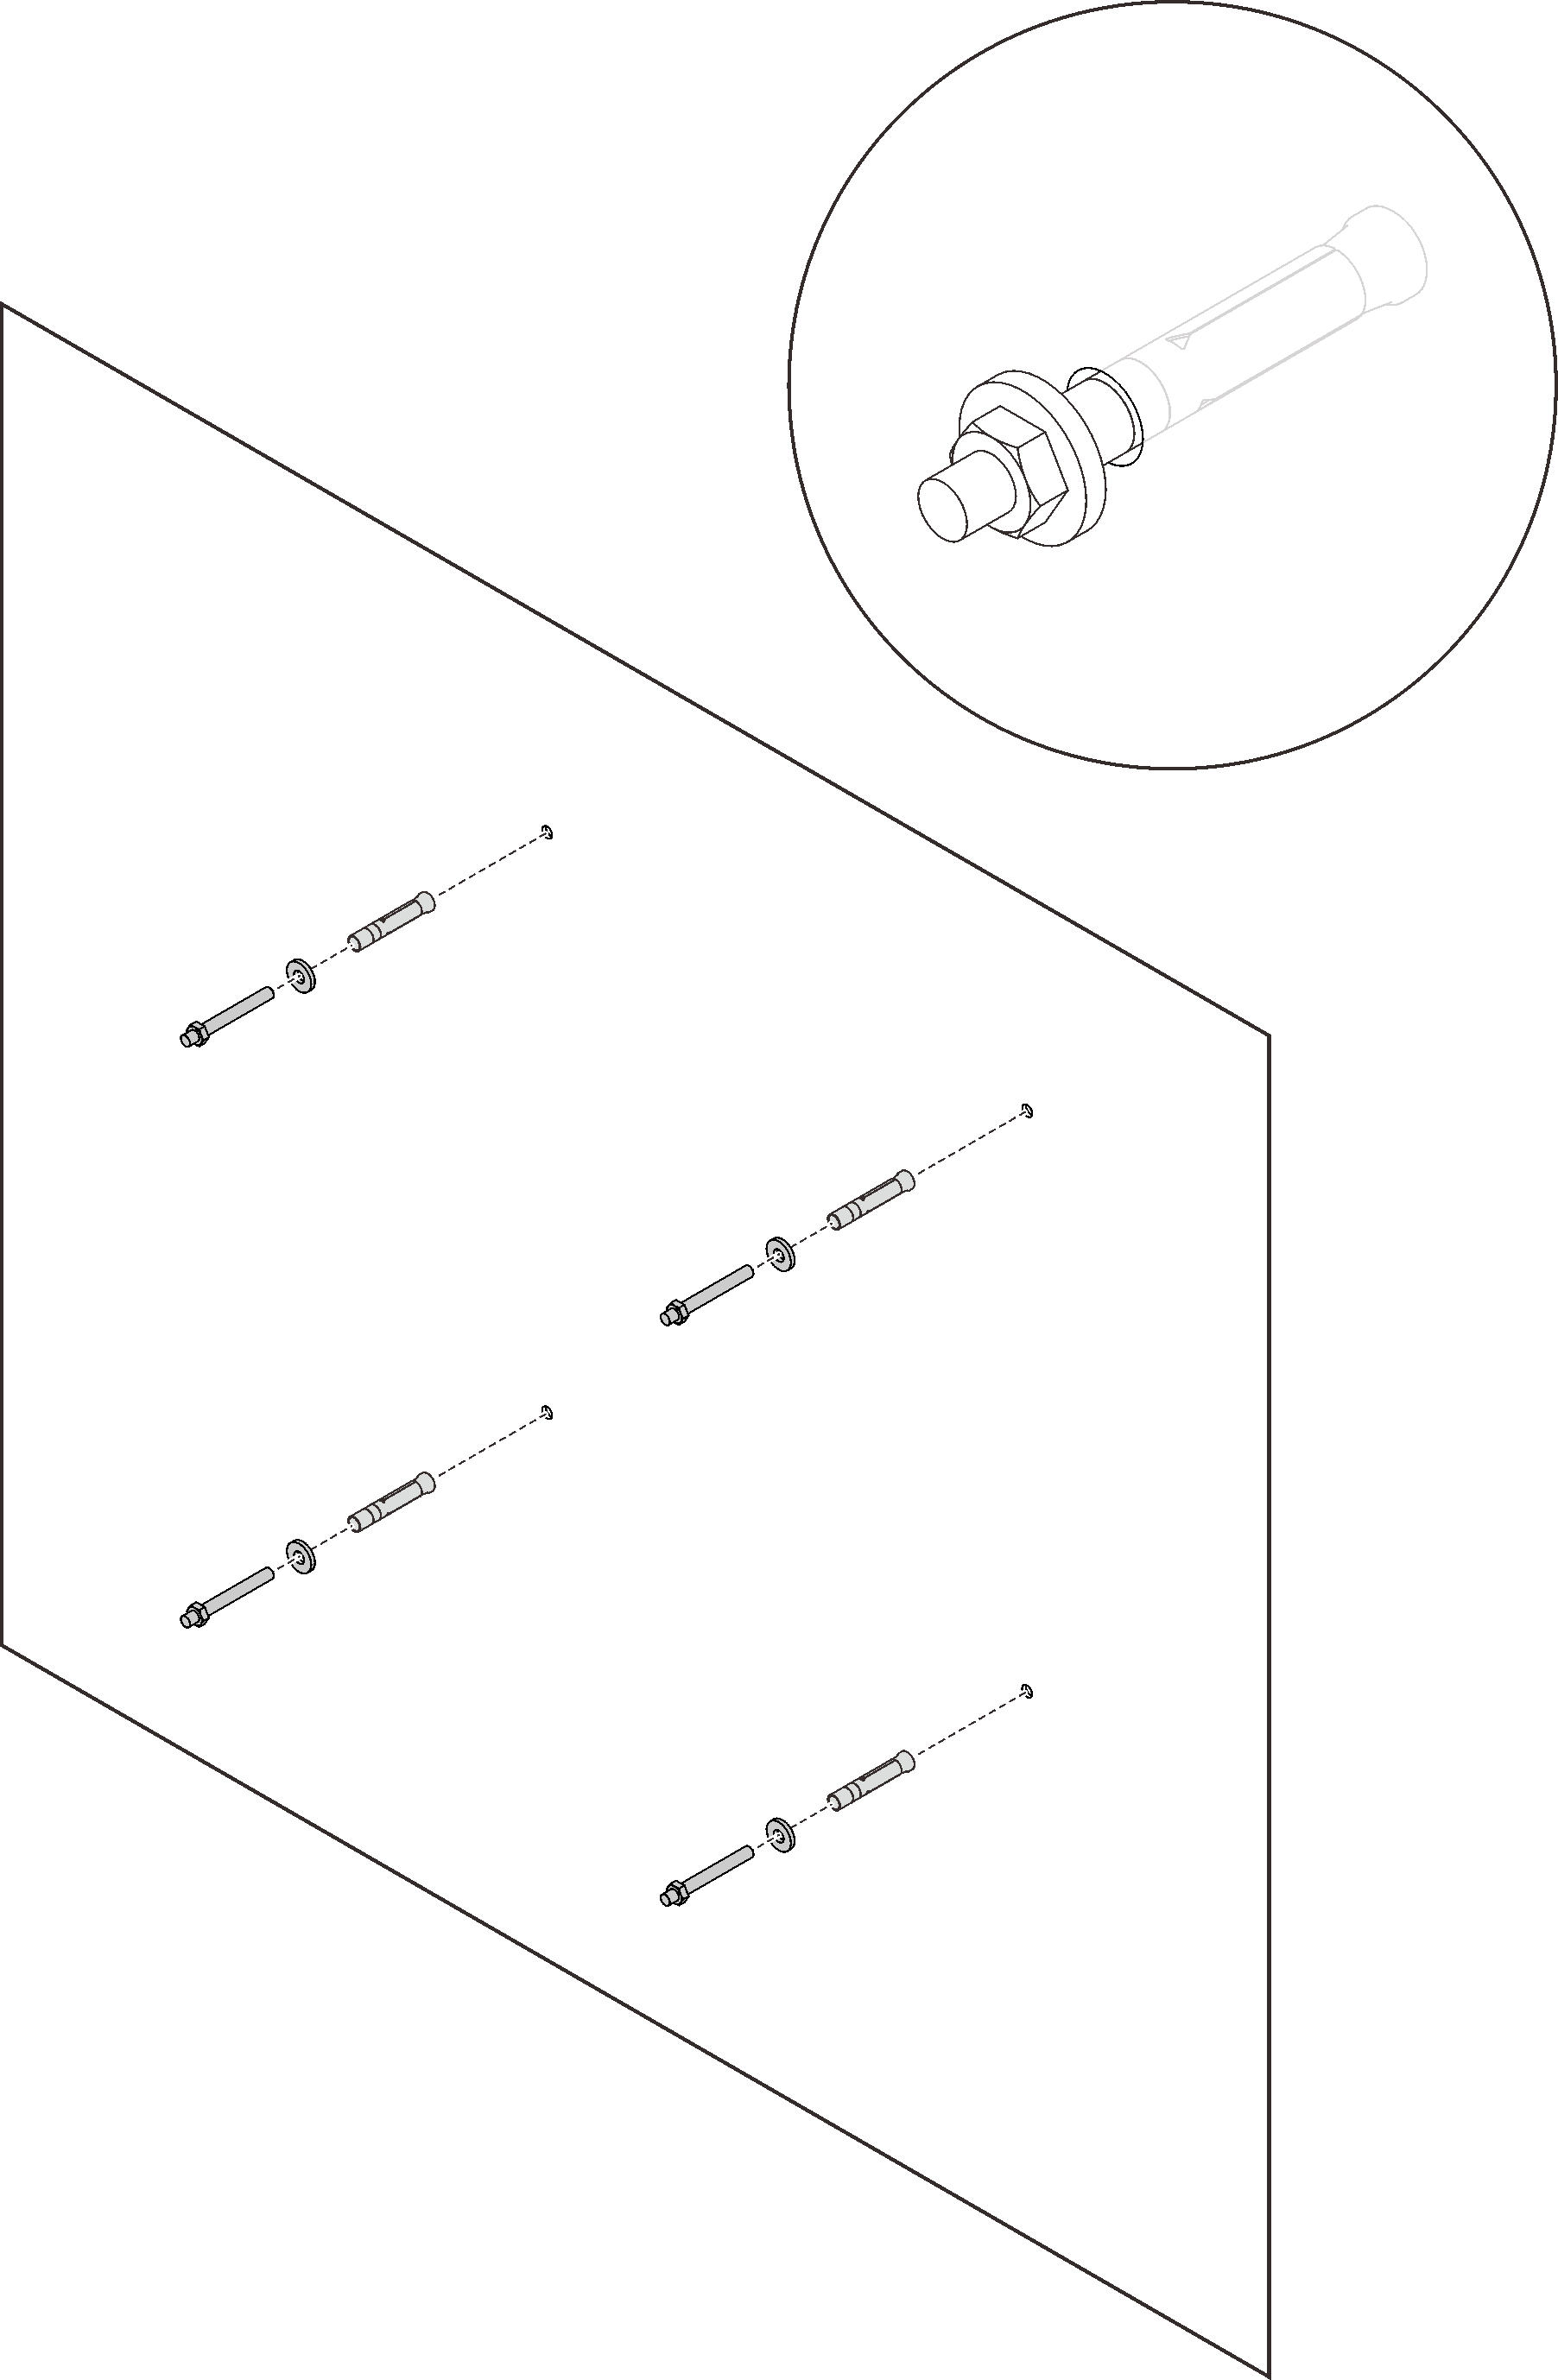
- Measure the wall and drill the four mounting bolts based on the following requirements:Figure 1. Mounting bolt location on the wall
- Remove the six screws that secure the two wheeled trays.Figure 2. Removing the wheeled trays
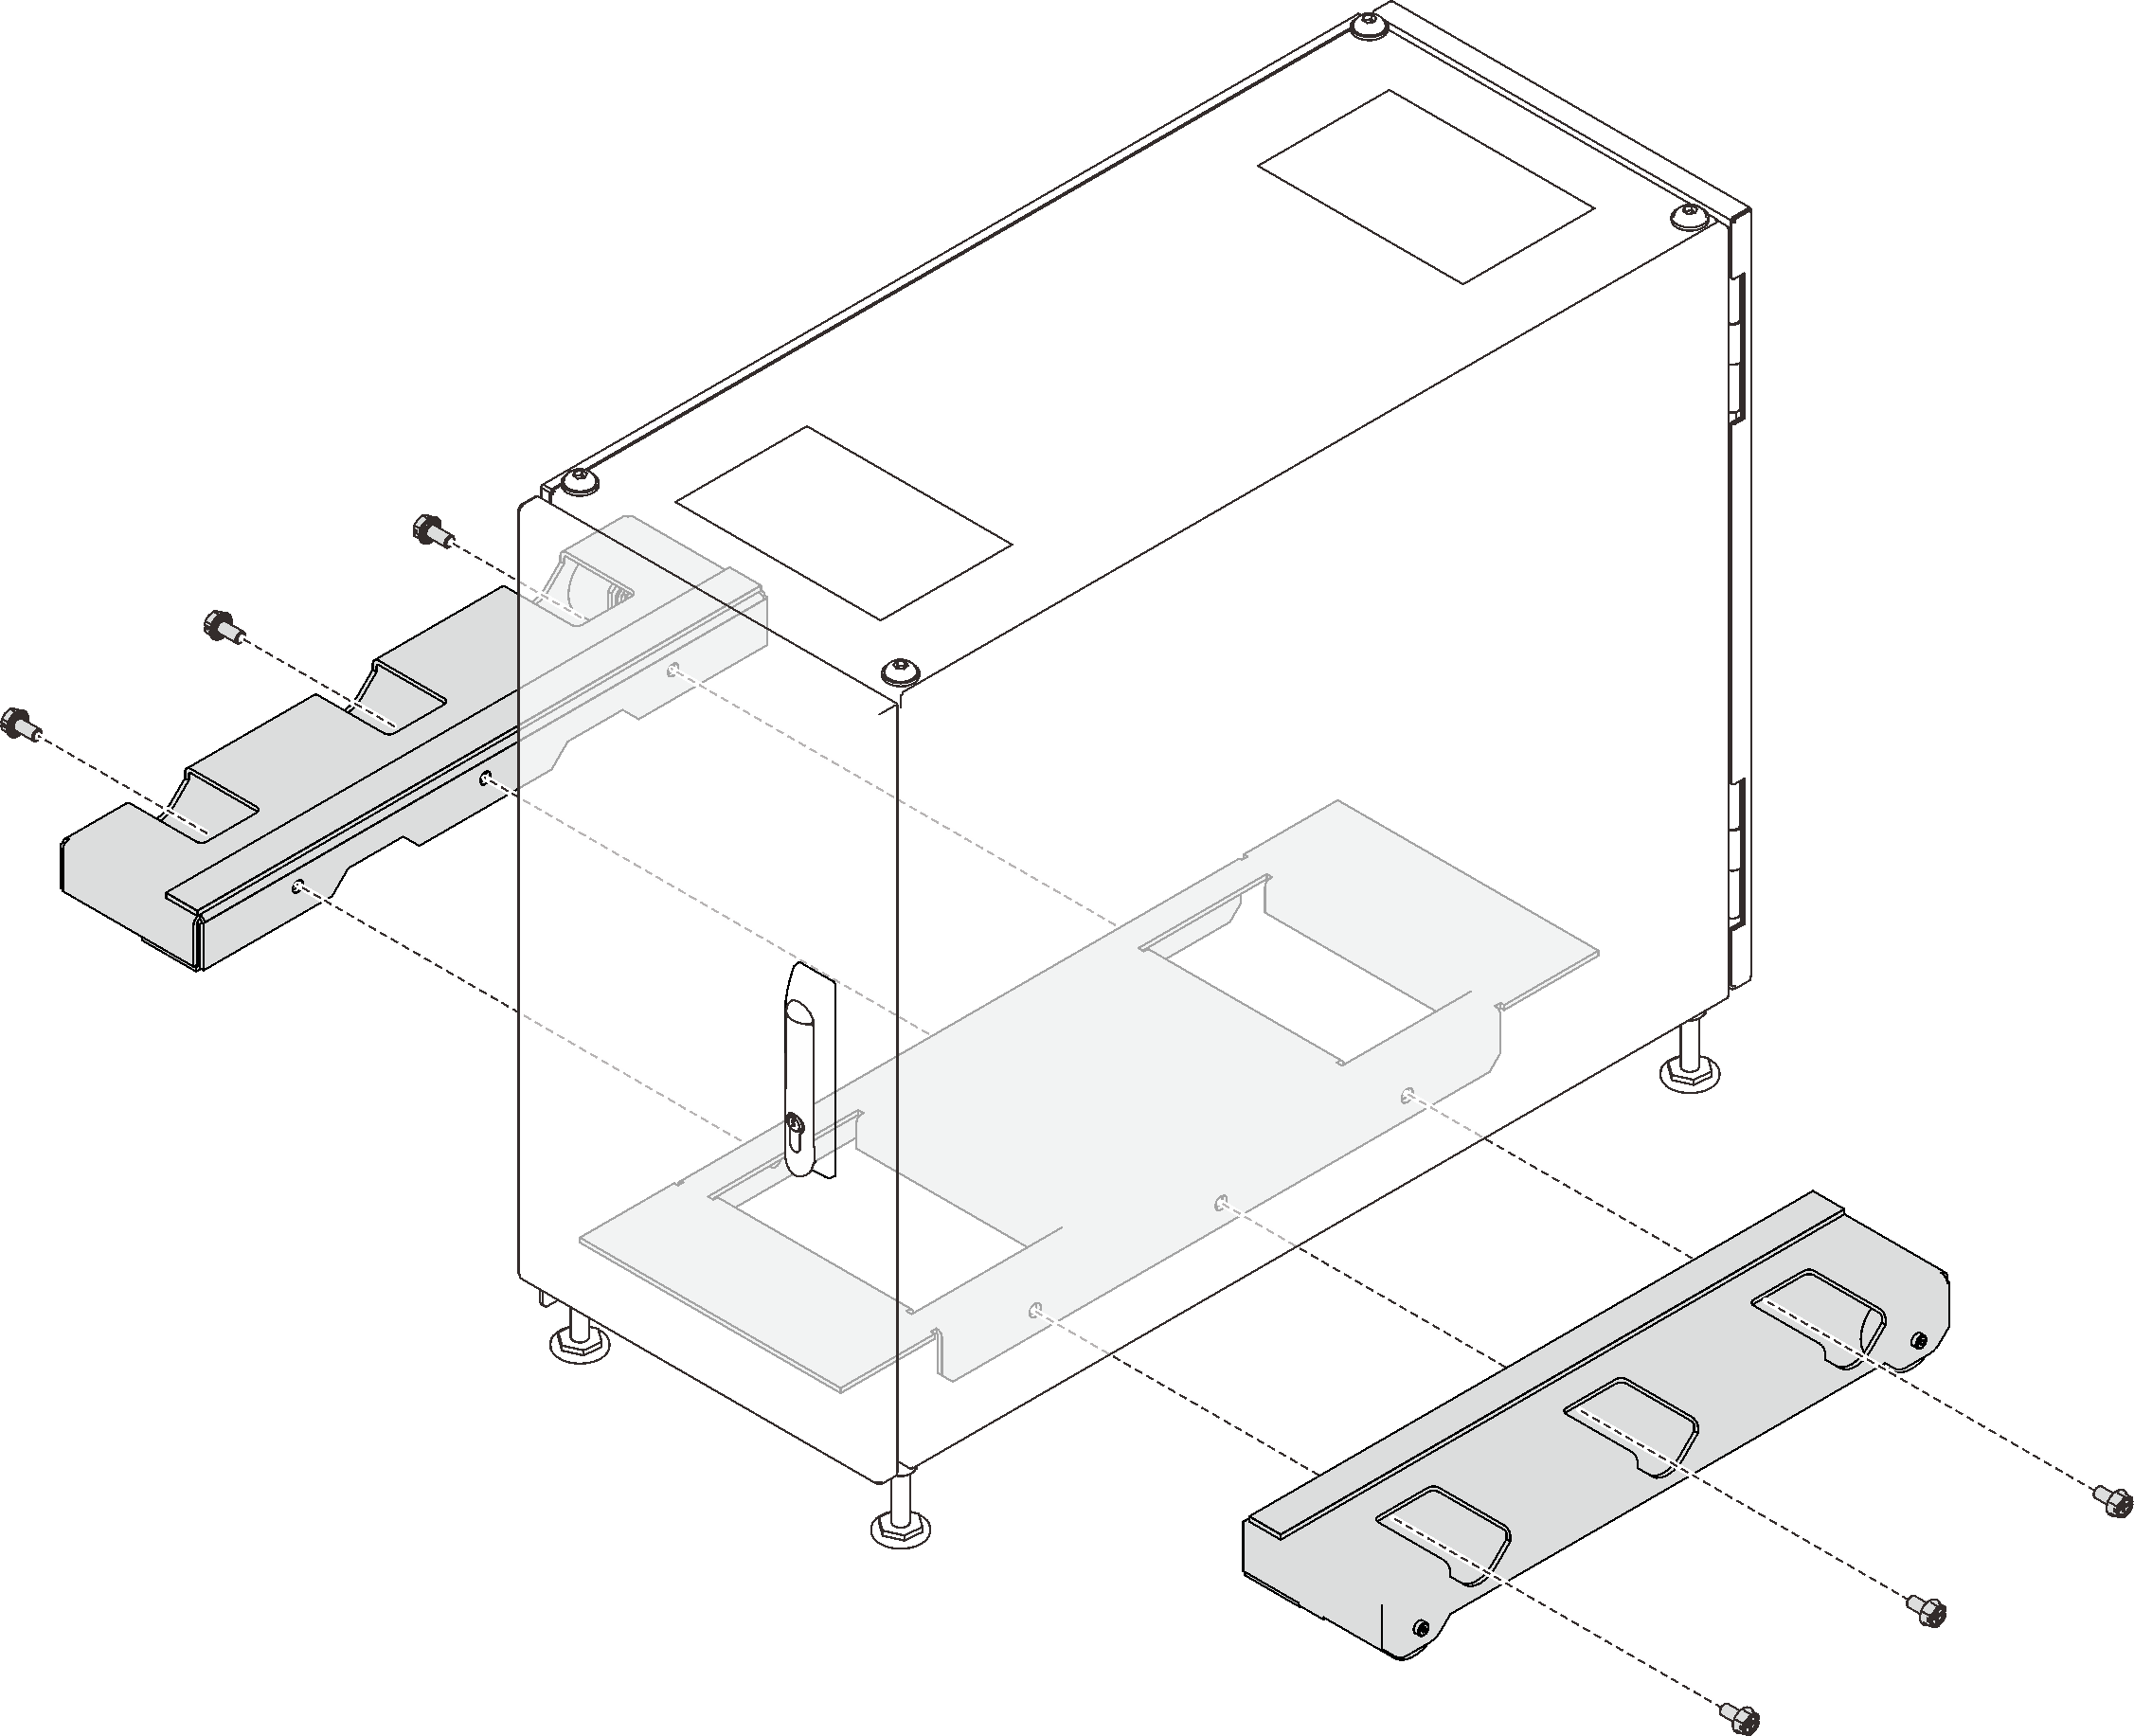
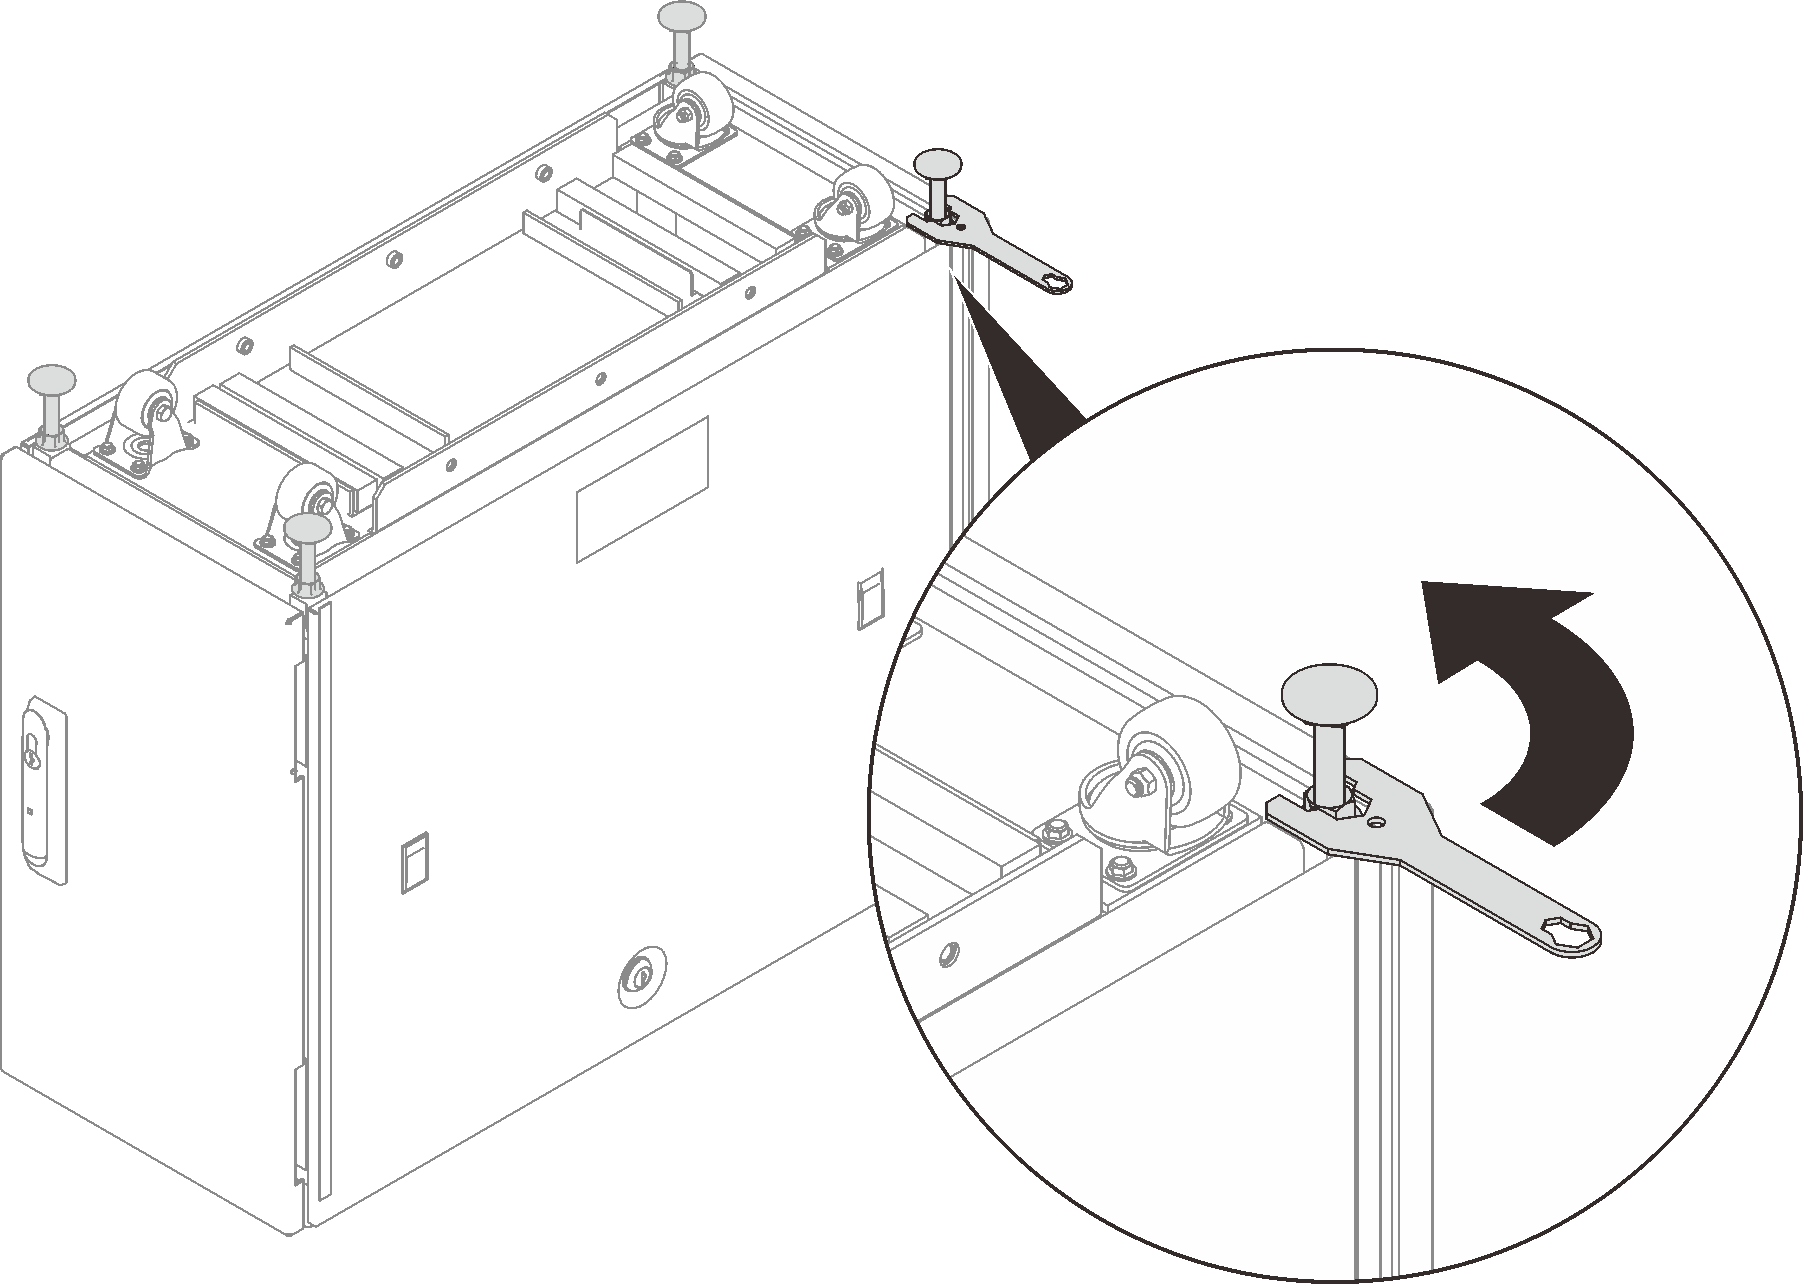
- Loosen the two M12 nuts on the feet on one long side of the cabinet.Figure 3. Loosening the nuts
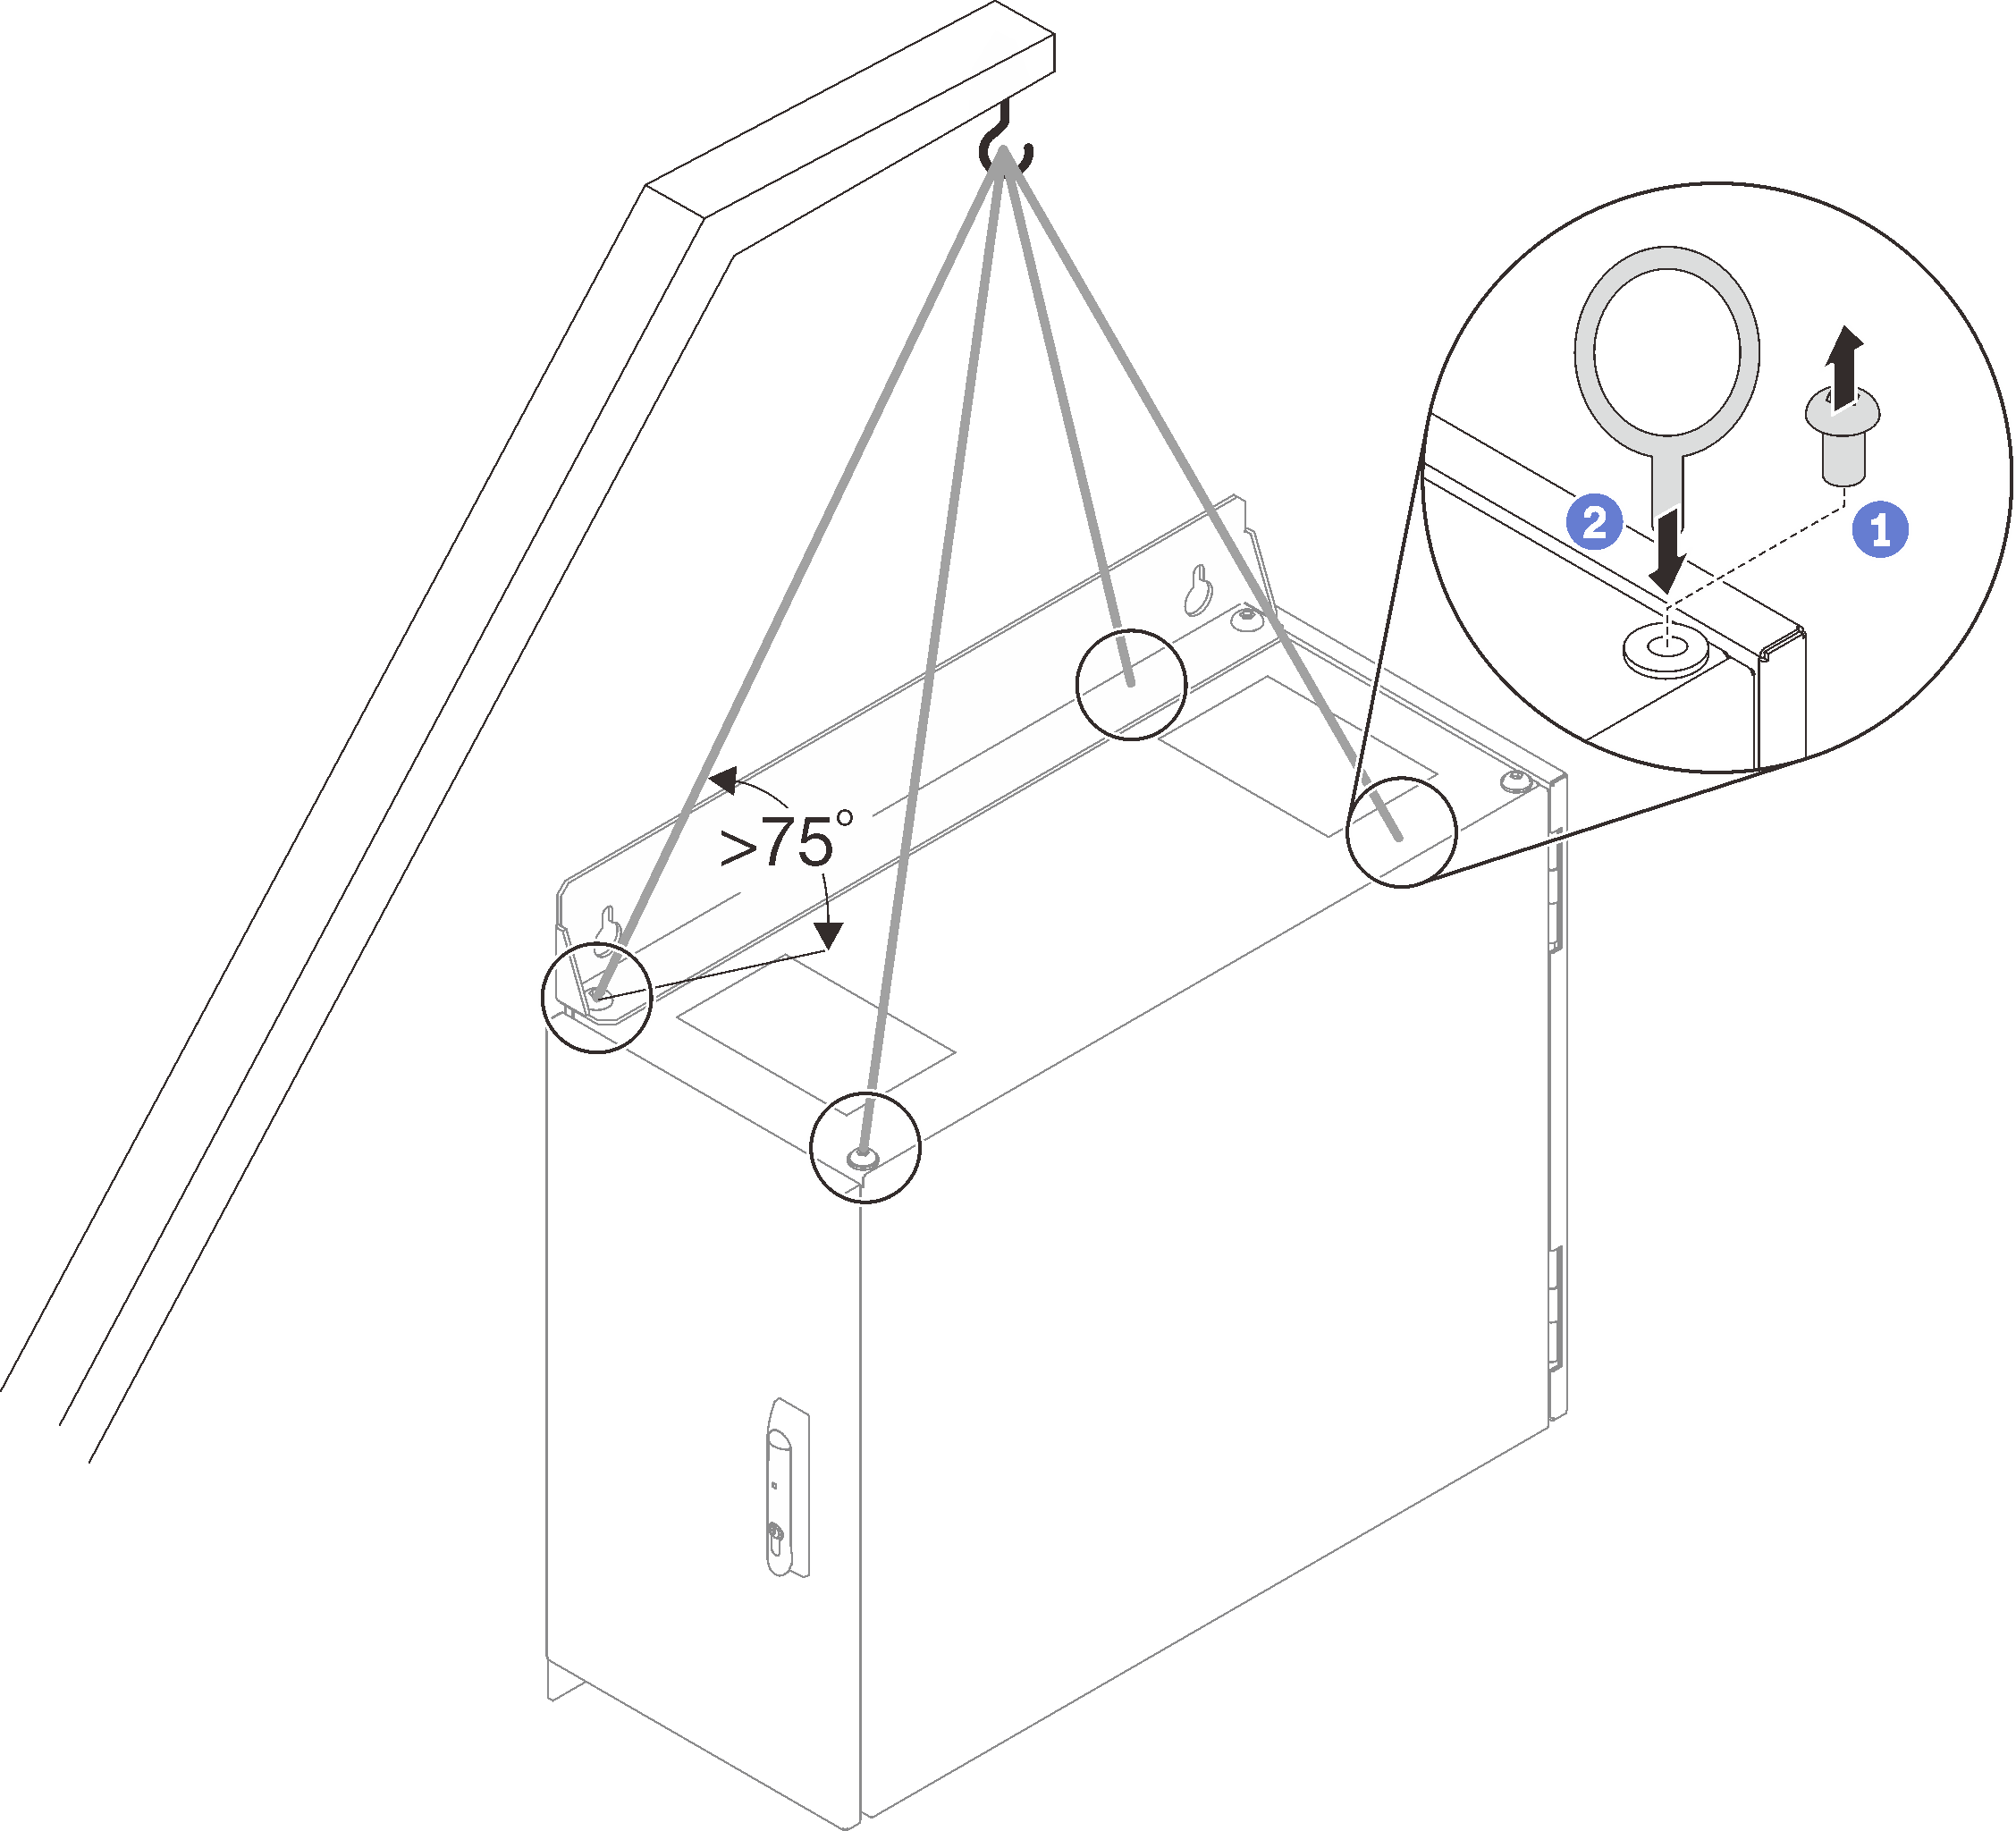
- Removing the four screws on the top cover; then, secure the upper wall mounting bracket above the lower bracket with two screws, and install two eyebolts to the key shape holes on the upper bracket.Figure 4. Securing the lower bracket
- Align a spacer to one of the locations, and drive a wall mount nail with washer into the wall.Figure 5. Installing wall mount nails
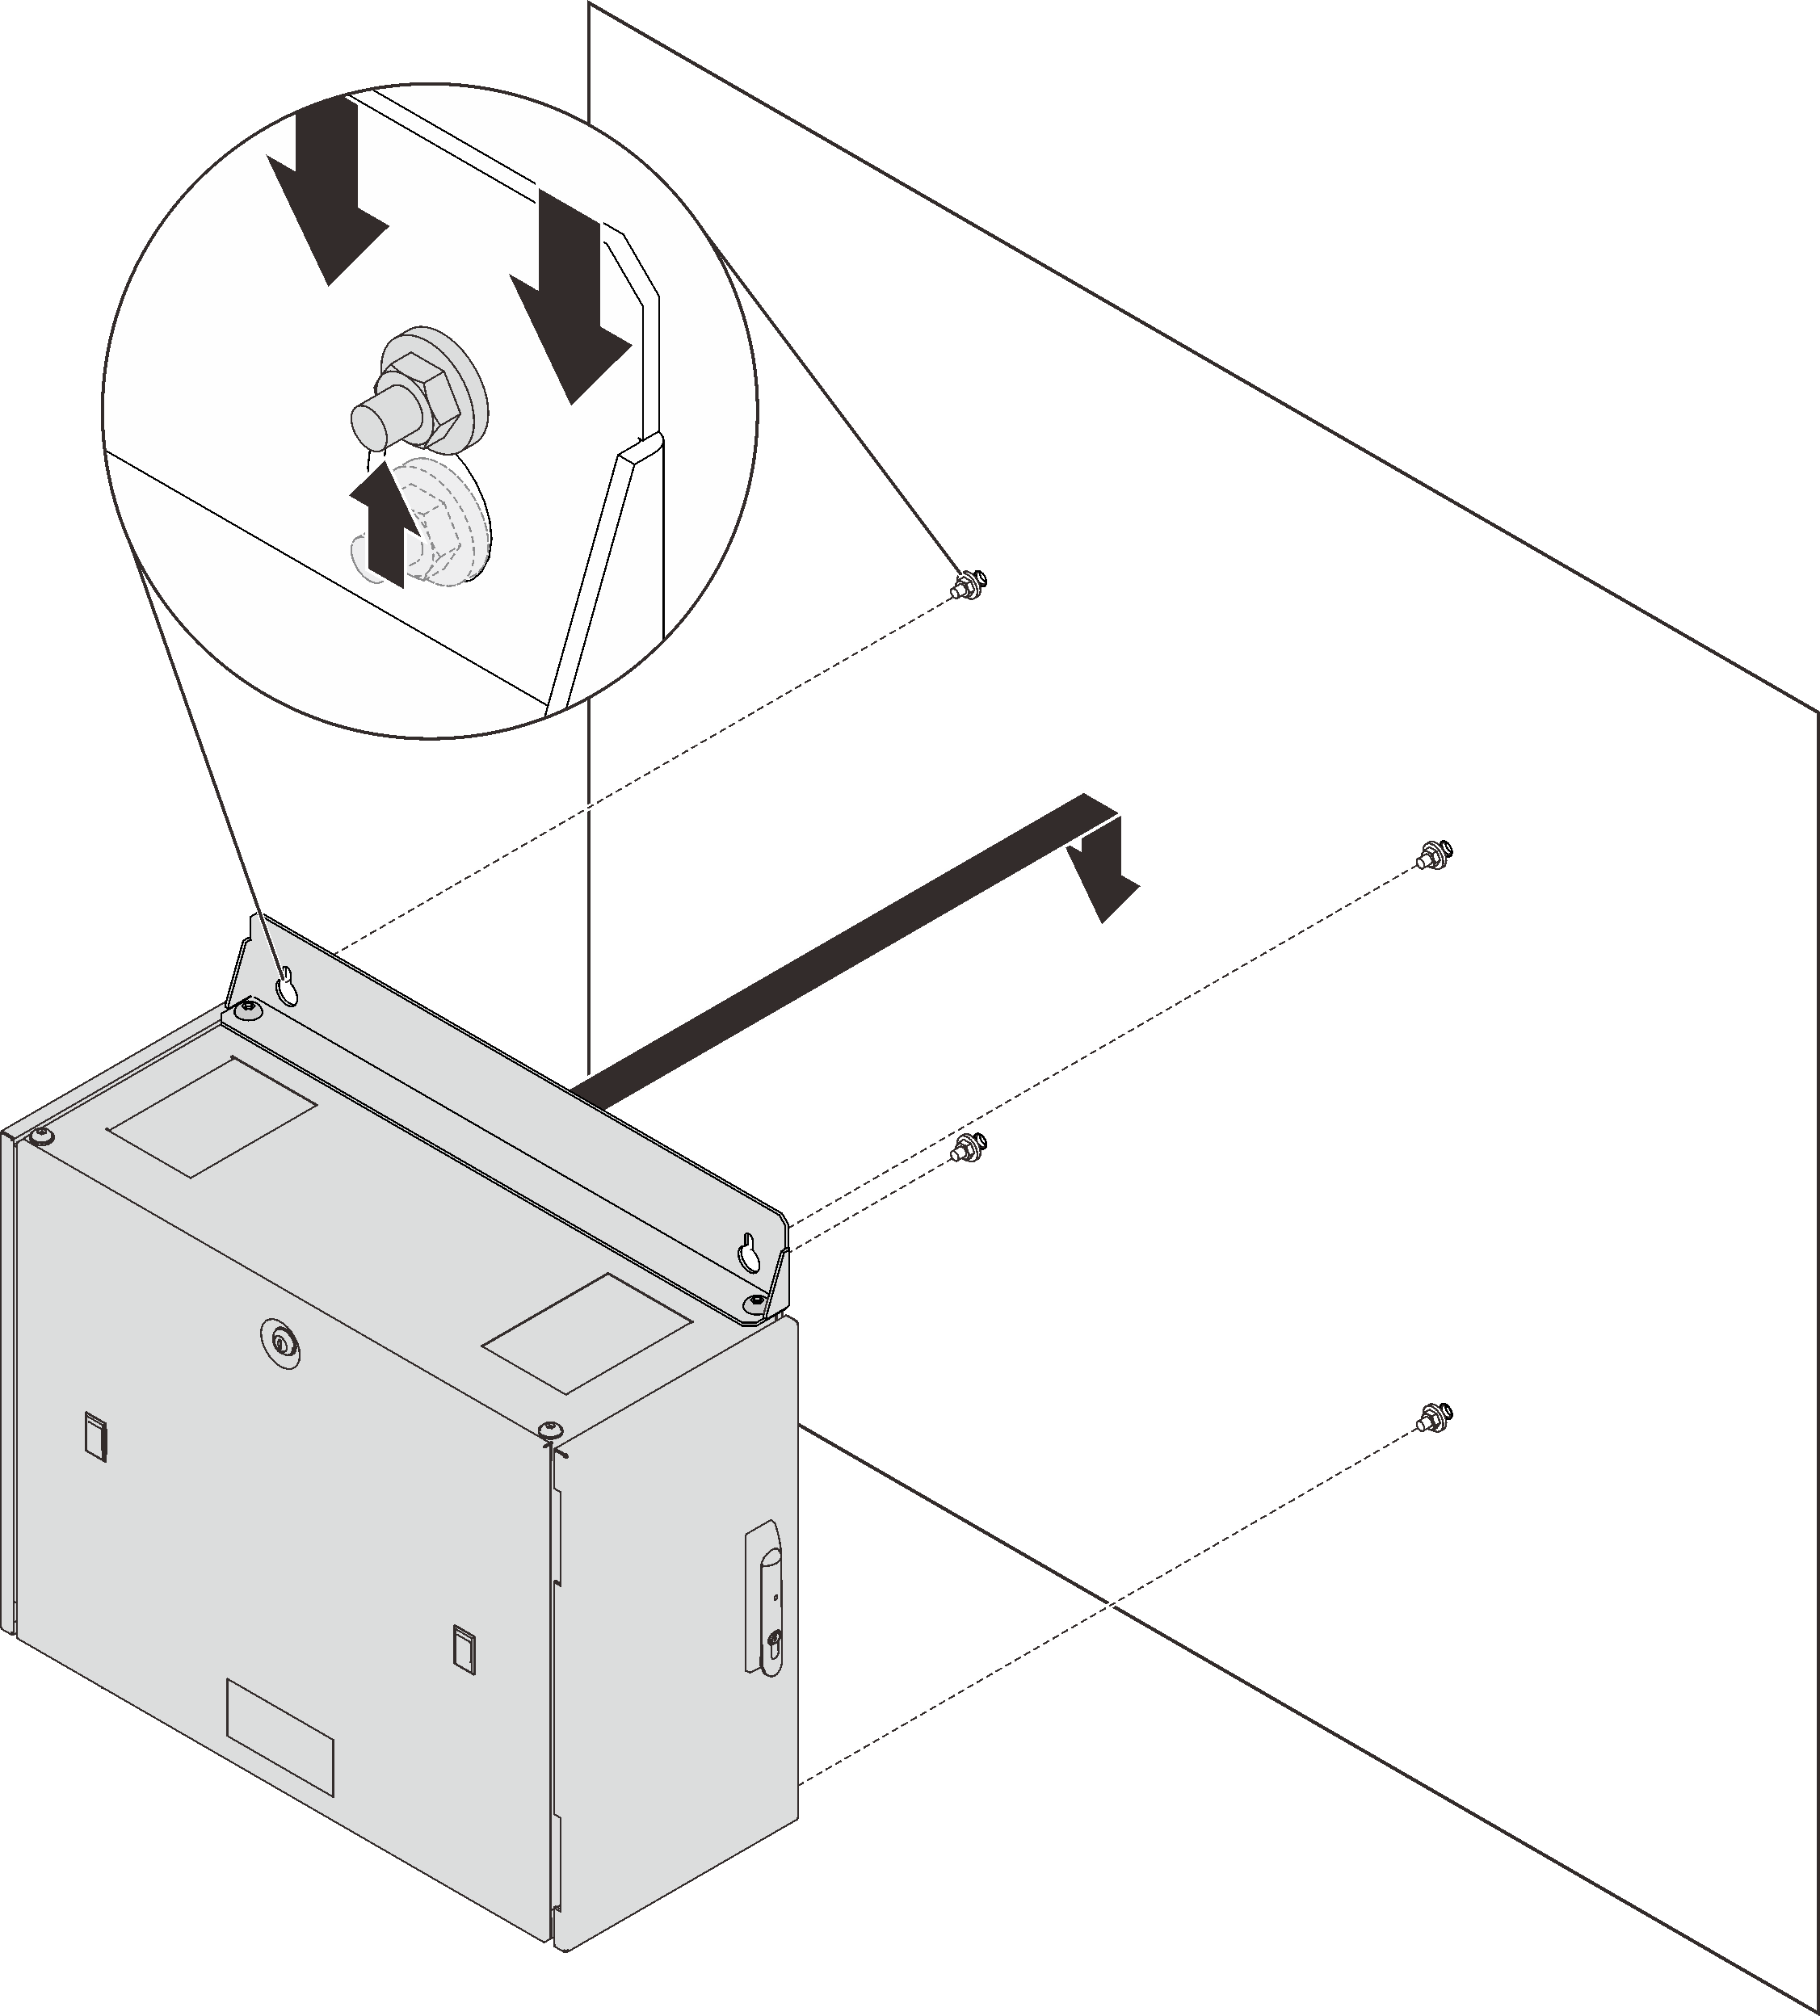
- Lift the cabinet with two people, and align the key-shaped holes on the upper bracket to the two top nails; then, carefully lower the cabinet and make sure the bottom nails fit in the notches in the lower bracket.Figure 6. Installing the cabinet to the wall