Remove the SMM2
Use this information to remove the SMM2.
About this task

Read Installation Guidelines and Safety inspection checklist to ensure that you work safely.
If you want to migrate current enclosure settings and the enclosure midplane VPD onto the new SMM2, make sure you have done the following:
You had performed SMM2 settings backup, the enclosure VPD backup, and the midplane VPD backup procedures.
Keep the old USB key which is removed from the SMM2 and install it onto the new SMM2.
- A video of this procedure is available at YouTube.
Procedure
- Remove the SMM2.
 Rotate the latch outwards.
 Slide the SMM2 out of the support bracket.
Figure 1. SMM2 removal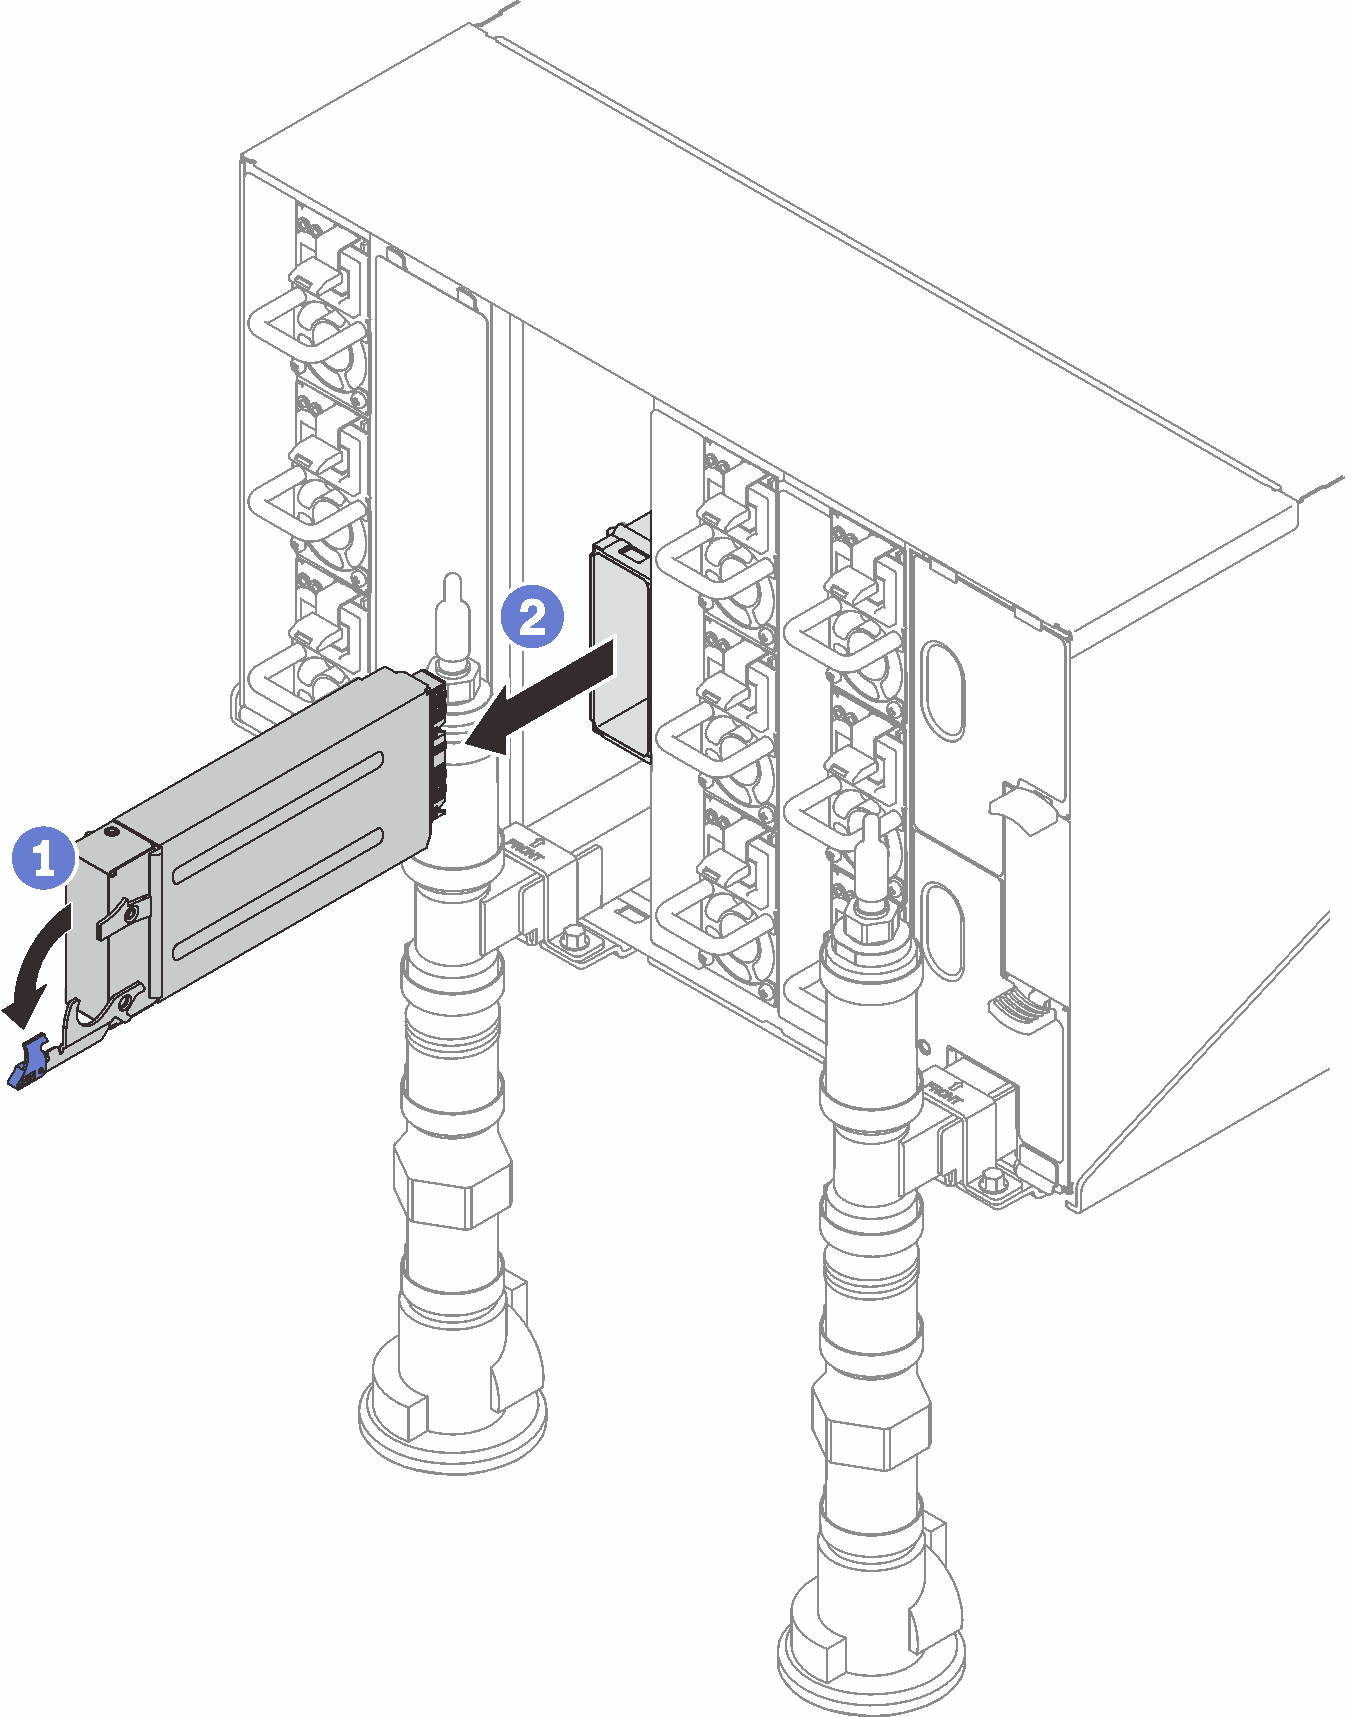
- Remove the support bracket.
- Press and hold the release tabs on the support bracket.
- Slightly lift the support bracket upwards to disengage it with the enclosure wall.
 Remove the support bracket away from the enclosure wall.
 Slide the support bracket out of the enclosure.
Figure 2. Support bracket removal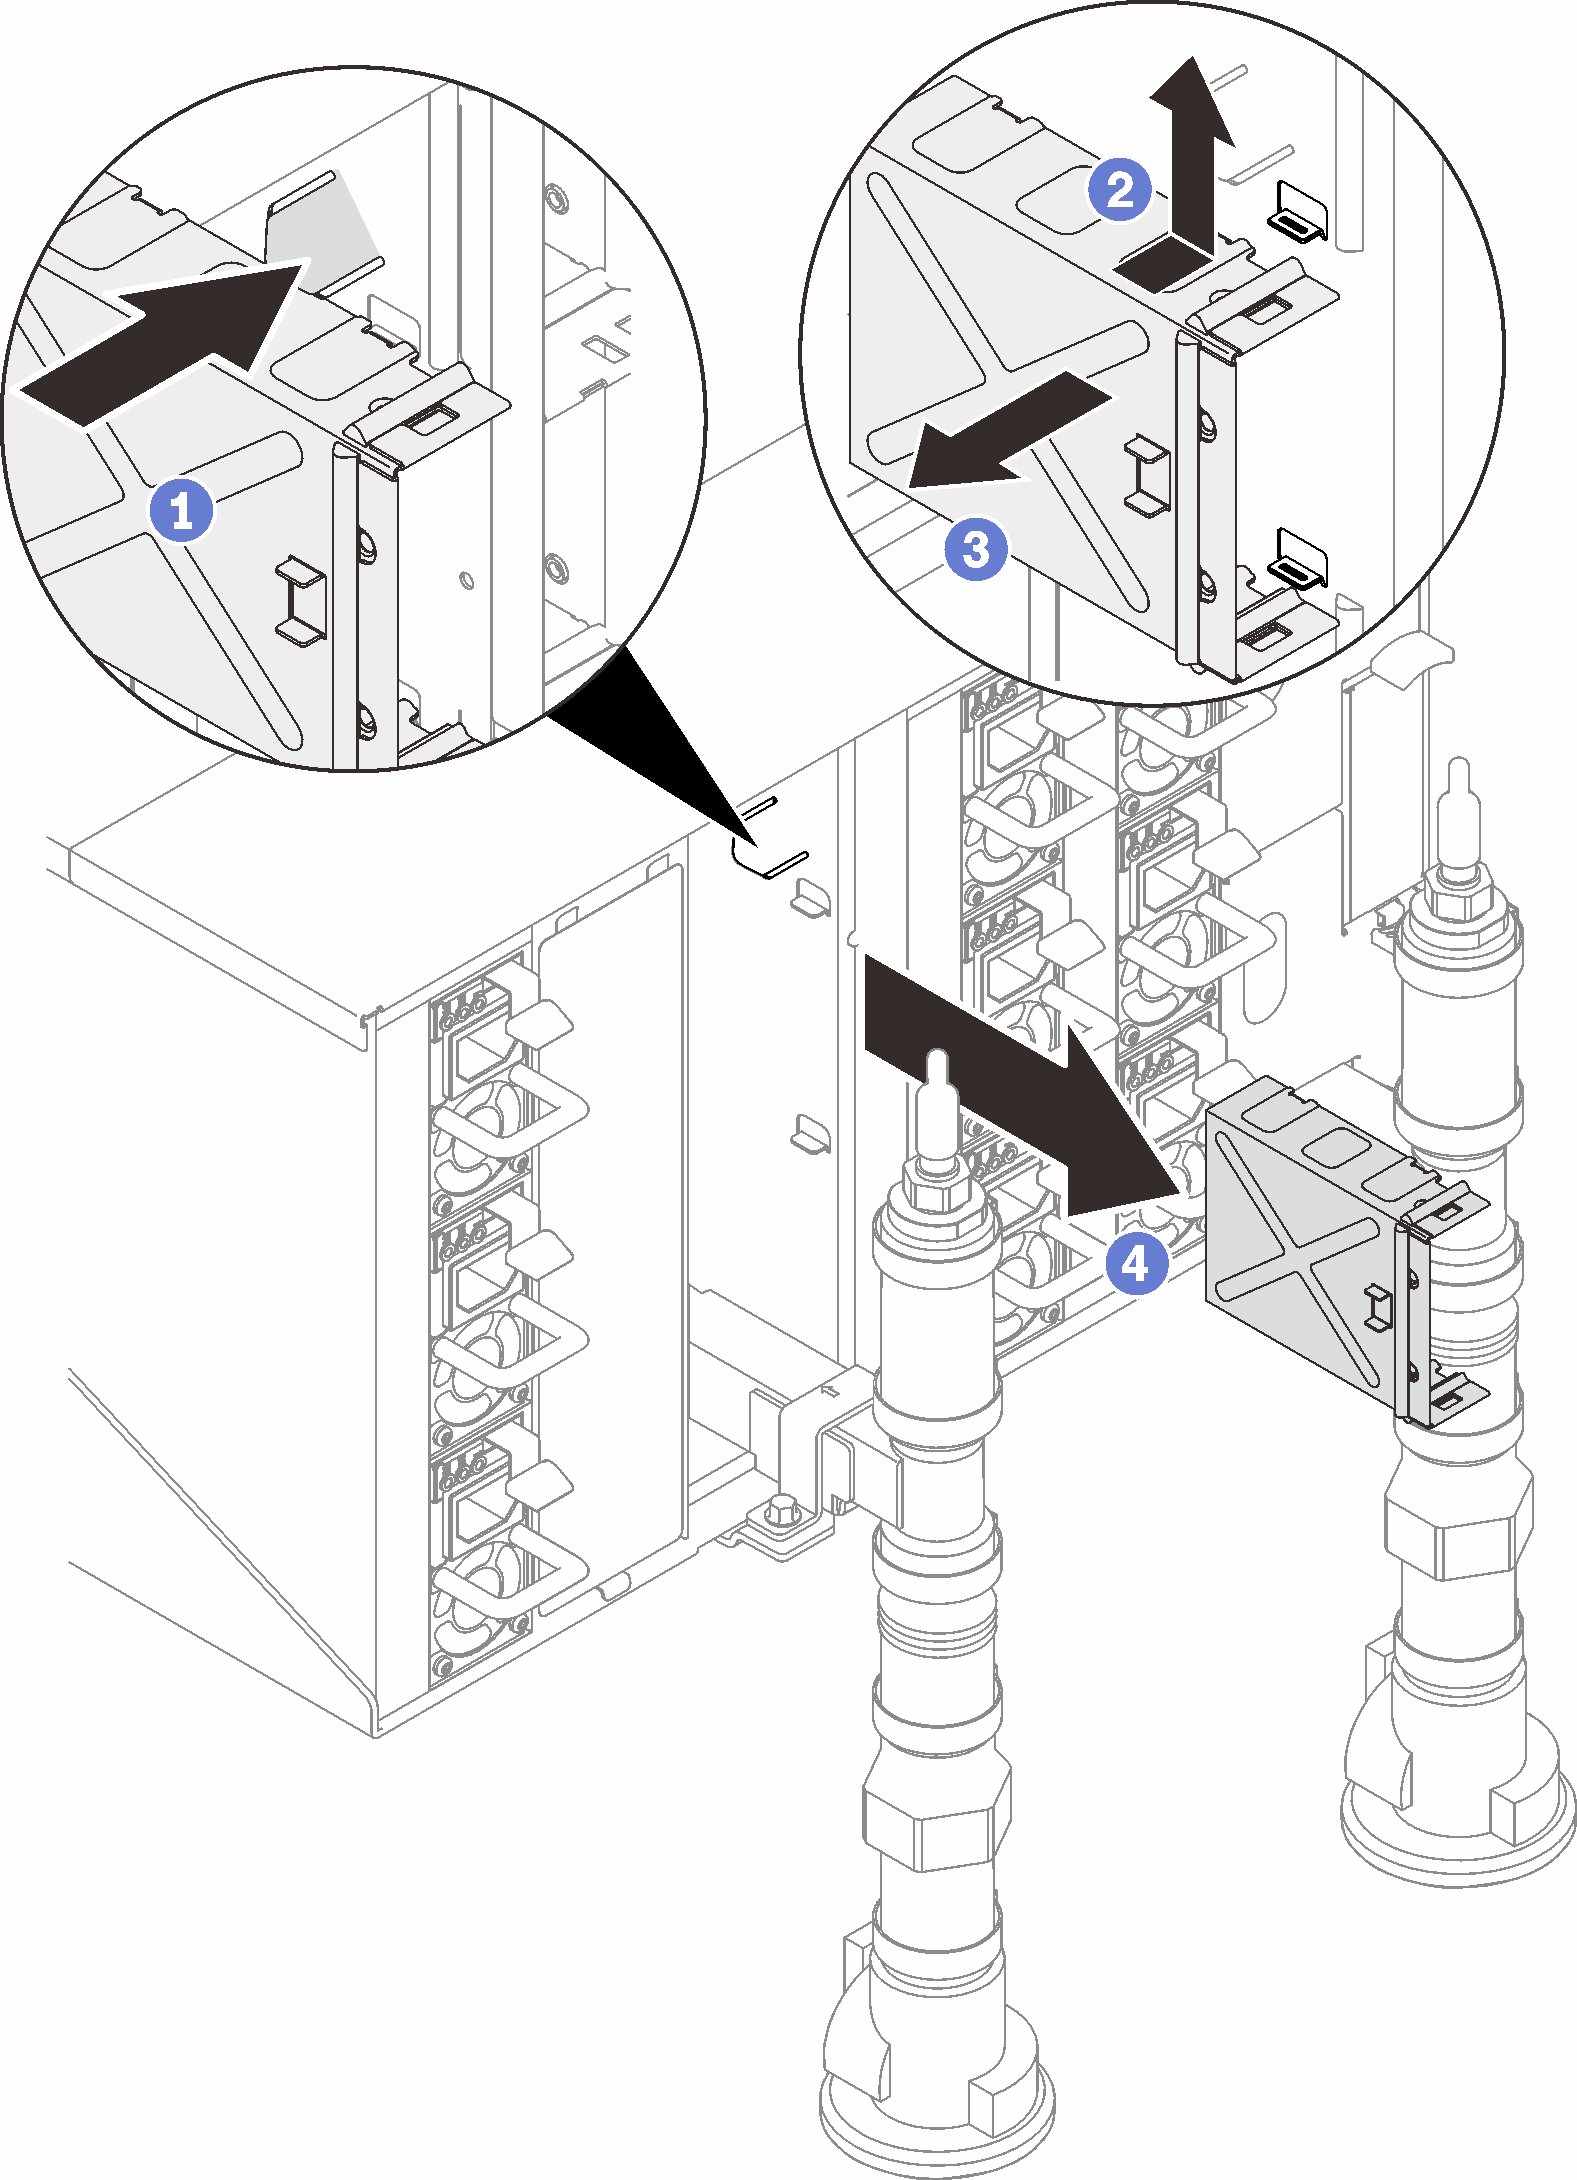
- If necessary, remove the blank filler.
- Press and hold the release tabs on the blank filler.
- Slightly lift the blank filler upwards to disengage it with the enclosure wall.
- Remove the blank filler away from the enclosure wall.
- Slide the blank filler out of the enclosure.
Figure 3. Blank filler removal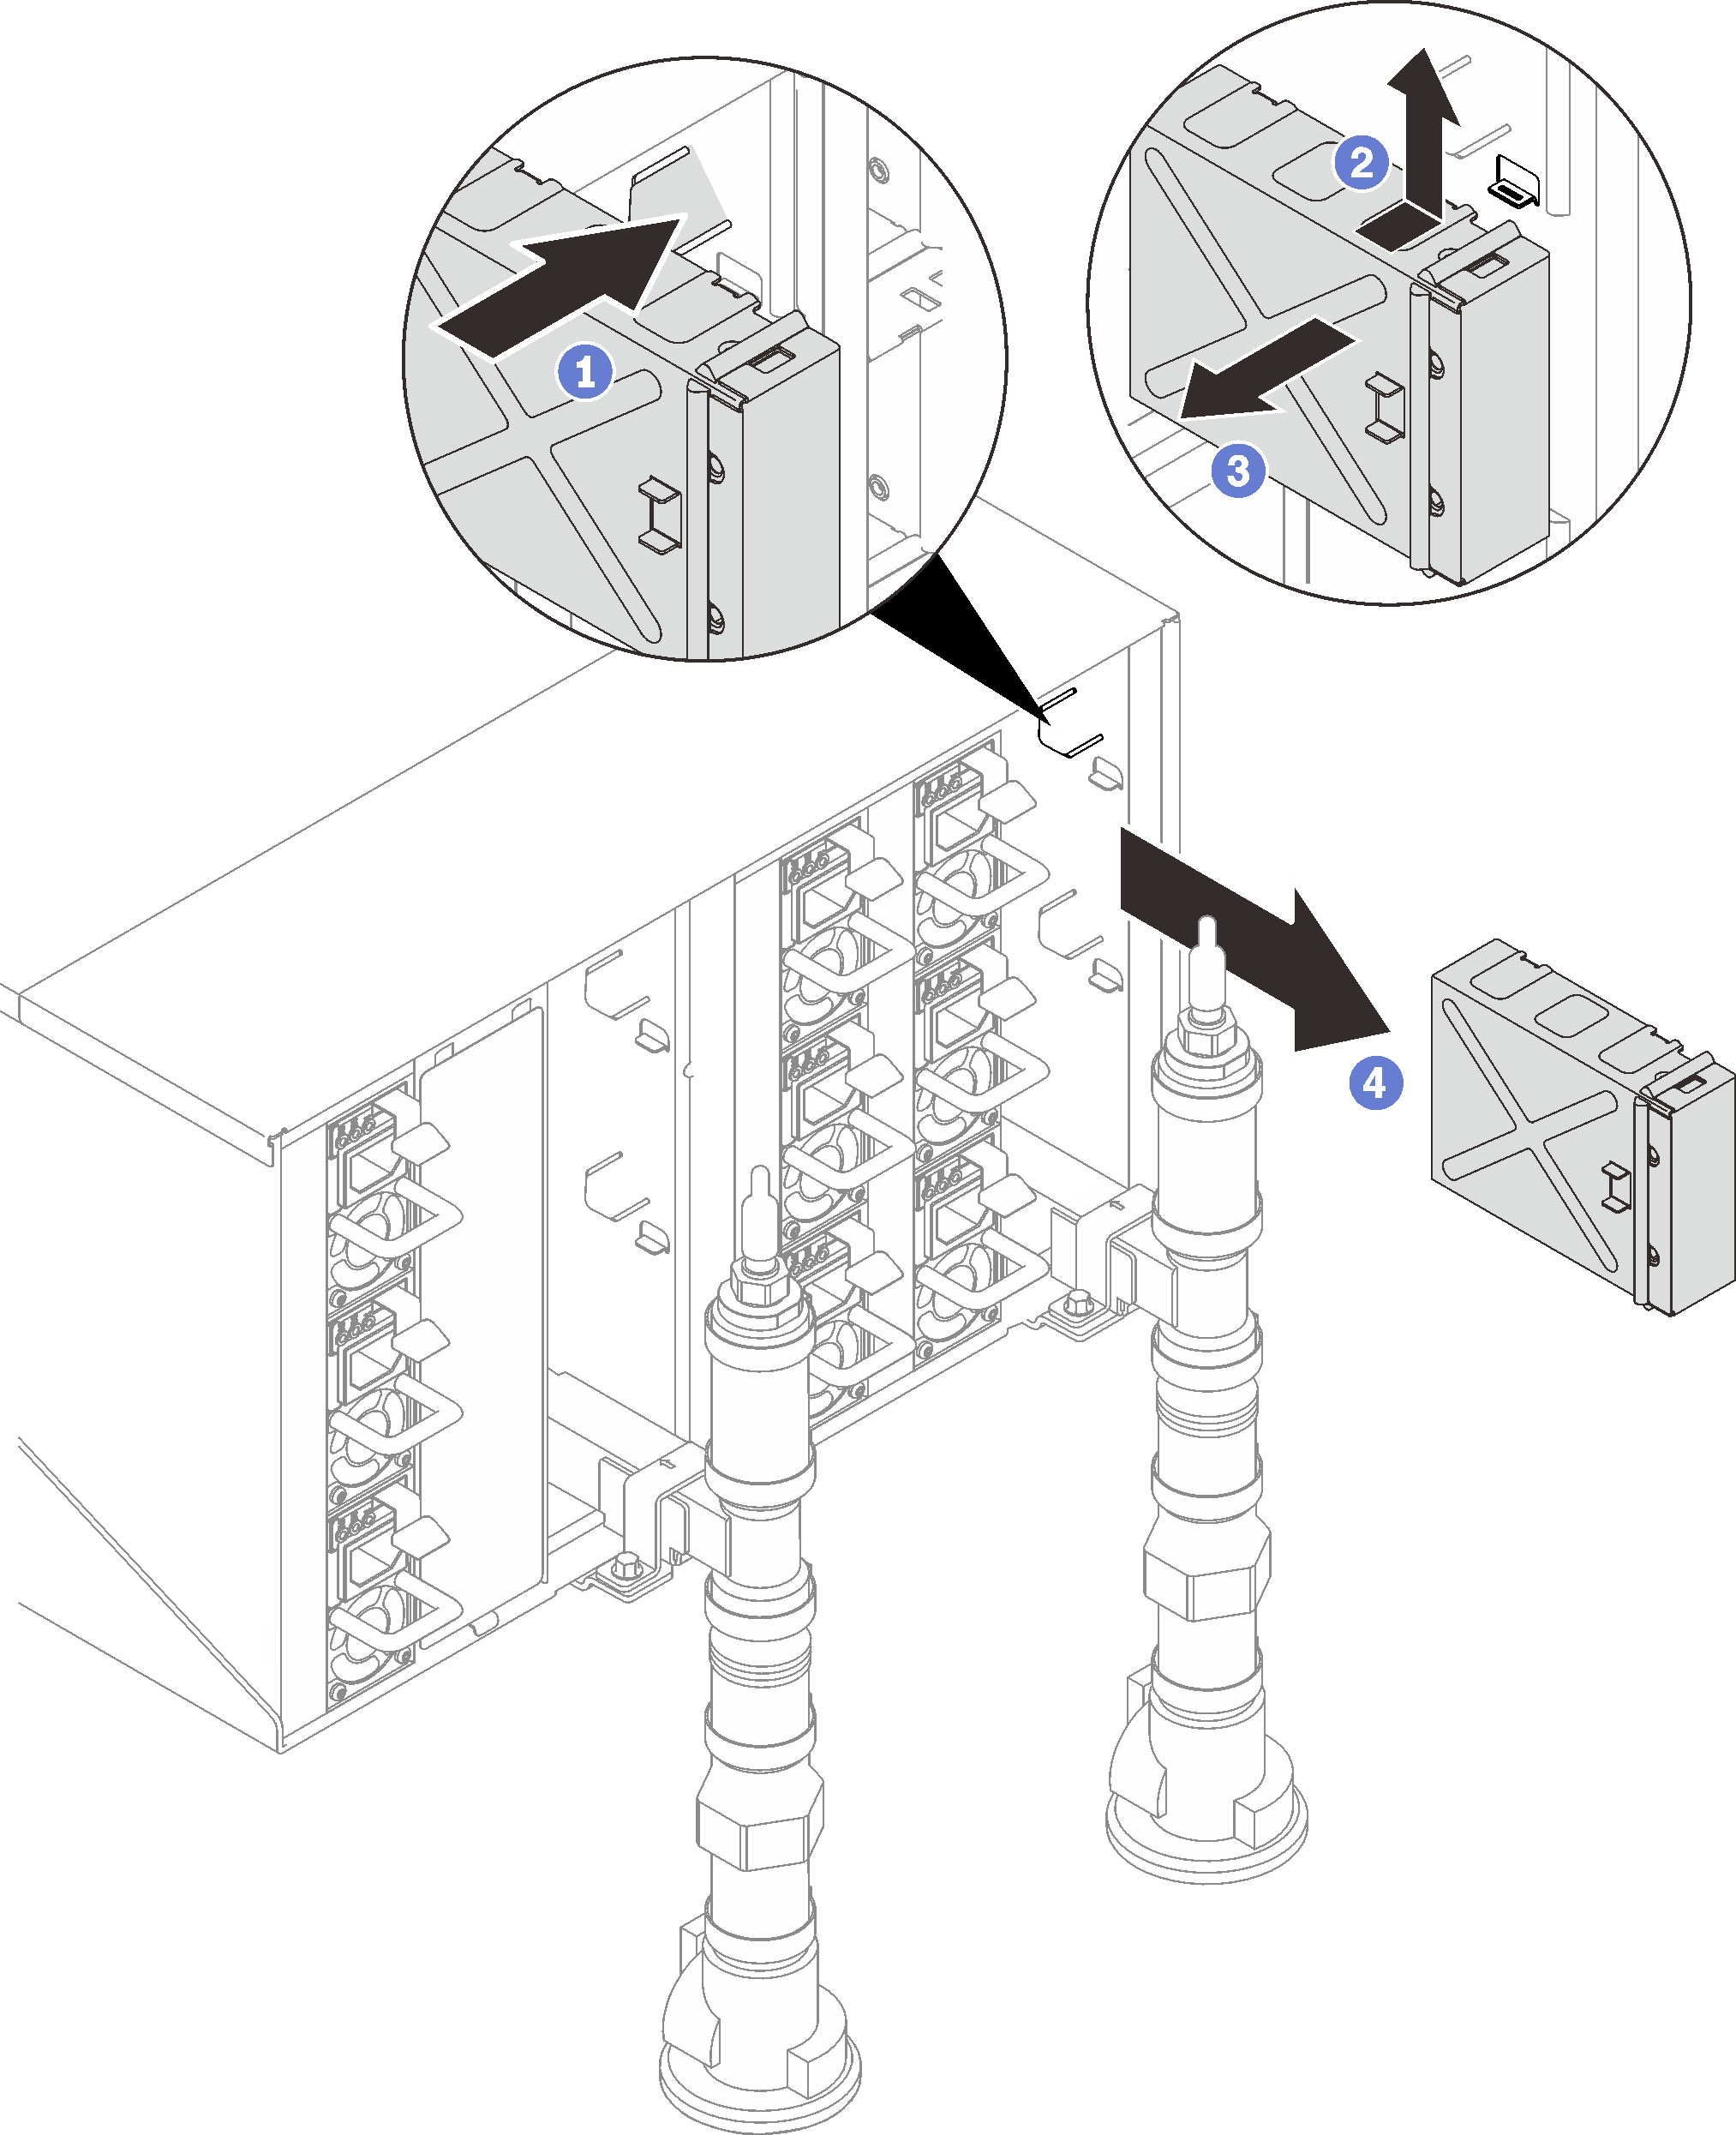
After you finish
If you are instructed to return the component or optional device, follow all packaging instructions, and use any packaging materials for shipping that are supplied to you.
Remove the SMM2 battery. See Remove the SMM2 battery.
Remove the four screws that secure the SMM2 board to the module.
Gently slide the SMM2 board out of the module.
Figure 4. SMM2 board removal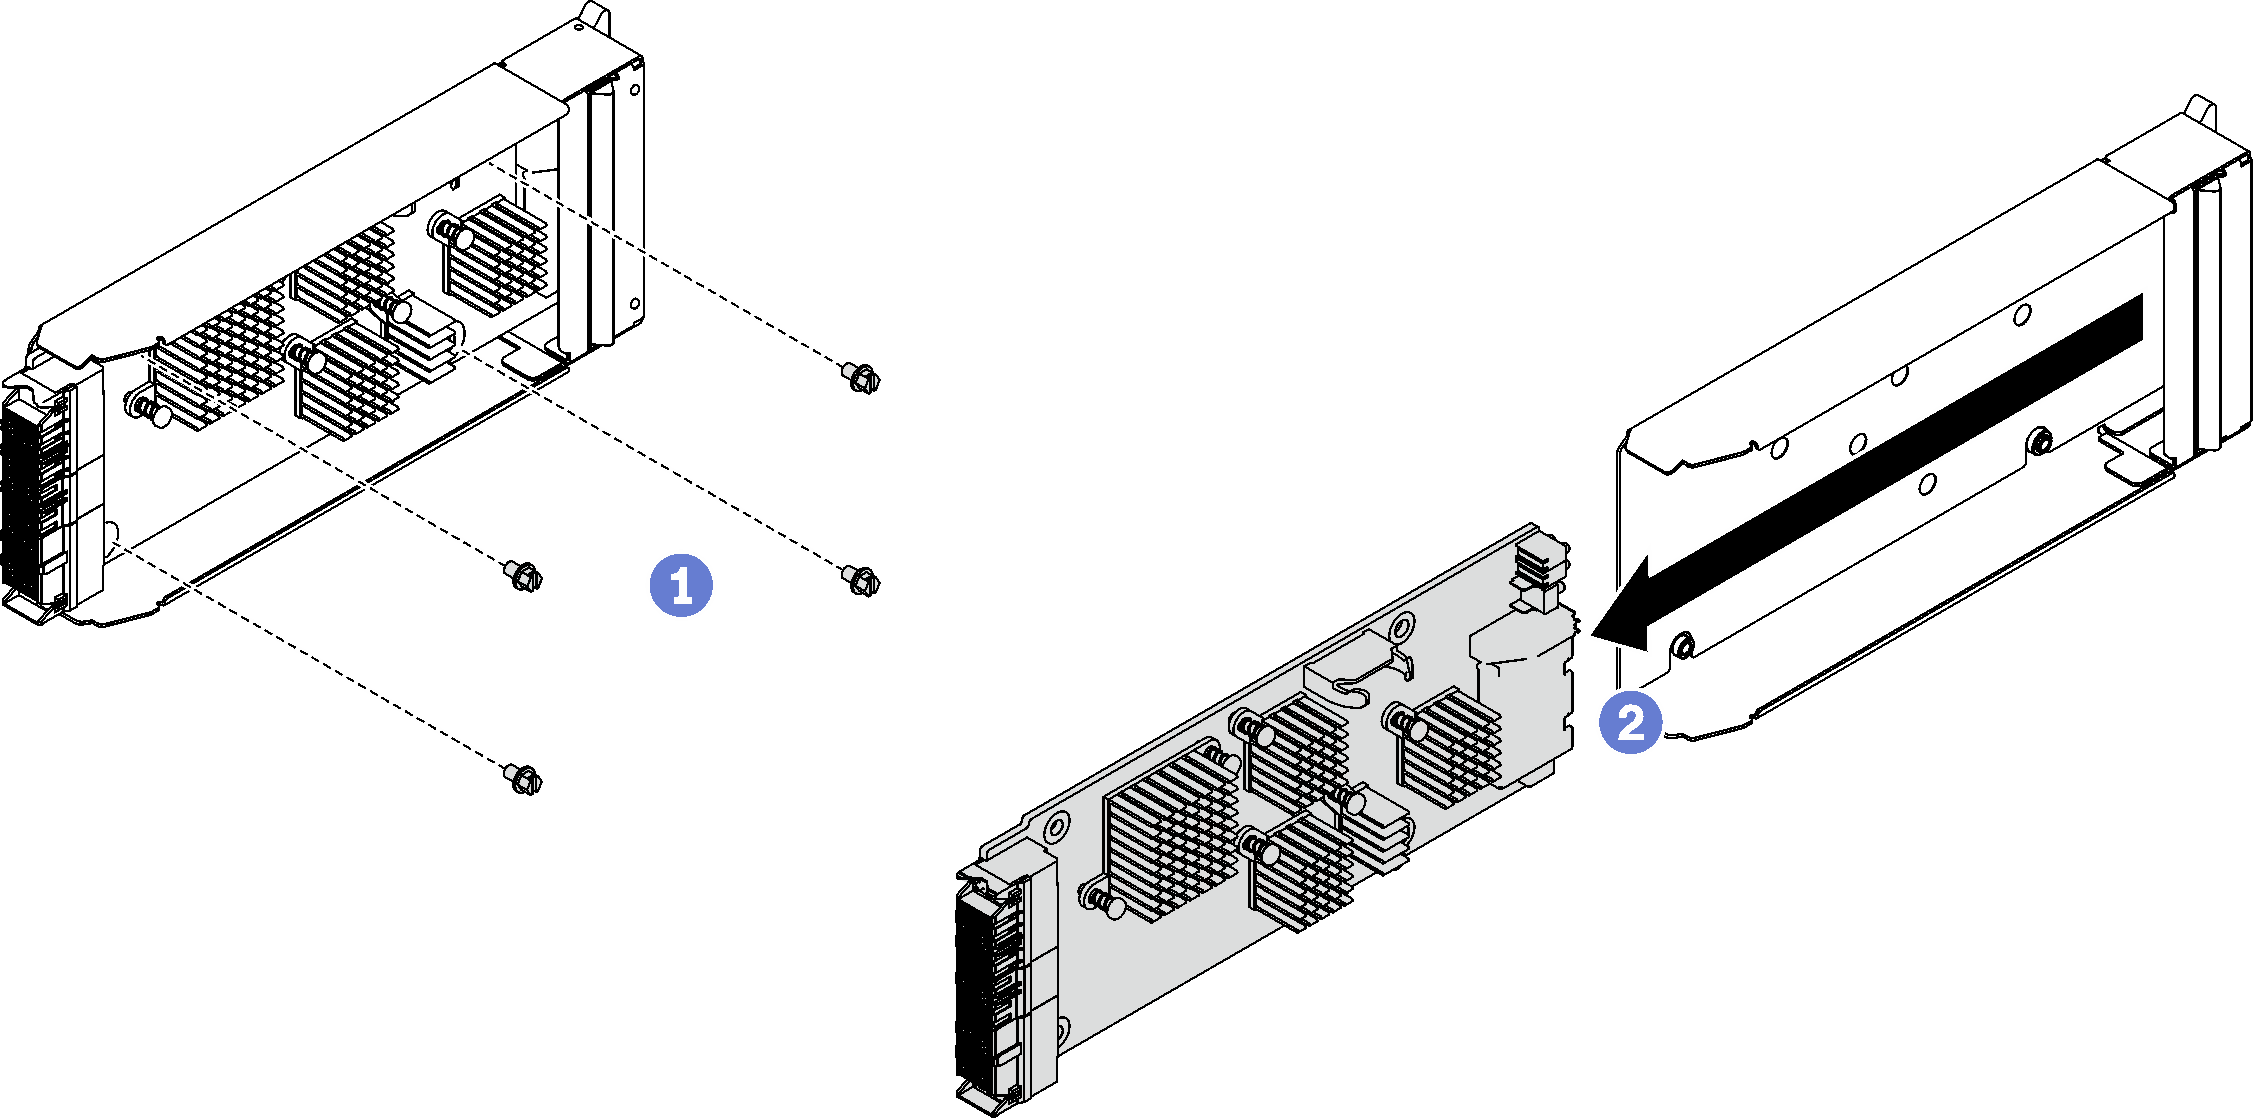
Recycle the unit in compliance with local regulations.