Creating a basic SVM
You can use a wizard that guides you through the process of creating a new storage virtual machine (SVM), configuring Domain Name System (DNS), creating a data logical interface (LIF), configuring a CIFS server, enabling NFS, and optionally configuring NIS.
Before you begin
Your network must be configured and the relevant physical ports must be connected to the network.
You must know which of the following networking components the SVM will use:
The node and the specific port on that node where the data logical interface (LIF) will be created
The subnet from which the data LIF's IP address will be provisioned, or optionally the specific IP address you want to assign to the data LIF
Active Directory (AD) domain that thisSVM will join, along with the credentials required to add the SVM to it
NIS information, if your site uses NIS for name services or name mapping
The subnet must be routable to all external servers required for services such as Network Information Service (NIS), Lightweight Directory Access Protocol (LDAP), Active Directory (AD), and DNS.
Any external firewalls must be appropriately configured to allow access to network services.
The time on the AD domain controllers, clients, and SVM must be synchronized to within five minutes of each other.
About this task
When you are creating an SVM for multiprotocol access, you should not use the provisioning sections of the Storage Virtual Machine (SVM) Setup window, which creates two volumes—not a single volume with multiprotocol access. You can provision the volume later in the workflow.
- In the Storage Virtual Machine (SVM) Setup dialog box, create the SVM:
- Optional: Select the root aggregate to contain the SVM root volume.The aggregate that you select for the root volume does not determine the location of the data volume. The aggregate for the data volume is selected separately in a later step.

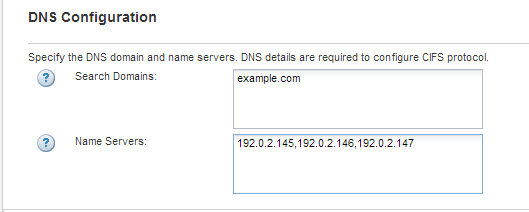
- Optional: In the DNS Configuration area, ensure that the default DNS search domain and name servers are the ones that you want to use for this SVM.
The SVM is created, but protocols are not yet configured. - Optional: Select the root aggregate to contain the SVM root volume.
- In the Data LIF Configuration section of the Configure CIFS/NFS protocol page, specify the details of the LIF that clients will use to access data:
- Click Browse and select a node and port that will be associated with the LIF.
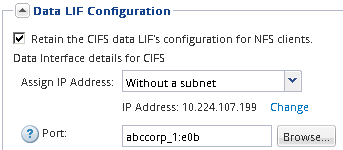
- Click Browse and select a node and port that will be associated with the LIF.
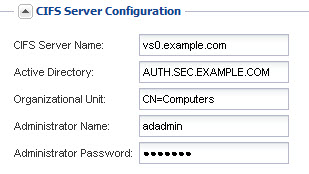
- In the CIFS Server Configuration section, define the CIFS server and configure it to access the AD domain:
- Specify a name for the CIFS server that is unique in the AD domain.
- Specify the FQDN of the AD domain that the CIFS server can join.
- If you want to associate an organizational unit (OU) within the AD domain other than CN=Computers, enter the OU.
- Specify the name and password of an administrative account that has sufficient privileges to add the CIFS server to the OU.
- If you want to avoid unauthorized access to all the shares on this , select the option to encrypt data using SMB 3.0.
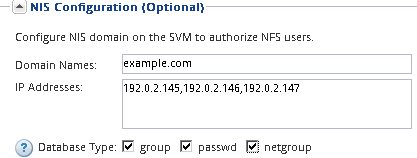
- If your site uses NIS for name services or name mapping, specify the domain and IP addresses of the NIS servers.
Result
A new SVM is created that has a CIFS server and an NFS server accessible through the same data LIF.After you finish
You must now open the export policy of the SVM root volume.