Remove an M.2 drive
Use this information to remove an M.2 drive.
About this task
Read Safety inspection checklist and Installation Guidelines to ensure that you work safely.
Power off the corresponding compute node that you are going to perform the task on.
Remove the compute node from the chassis. See Remove the compute node from chassis.
Carefully lay the compute node on a flat, static-protective surface, orienting the compute node with the bezel pointing toward you.
Before you make changes to the drives, drive controllers, drive backplanes, or drive cables, make sure to back up all important data stored in drives.
Before you remove any component of a RAID array (drive, RAID card, etc.), back up all RAID configuration information.
Procedure
- Remove the M.2 drive.
 Press the retainer from the sides.
 Slide the retainer backward and away from the M.2 drive.
 Rotate the rear end of M.2 drive to an angle.
 Remove the M.2 drive from the M.2 backplane.
Figure 1. M.2 drive removal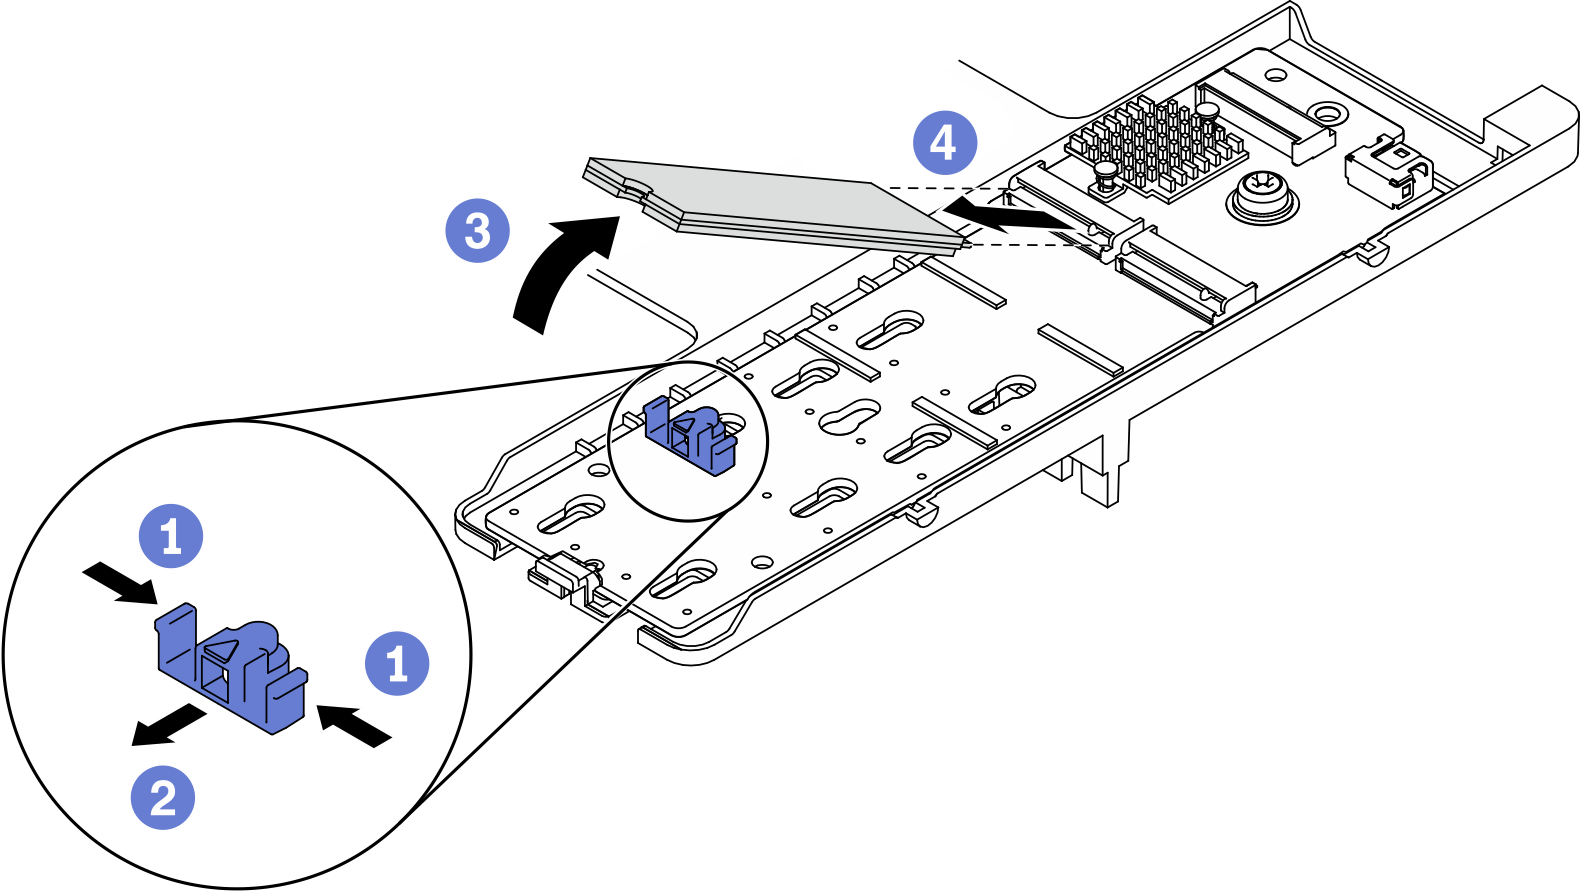
If you are instructed to return the component or optional device, follow all packaging instructions, and use any packaging materials for shipping that are supplied to you.
Demo video