Remove the RAID adapter
Use this information to remove the RAID adapter.
Before you remove the RAID adapter, complete the following steps:
Attention
Replacing the RAID adapter might impact your RAID configurations. Back up your data before the replacement to avoid any data loss due to a RAID configuration change.
- Read the following section(s) to ensure that you work safely.
Turn off the server. Disconnect the power cords and all external cables (see Power off the server).
If server is installed in a rack, remove the server from the rack.
Remove the top cover (see Remove the top cover).
Remove the power supply 1 if the redundant power supply model is used (see Remove a hot-swap power supply unit).
To remove the RAID adapter, complete the following steps:
Figure 1. RAID adapter removal
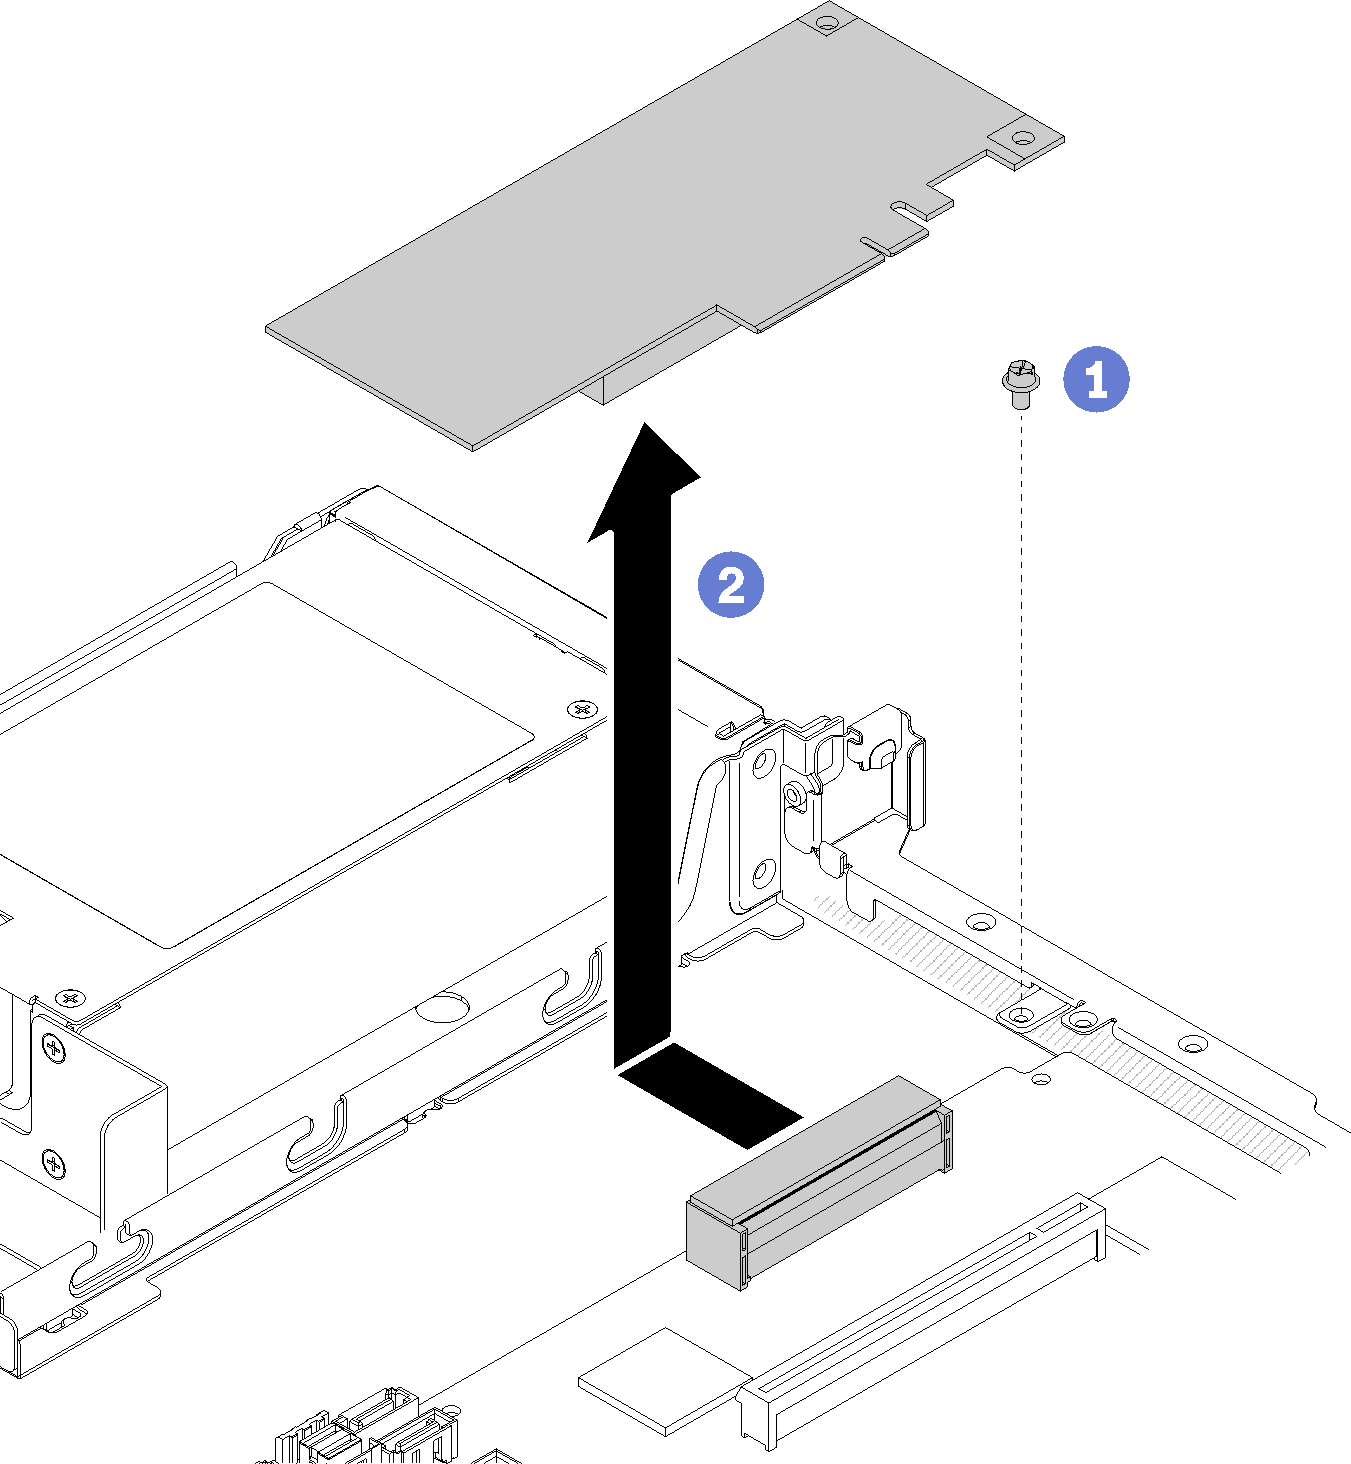
- Remove the screw that secures the RAID adapter.
- Slide the RAID adapter aside to disengage the adapter from the connector.
- Disconnect all cables from the RAID adapter; then, lift the adapter out of the server. See Internal cable routing for more information.
If you are instructed to return the defective component, please package the part to prevent any shipping damage. Reuse the packaging the new part arrived in and follow all packaging instructions.
Demo video
Give documentation feedback