Install a riser card
Use this information to install a riser card.


Before installing a riser card, touch the static-protective package that contains the new riser card to any unpainted surface on the outside of the server. Then, take the new riser card out of the package and place it on a static-protective surface.
To install a riser card, complete the following steps:
Watch the procedure
A video of this procedure is available at YouTube.
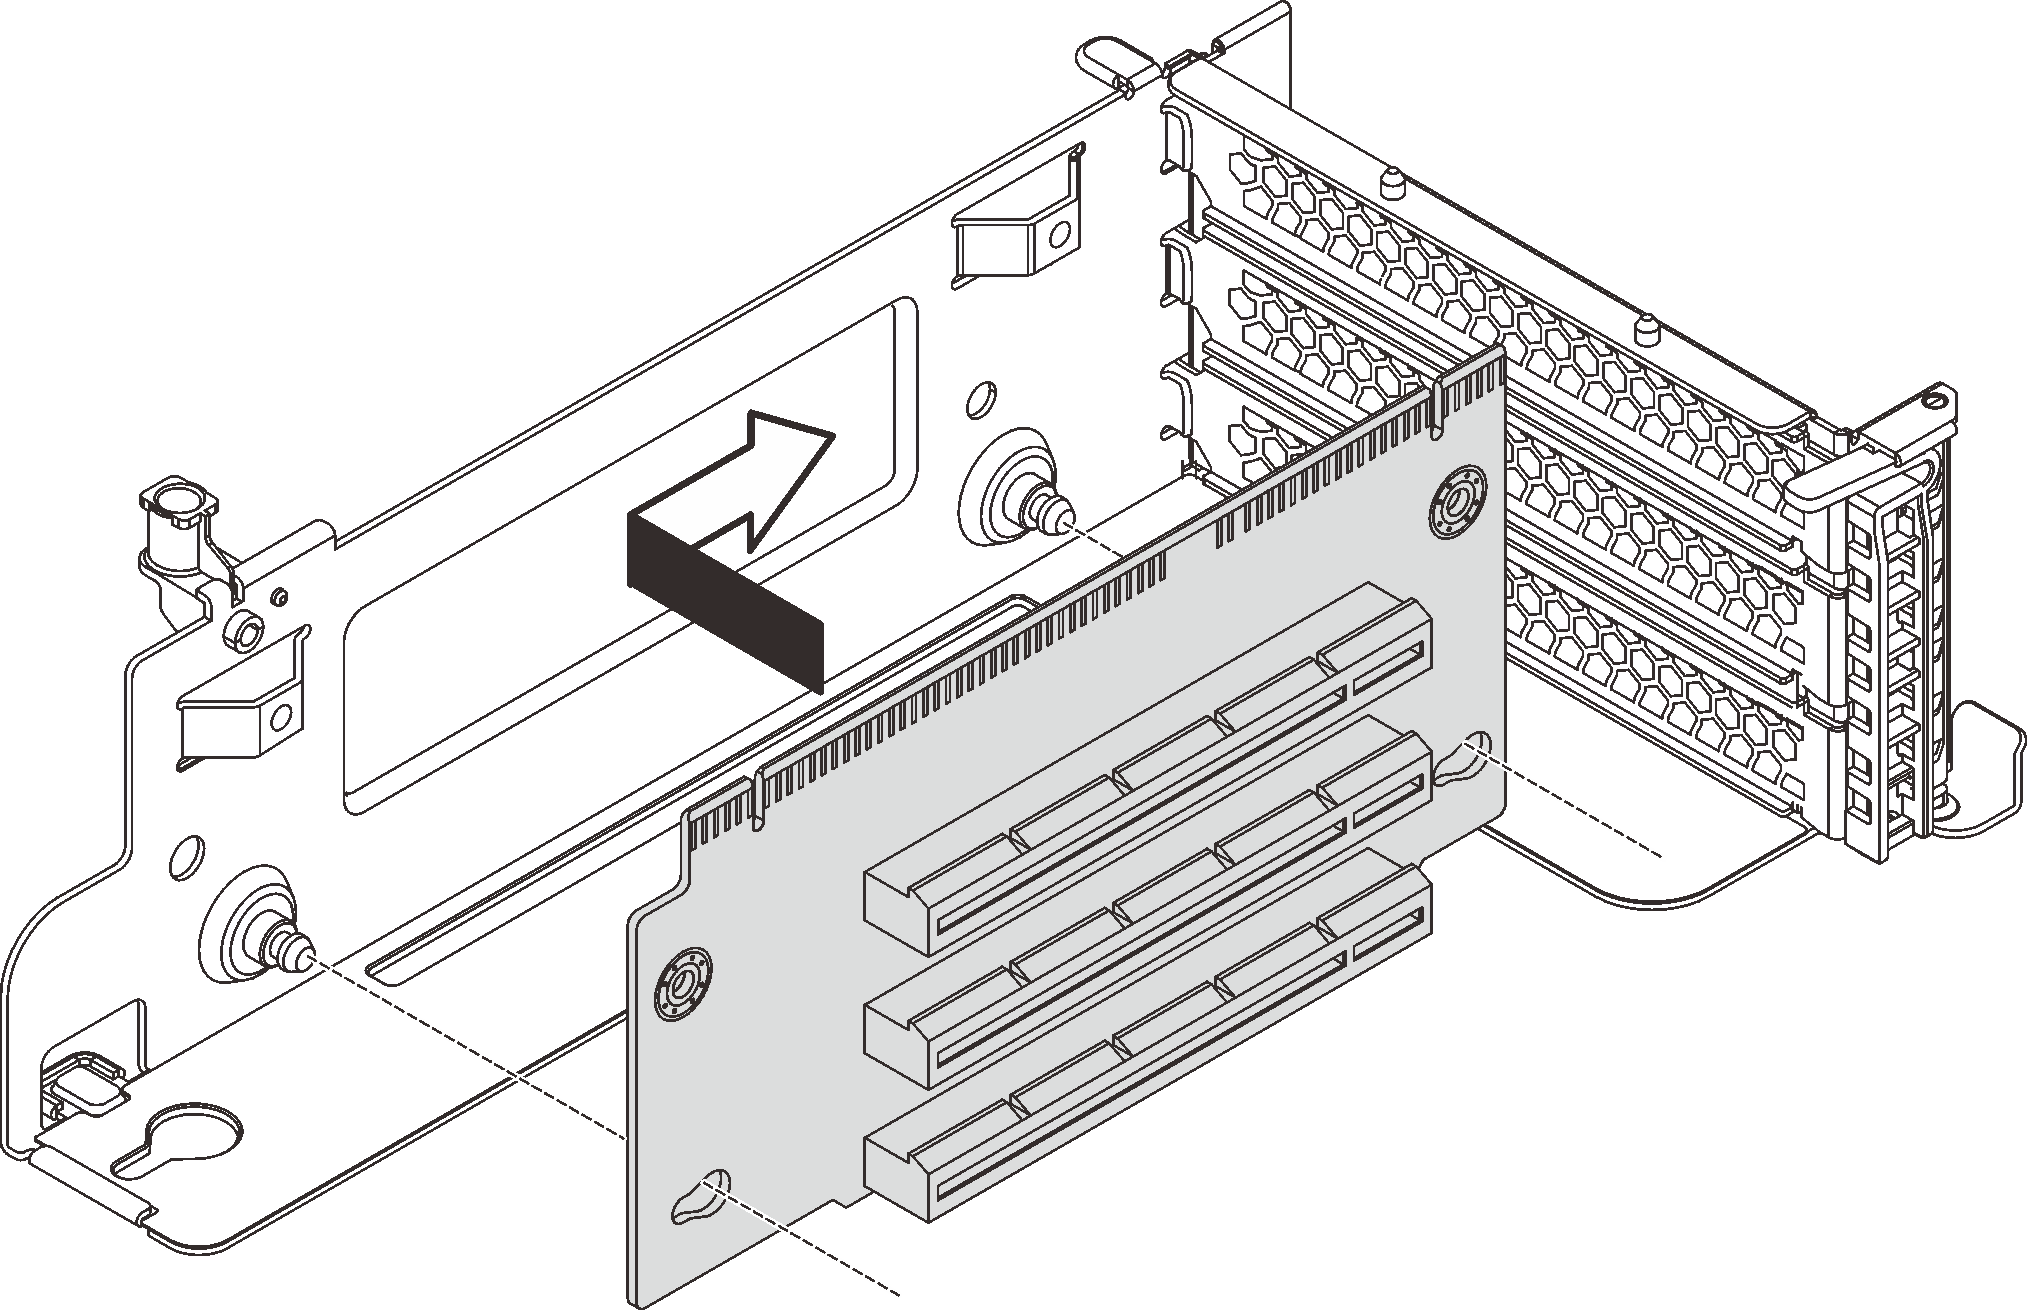
- Ensure the mounting studs in the bracket go through the holes in the new riser card. Push the riser card to the direction as shown to align the screw holes in the new riser card with the corresponding ones in the bracket.Figure 1. Riser card installation
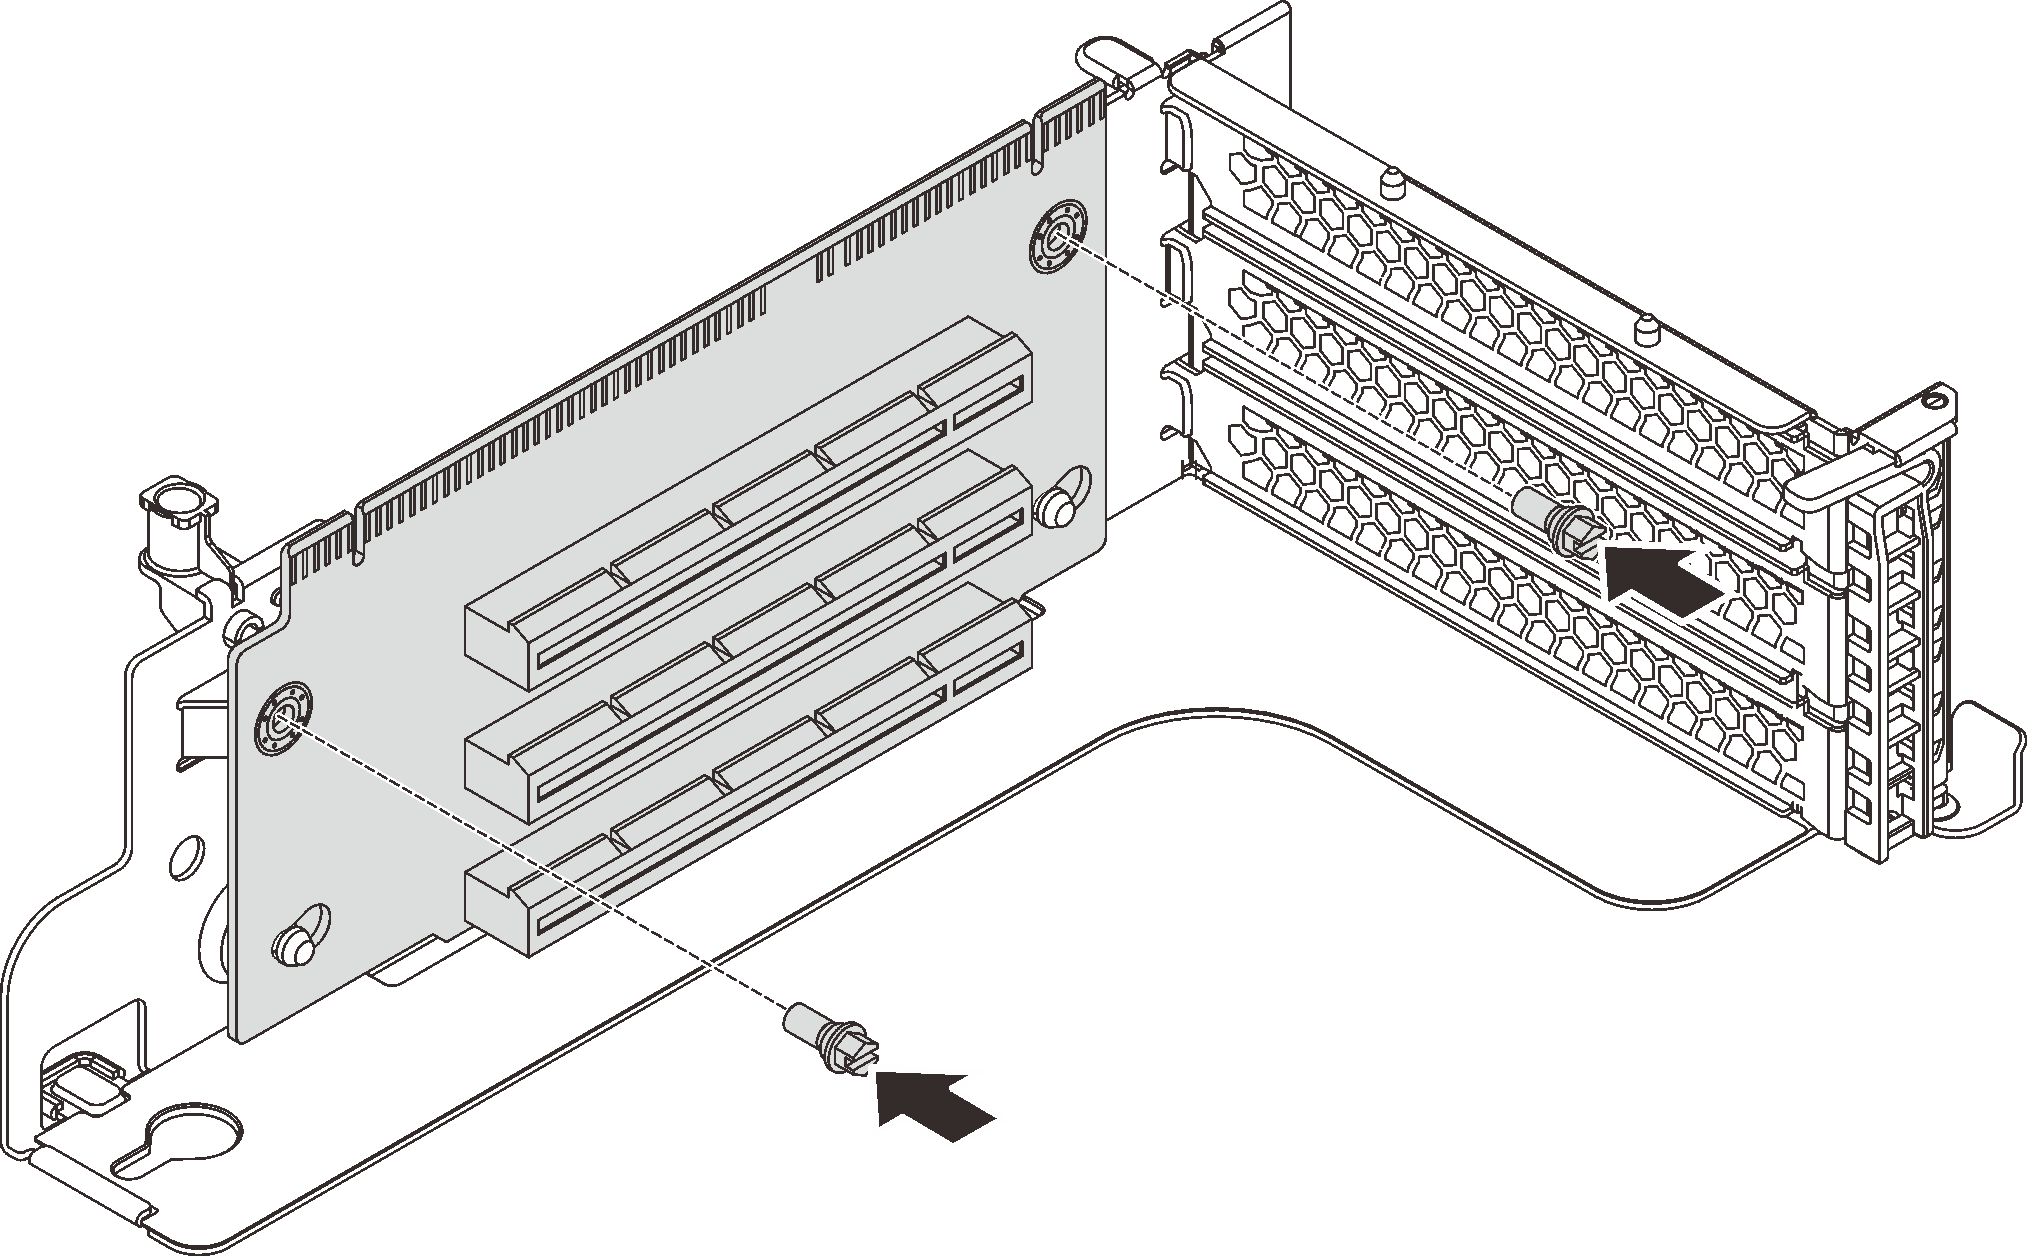
- Install the two screws to secure the riser card to the bracket.Figure 2. Installing the two screws to secure the riser card
- Install the riser assembly by doing one of the following:
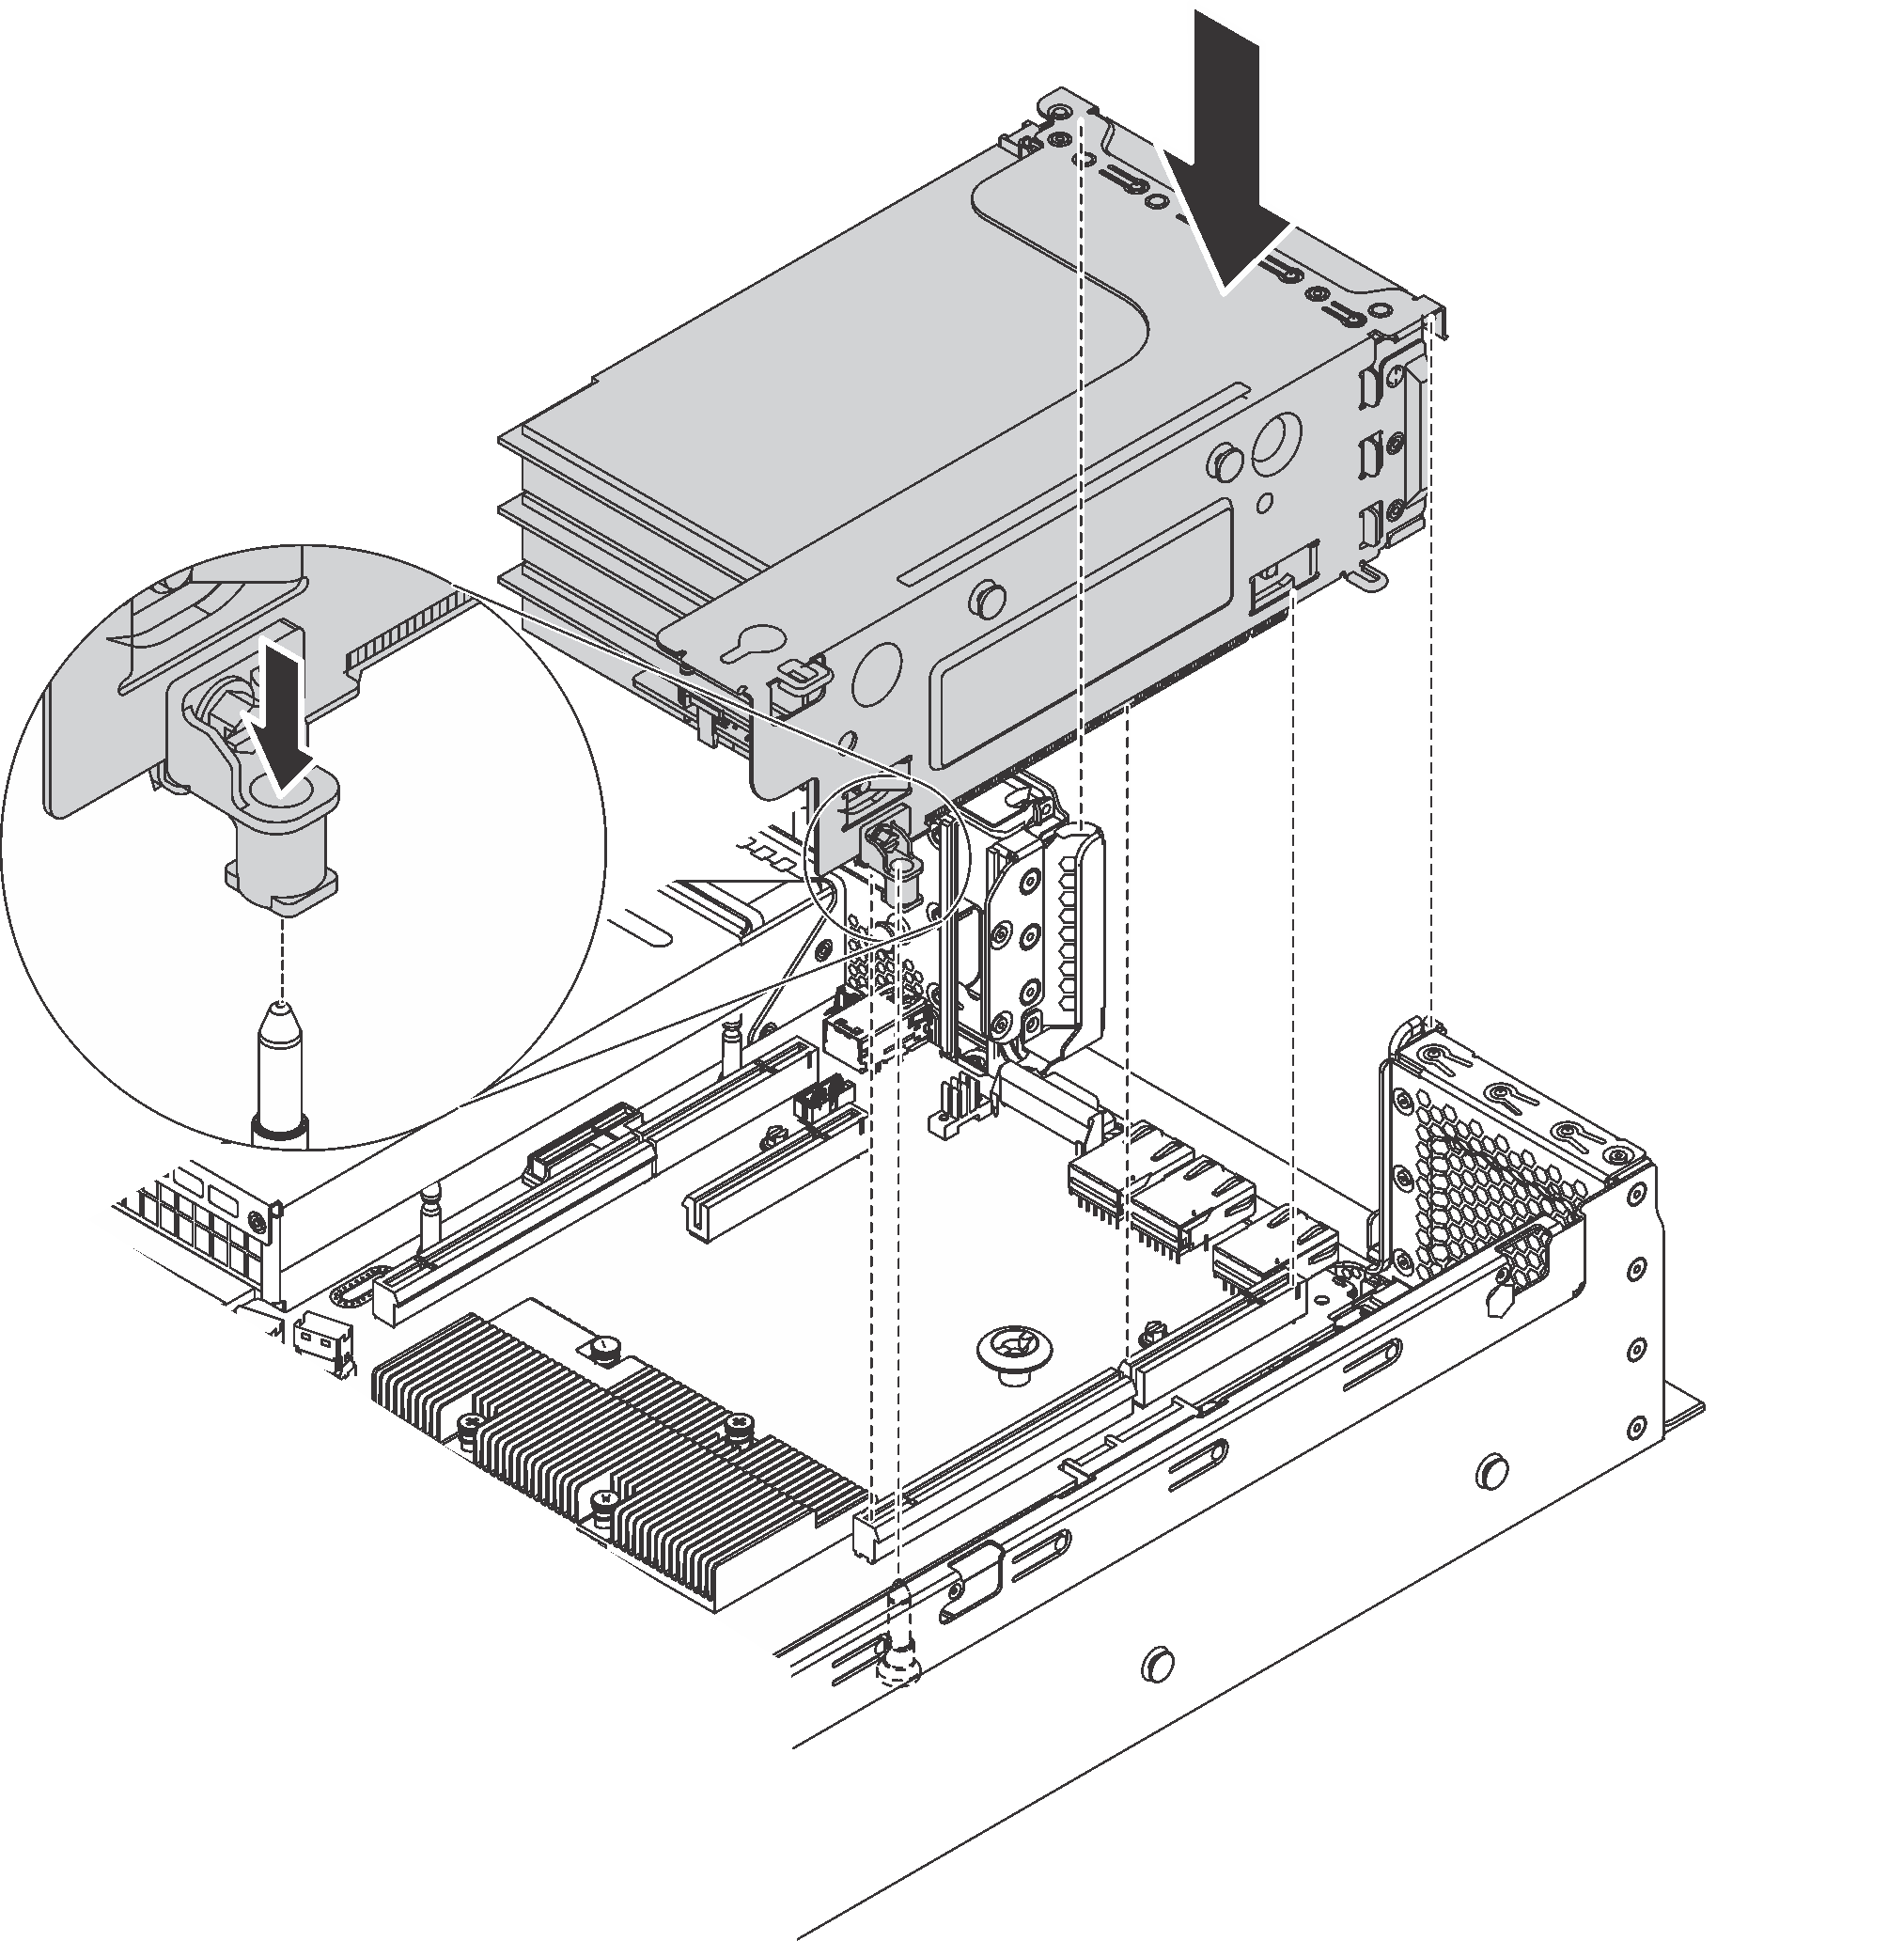
- To install the riser 1 assembly, align the mounting stud on the system board with the corresponding hole in the riser bracket. Meanwhile, align the rear of the riser 1 assembly with the corresponding rail guides in the rear of the chassis. Then, carefully press the riser 1 assembly straight down into the chassis until it is fully seated.Figure 3. Riser 1 assembly installation
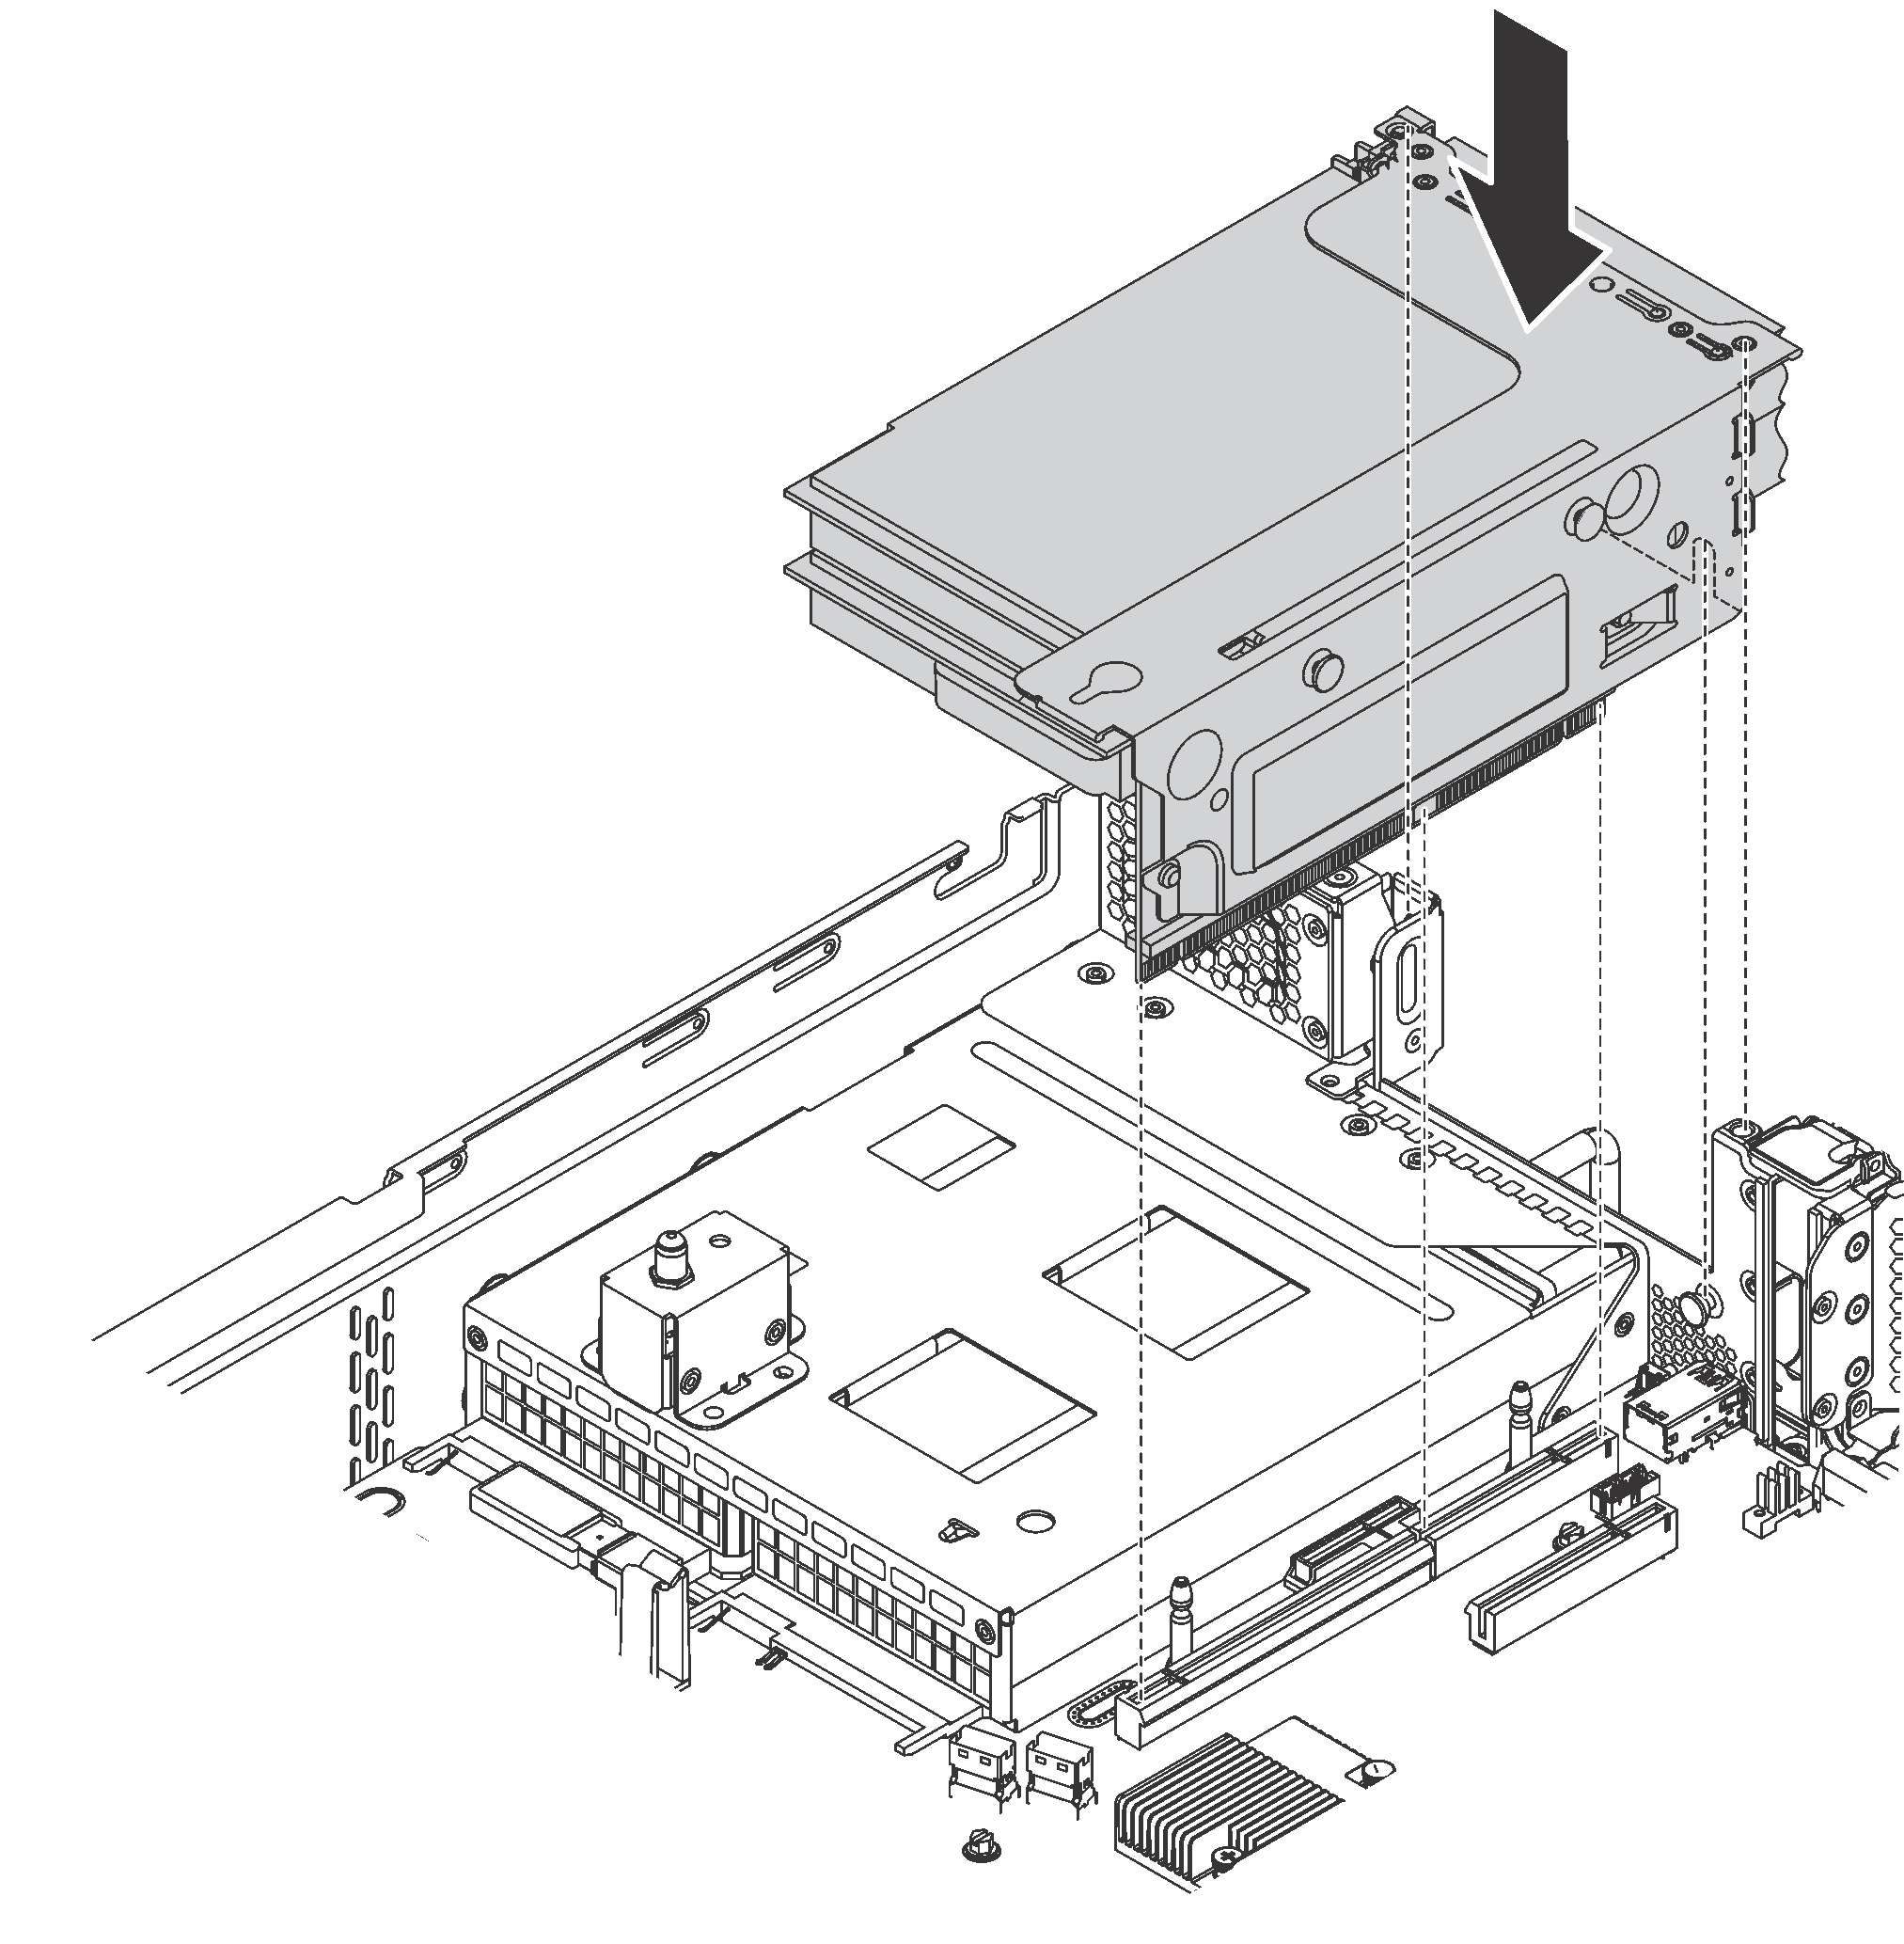
- To install the riser 2 assembly, align the rear of the riser 2 assembly with the corresponding rail guides in the rear of the chassis. Then, carefully press the riser 2 assembly straight down into the chassis until it is fully seated.Figure 4. Riser 2 assembly installation
NoteProperly route the cables.
Complete the parts replacement. See Complete the parts replacement.
Give documentation feedback