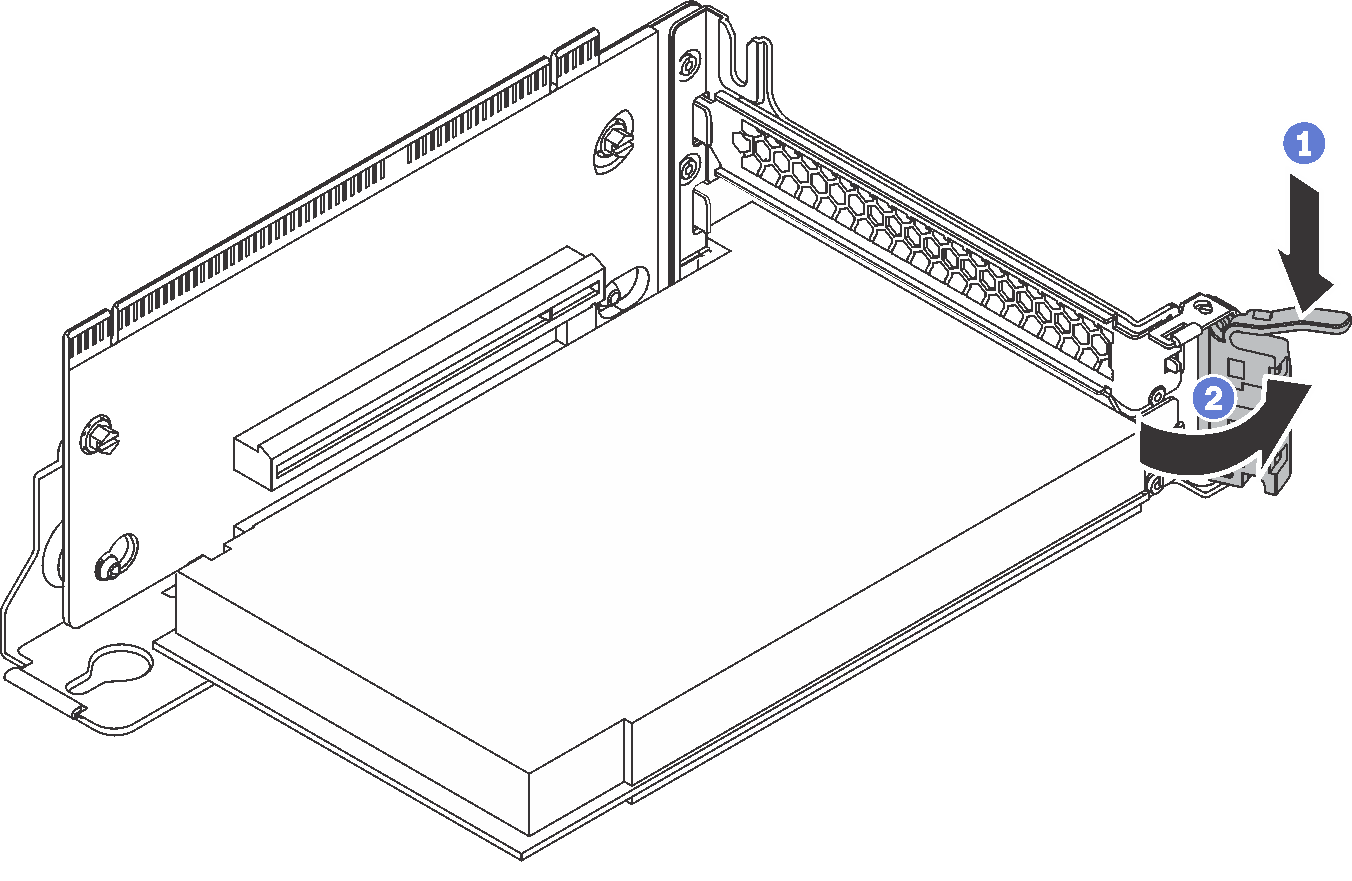
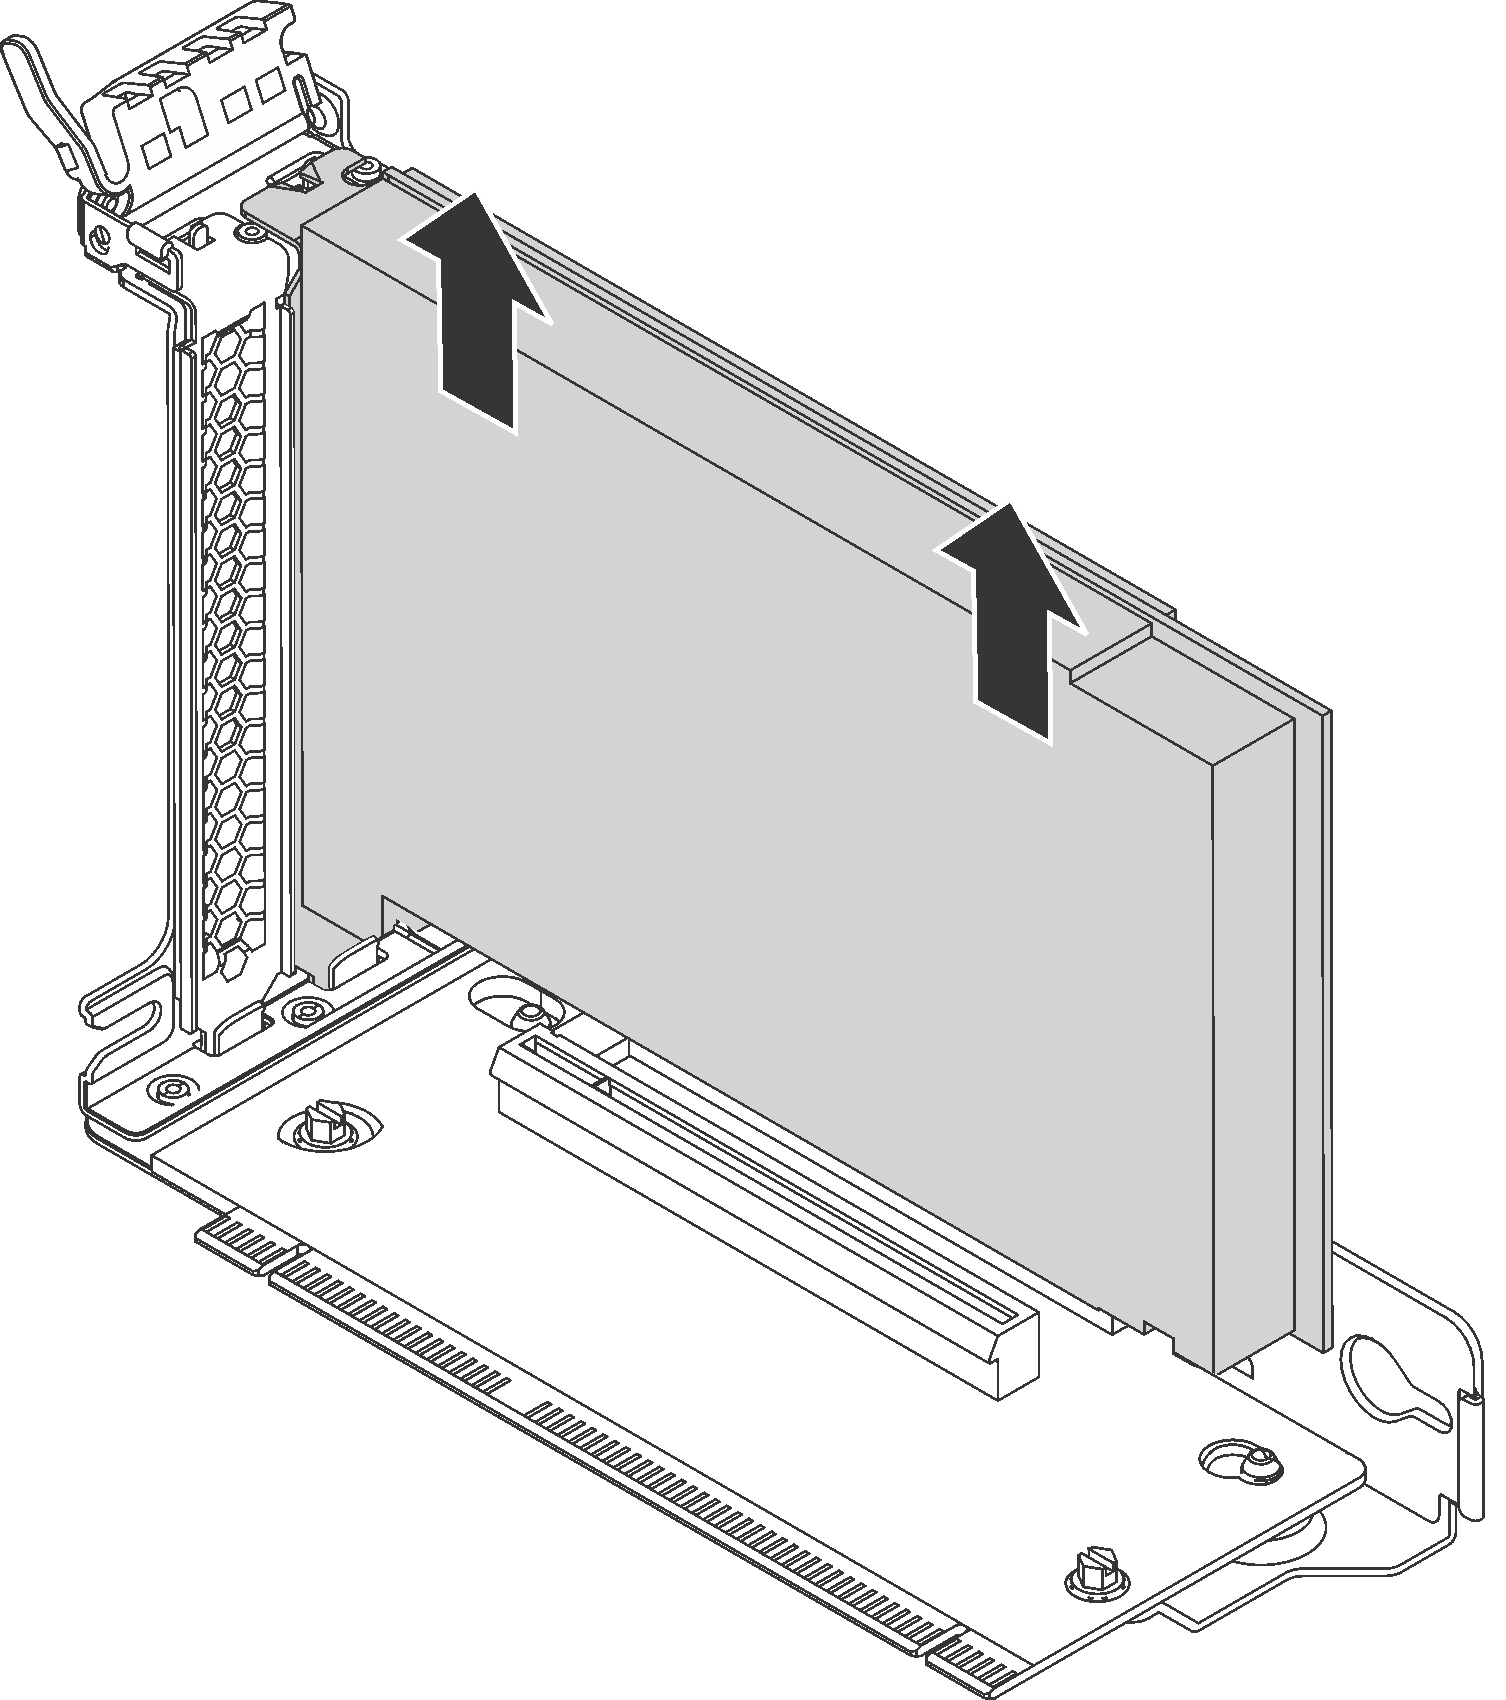
Remove a PCIe adapter from the riser assembly
Use this information to remove a PCIe adapter from the riser assembly.
Note
Depending on the specific type, your PCIe adapter might look different from the illustration in this topic.
Use any documentation that comes with the PCIe adapter and follow those instructions in addition to the instructions in this topic.
Before removing a PCIe adapter from the riser assembly:
Remove the top cover. See Remove the top cover.
Record the cable connections on the PCIe adapter and then disconnect all cables from the PCIe adapter.
Remove the riser assembly and lay it upside down on a flat, clean, and static-protective surface. See Remove a riser card.
To remove a PCIe adapter from the riser assembly, complete the following steps:
Watch the procedure
A video of this procedure is available at YouTube.
If you are instructed to return the old PCIe adapter, follow all packaging instructions and use any packaging materials that are provided.
Give documentation feedback


