Remove the front I/O assembly
Use this information to remove the front I/O assembly.


Before removing the front I/O assembly:
Remove the top cover. See Remove the top cover.
If the security bezel is installed, remove it. See Remove the security bezel.
- Disconnect cables of the front I/O assembly from the system board.AttentionTo avoid damaging the system board, make sure to follow the instructions in
Internal cable routing when disconnecting cables from the system board.
To remove the front I/O assembly, complete the following steps:
Watch the procedure
A video of this procedure is available at YouTube.
Figure 1. Server models with four 3.5-inch drive bays 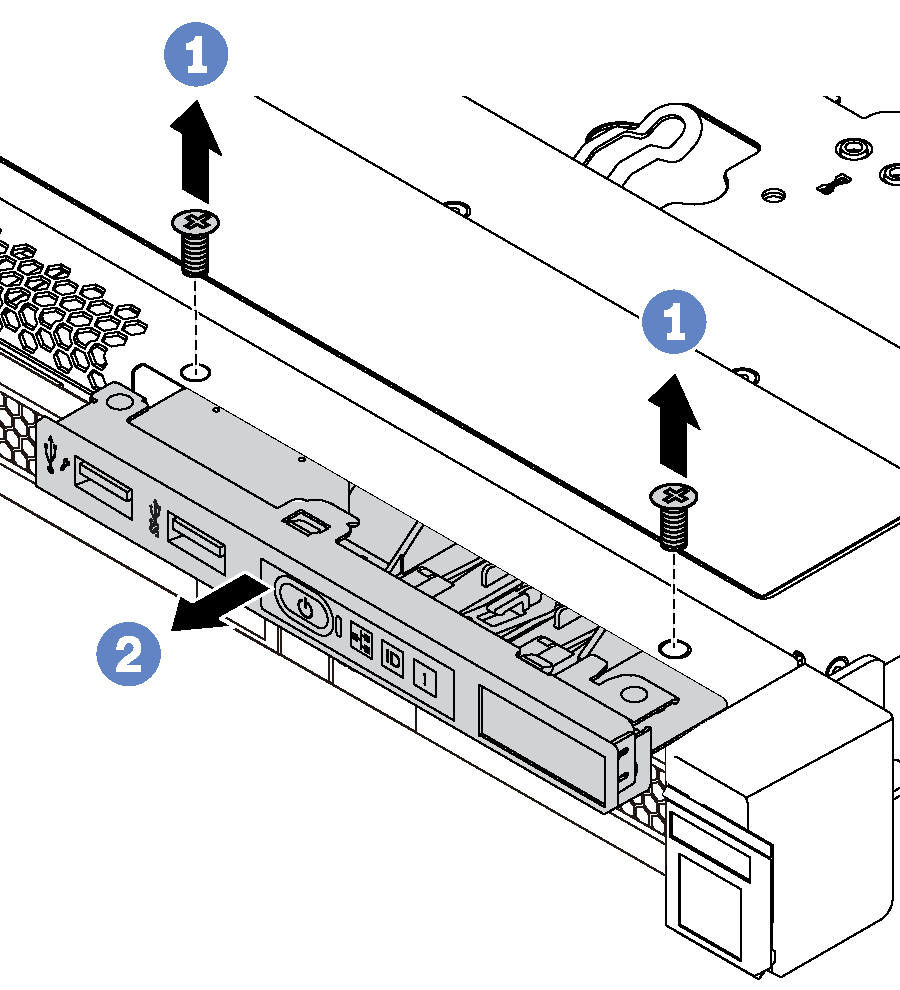 | Figure 2. Server models with eight 2.5-inch drive bays 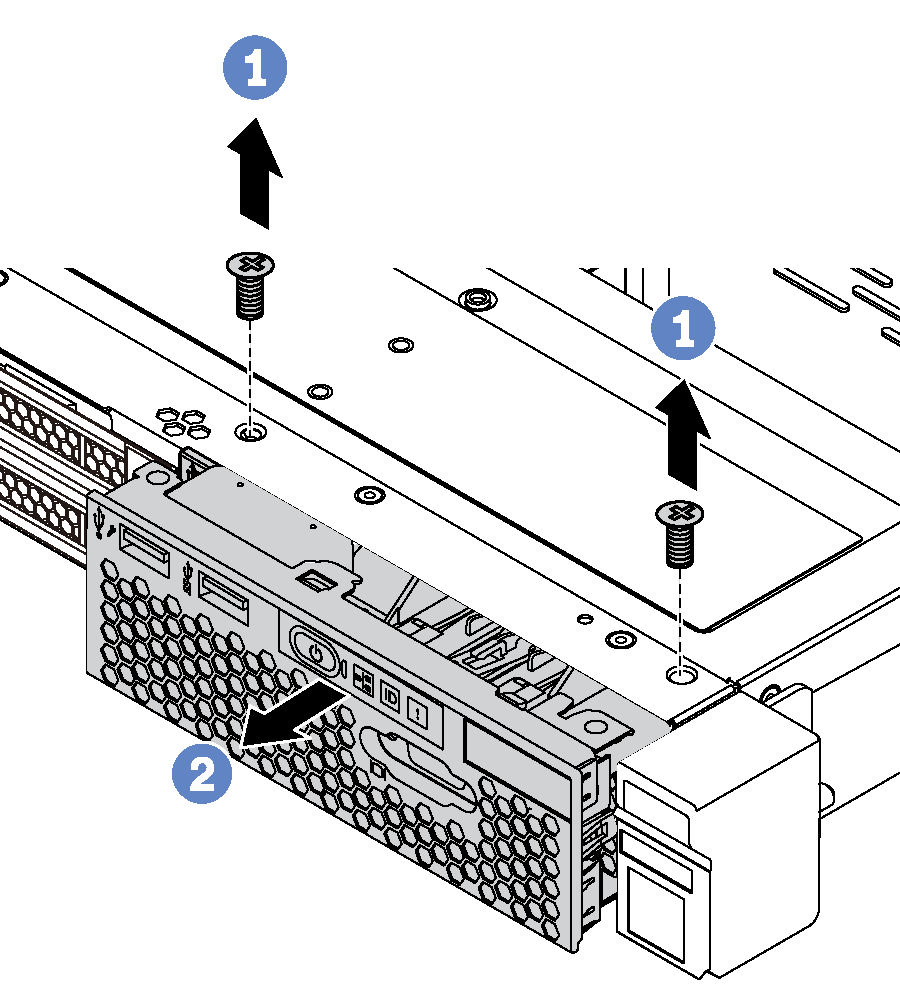 | Figure 3. Server models with ten 2.5-inch drive bays 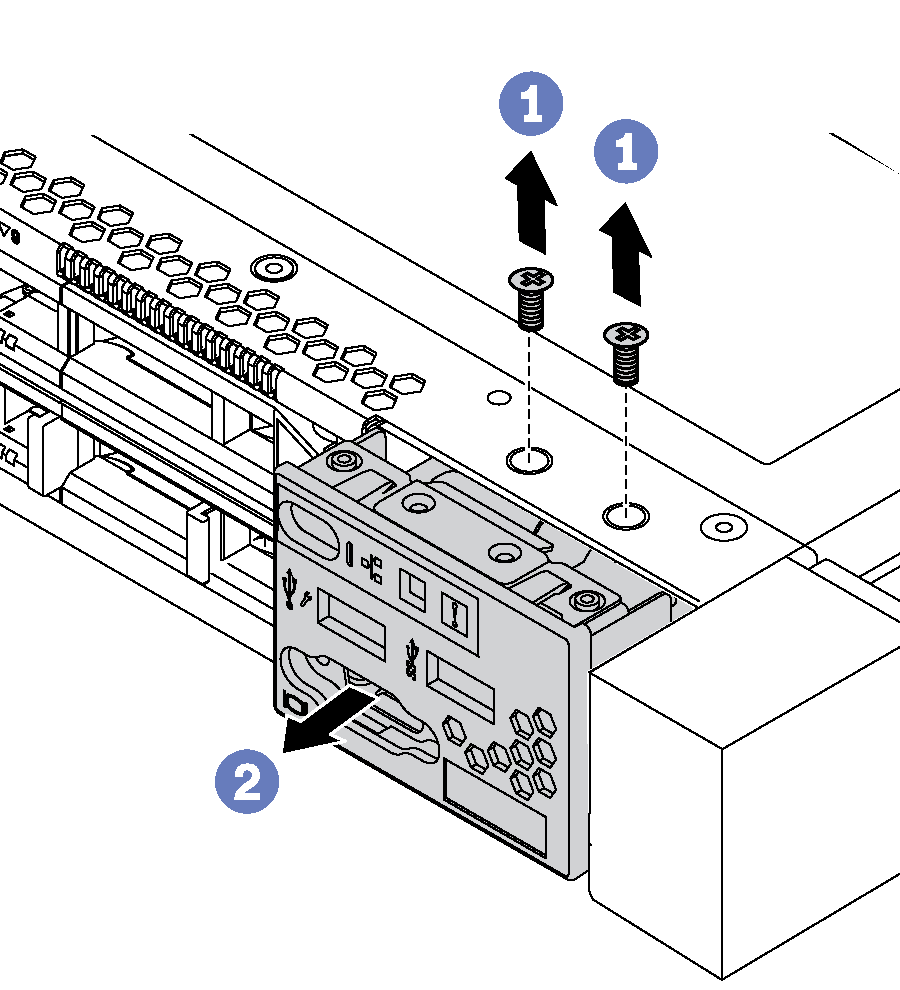 |
- Remove the screws that secure the front I/O assembly.
- Slide the front I/O assembly out of the assembly bay.
If you are instructed to return the old front I/O assembly, follow all packaging instructions and use any packaging materials that are provided.
Give documentation feedback