Install the 2.5-inch-drive backplane
Use this information to install the 2.5-inch-drive backplane.


Before installing the 2.5-inch-drive backplane, touch the static-protective package that contains the new backplane to any unpainted surface on the outside of the server. Then, take the new backplane out of the package and place it on a static-protective surface.
To install the 2.5-inch-drive backplane, complete the following steps:
Watch the procedure
A video of this procedure is available at YouTube.
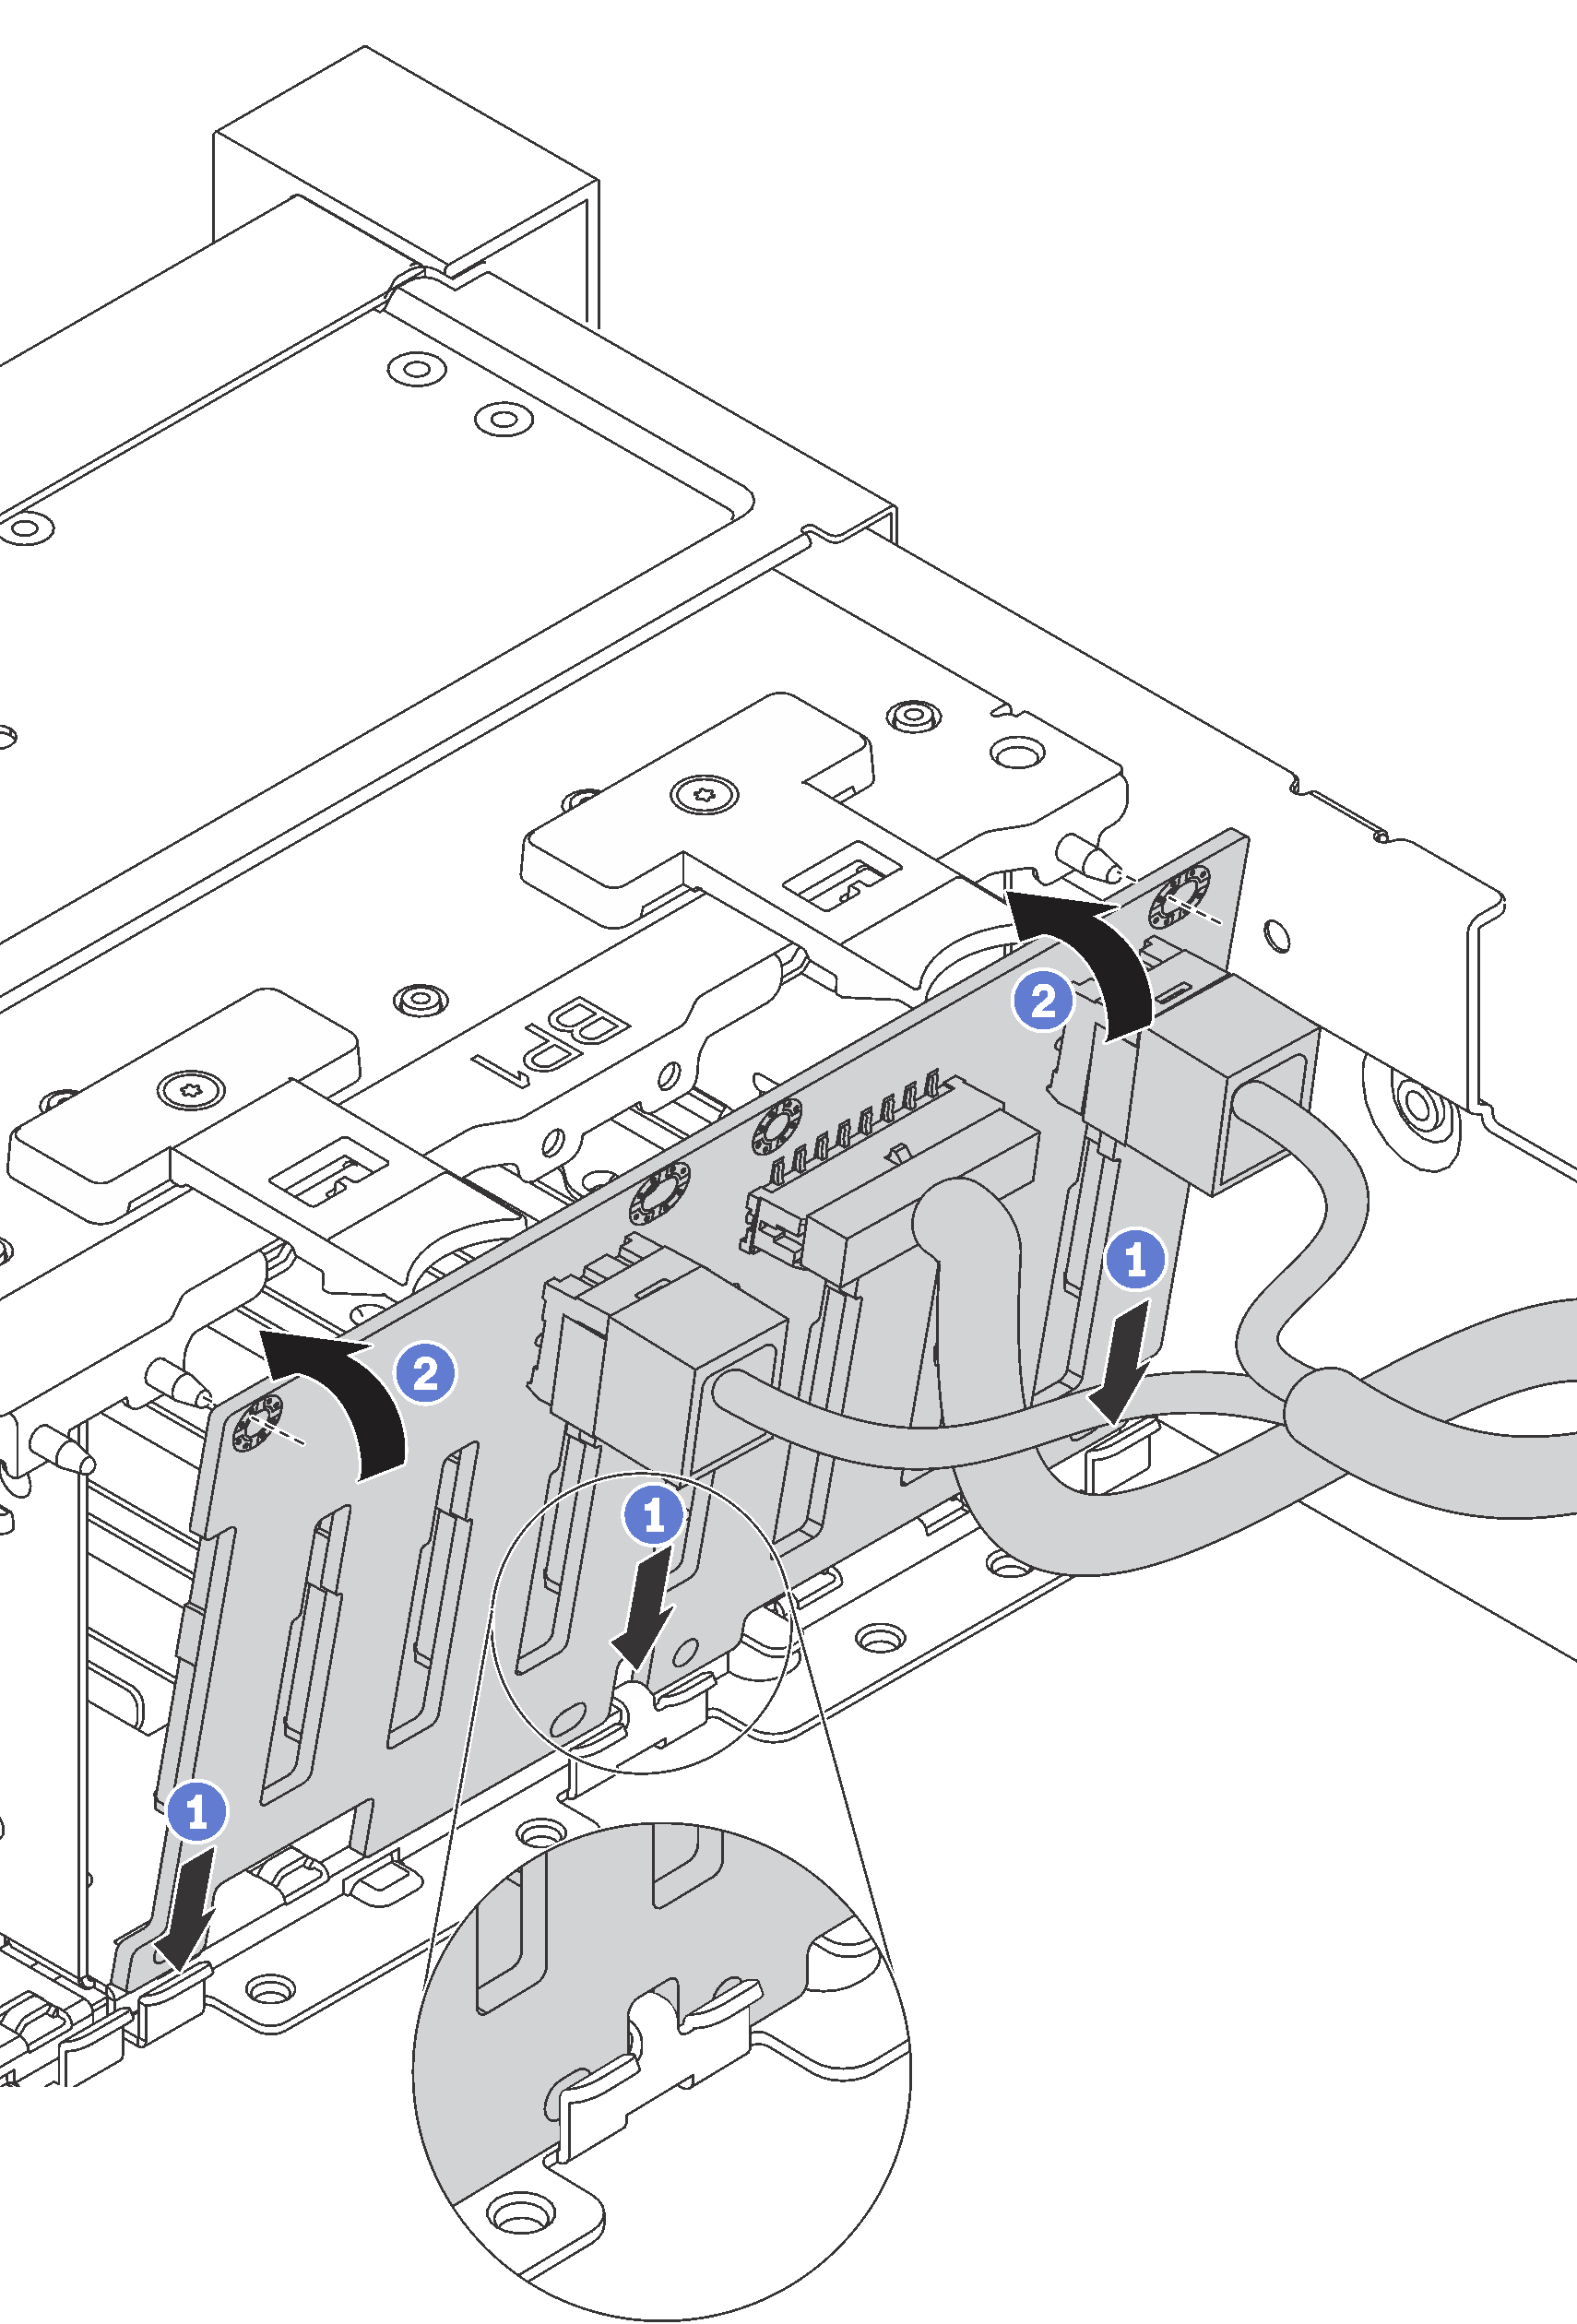
- Align the bottom of the backplane in the slots on the bottom of the chassis. Then, rotate the backplane to vertical position and align the holes in the backplane with the pins on the chassis and press the backplane into position. The release tabs will secure the backplane in place.Figure 1. 2.5-inch-drive backplane installation
After installing the 2.5-inch-drive backplane:
Reinstall all the drives and fillers (if any) into the drive bays. See Install a hot-swap drive.
Complete the parts replacement. See Completing the parts replacement.
Give documentation feedback