M.2-Laufwerkbaugruppe zusammenfügen
Führen Sie die Anweisungen in diesem Abschnitt aus, um eine M.2-Laufwerkbaugruppe zusammenzubauen.
Zu dieser Aufgabe
Lesen Sie Installationsrichtlinien und Sicherheitsprüfungscheckliste, um sicherzustellen, dass Sie sicher arbeiten.
Schalten Sie den Server und die Peripheriegeräte aus und trennen Sie alle Netzkabel und alle externen Kabel. Siehe Server ausschalten.
Vermeiden Sie den Kontakt mit statischen Aufladungen. Diese können zu einem Systemstopp und Datenverlust führen. Belassen Sie elektrostatisch empfindliche Komponenten bis zur Installation in ihren antistatischen Schutzhüllen. Handhaben Sie diese Einheiten mit einem Antistatikarmband oder einem anderen Erdungssystem.
Vorgehensweise
- Installieren Sie ggf. einen neuen Kühlkörper im M.2-Laufwerk.
- Bevor Sie einen neuen Kühlkörper im M.2-Laufwerk einbauen, ziehen Sie die Folien auf den Wärmepads ab.Abbildung 1. Abziehen der Folie
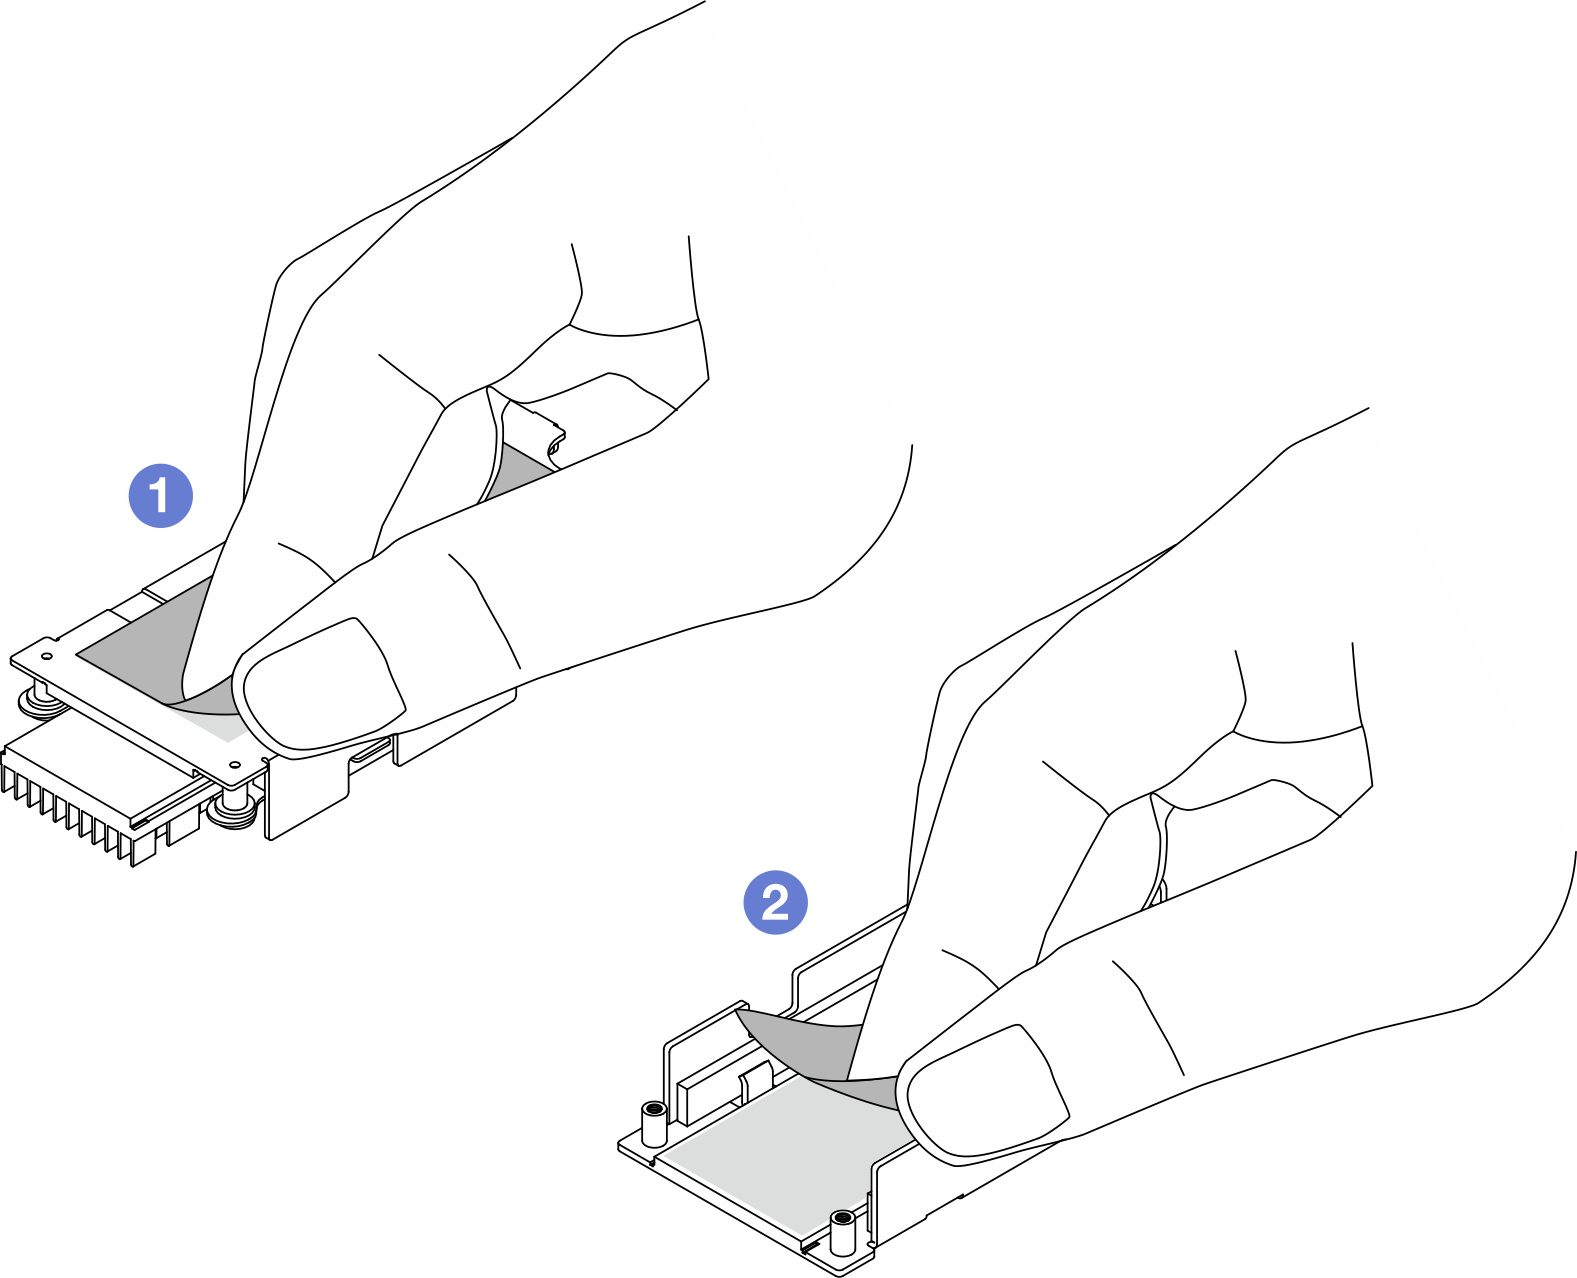
 Ziehen Sie die Folie vom Wärmepad des Kühlkörpers ab.
 Ziehen Sie die Folie vom Thermopad des Einbaurahmens ab.
- Kombinieren Sie Kühlkörper und M.2-Laufwerk.Abbildung 2. Installieren eines M.2-Laufwerks
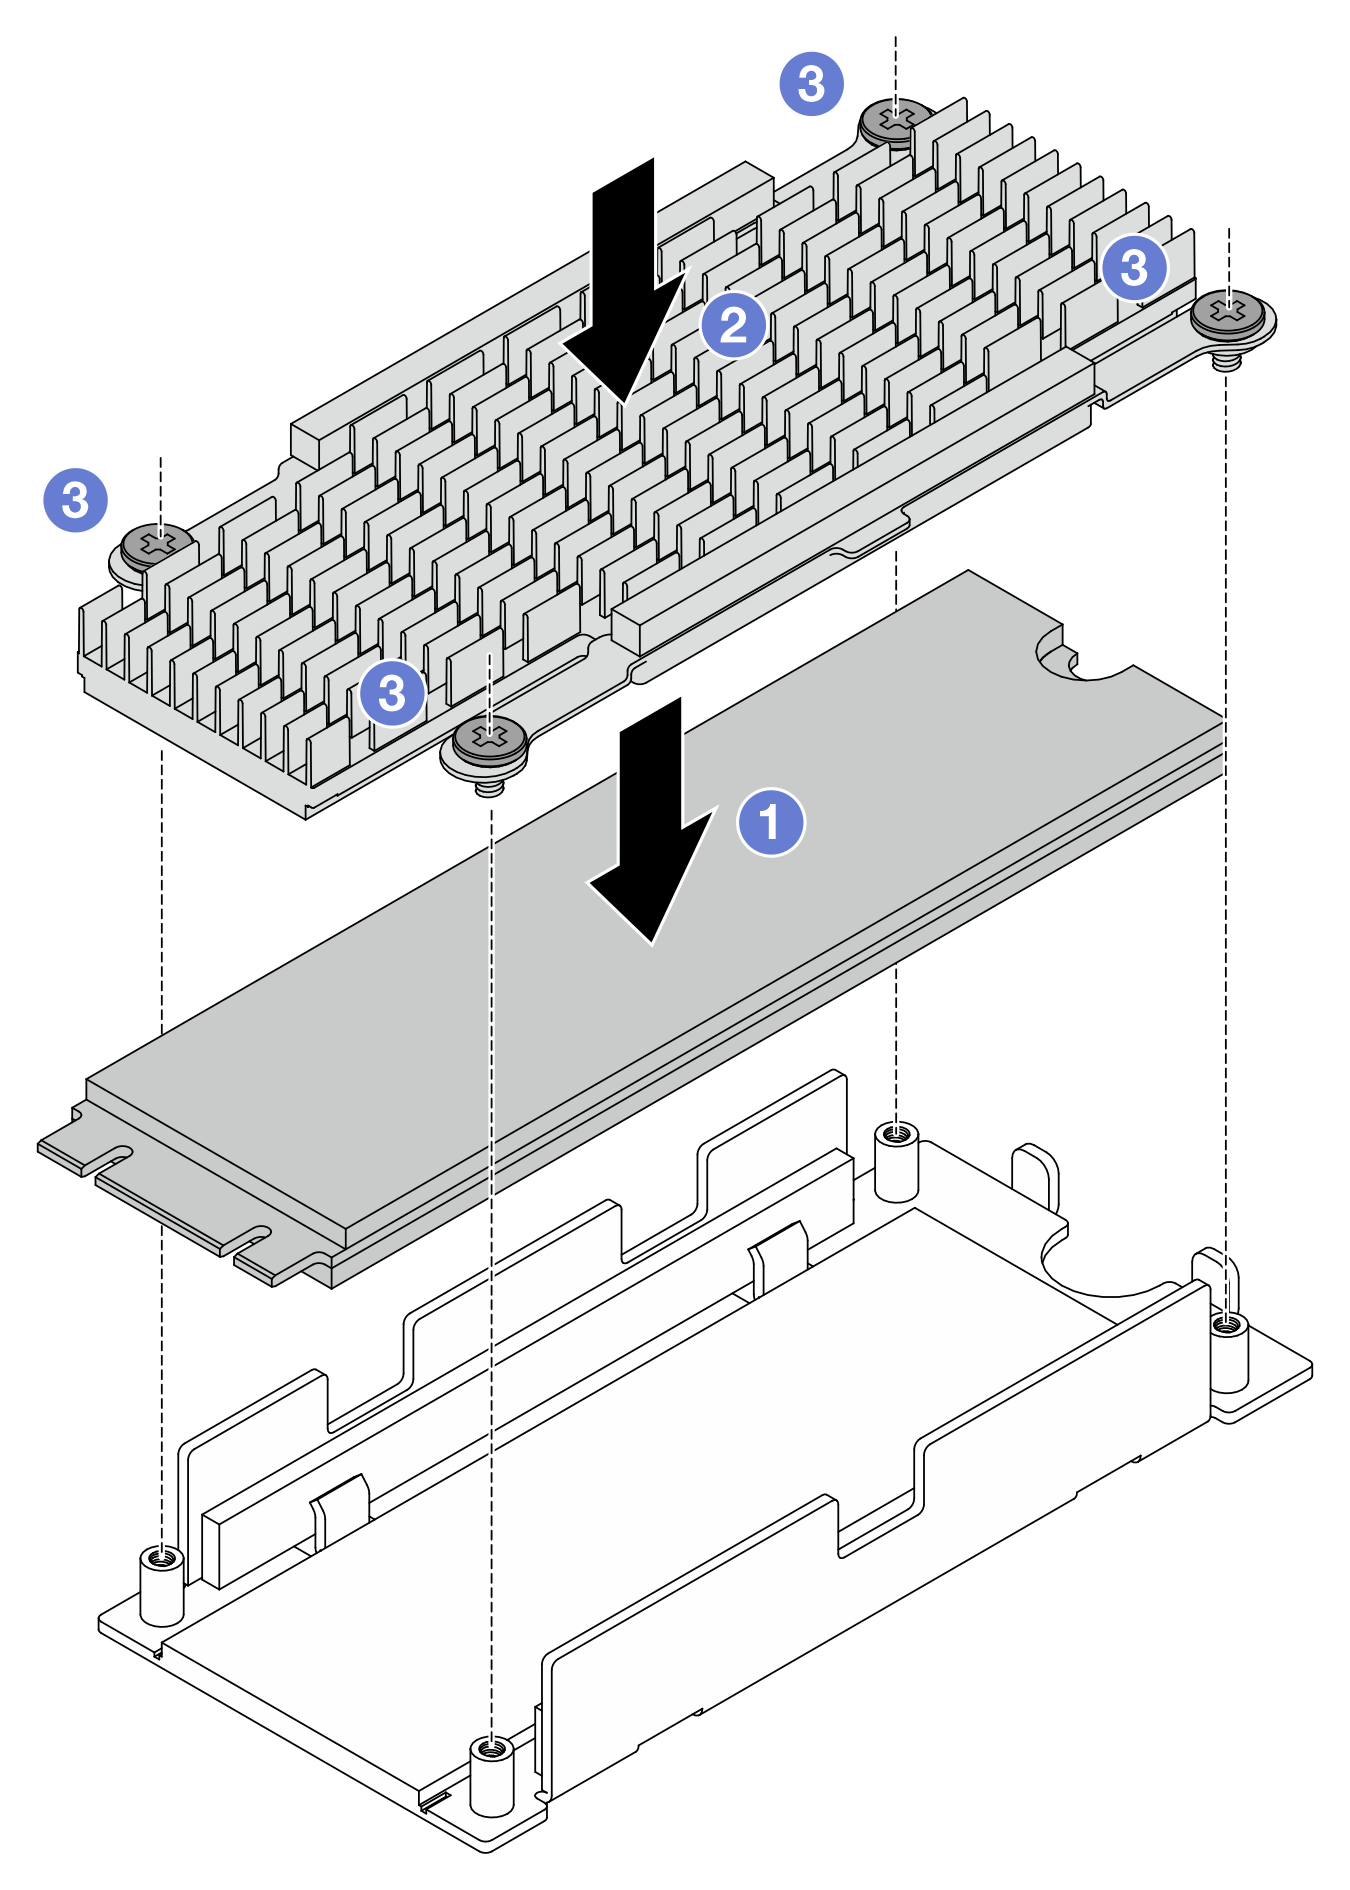
- Positionieren Sie das M.2-Laufwerk auf der Bodenplatte.
- Richten Sie den Kühlkörper an den Führungsstiften auf der Bodenplatte aus.
 Ziehen Sie vier Schrauben fest, um das Laufwerk und den Kühlkörper zu befestigen.
- Bevor Sie einen neuen Kühlkörper im M.2-Laufwerk einbauen, ziehen Sie die Folien auf den Wärmepads ab.
- Installieren Sie den M.2-Interposer im Einbaurahmen.Abbildung 3. Installieren des M.2-Interposers
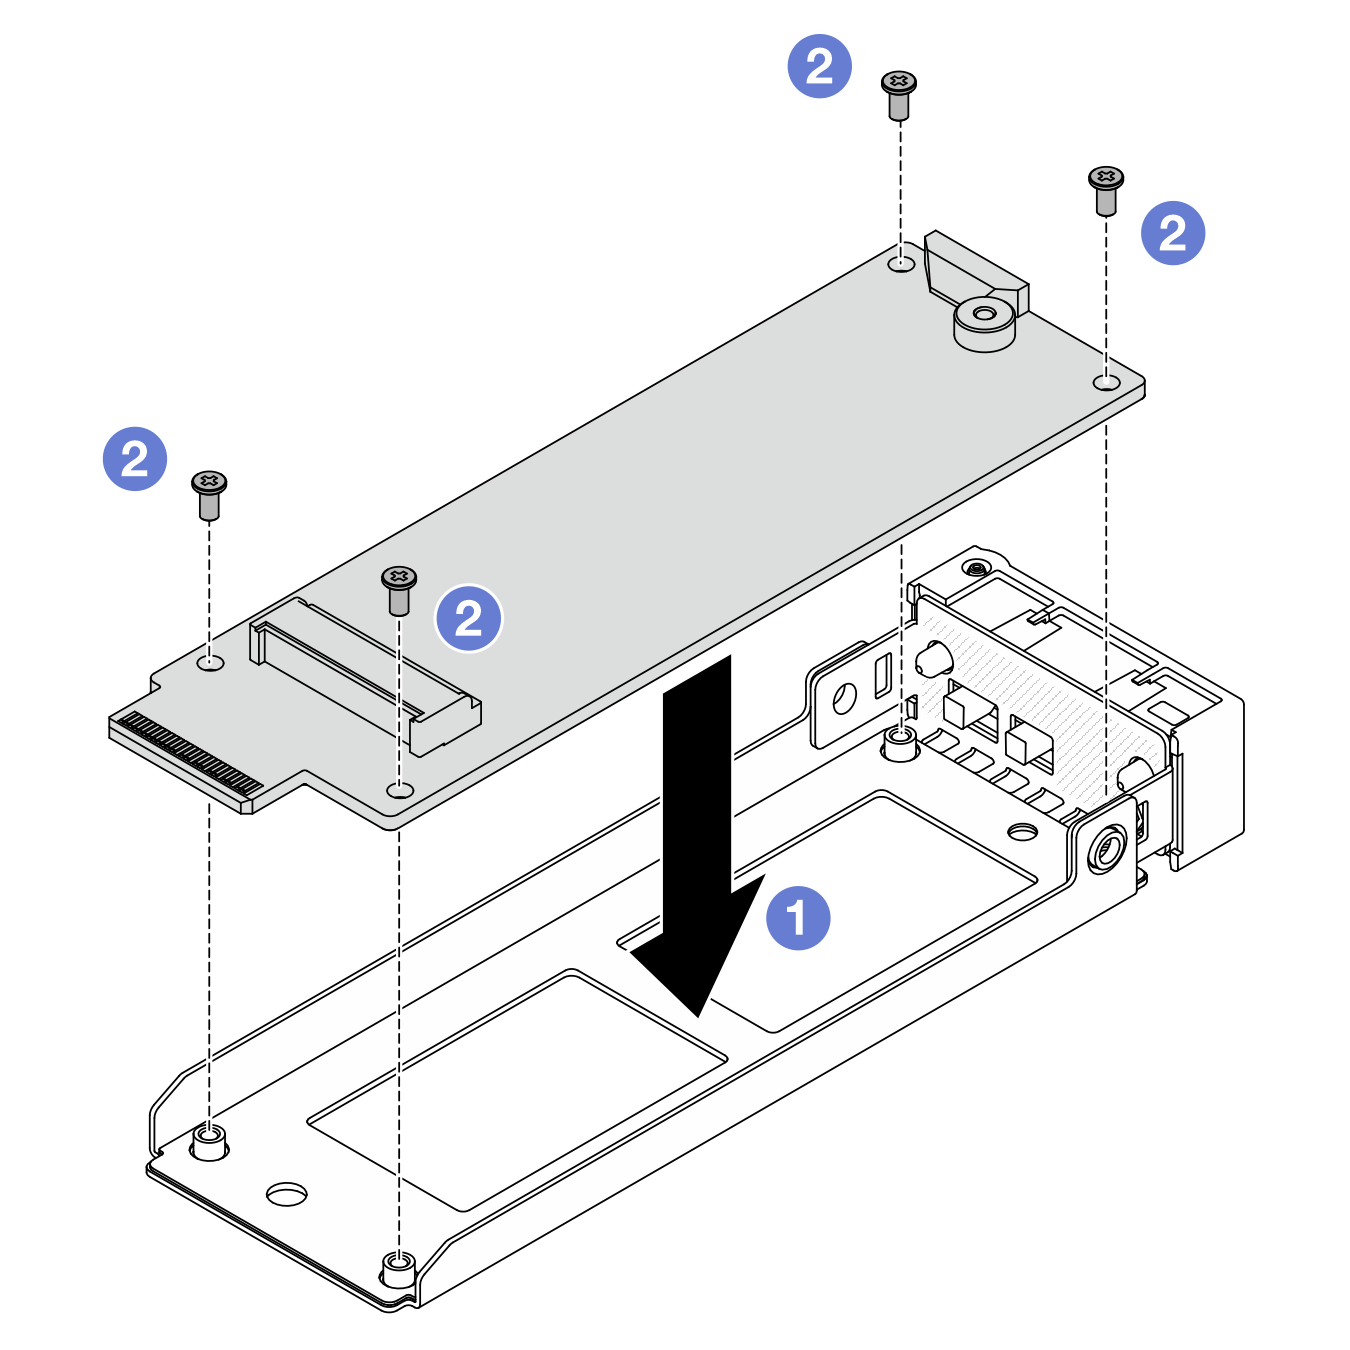
- Richten Sie den Interposer an den Führungsstiften des Einbaurahmens aus.
- Ziehen Sie vier Schrauben an, um den Interposer zu befestigen.
- Installieren Sie das M.2-Laufwerk mit Kühlkörper im Interposer.Abbildung 4. Installieren des M.2-Laufwerks mit Kühlkörper
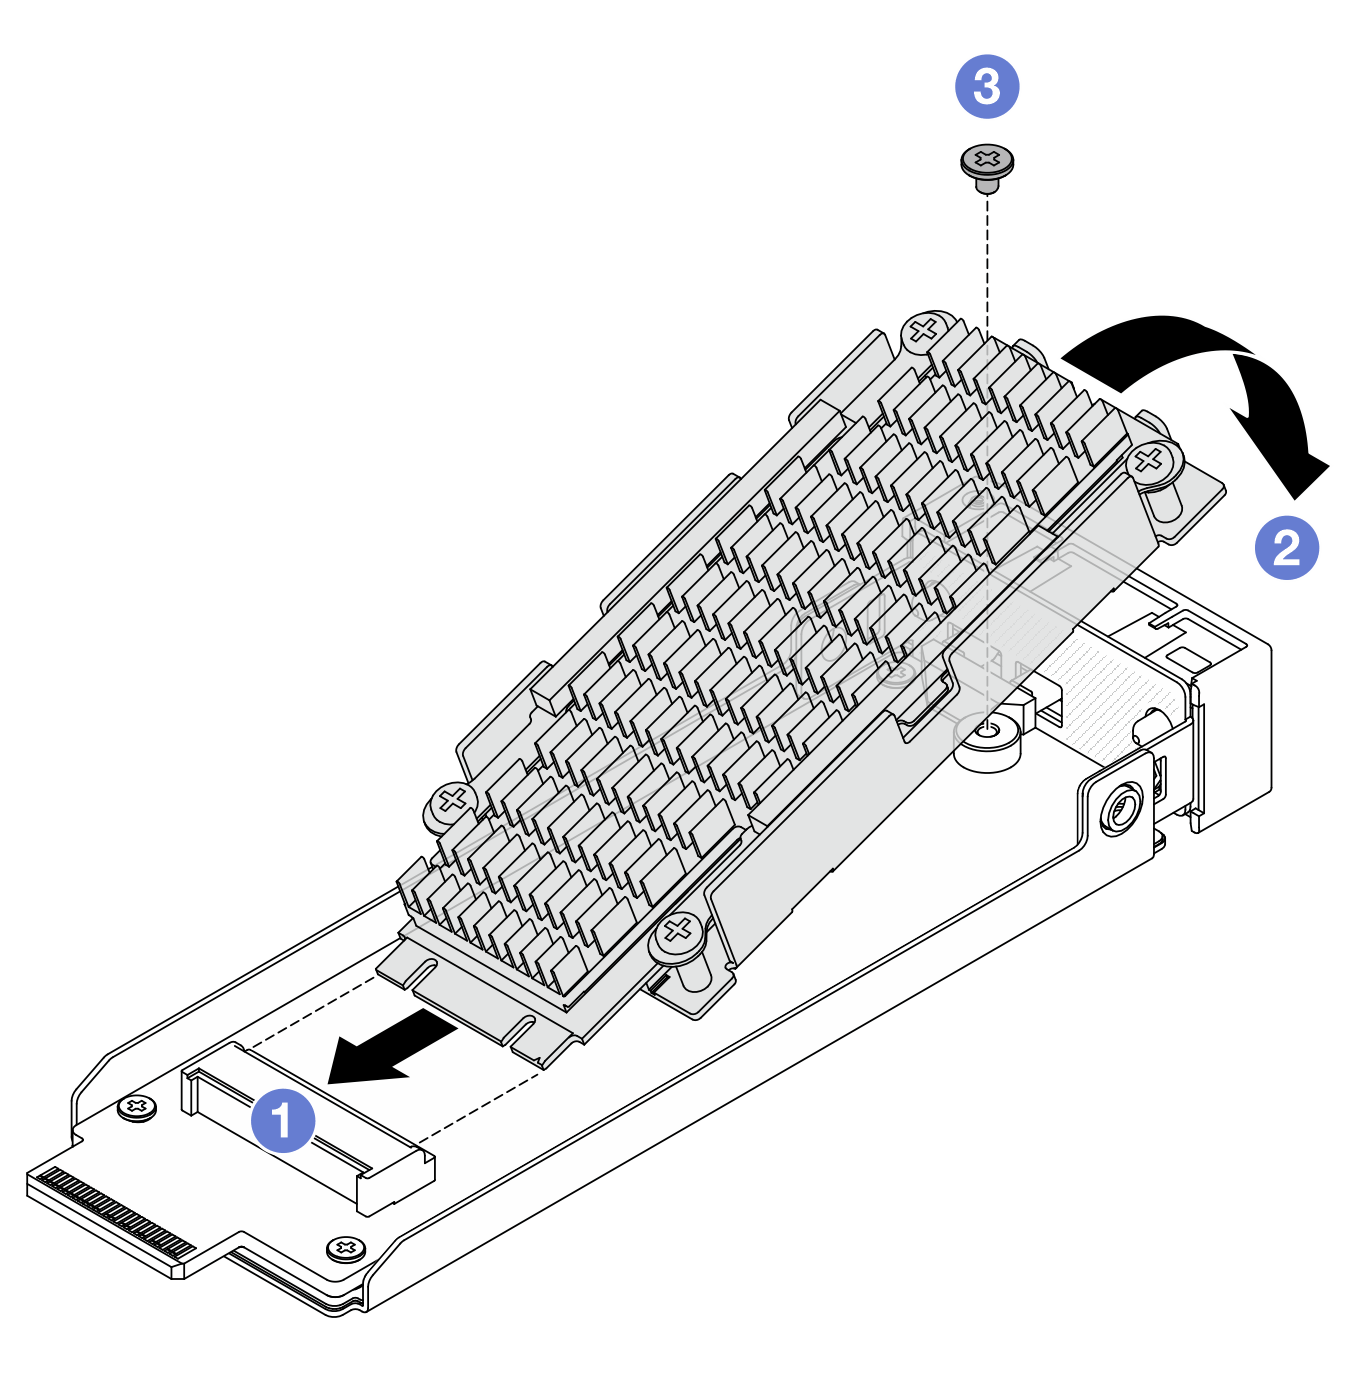
- Halten Sie das M.2-Laufwerk mit Kühlkörper schräg und setzen Sie das Laufwerk in den Interposer-Steckplatz ein.
- Drücken Sie das Laufwerk nach unten auf den Interposer.
- Ziehen Sie eine Schraube an, um das Laufwerk zu fixieren.
Schließen Sie den Austausch von Komponenten ab, (siehe Austausch von Komponenten abschließen).
Demo-Video