E3.S-Laufwerkhalterung und -Rückwandplatine installieren
Führen Sie die Anweisungen in diesem Abschnitt aus, um eine E3.S-Laufwerkhalterung und -Rückwandplatine zu installieren.
Zu dieser Aufgabe
Lesen Sie Installationsrichtlinien und Sicherheitsprüfungscheckliste, um sicherzustellen, dass Sie sicher arbeiten.
Schalten Sie den Server und die Peripheriegeräte aus und trennen Sie alle Netzkabel und alle externen Kabel. Siehe Server ausschalten.
Vermeiden Sie den Kontakt mit statischen Aufladungen. Diese können zu einem Systemstopp und Datenverlust führen. Belassen Sie elektrostatisch empfindliche Komponenten bis zur Installation in ihren antistatischen Schutzhüllen. Handhaben Sie diese Einheiten mit einem Antistatikarmband oder einem anderen Erdungssystem.
Vorgehensweise
- Installieren Sie die Rückwandplatinenbaugruppe an der E3.S-1T-Halterung.
 Installieren Sie die Rückwandplatinenbaugruppe am Rahmen.
 Ziehen Sie vier Schrauben an, um die Rückwandplatinenbaugruppe zu befestigen.
Abbildung 1. Installieren der Rückwandplatinenbaugruppe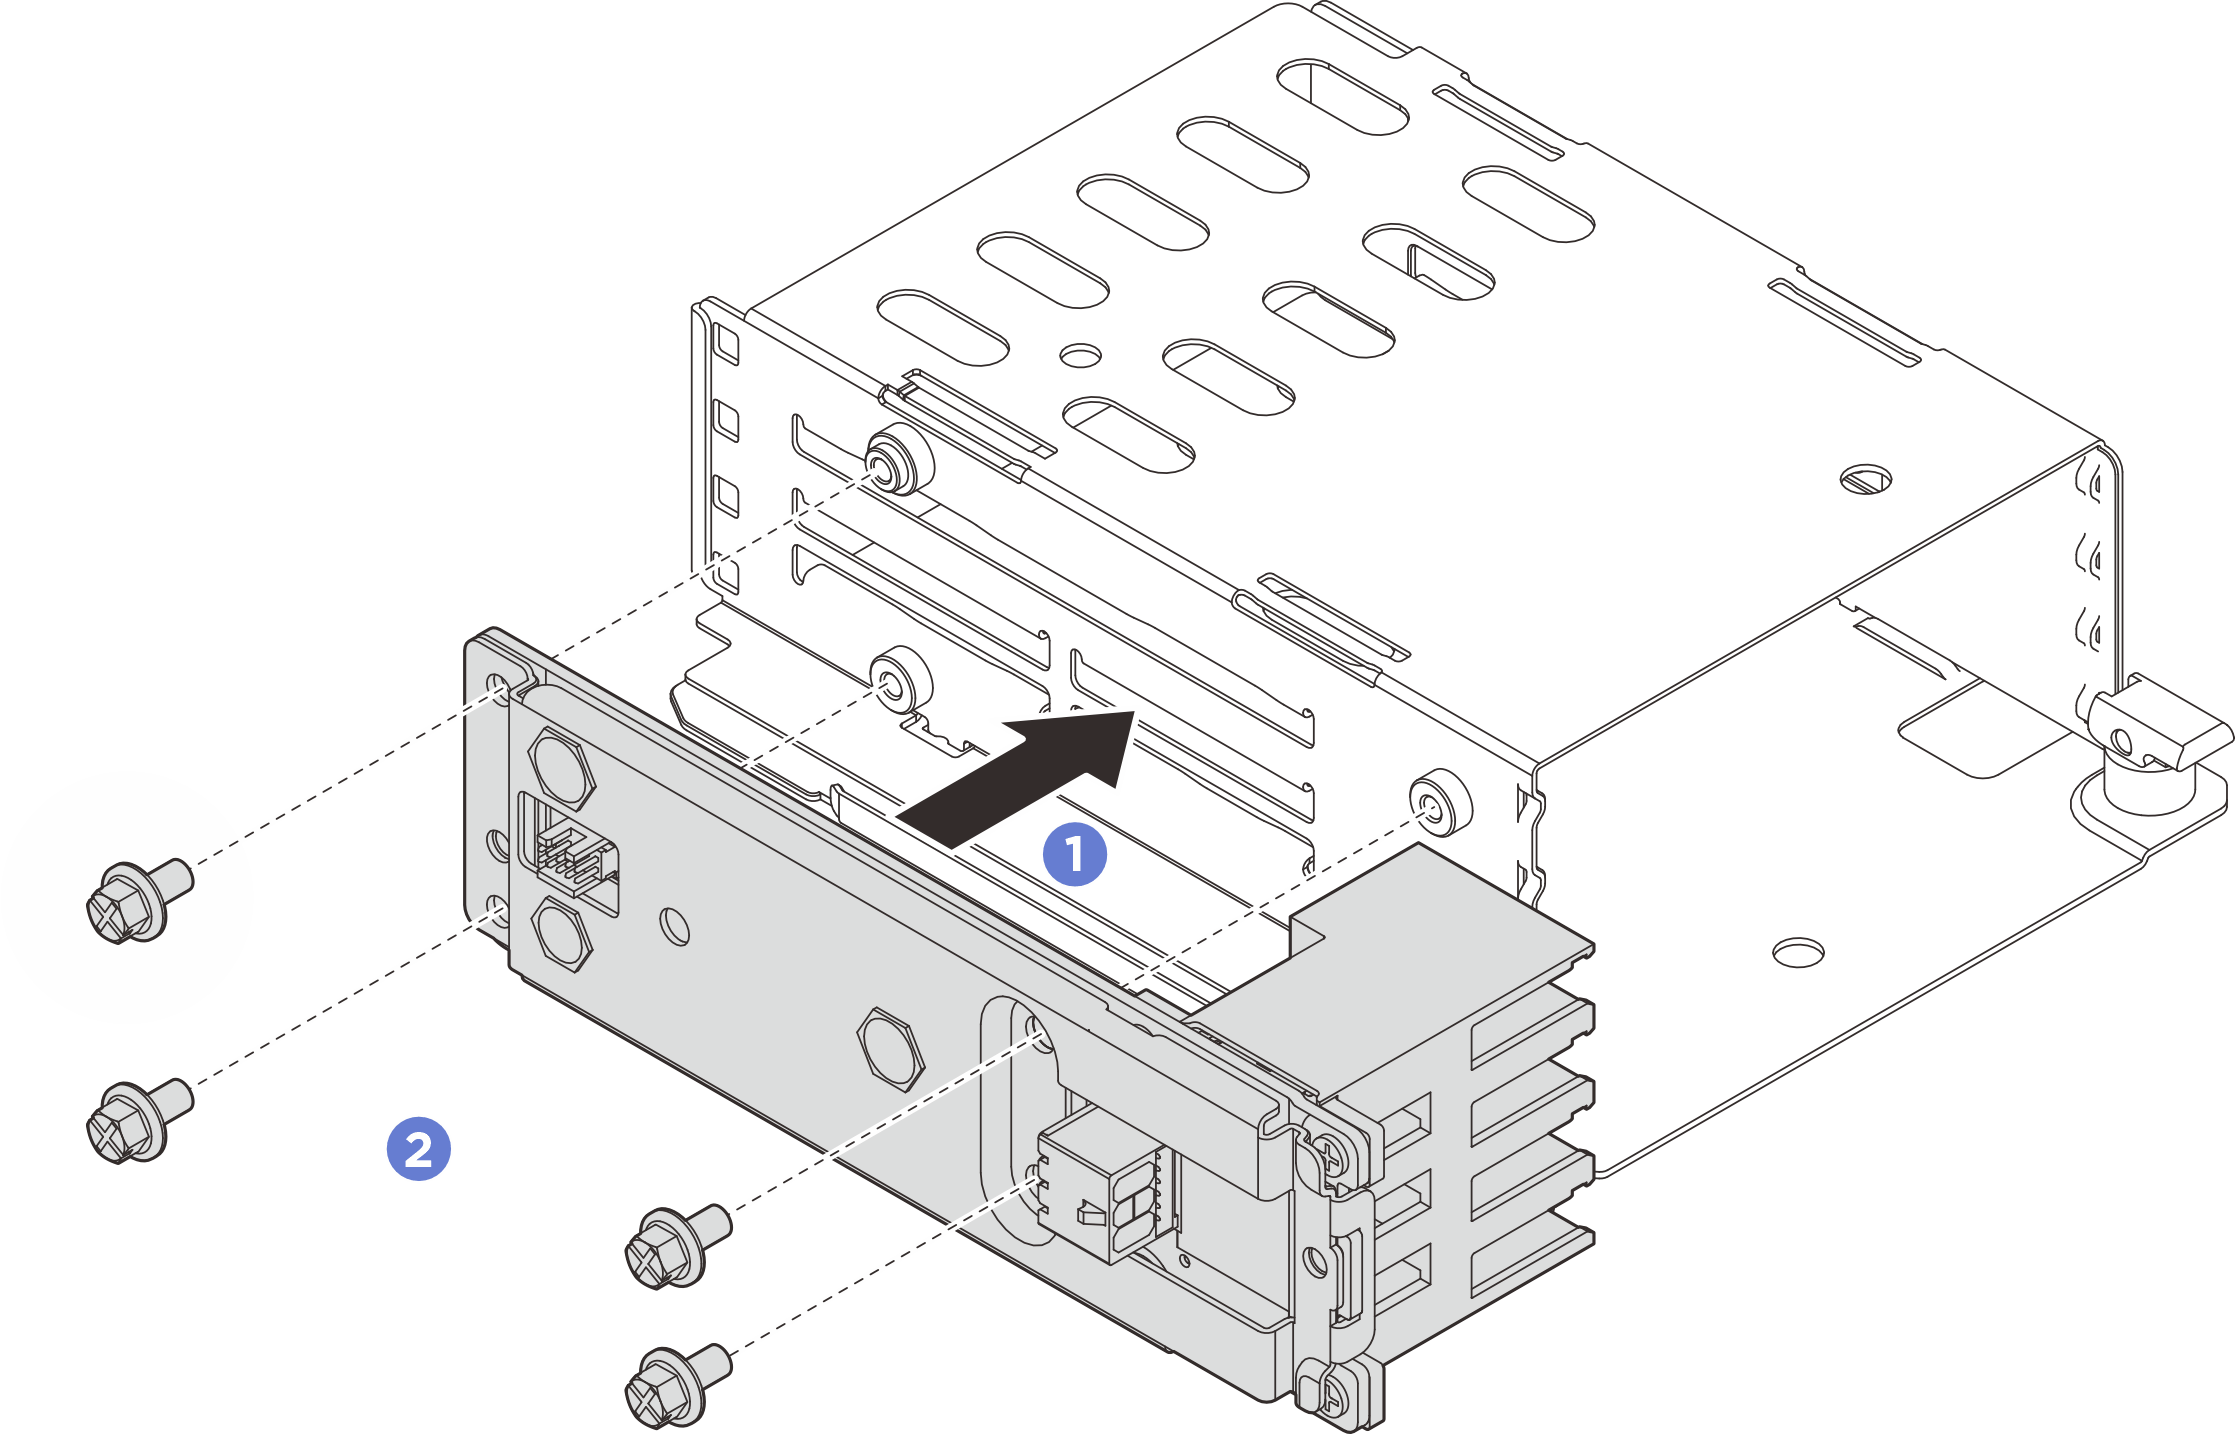
- Installieren Sie die E3.S-1T-Halterung.
- Stellen Sie sicher, dass sich die Verriegelung in geöffneter Position befindet.
- Schieben Sie den Rahmen in das Gehäuse, bis der Führungsstift am Gehäuse einrastet.
 Drücken Sie die Verriegelung nach unten, um den Rahmen zu sichern.
Abbildung 2. Installieren der E3.S-1T-Halterung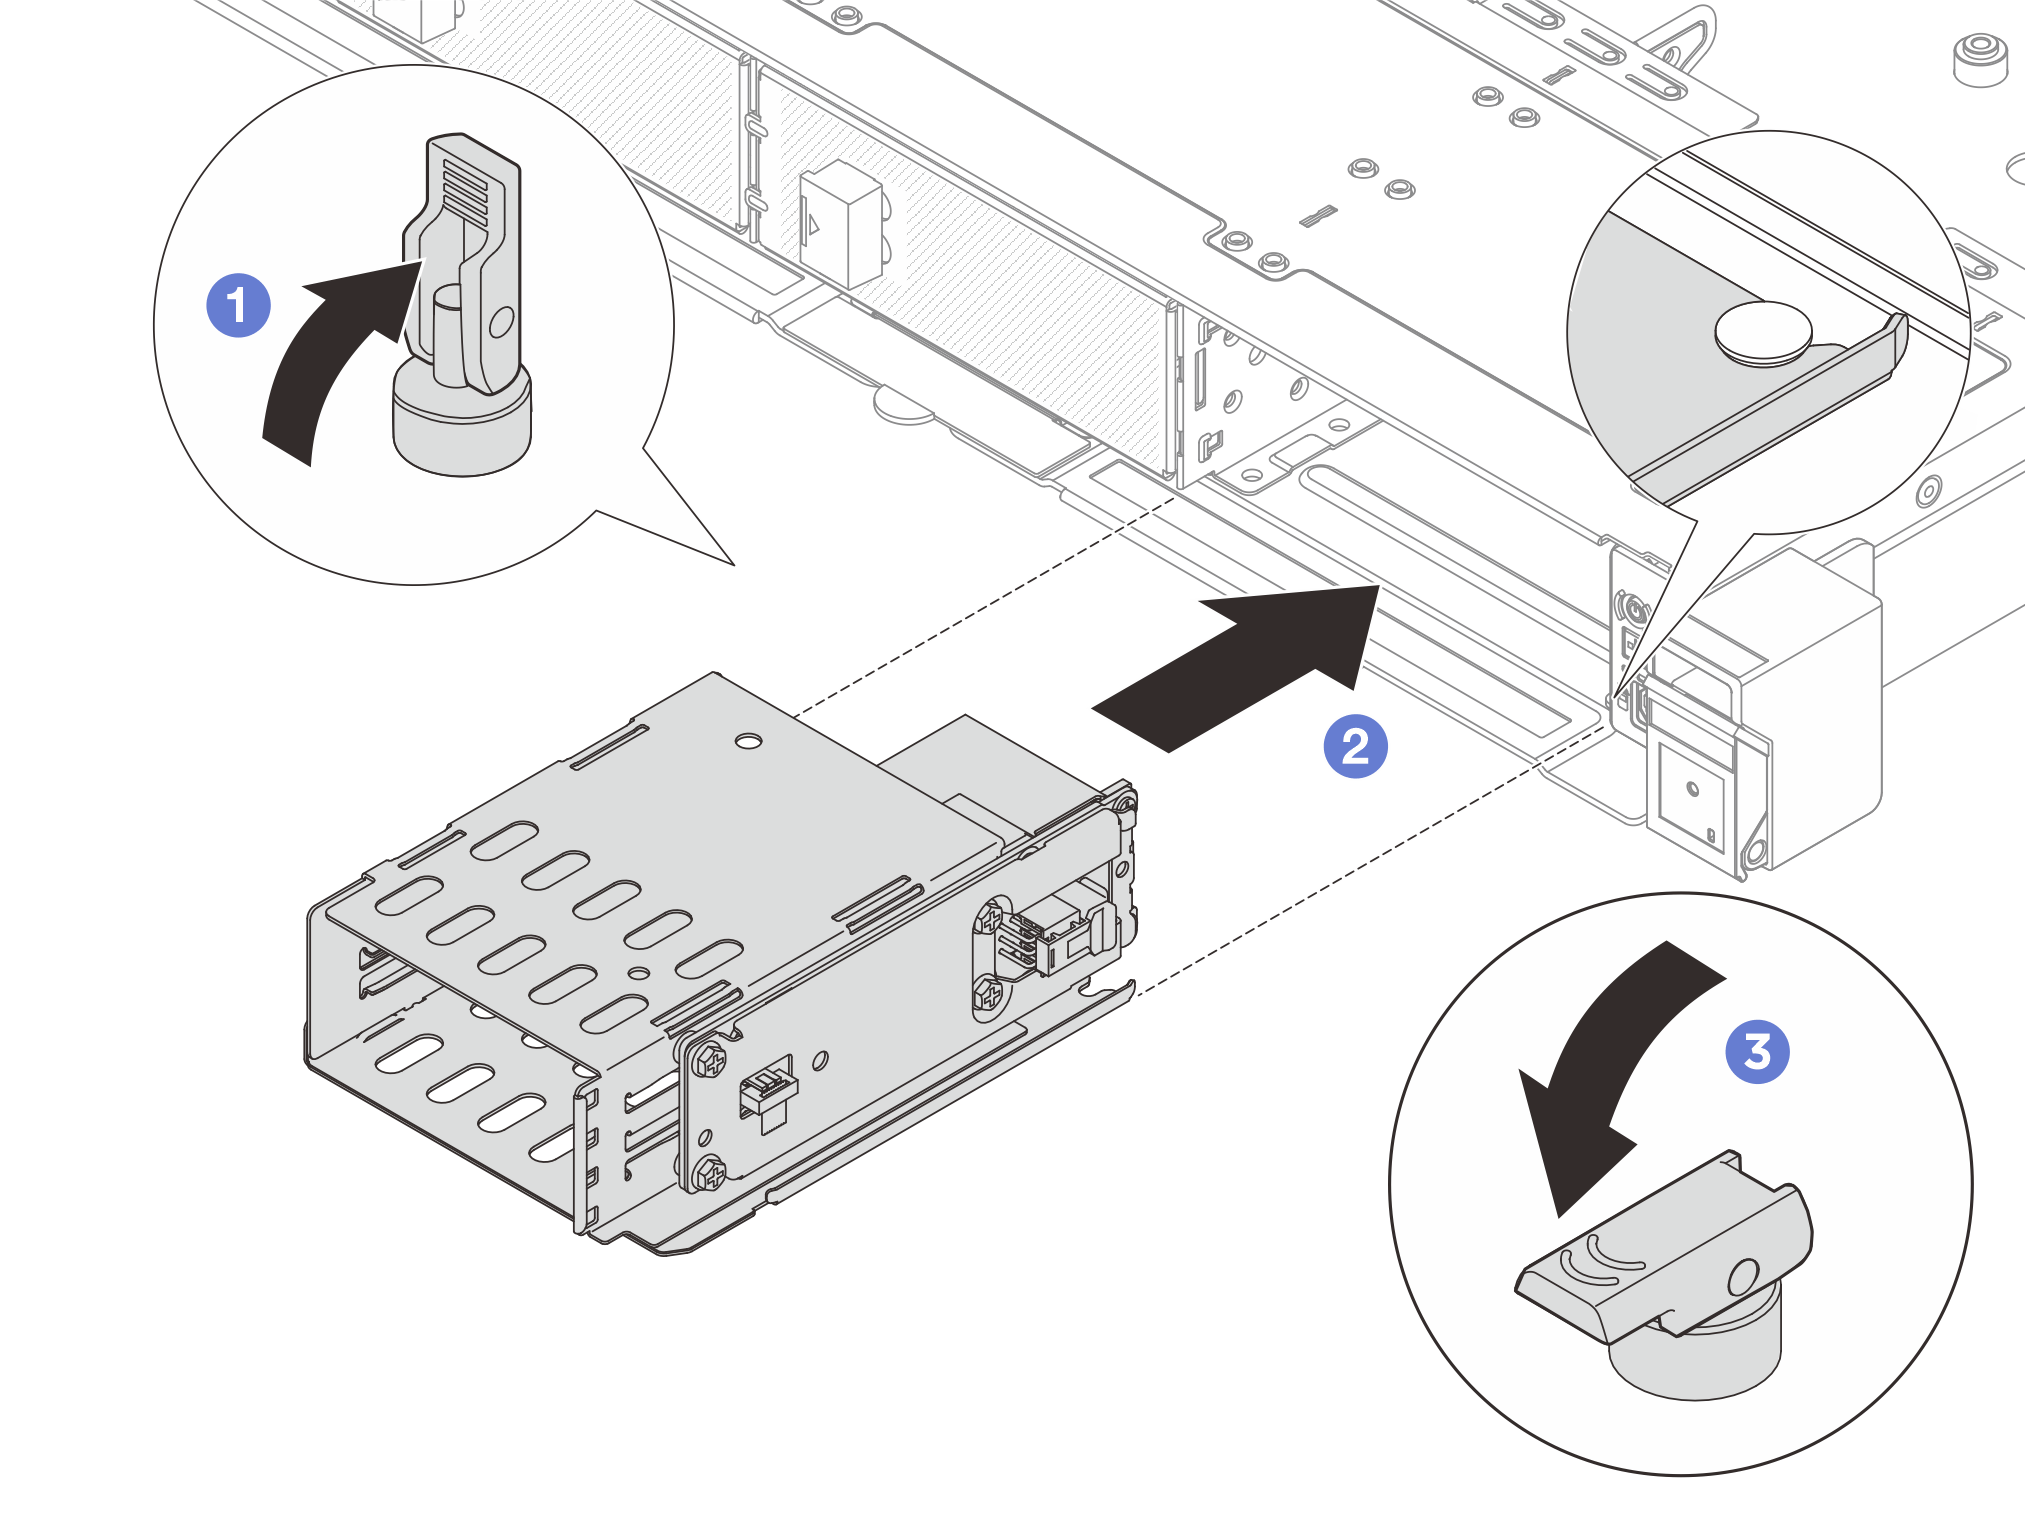
Nach dieser Aufgabe
Bringen Sie die Laufwerke/Laufwerkabdeckblenden und die E3.S-Blende wieder an. Siehe E3.S-Hot-Swap-Laufwerk installieren.
Schließen Sie den Austausch von Komponenten ab, (Informationen hierzu finden Sie im Abschnitt Austausch von Komponenten abschließen.)
Demo-Video