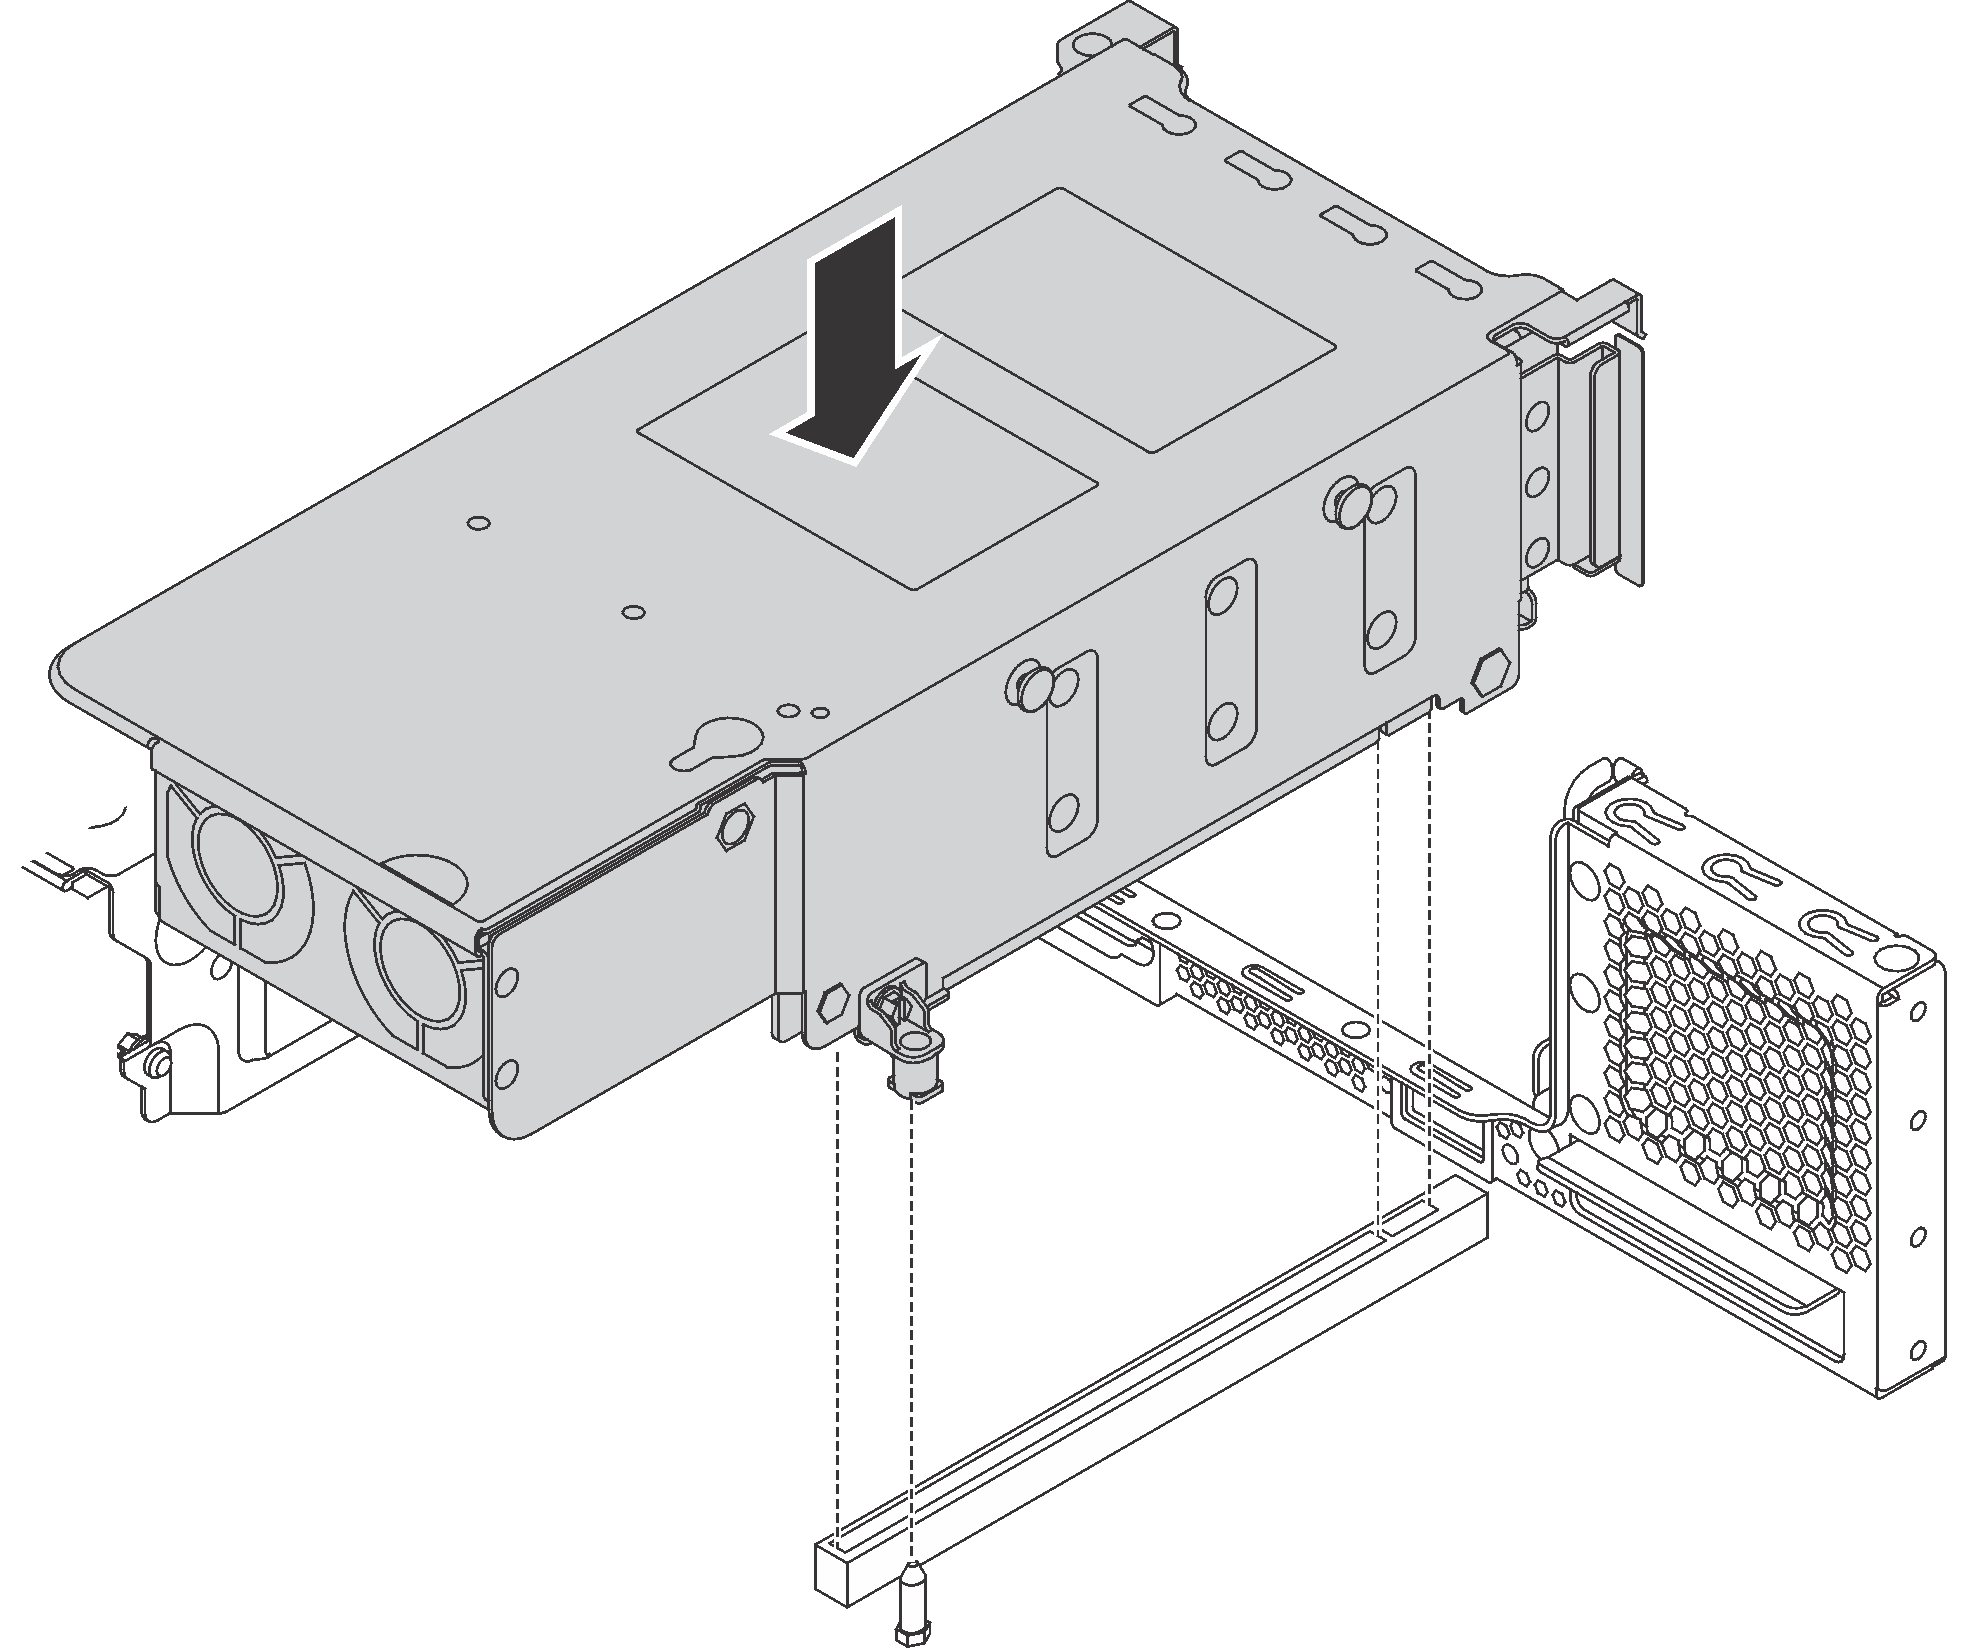
Install the rear hot-swap drive assembly
Use this information to install the rear hot-swap drive assembly.
Before installing the rear hot-swap drive assembly, touch the static-protective package that contains the new rear hot-swap drive assembly to any unpainted surface on the outside of the server. Then, take the new rear hot-swap drive assembly out of the package and place it on a static-protective surface.
Note
If you are installing the ThinkSystem SR650 Rear 3.5 HDD kit Without Fan (provided for Chinese Mainland only), the maximum supported processor TDP is 125 watts.
To install the rear hot-swap drive assembly, complete the following steps:
After installing the rear hot-swap drive assembly:
Reinstall the drives or drive fillers into the rear hot-swap drive assembly. See Install a hot-swap drive.
Complete the parts replacement. See Complete the parts replacement.
Give documentation feedback


