Installazione della scheda adattatore CX-7
Seguire le istruzioni riportate in questa sezione per installare la scheda adattatore CX-7. La procedura deve essere eseguita da un tecnico qualificato.
Informazioni su questa attività
Attenzione
- Leggere Linee guida per l'installazione ed Elenco di controllo per la sicurezza per assicurarsi di operare in sicurezza.
- Mettere in contatto l'involucro antistatico contenente il componente con qualsiasi superficie metallica non verniciata del server, quindi rimuoverlo dall'involucro e posizionarlo su una superficie antistatica.
Nota
Assicurarsi di disporre degli strumenti necessari elencati di seguito per sostituire correttamente il componente:
- Cacciavite a testa Torx T15
Download di firmware e driver: potrebbe essere necessario aggiornare il firmware o il driver dopo la sostituzione di un componente.
Visitare il sito Sito Web per il download di driver e software per ThinkSystem SR780a V3 per visualizzare gli aggiornamenti più recenti di firmware e driver per il server in uso.
Per ulteriori informazioni sugli strumenti di aggiornamento del firmware, vedere Aggiornamento del firmware.
Procedura
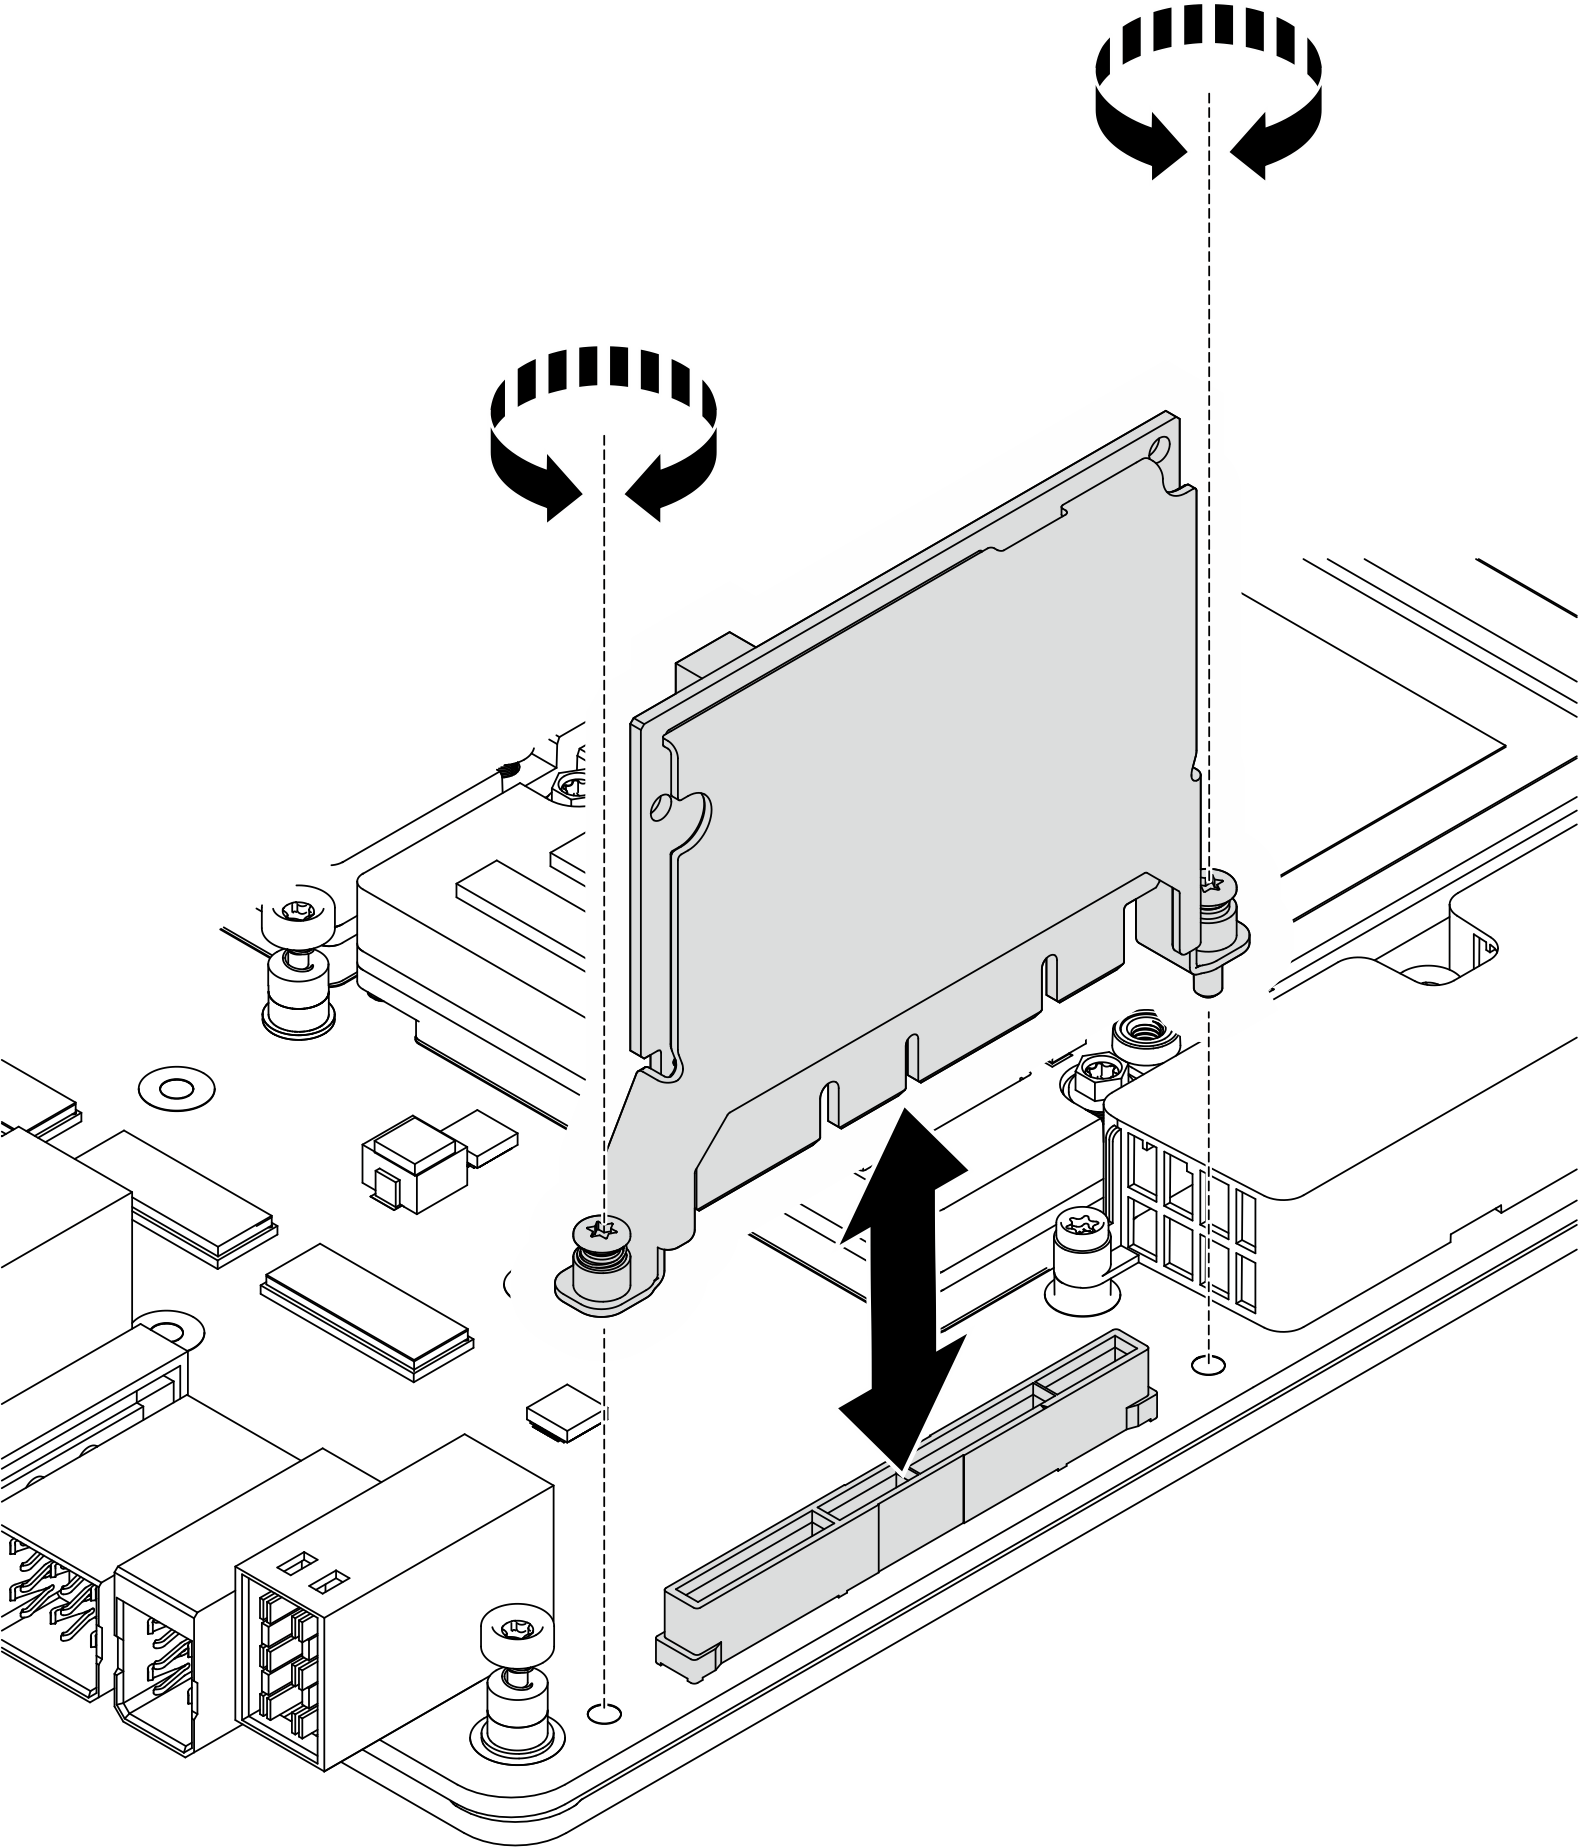
- Impostare il cacciavite su 0,59±0,059 newton metri, 5,22±0,522 pollici libbre e serrare le due viti Torx T15 per fissare la scheda adattatore CX-7.Figura 1. Installazione della scheda adattatore CX-7
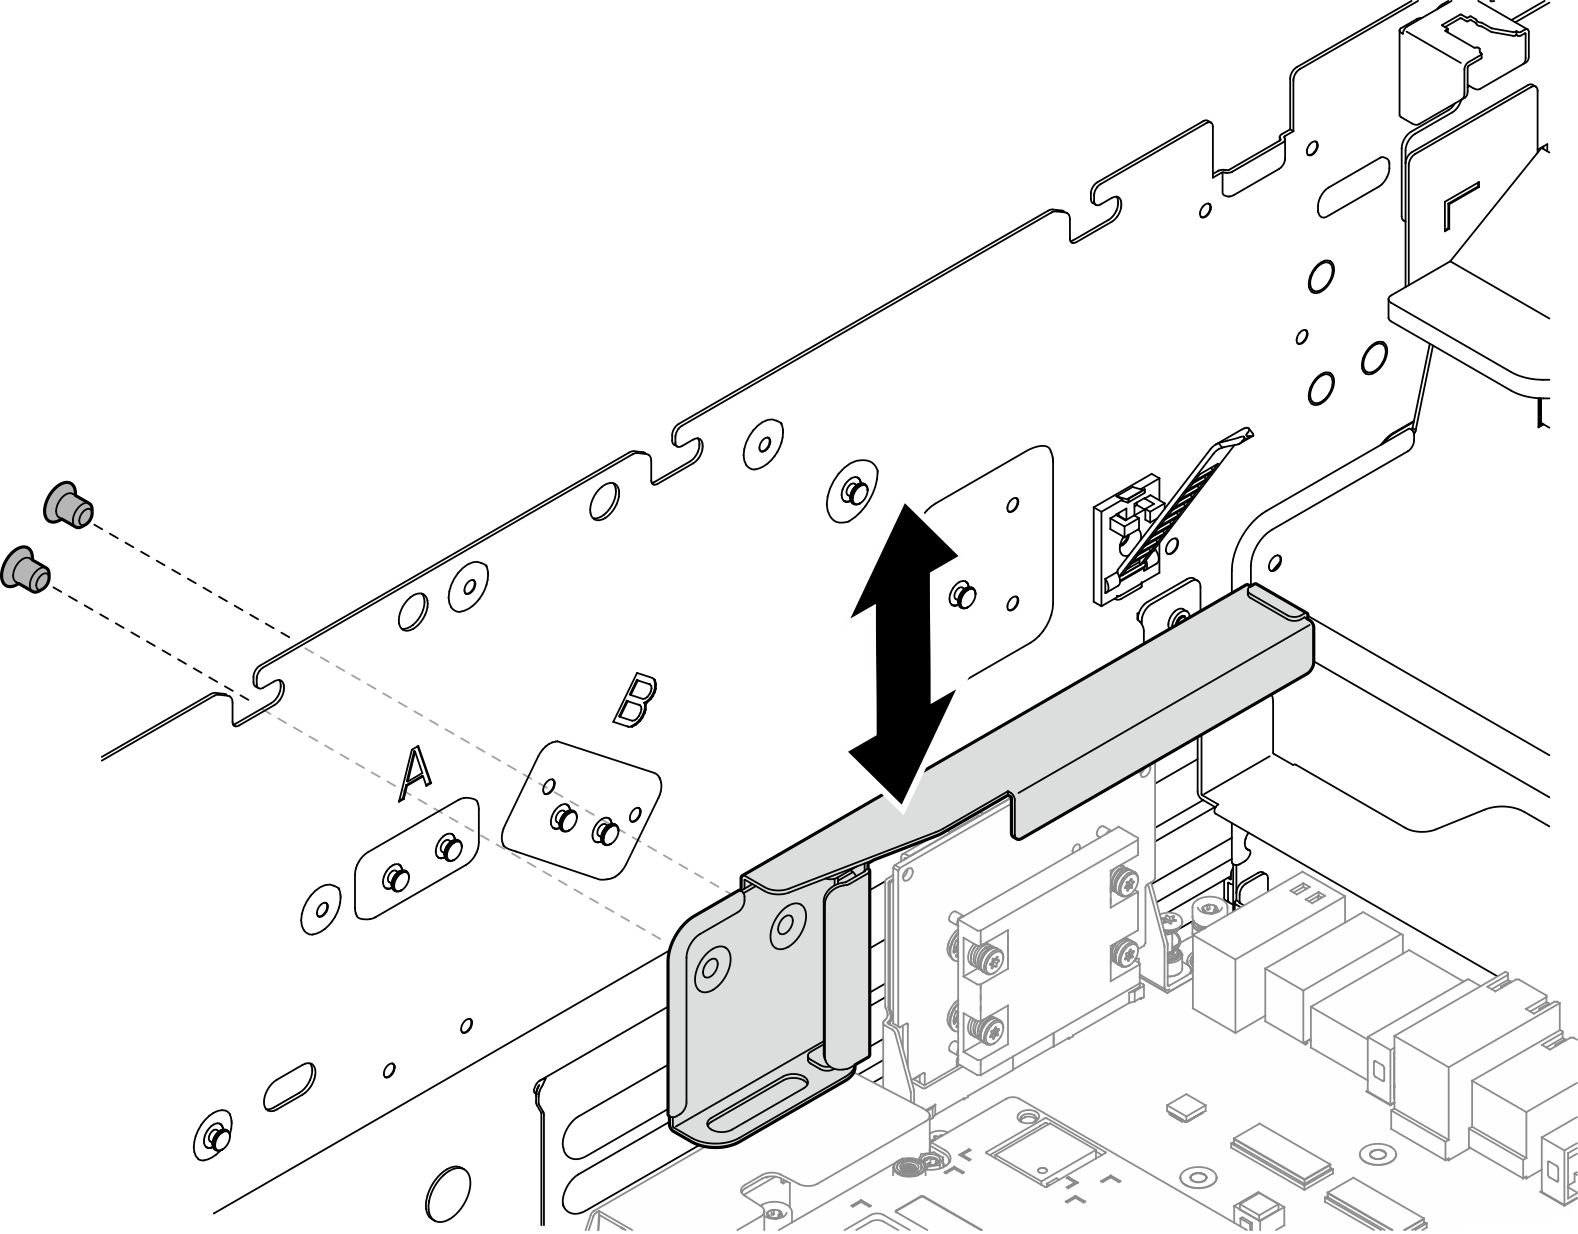
- Allineare la staffa di protezione della scheda adattatore CX-7 ai fori per viti corrispondenti, quindi stringere le due viti M3 (PH2, 2 M3, 0,5 newton metri, 4,3 pollici libbre) per fissare la staffa allo chassis.Figura 2. Installazione della staffa di protezione della scheda adattatore CX-7
Dopo aver terminato
- Ricollegare tutti i cavi precedentemente scollegati. Vedere Instradamento dei cavi interni.
- Reinstallare il complesso di alimentazione. Vedere Installazione del complesso di alimentazione.
- Reinstallare il complesso CPU. Vedere Installazione del complesso CPU.
- Reinstallare il coperchio superiore posteriore. Vedere Installazione del coperchio superiore posteriore.
- Reinstallare il coperchio superiore anteriore. Vedere Installazione del coperchio superiore anteriore.
- Completare le operazioni di sostituzione dei componenti. Vedere Completamento delle operazioni di sostituzione dei componenti.
Envoyer des commentaires