Remove the 4U PCIe expansion tray

Follow instructions in this section to remove the 4U PCIe expansion tray.

About this task

Attention
  • Go over Installation Guidelines to ensure that you work safely.

  • Turn off the server and peripheral devices and disconnect the power cords and all external cables (see Power off the server).

  • If the server is installed in a rack, slide the server out on its rack slide rails to gain access to the top cover, or remove the server from the rack.

Procedure

  1. Make preparations for this task.
    1. Remove the top cover (see Remove the top cover).
    2. Disconnect the following cables.
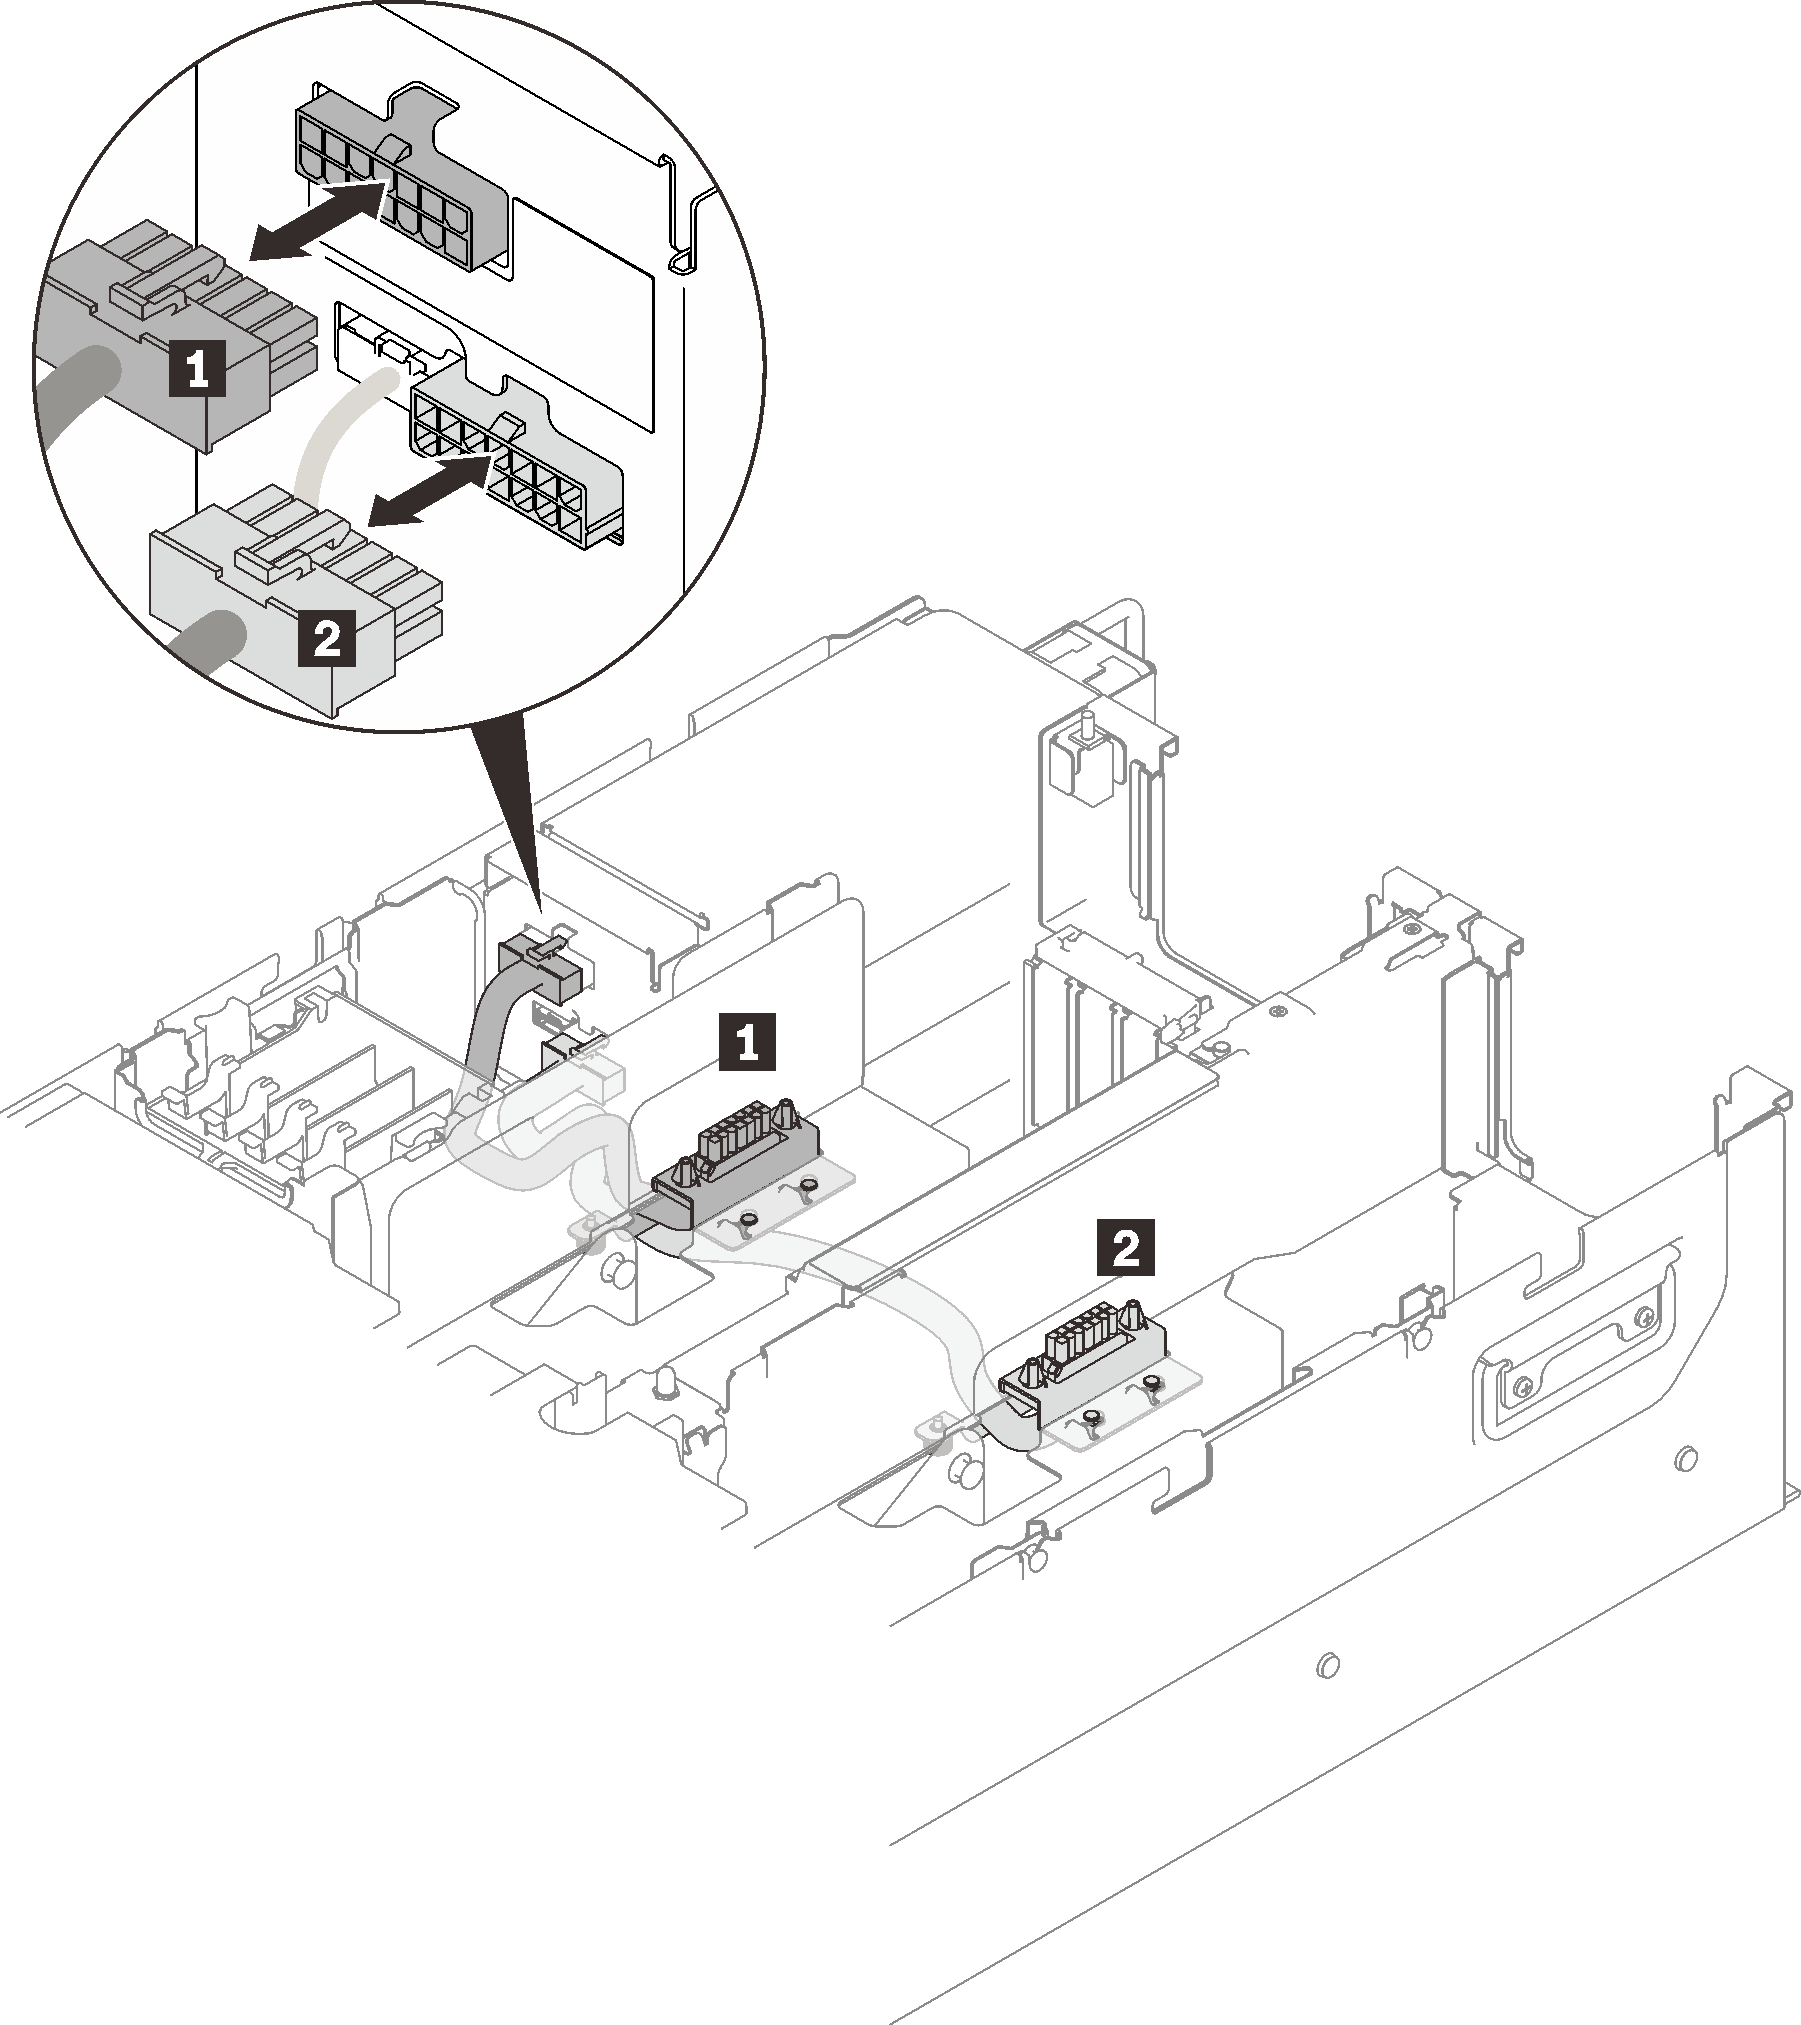
      1. Disconnect both 4U PCIe riser power cables from the power backplane.
        Figure 1. Disconnecting 4U PCIe riser power cables

        Table 1. 4U PCIe riser power cables
        LengthFromTo
        1 230 mm (shorter)PCIe riser cage 2upper power connector
        2 320 mm (longer)PCIe riser cage 1lower power connector
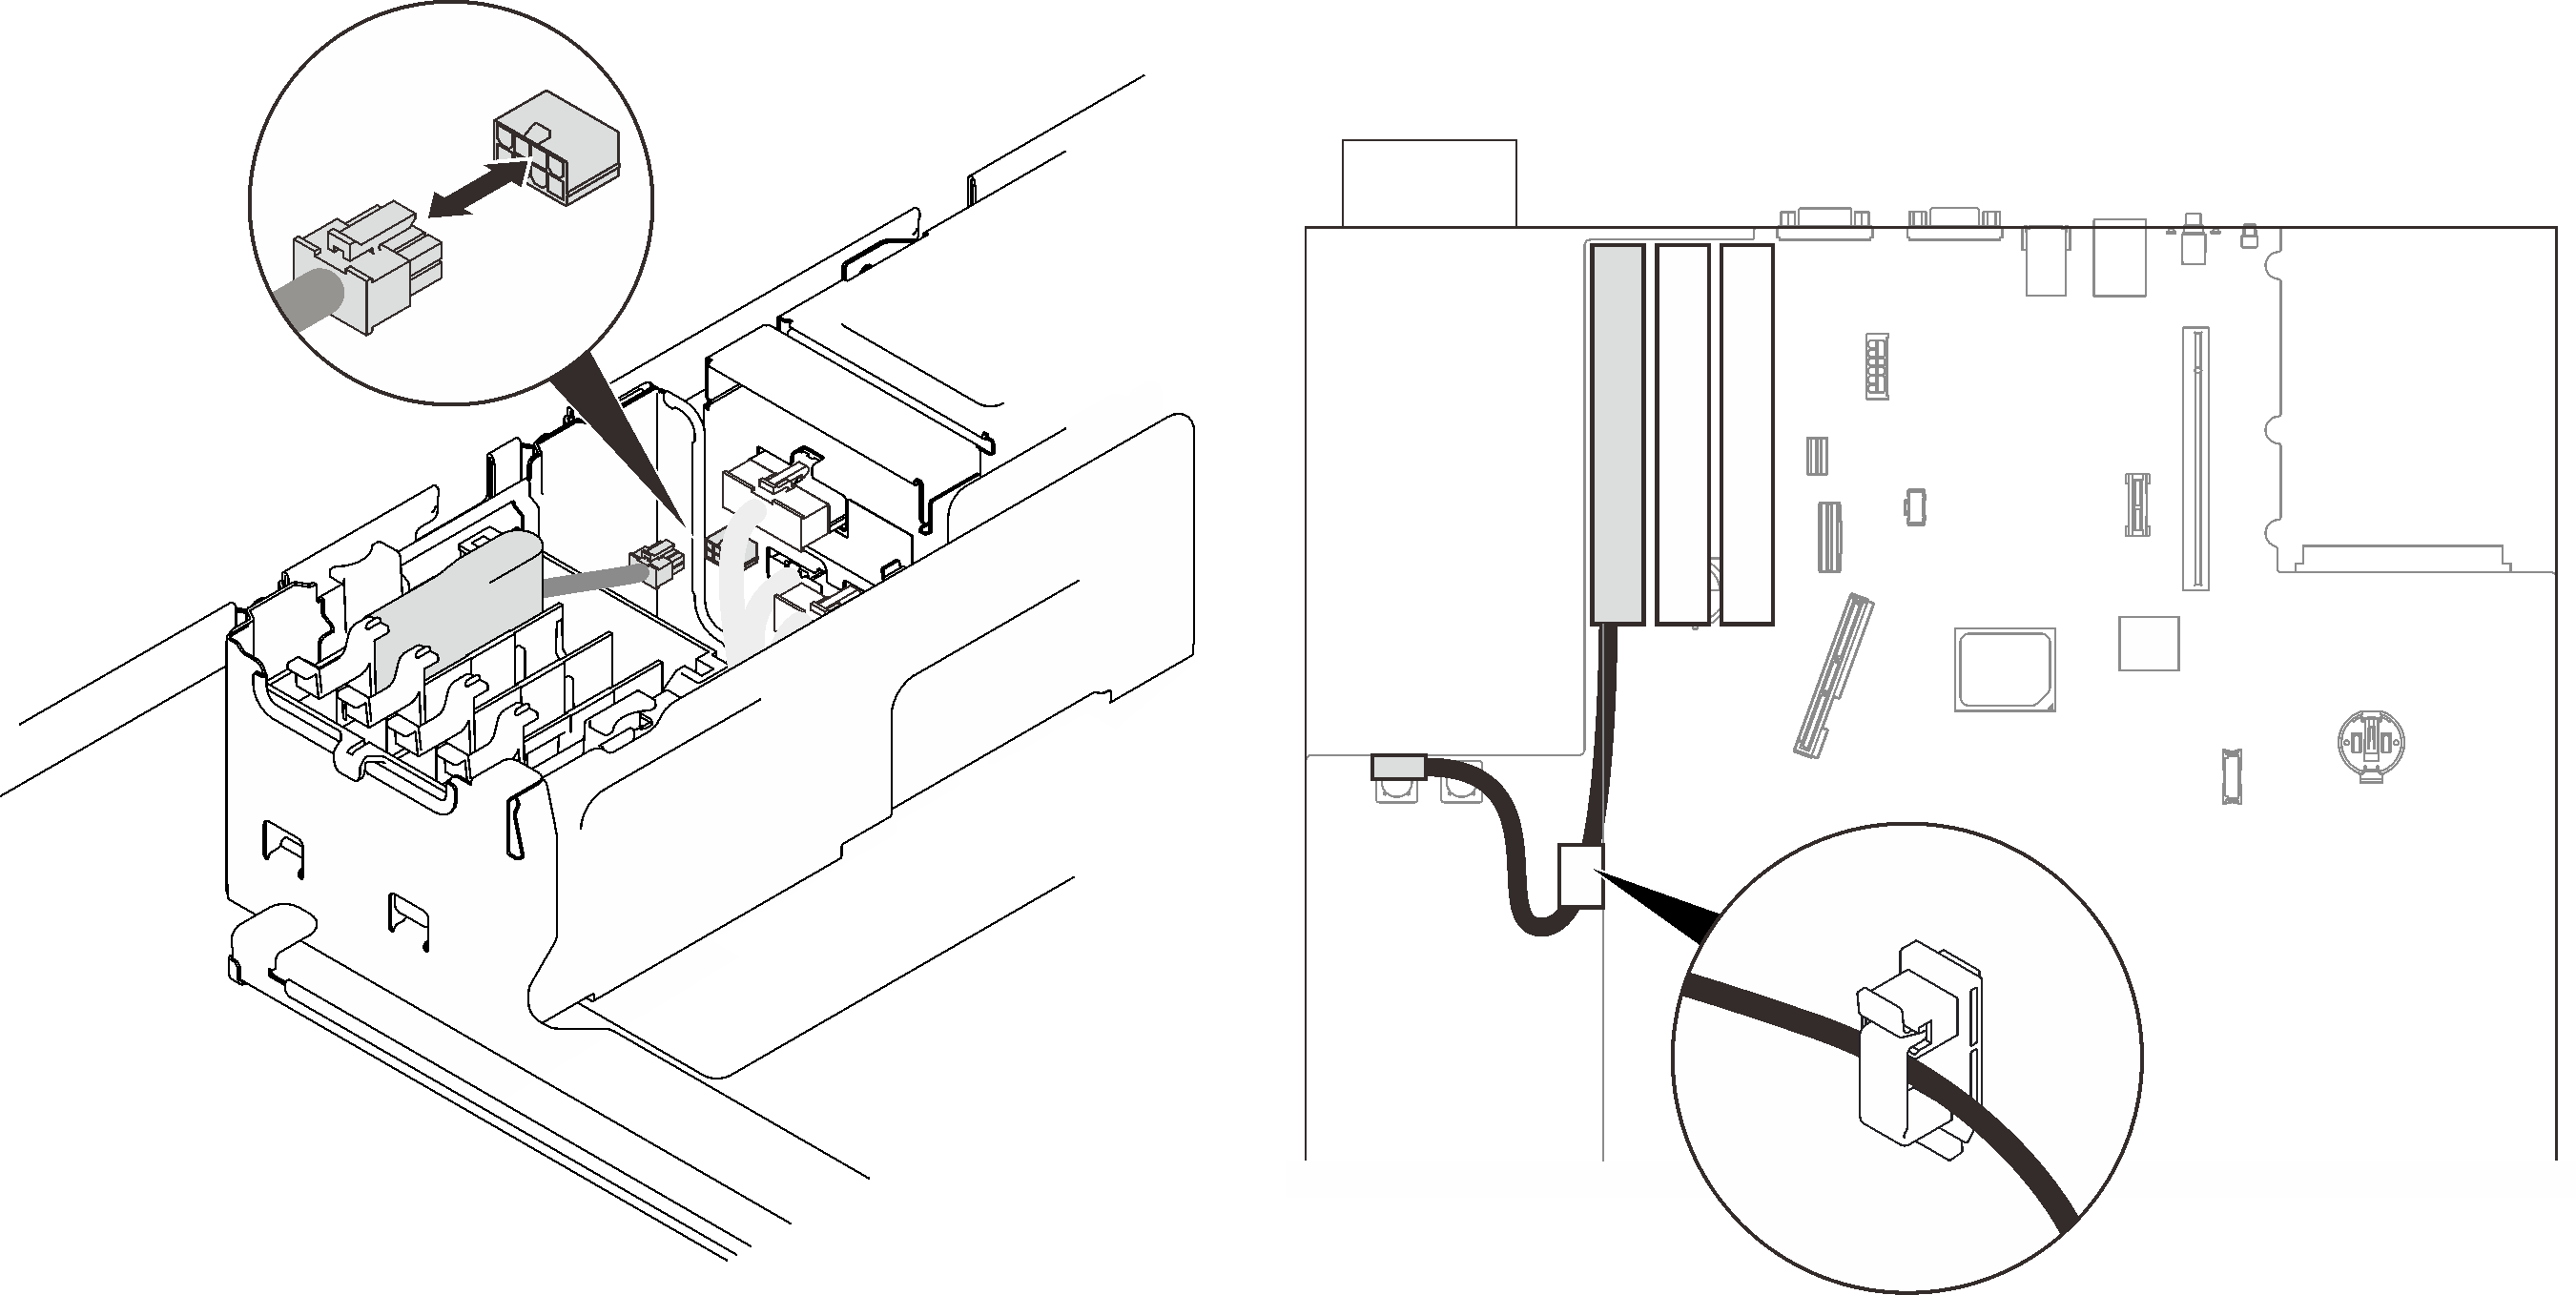
      2. If applicable, disconnect M.2 and 7mm drive cables from the system board.
      3. If applicable, disconnect all the flash power module cables.
        Figure 2. Disconnecting flash power module cables

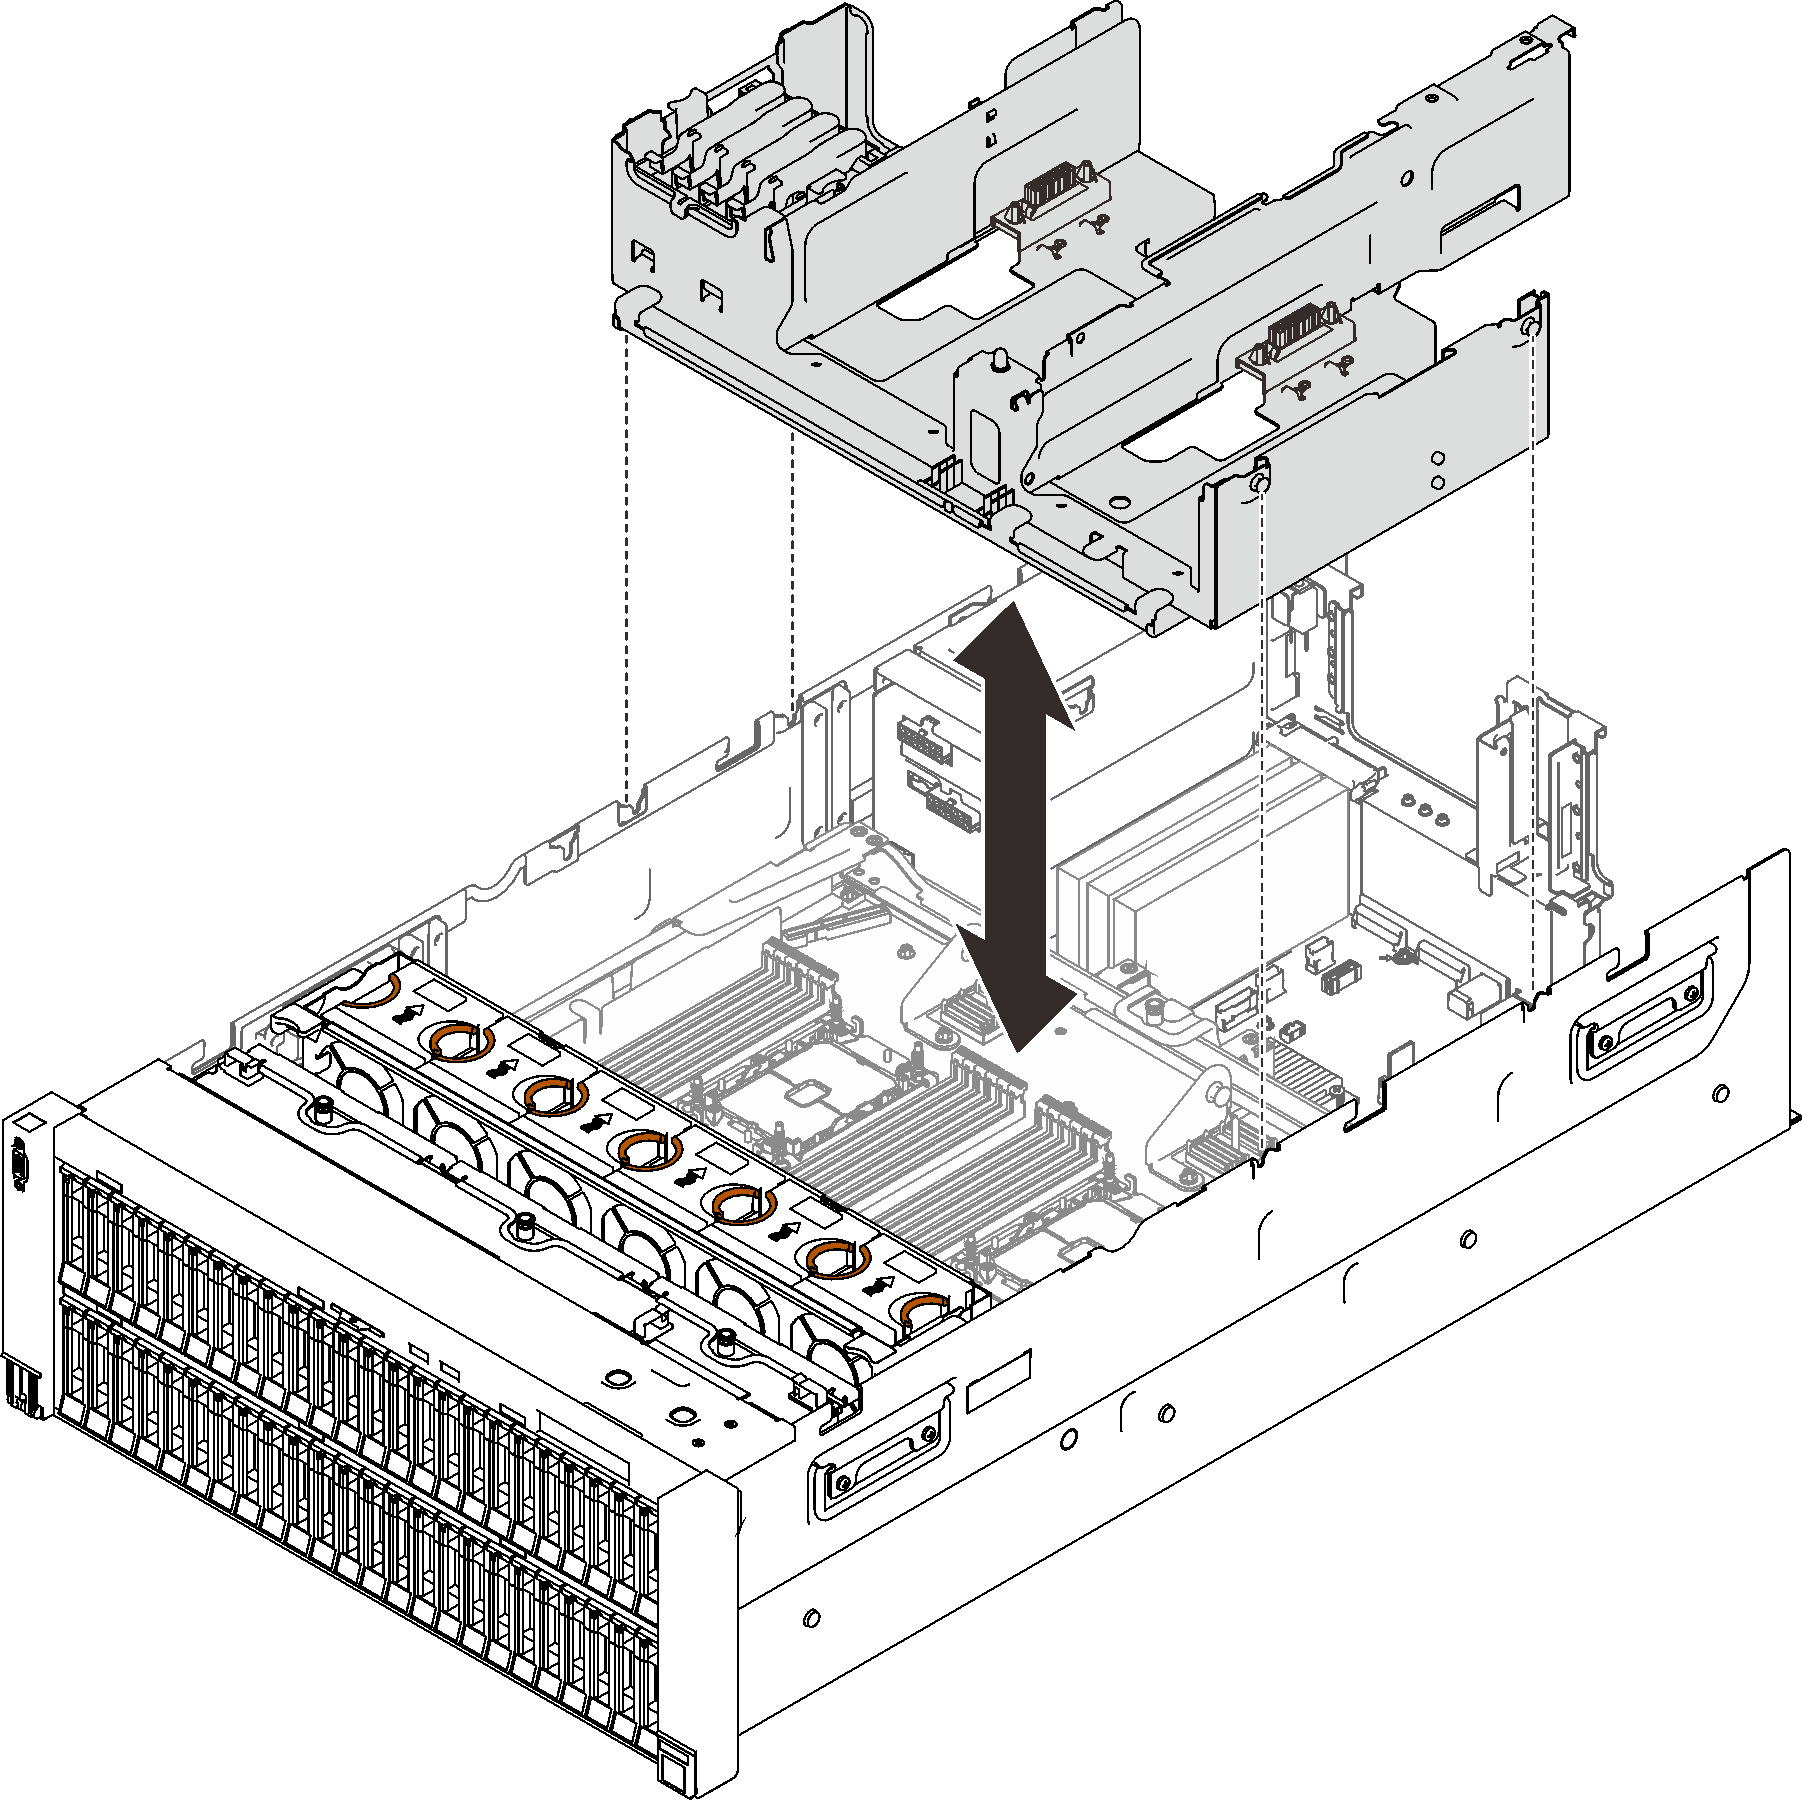
  2. Lift the 4U PCIe expansion tray to remove it from the server.
    Figure 3. Removing the 4U PCIe expansion tray

After this task is completed

If you are instructed to return the component or optional device, follow all packaging instructions, and use any packaging materials for shipping that are supplied to you.

Demo video