Install a PCIe adapter in a 4U PCIe riser assembly
Use this procedure to install a PCIe adapter in a 4U PCIe riser assembly.
Before installing a PCIe adapter:
Read the safety information and installation guidelines (see Safety and Installation Guidelines).
Touch the static-protective package that contains the component to any unpainted metal surface on the server; then, remove it from the package and place it on a static-protective surface.
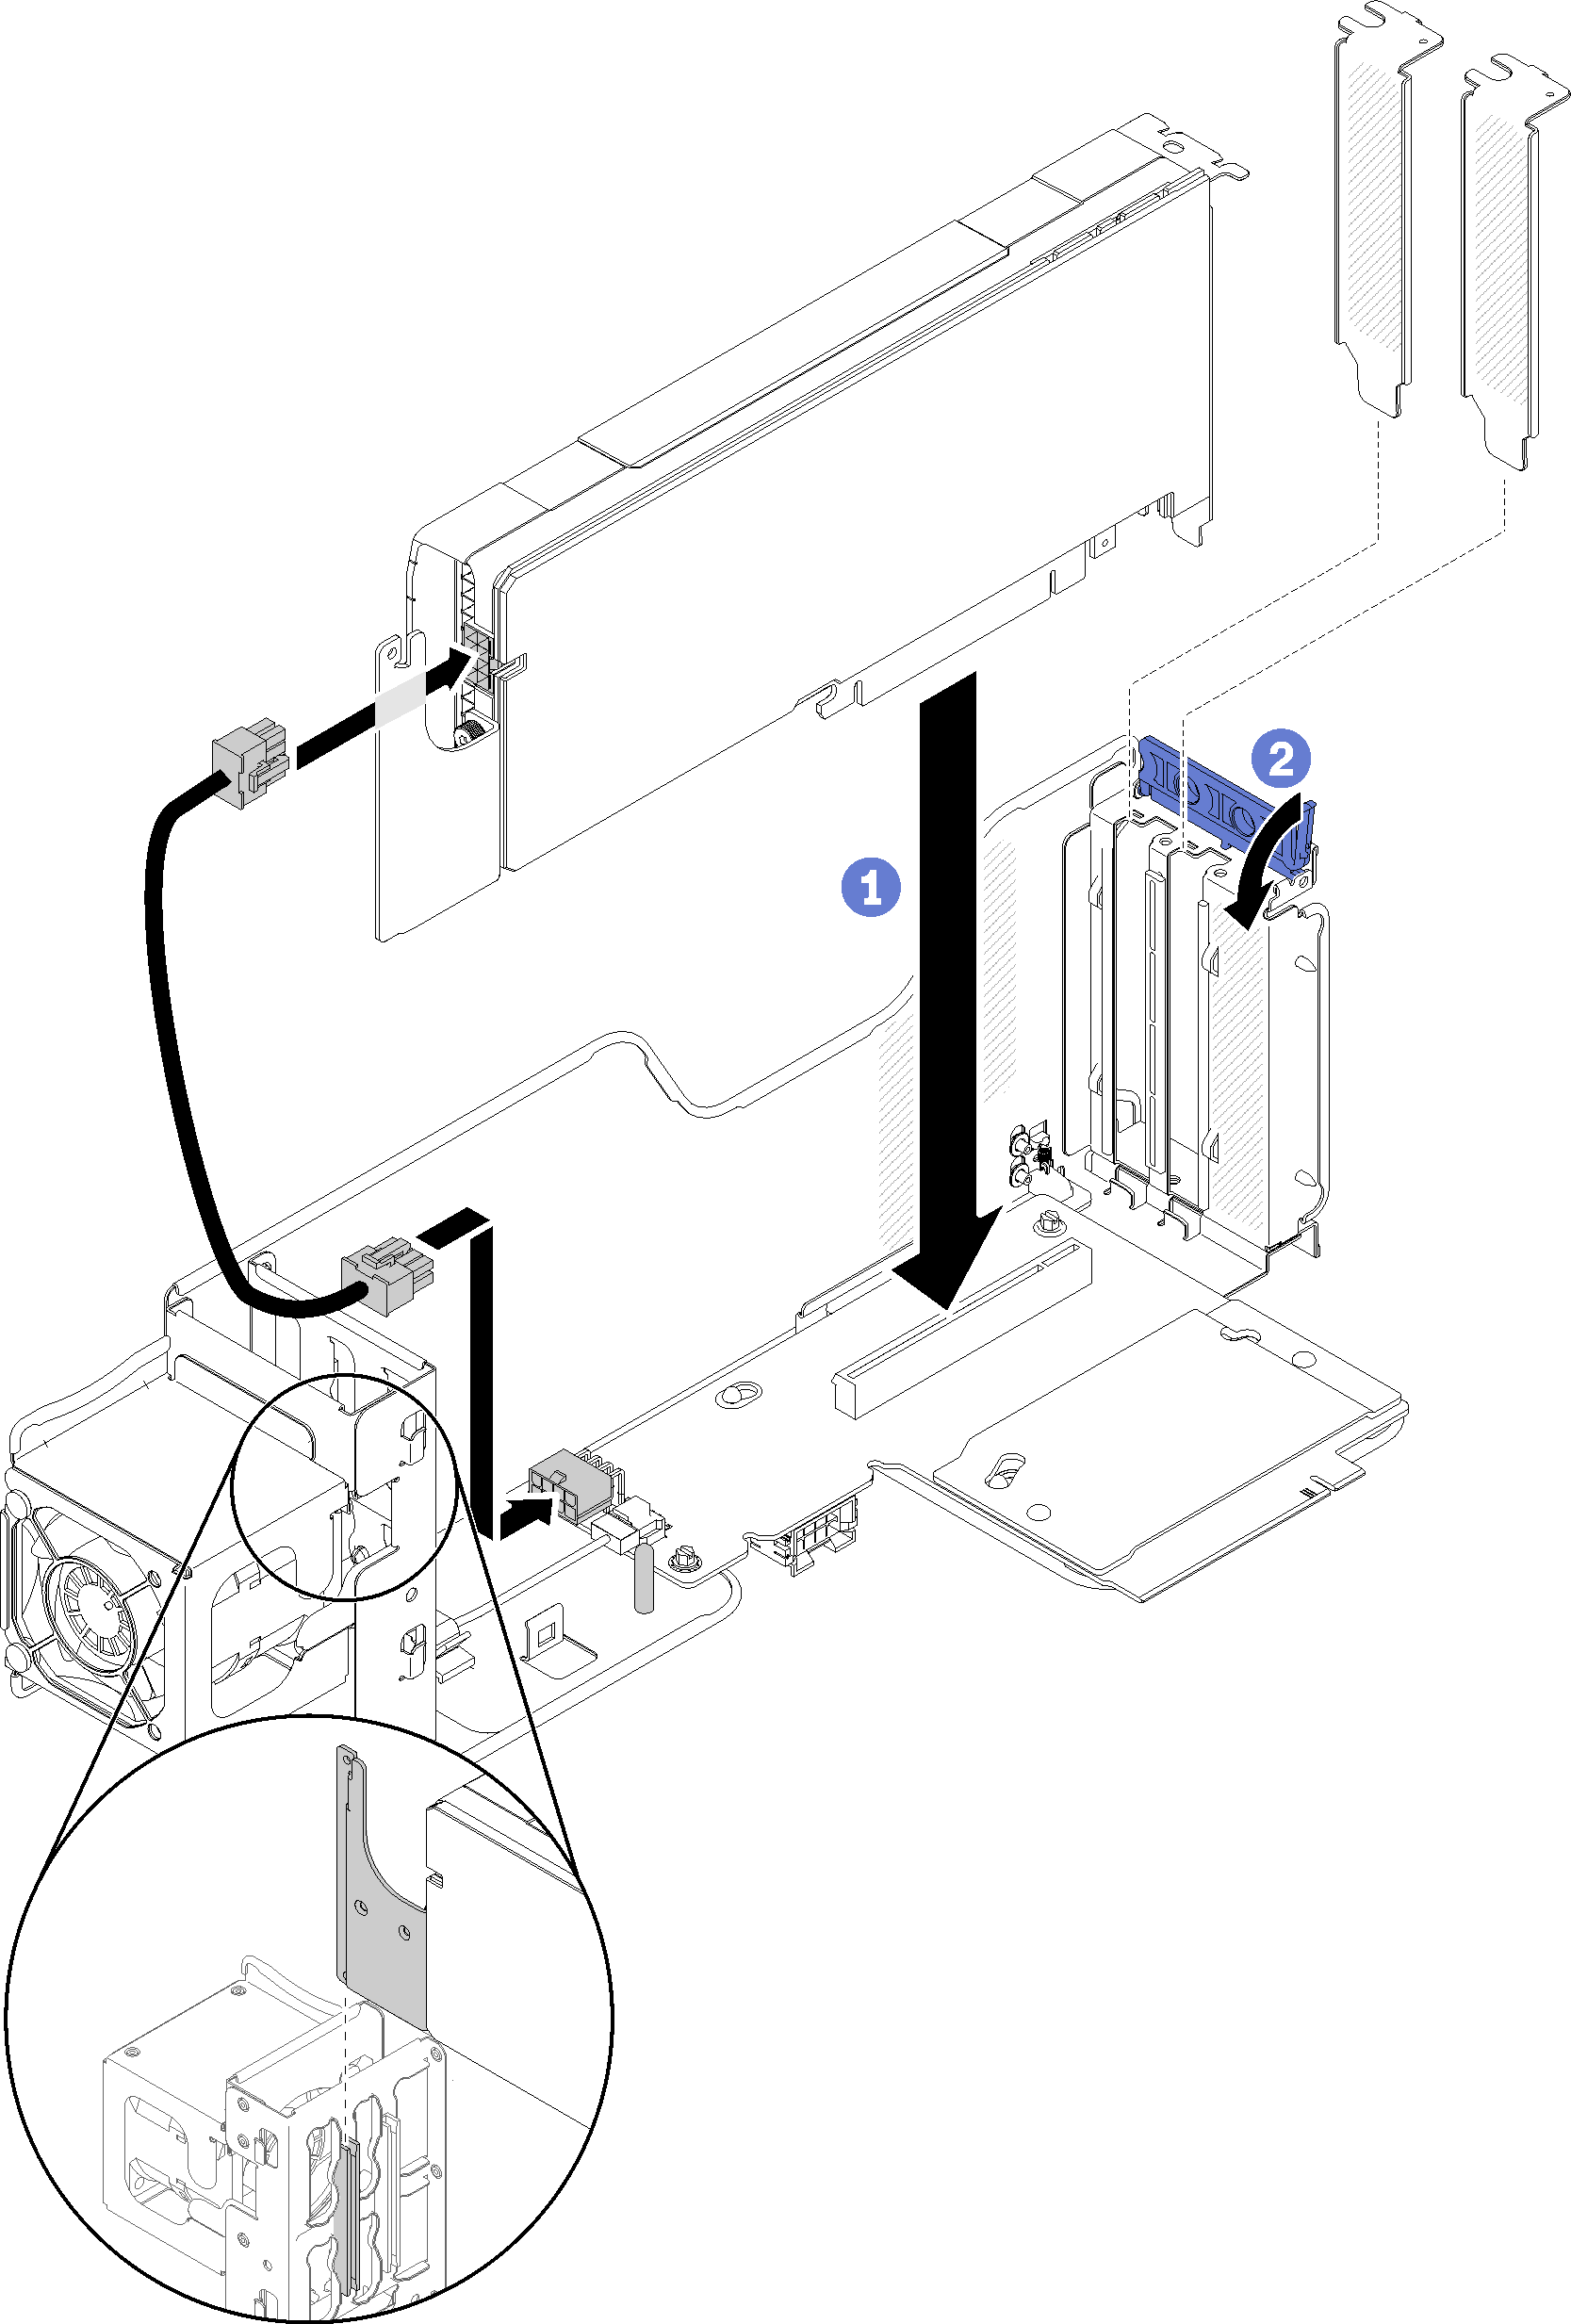
All GPUs come with a power cable, which has to be connected to the 4U PCIe riser card.
All types of the PCIe adapter are removed and installed in a similar manner.
Some types of GPU require the total installed memory to be less than 1 TB. For specific types of GPU, see: GPU limitations.
NVIDIA V100 GPU is supported only when two 2000W power supply units are installed in the server and all processors are less than 200W.
To install a PCIe adapter, complete the following steps:
- Close the retention latch to firmly secure the PCIe adapter into the 4U PCIe riser assembly.Figure 1. PCIe adapter installation
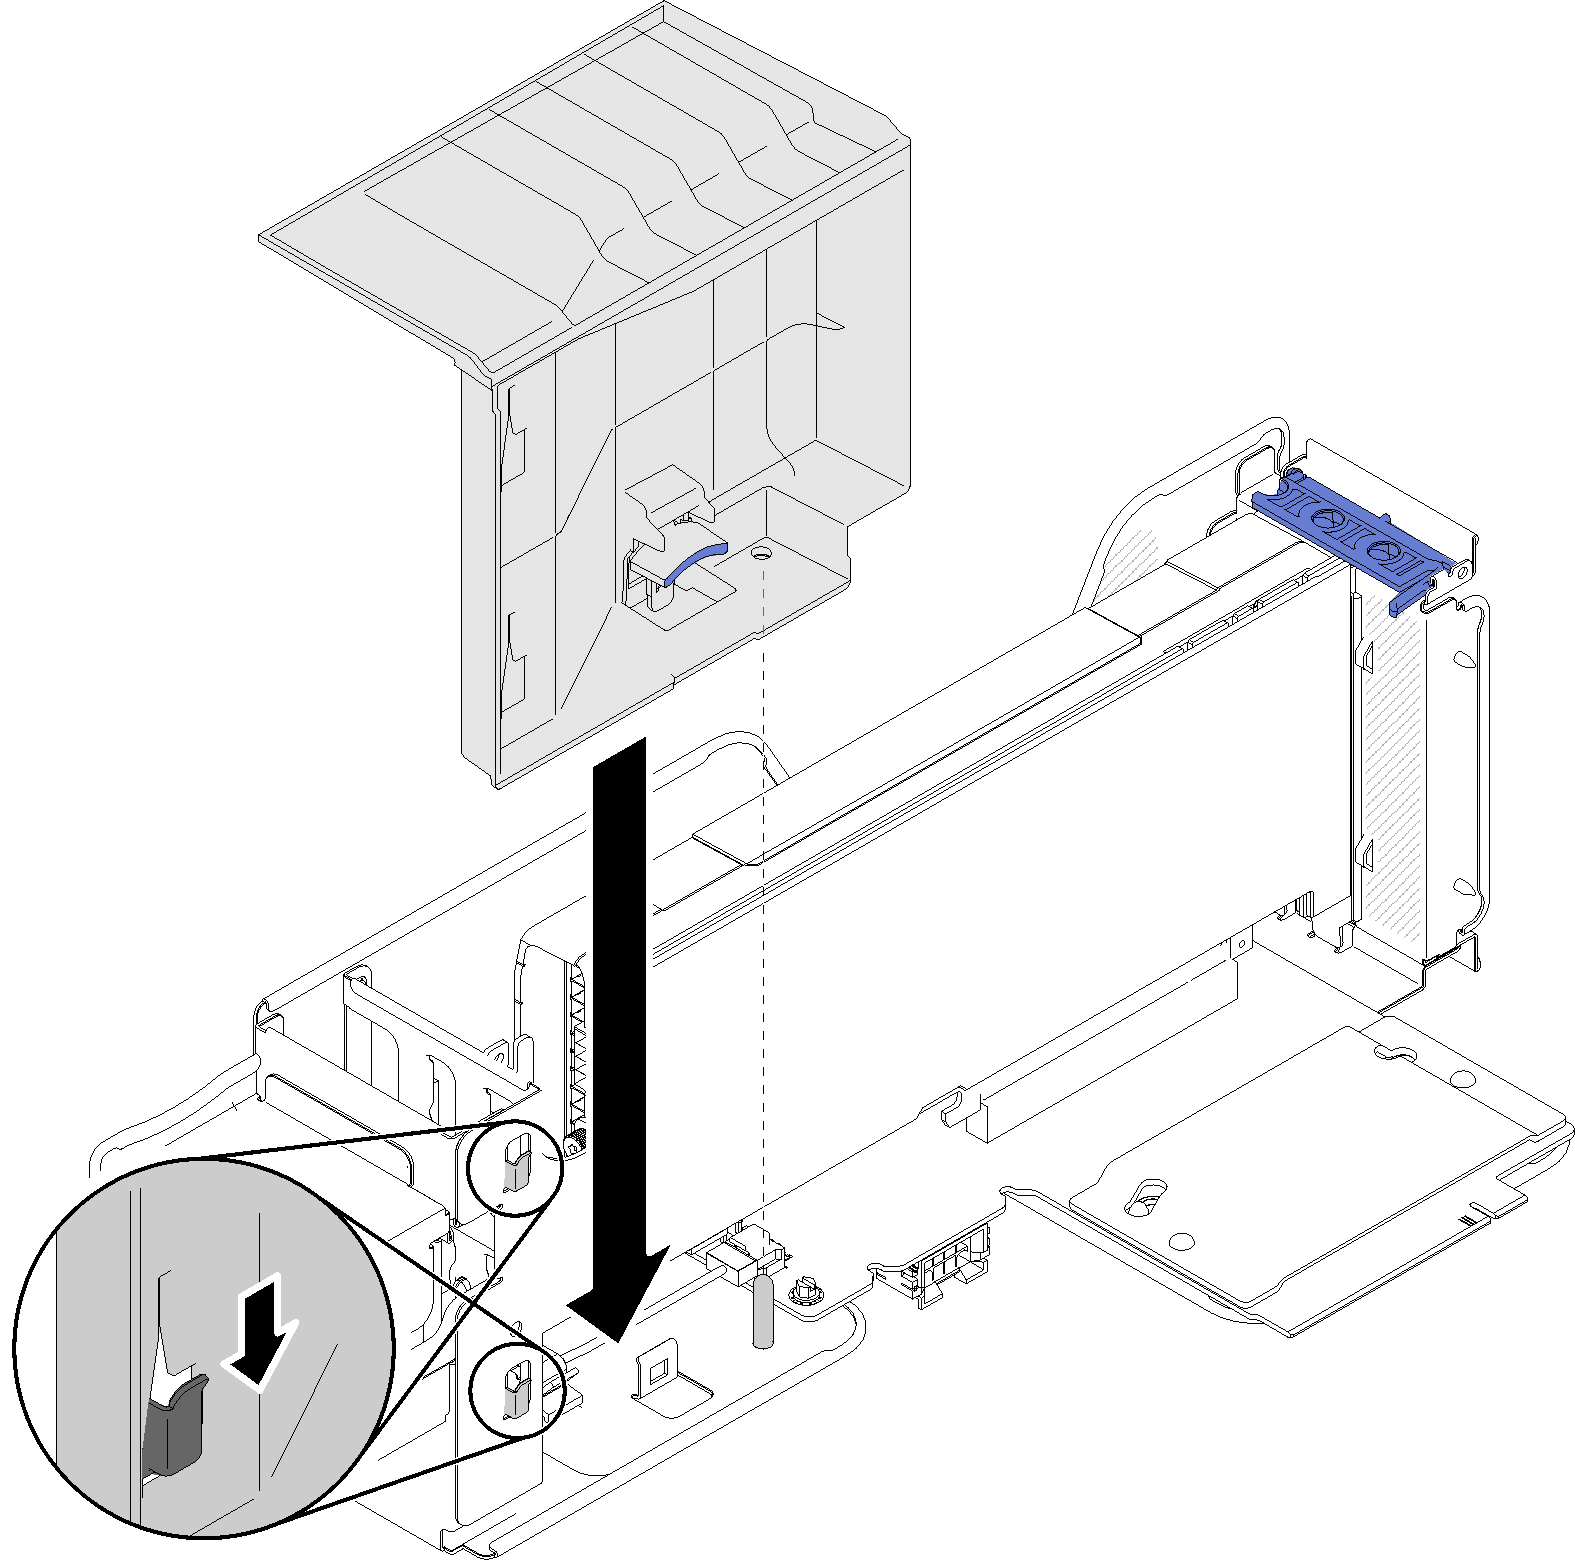
- Slightly press the 4U PCIe riser air baffle until it clicks.Figure 2. PCIe adapter installation
After installing the PCIe adapter, complete the following steps:
Install the top cover (see Install the top cover).
If the server is installed in a rack, reinstall the server into the rack.
Power on the server and any peripheral devices.
Demo video