Remove a PCIe adapter from a 4U PCIe riser assembly
Use this procedure to remove a PCIe adapter from a 4U PCIe riser assembly.
Before removing a PCIe adapter:
Read the safety information and installation guidelines (see Safety and Installation Guidelines).
Turn off the server and peripheral devices and disconnect the power cords and all external cables (see Power off the server).
If the server is installed in a rack, remove the server from the rack.
Remove the top cover (see Remove the top cover).
Remove the 4U PCIe riser assembly (see Remove a 4U PCIe riser assembly).
All GPUs come with a power cable, which has to be connected to the 4U PCIe riser card.
All types of the PCIe adapter are removed and installed in a similar manner.
Some types of GPU require the total installed memory to be less than 1 TB. For specific types of GPU, see: GPU limitations.
NVIDIA V100 GPU is supported only when two 2000W power supply units are installed in the server and all processors are less than 200W.
To remove a PCIe adapter, complete the following steps:
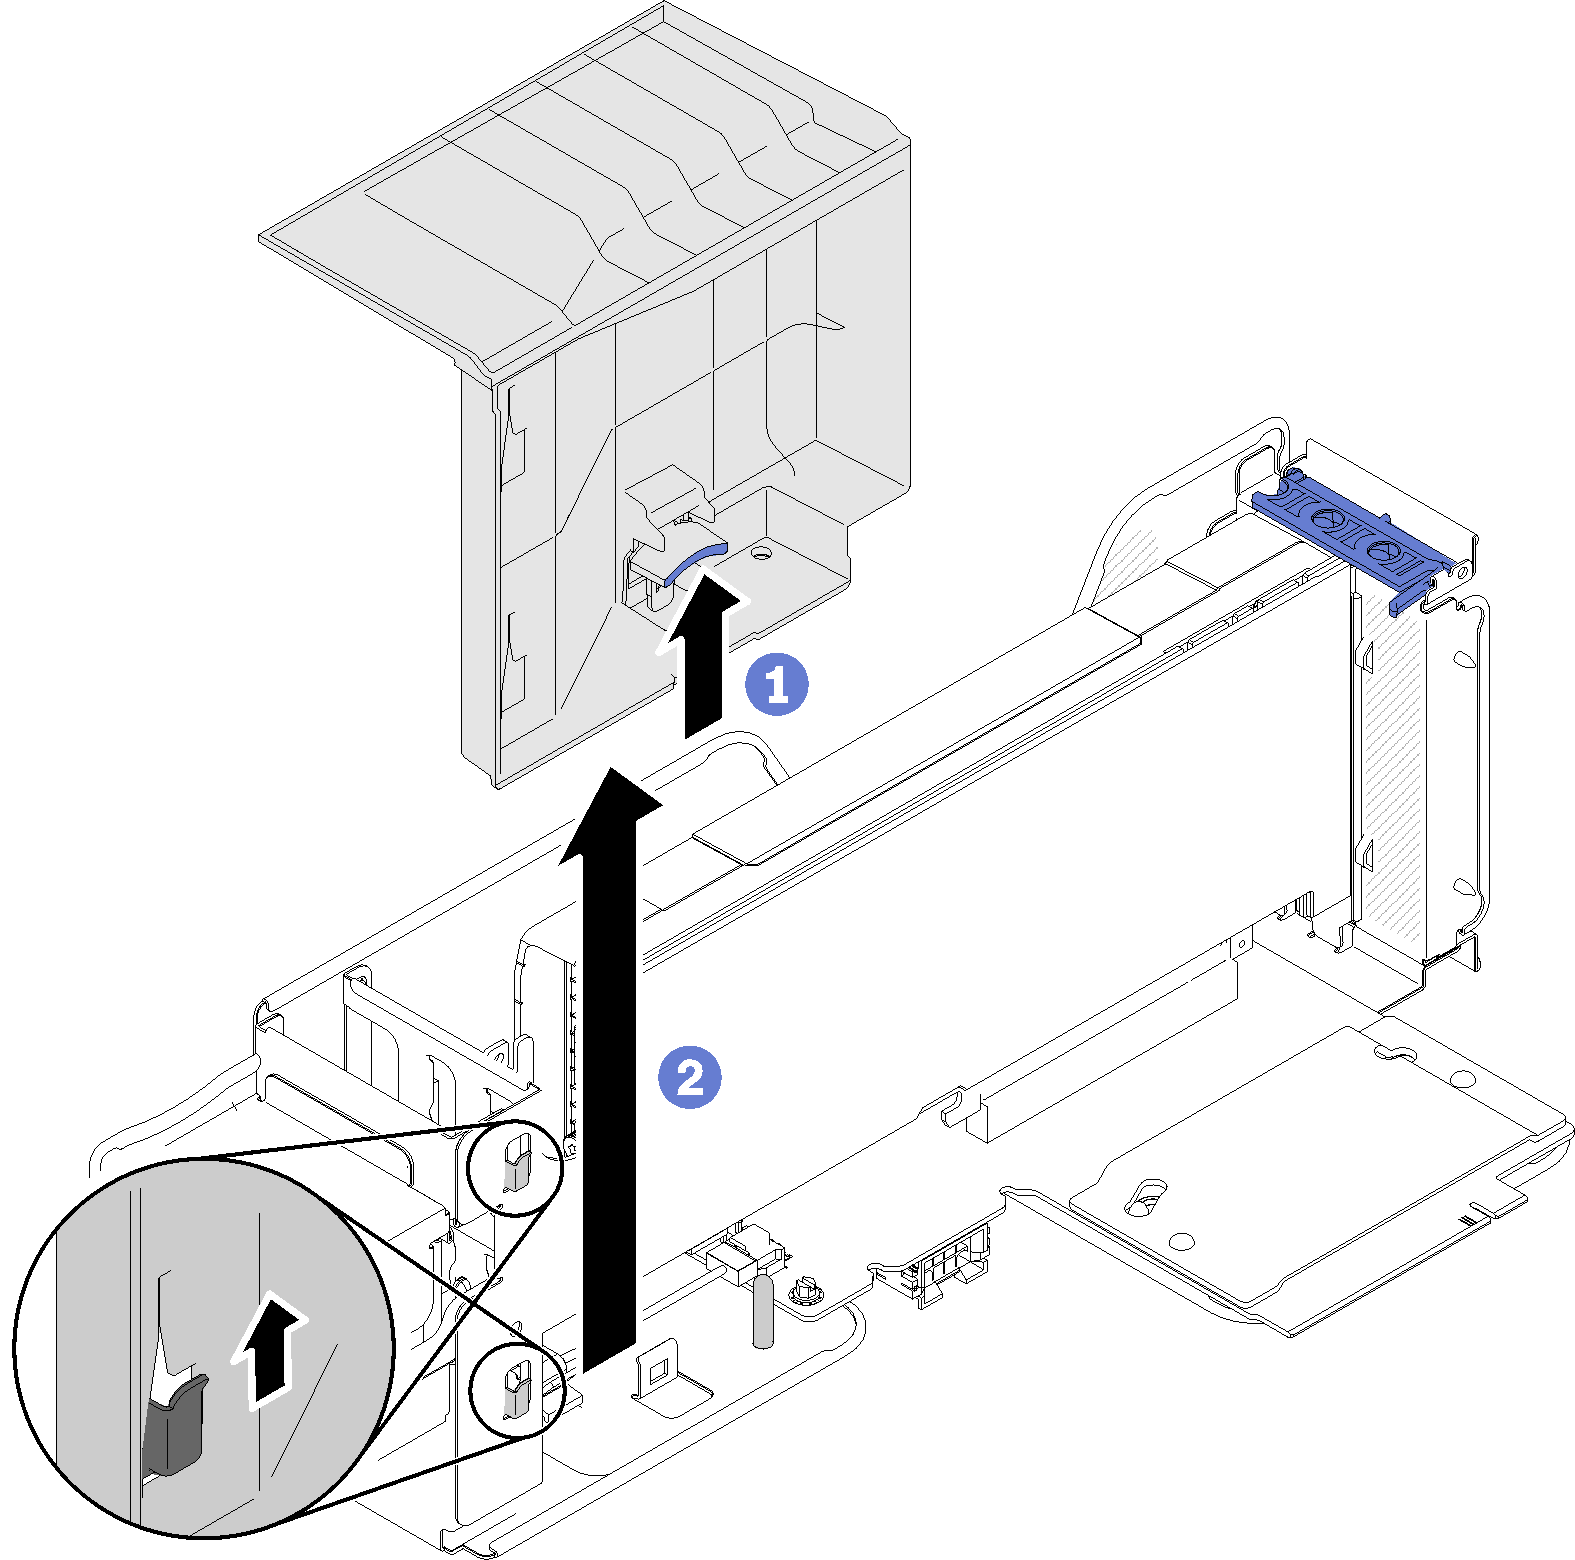
- Use one of your fingers to open the air baffle release latch; then, lift the 4U PCIe riser air baffle away from the retention clips.Figure 1. PCIe adapter removal
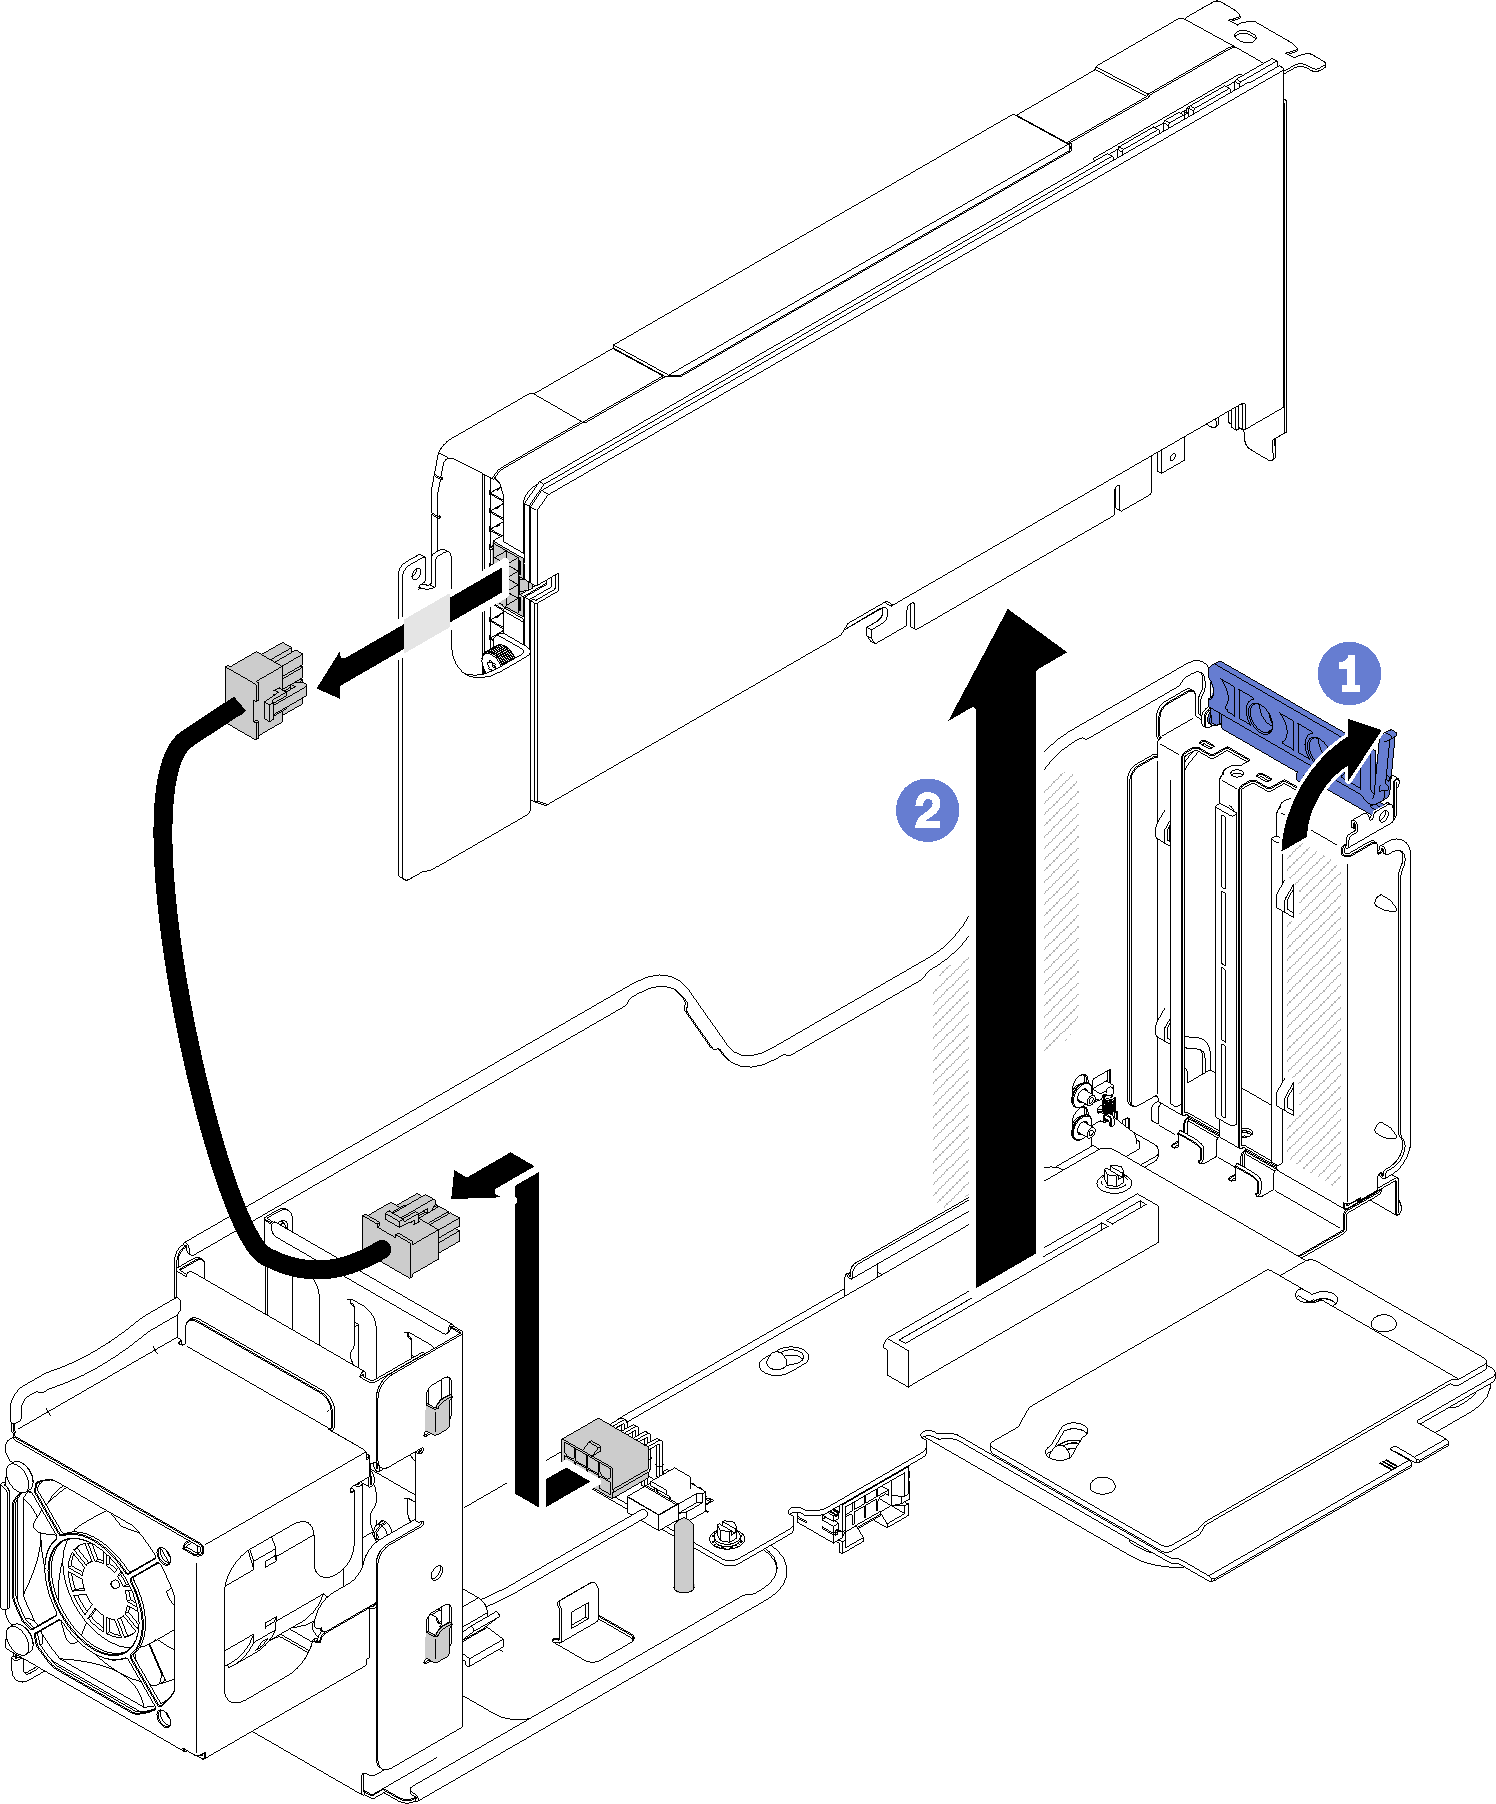
- Pull the PCIe adapter out of the 4U PCIe riser assembly.Figure 2. PCIe adapter removal
If you are instructed to return the component or optional device, follow all packaging instructions, and use any packaging materials for shipping that are supplied to you.
Demo video