Install a 4U PCIe riser card
Use this procedure to install a 4U PCIe riser card.
Before installing a 4U PCIe riser card:
Read the safety information and installation guidelines (see Safety and Installation Guidelines).
To install a 4U PCIe riser card, complete the following steps:
Two different types of the 4U PCIe riser card can be installed in a 4U PCIe riser cage. One of them comes with two PCIe connectors (x8) on it, the other comes with only one PCIe connector (x16). All types of the 4U PCIe riser card are removed and installed in a similar manner.
- Align the 4U PCIe riser card with the guide pins; then, lower it to the 4U PCIe riser cage. Slightly slide the riser card to fit the holes into the pins.NoteSlightly lift the
4U PCIe riser cage to fully seat the 4U PCIe riser card into the guide pins when assembly the 4U PCIe riser assembly 3. Figure 1. 4U PCIe riser card installation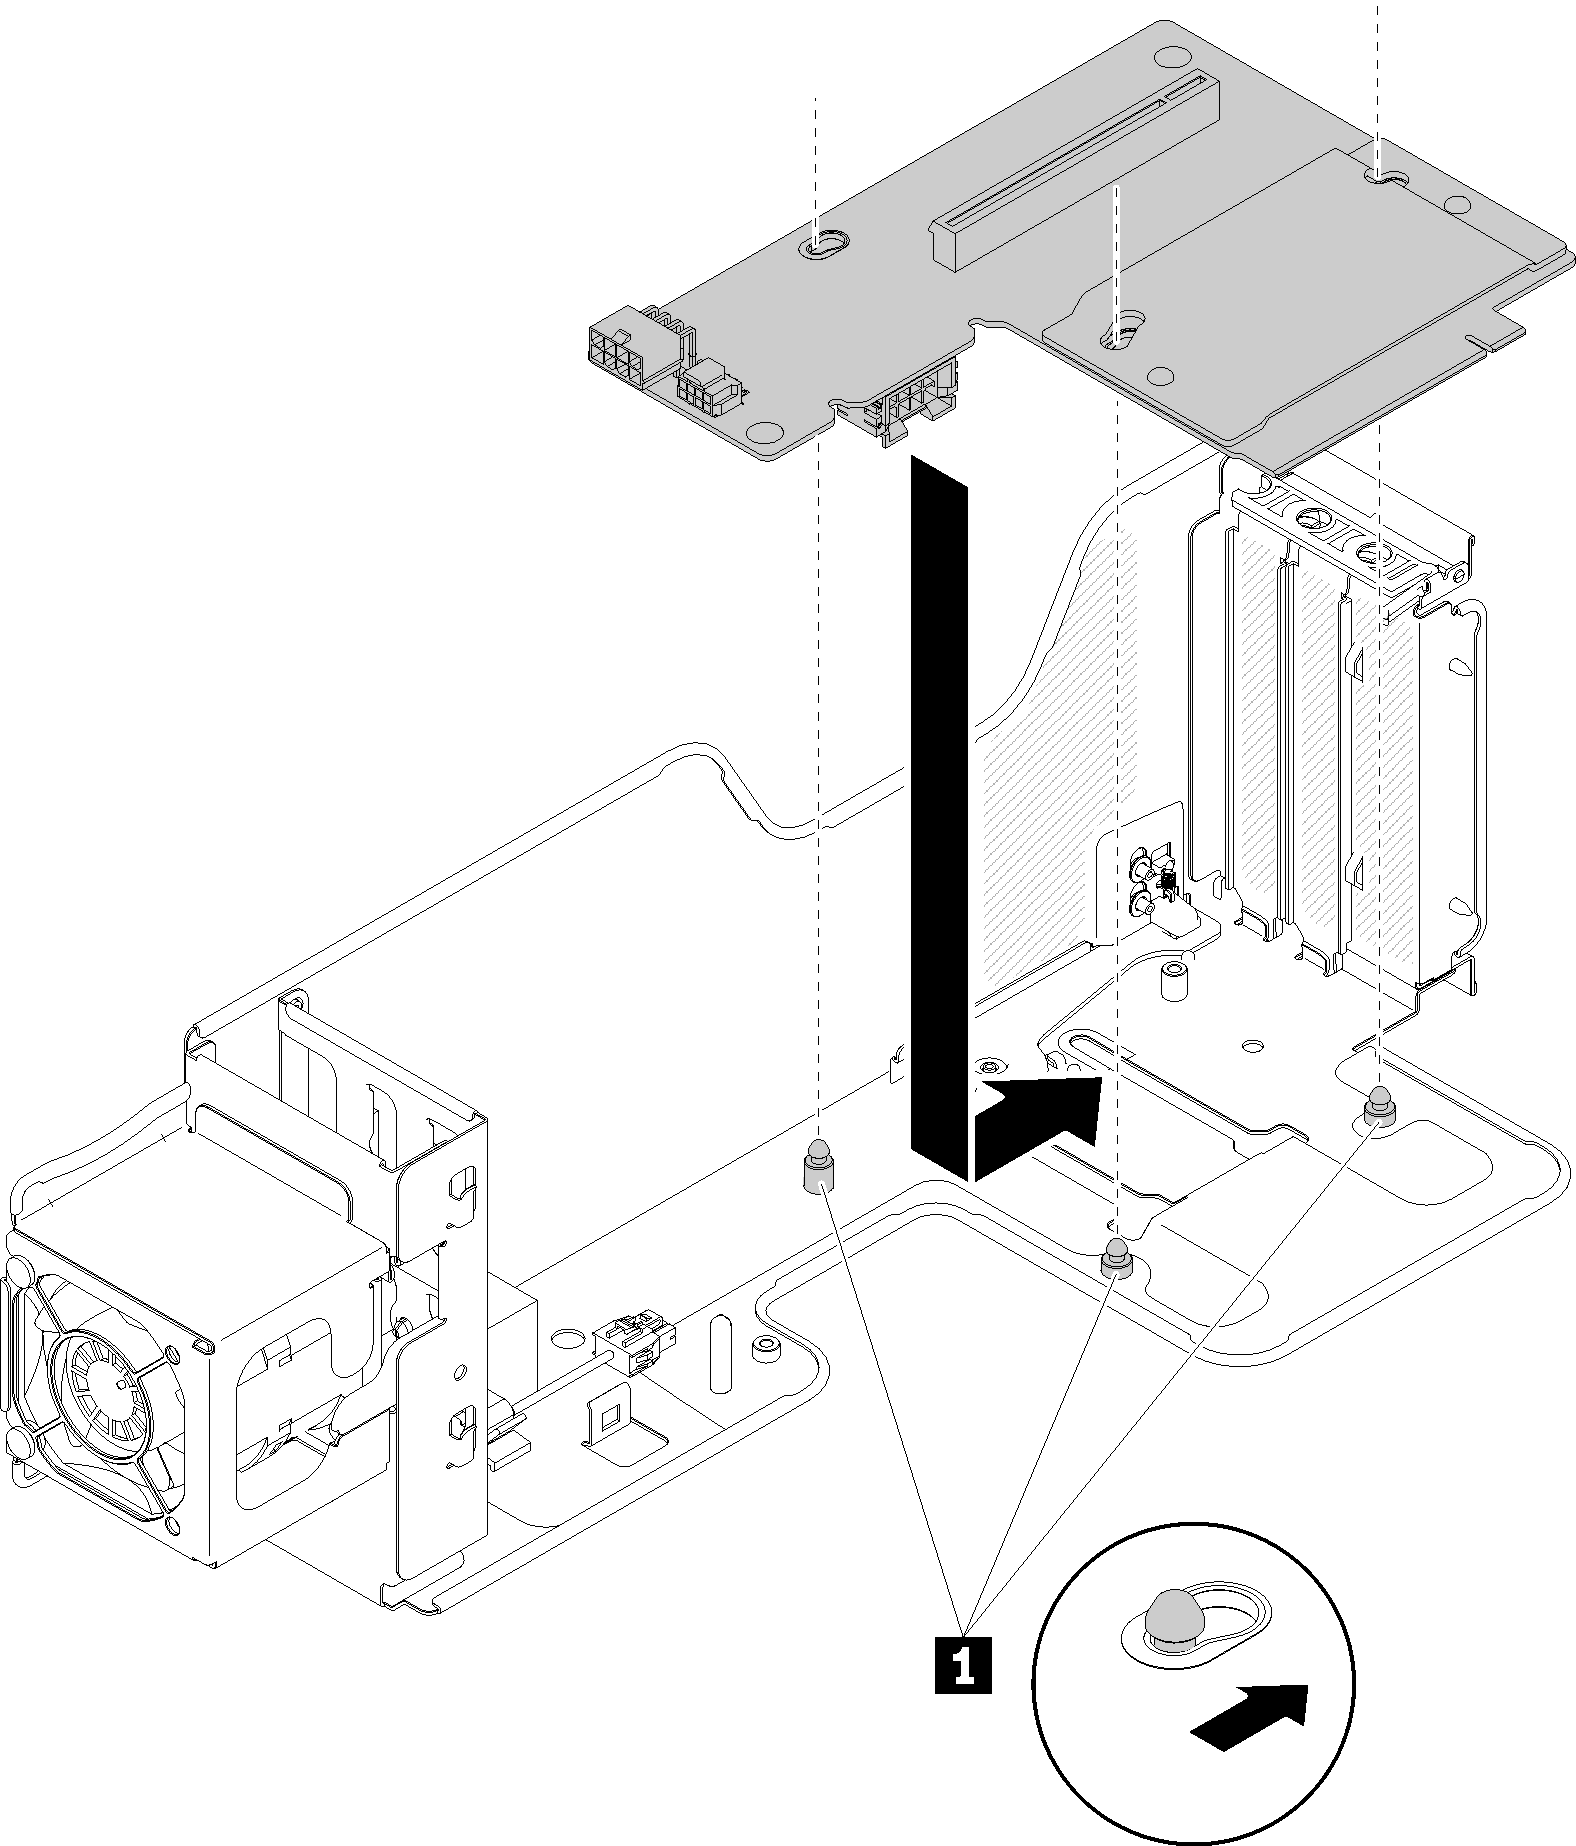
Table 1. Guide pin on the riser cage 1 Guide pin - Fasten the screws to secure the 4U PCIe riser card to the 4U PCIe riser cage; then, connect the fan power cable to the 4U PCIe riser card.Figure 2. 4U PCIe riser card installation

After installing a 4U PCIe riser card, complete the following steps:
Install the 4U PCIe riser assembly (see Install a 4U PCIe riser assembly).
Install the top cover (see Install the top cover).
If the server is installed in a rack, reinstall the server into the rack.
Power on the server and any peripheral devices.
Demo video