Install the PCIe expansion tray
Use this procedure to install the PCIe expansion tray.
Before installing a PCIe expansion tray:
Read the safety information and installation guidelines (see Safety and Installation Guidelines).
To install the PCIe expansion tray, complete the following steps:
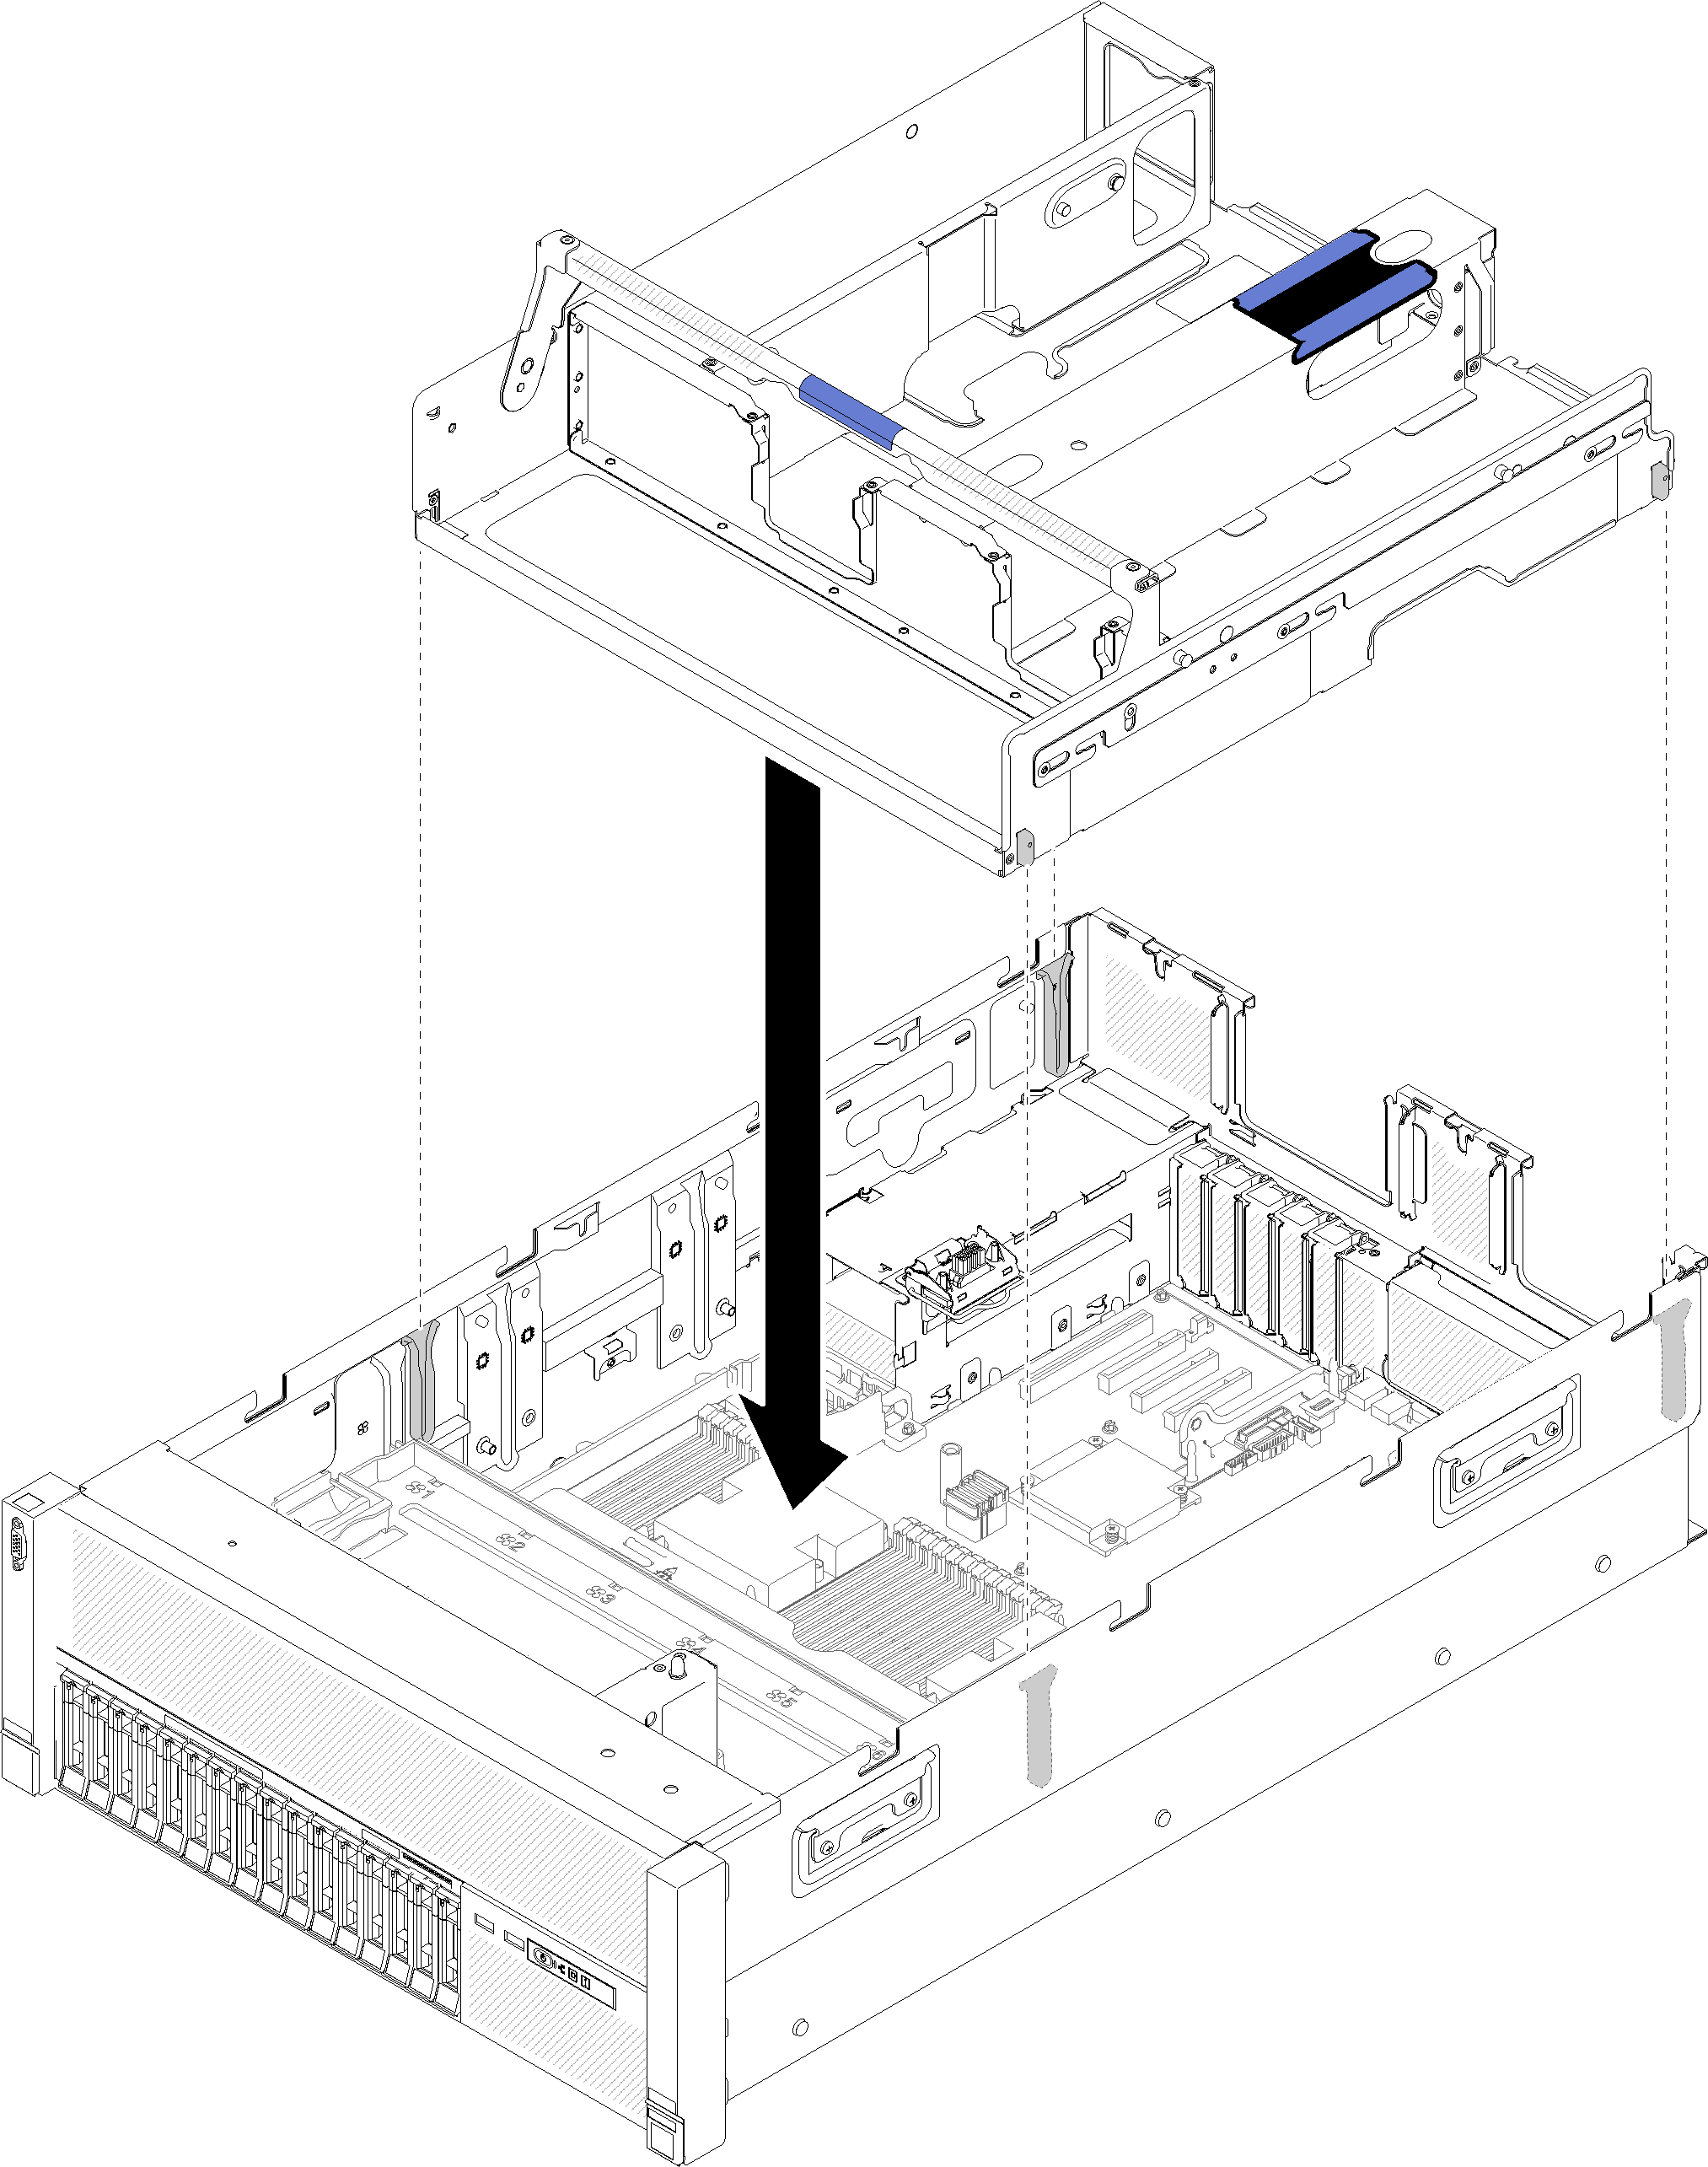
- Grasp the handle with one of your hands, with the other hand grasping the PCIe expansion tray lift point; then, carefully lower the tray into the server. Make sure the four posts on the sides are inserted into the alignment slots on the chassis.Figure 1. PCIe expansion tray installation
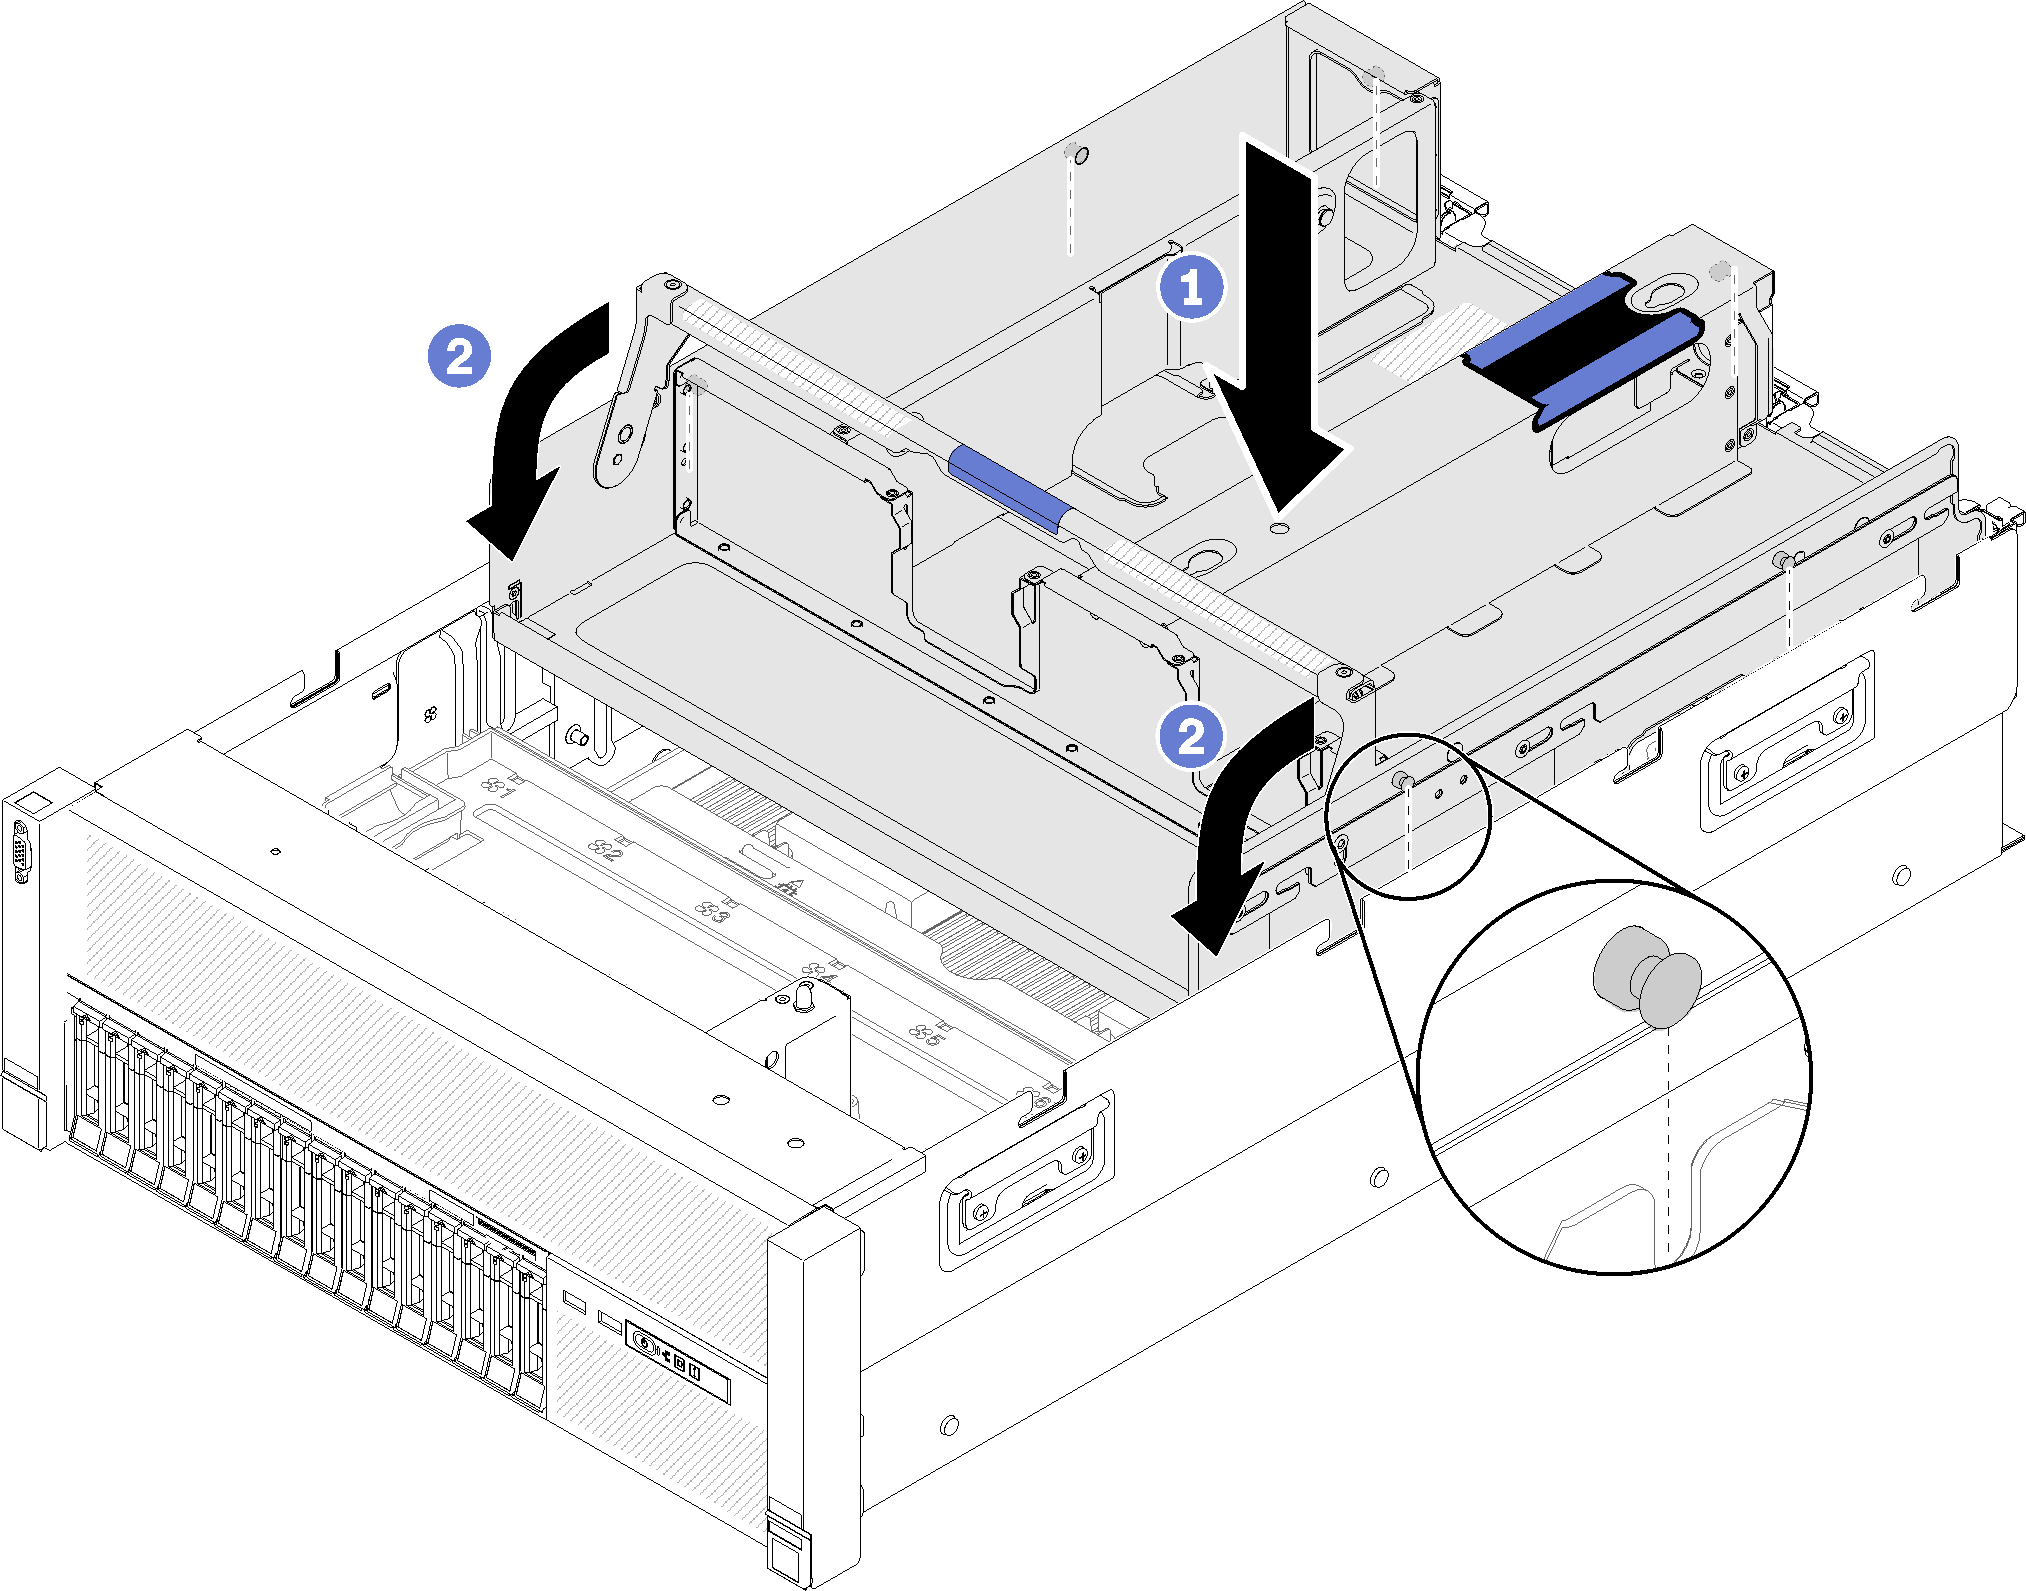
- Rotate the handle down. Make sure the PCIe expansion tray is fully seated into the server.Figure 2. PCIe expansion tray installation
After installing the PCIe expansion tray, complete the following steps:
Install the 4U PCIe riser assemblies (see Install a 4U PCIe riser assembly).
Install the top cover (see Install the top cover).
If the server is installed in a rack, reinstall the server into the rack.
Power on the server and any peripheral devices.
Demo video
Give documentation feedback