Remove a processor and heat sink
Processors are in the compute system boards that are accessed from the top of the server. This task has instructions for removing an assembled processor and heat sink, known as a processor-heat-sink module (PHM), a processor, and a heat sink. All of these tasks require a Torx T30 driver.


Read the safety information and installation guidelines (see Safety and Installation Guidelines).
Turn off the server and peripheral devices and disconnect the power cords and all external cables (see Power off the server).
Remove the top cover (see Remove the top cover).
Remove the PCIe expansion tray (see Remove the PCIe expansion tray).
Remove the system board air baffle (see Remove the system board air baffle and the power interposer) or the processor and memory expansion tray and the processor and memory expansion tray air baffle (see Remove the processor and memory expansion tray).
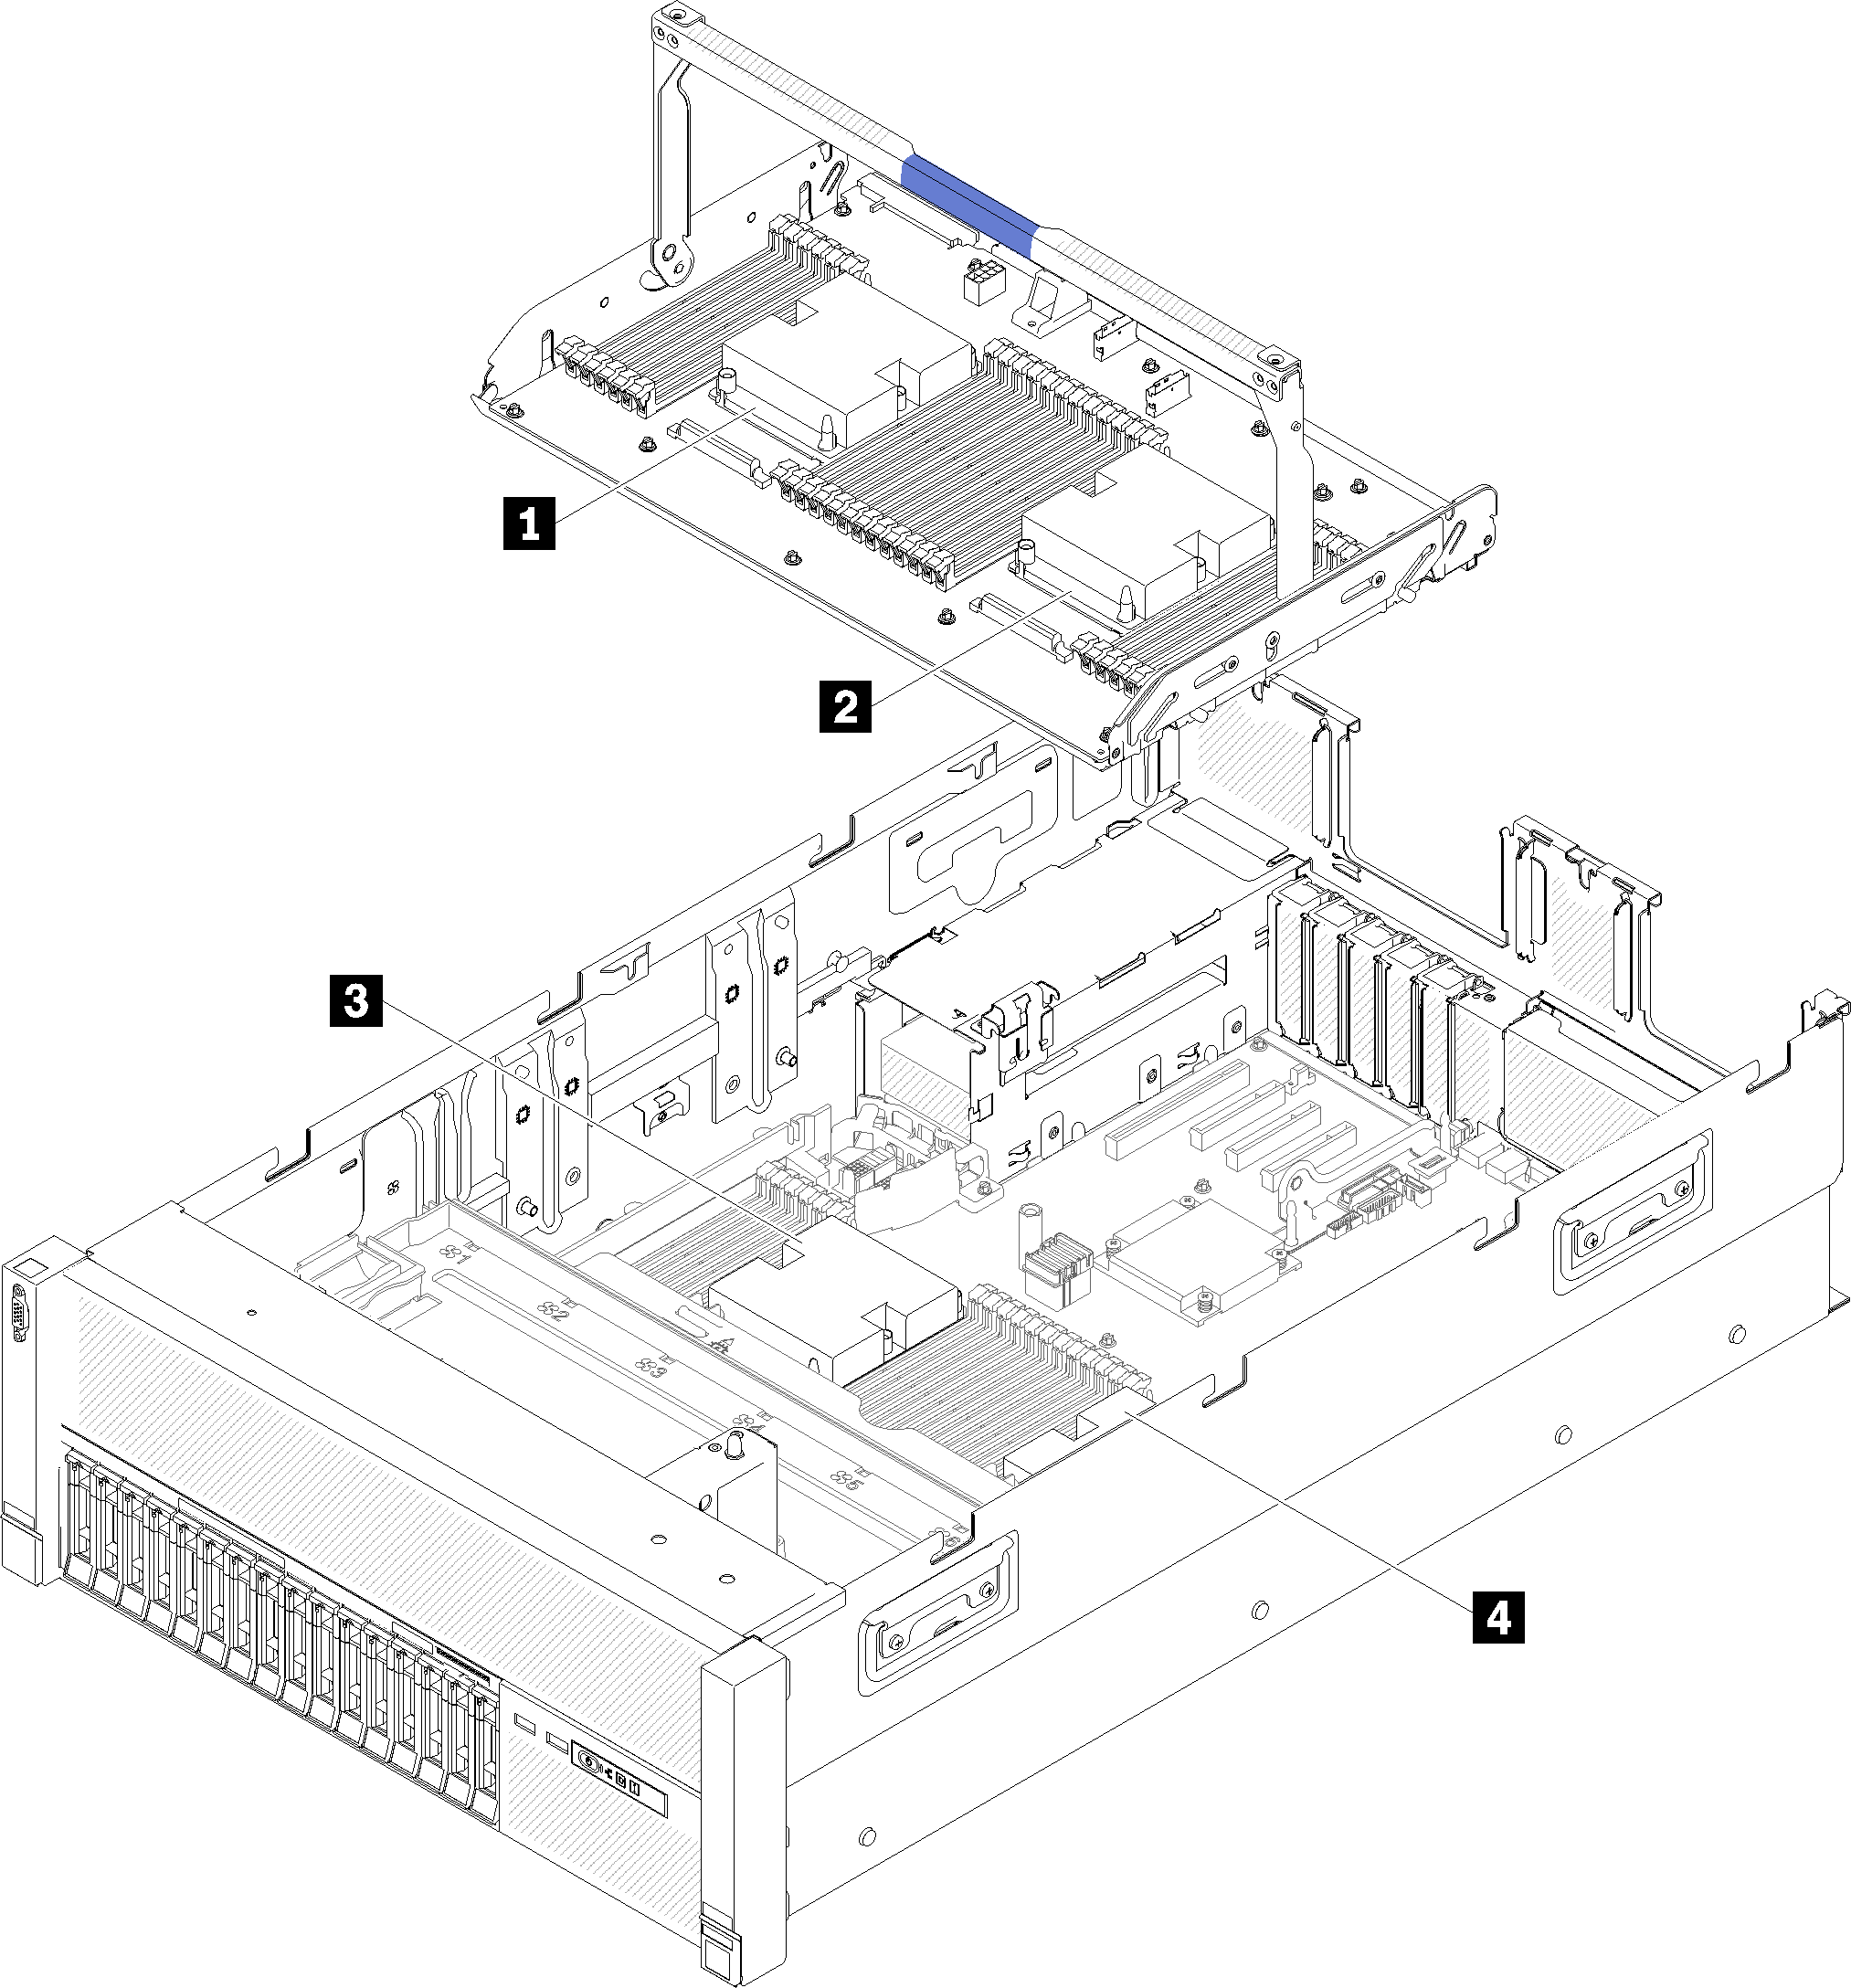
| 1 Processor 3 | 3 Processor 1 |
| 2 Processor 4 | 4 Processor 2 |
Complete the following steps to remove a PHM.

- Fully loosen the Torx T30 captive fasteners on the processor-heat-sink module in the removal sequence shown on the heat-sink label.
- Lift the processor-heat-sink module from the processor socket.
After you remove a PHM:
If you are removing the PHM as part of a system board replacement, set the PHM aside.
If you are replacing the processor or heat sink, separate the processor and its retainer from the heat sink.
Figure 3. Separating a heat sink from a processor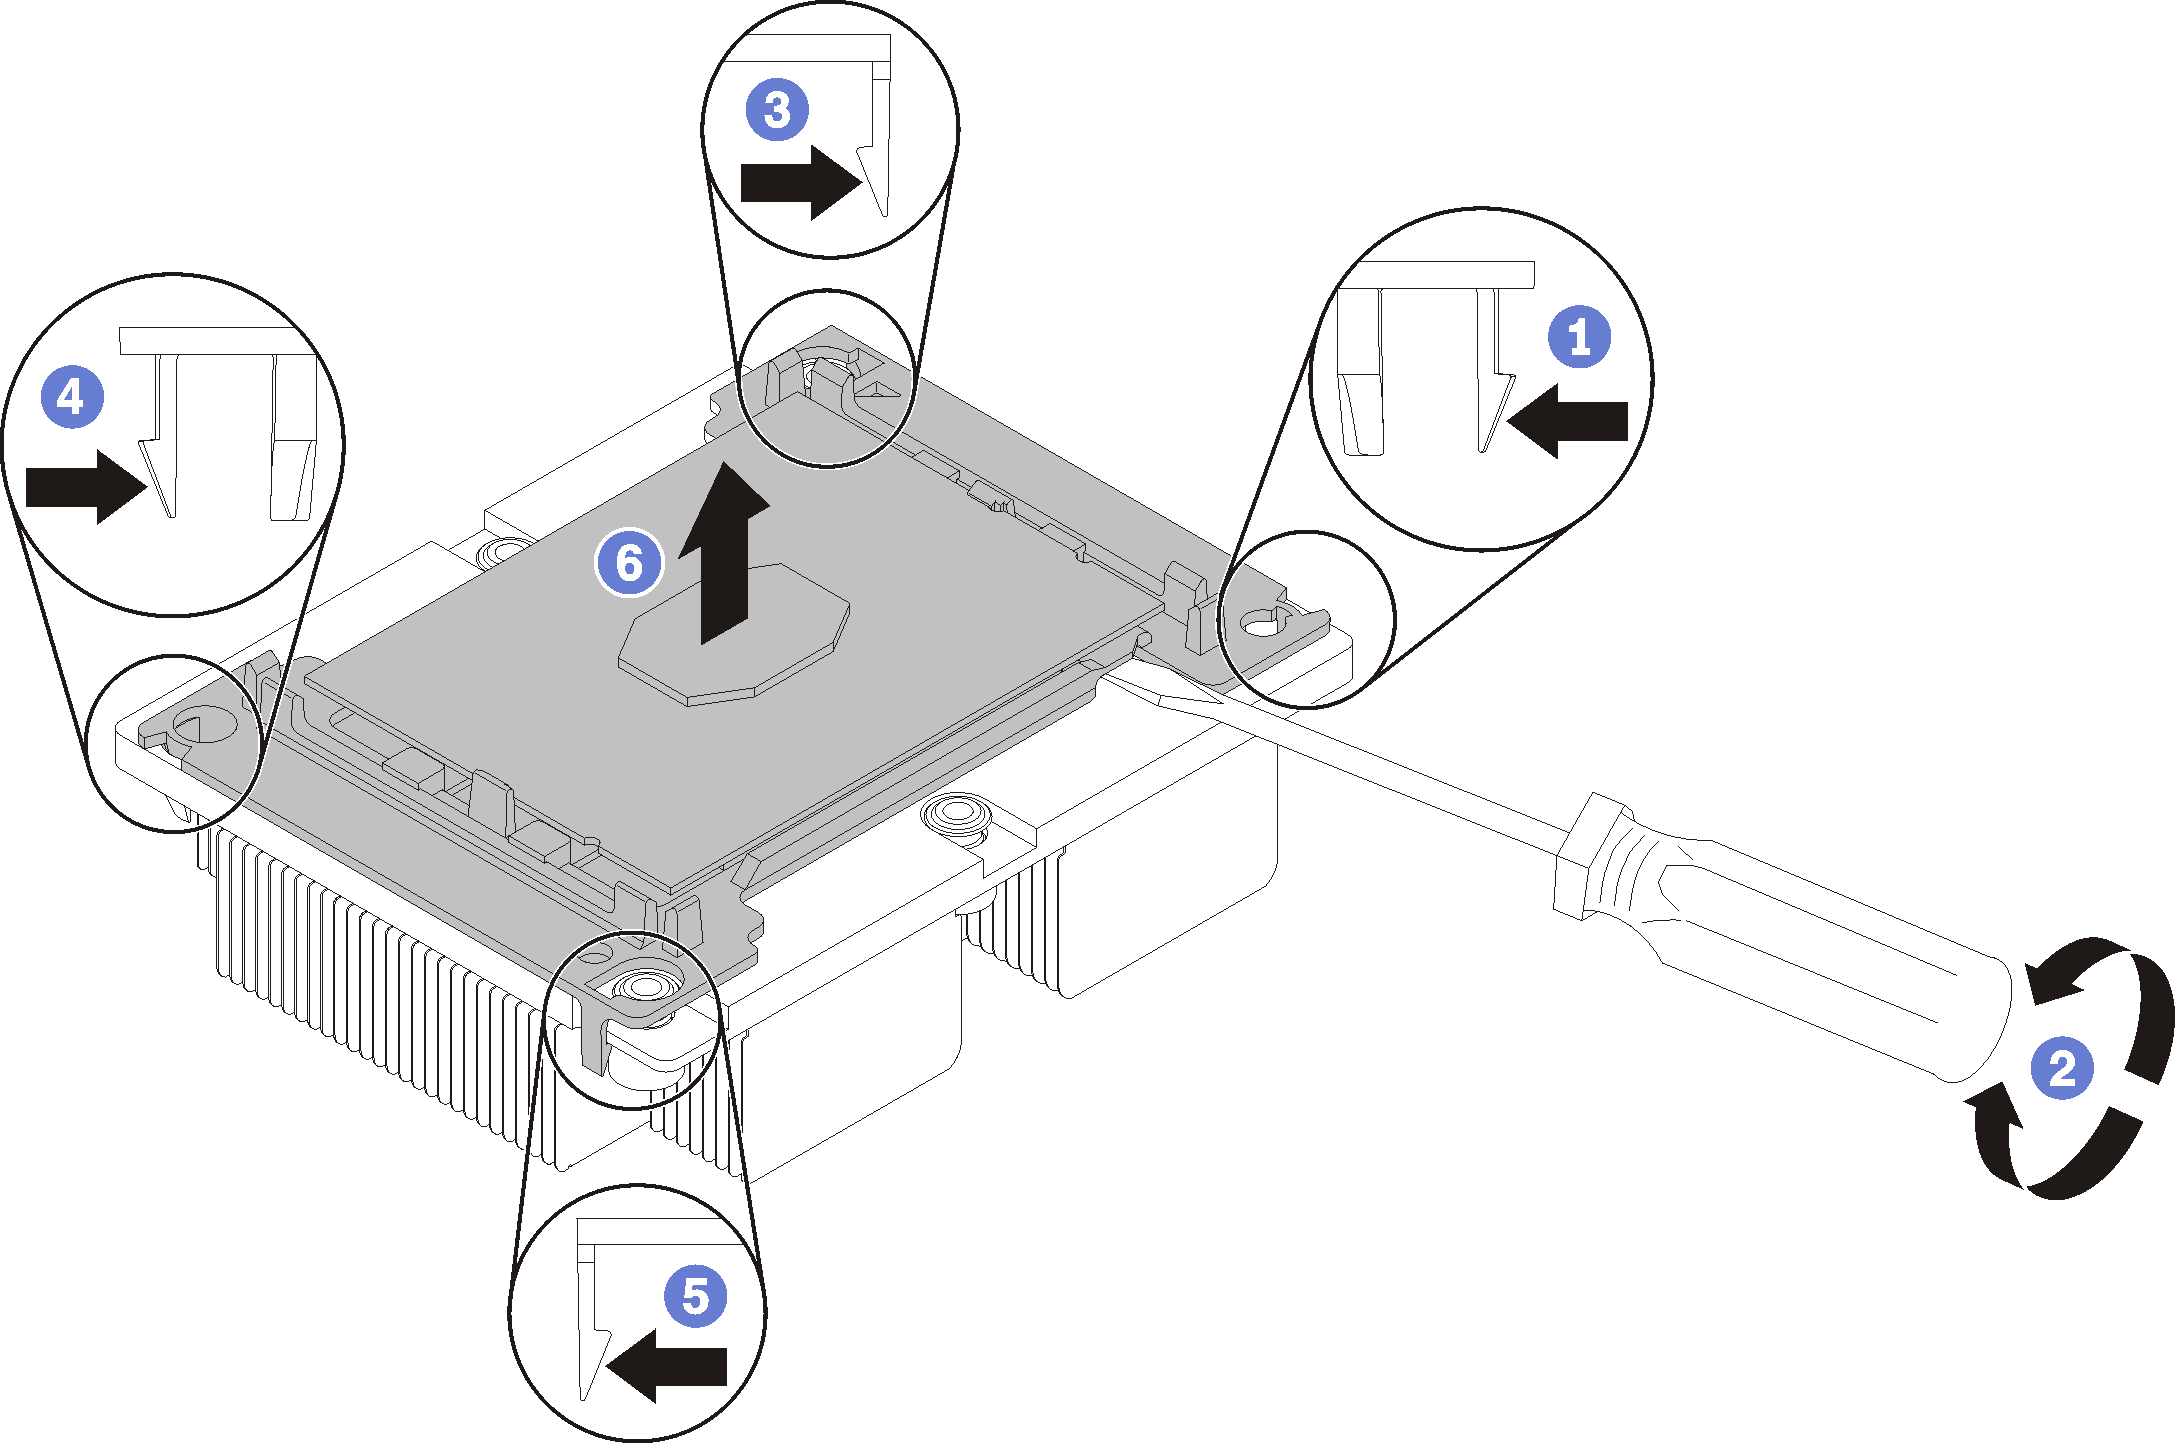
Press the retaining clip at the corner of the processor retainer closest to the pry point; then, gently pry this corner of the retainer away from the heat sink with a flat-bladed screwdriver, using a twisting motion to break the processor-to-heat-sink seal.
Release the remaining retaining clips and lift the processor and retainer from the heat sink.
After separating the processor and retainer from the heat sink, hold the processor and retainer with the thermal-grease side down and the processor-contact side up to prevent the processor from falling out of the retainer.
NoteThe processor retainer will be removed and discarded in a later step and replaced with a new one.
If you are replacing the processor, you will be reusing the heat sink. Wipe the thermal grease from the bottom of the heat sink using an alcohol cleaning pad.
If you are replacing the heat sink, you will be reusing the processor. Wipe the thermal grease from the top of the processor using an alcohol cleaning pad.
Thermal grease can stay functional on the heat sink for two years. When installing a new heat sink, make sure to check the manufacturing date to ensure the thermal grease is still functioning. If the date is over two years ago, replace the thermal grease to avoid seating issues.
If you are instructed to return the component or optional device, follow all packaging instructions, and use any packaging materials for shipping that are supplied to you.
Demo video