
Remove controller canister

You remove the failed controller canister so you can replace it with a new one.

Before you begin

  • You must use labels to identify each cable that is connected to the controller canister.
  • You must have a #1 Phillips screwdriver.
  • You have an ESD wristband, or you have taken other antistatic precautions.
  1. Put on an ESD wristband or take other antistatic precautions.
  2. Label each cable that is attached to the controller canister.
  3. Disconnect all the cables from the controller canister.
    Attention
    To prevent degraded performance, do not twist, fold, pinch, or step on the cables.
  4. If the controller canister has a HIC that uses SFP+ transceivers, remove the SFPs.
    Because you must remove the HIC from the failed controller canister, you must remove any SFPs from the HIC ports. However, you can leave any SFPs installed in the baseboard host ports. When you reconnect the cables, you can move those SFPs to the new controller canister.
  5. Confirm that the Cache Active LED on the back of the controller is off.
  6. Squeeze the latch on the cam handle until it releases, and then open the cam handle to the right to release the controller canister from the shelf.
    The following figures are examples of a 2U and 4 U controller shelf:
    Figure 1. 2U controller shelf
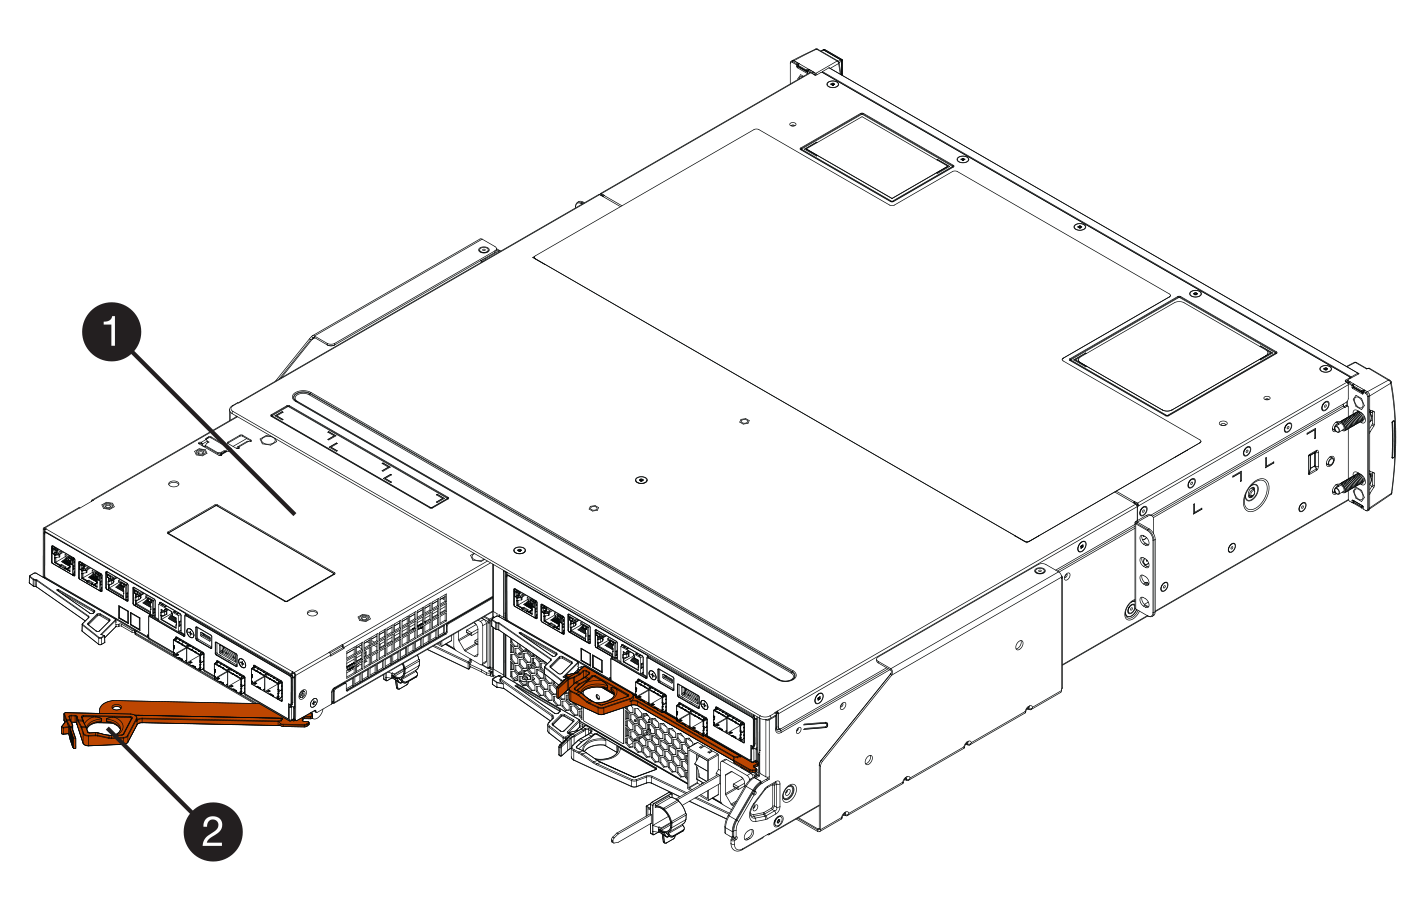
    Figure 2. 4U controller shelf
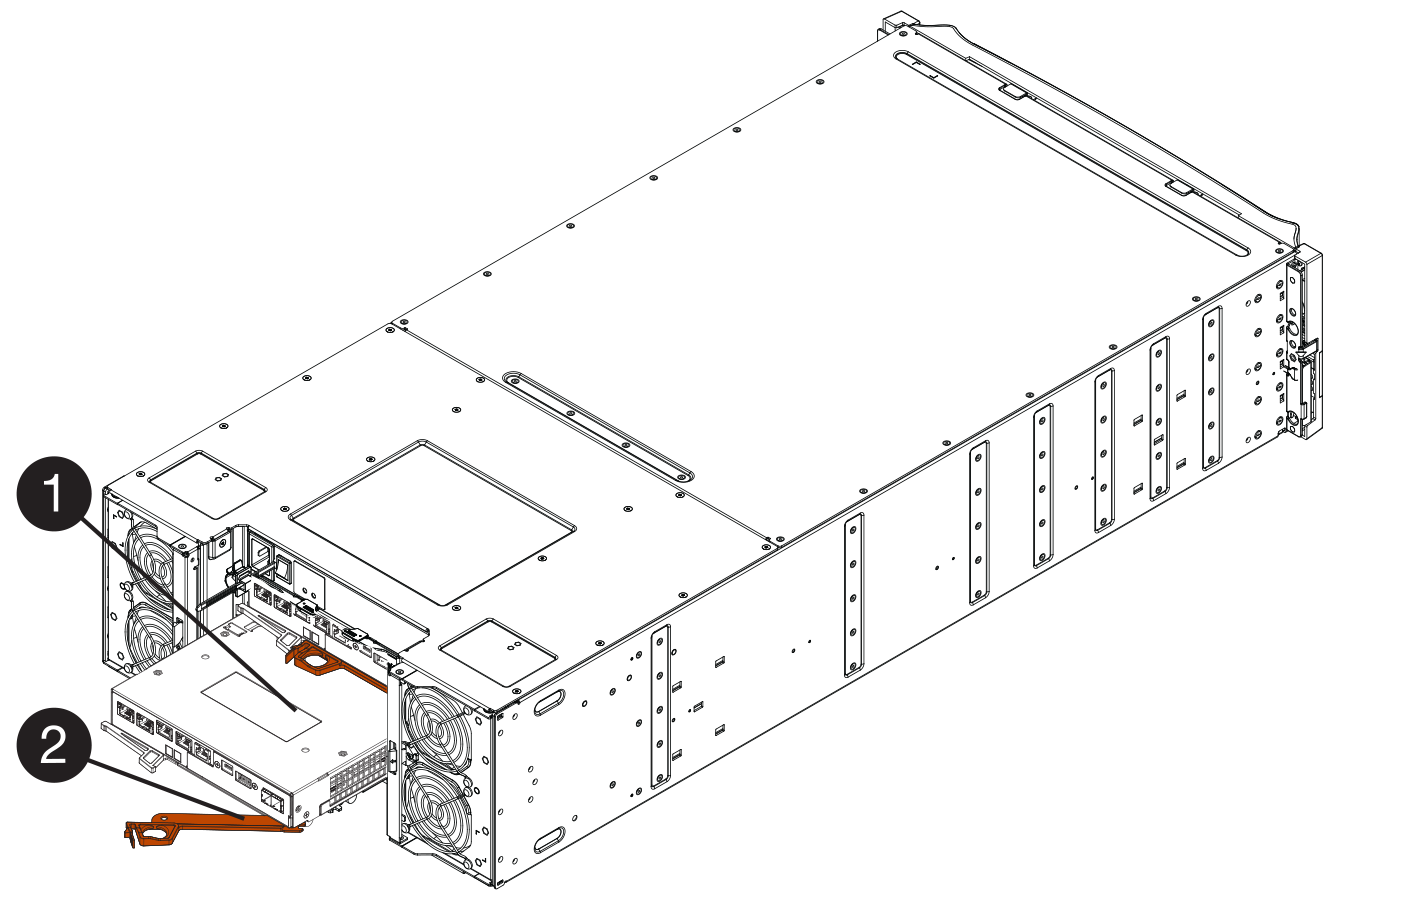
    Controller canister Cam handle
  7. Using two hands and the cam handle, slide the controller canister out of the shelf.
    Attention
    Always use two hands to support the weight of a controller canister.

    If you are removing the controller canister from a 2U controller shelf, a flap swings into place to block the empty bay, helping to maintain air flow and cooling.

  8. Turn the controller canister over, so that the removable cover faces up.
  9. Place the controller canister on a flat, static-free surface.