Install host interface card
You install a host interface card (HIC) to replace the failed one with a new HIC.
Before you begin
- You have an ESD wristband, or you have taken other antistatic precautions.
- You have a #1 Phillips screwdriver.
- You have one or two HICs, based on whether you have one or two controllers in your storage array. The HICs must be compatible with your controllers.
Attention
Possible loss of data access – Never install a HIC in a controller canister if that HIC was designed for another DE Series controller. In a two-controller configuration, both controllers and both HICs must be identical. The presence of incompatible or mismatched HICs will cause the controllers to lock down when you apply power.
- Confirm that the green LED inside the controller (by the DIMMs) is off.
If this green LED is on, the controller is still using battery power. You must wait for this LED to go off before removing any components.

 Internal Cache Active LED
 Battery
 - Carefully lower the HIC into place, and seat the HIC connector by pressing gently on the HIC.AttentionPossible equipment damage – Be very careful not to pinch the gold ribbon connector for the controller LEDs between the HIC and the thumbscrews.
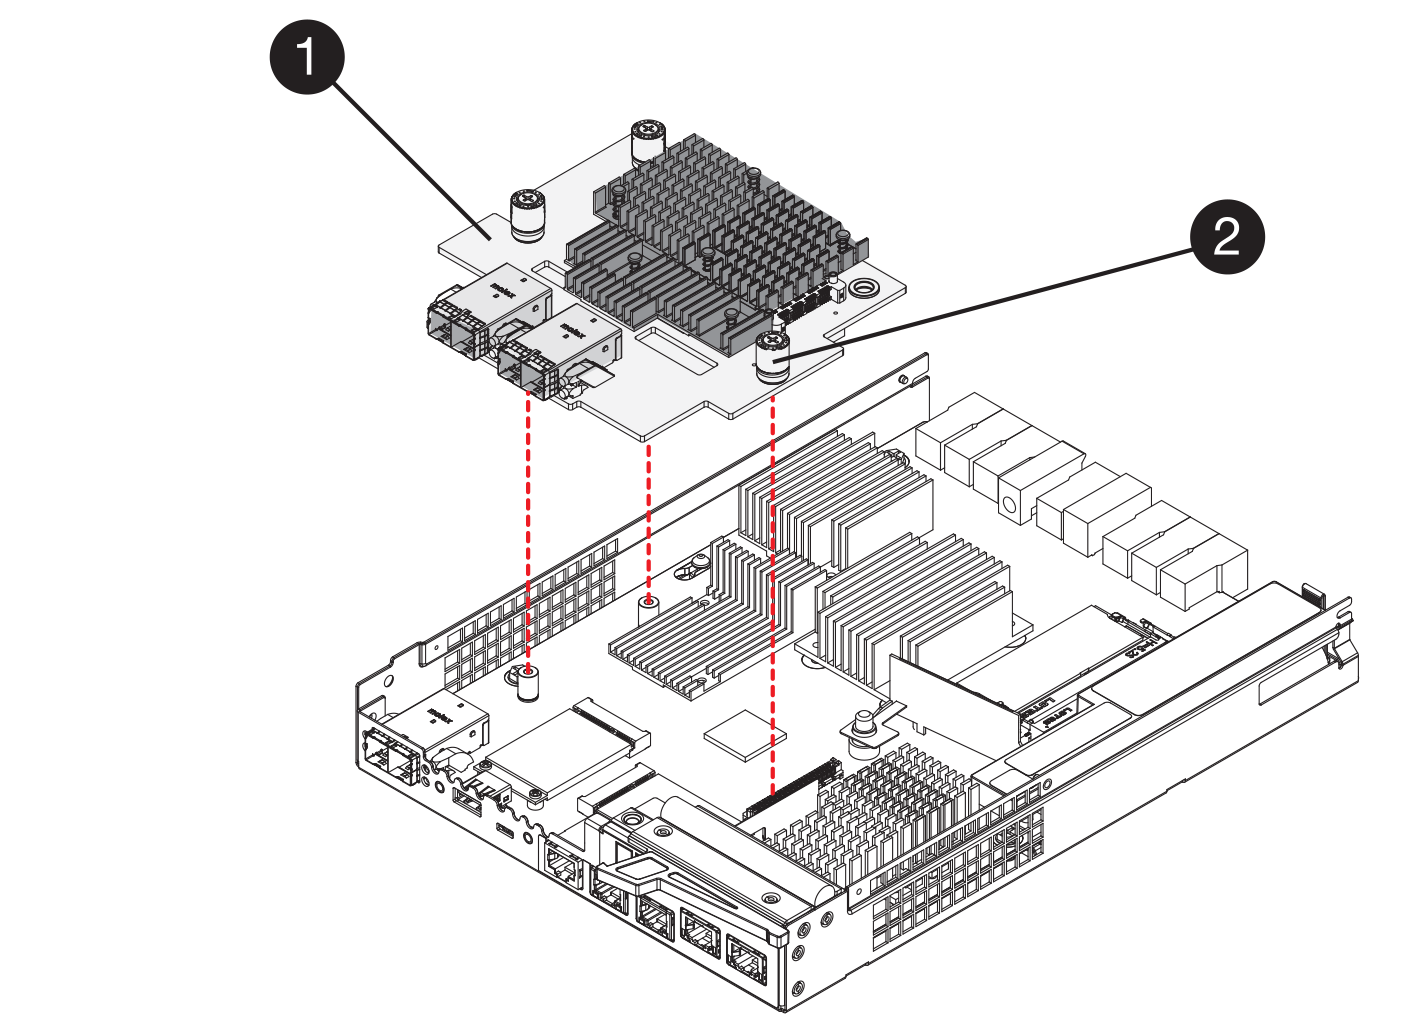 Host interface card (HIC) Thumbscrews
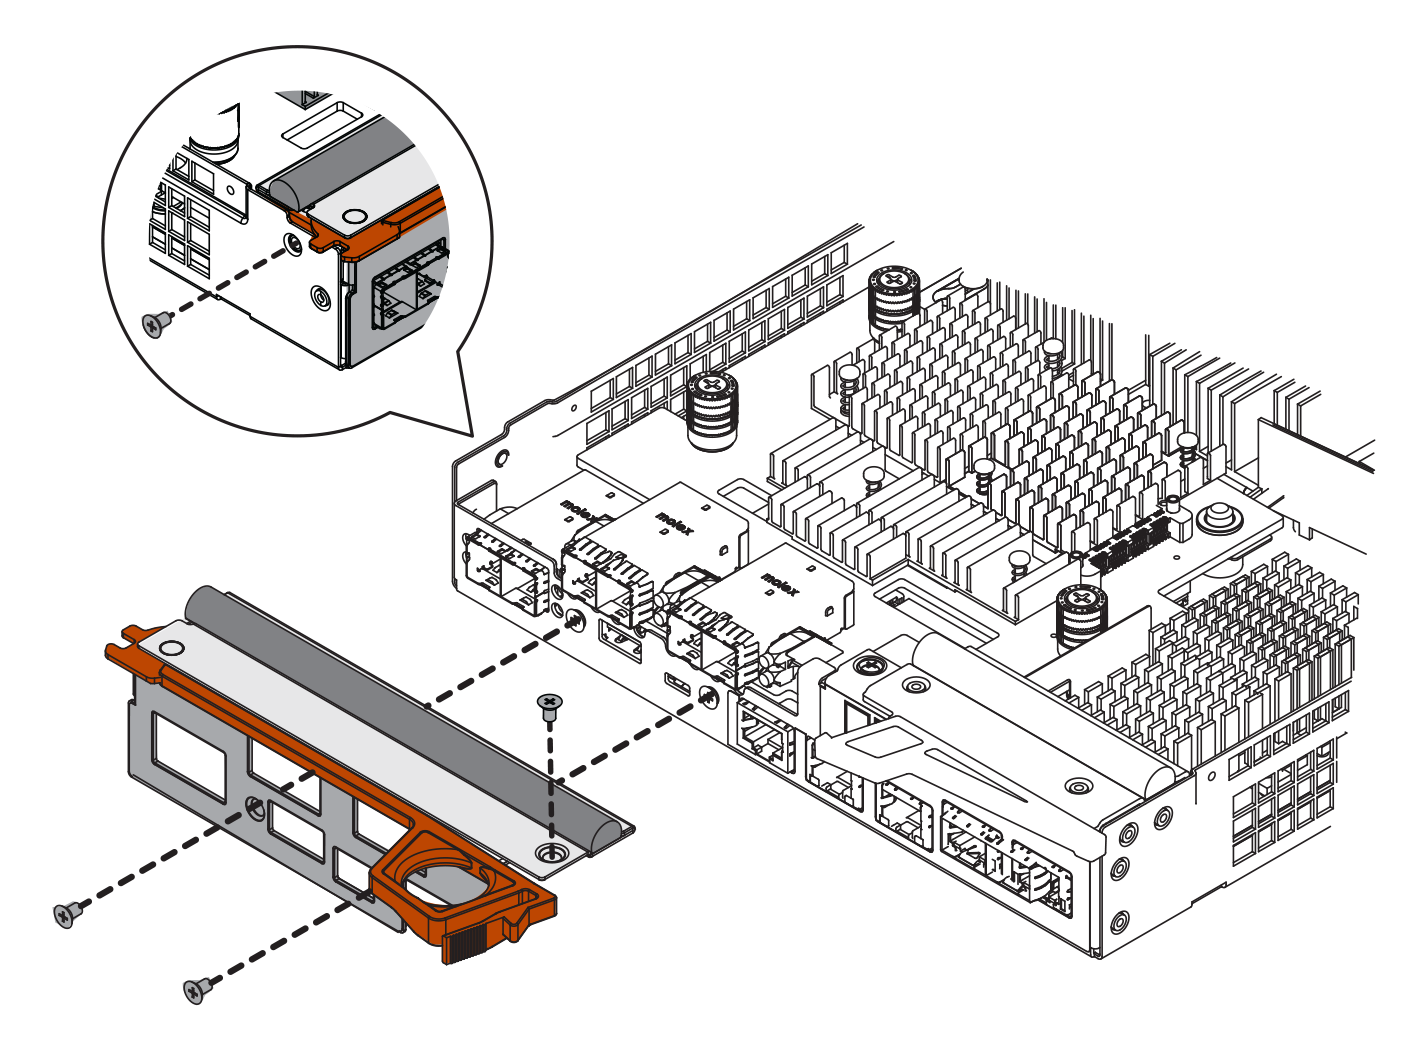
 - Using a #1 Phillips screwdriver, attach the new HIC faceplate to the controller canister with the four screws you removed previously.
Give documentation feedback