Install host interface card
If you removed a HIC from the original controller canister, you must install that HIC in the new controller canister.
Before you begin
- You must have a replacement controller canister with the same part number as the controller canister you are replacing.
- You must have a #1 Phillips screwdriver.
- You have an ESD wristband, or you have taken other antistatic precautions.
- Carefully lower the HIC into place, and seat the HIC connector by pressing gently on the HIC.AttentionPossible equipment damage – Be very careful not to pinch the gold ribbon connector for the controller LEDs between the HIC and the thumbscrews.
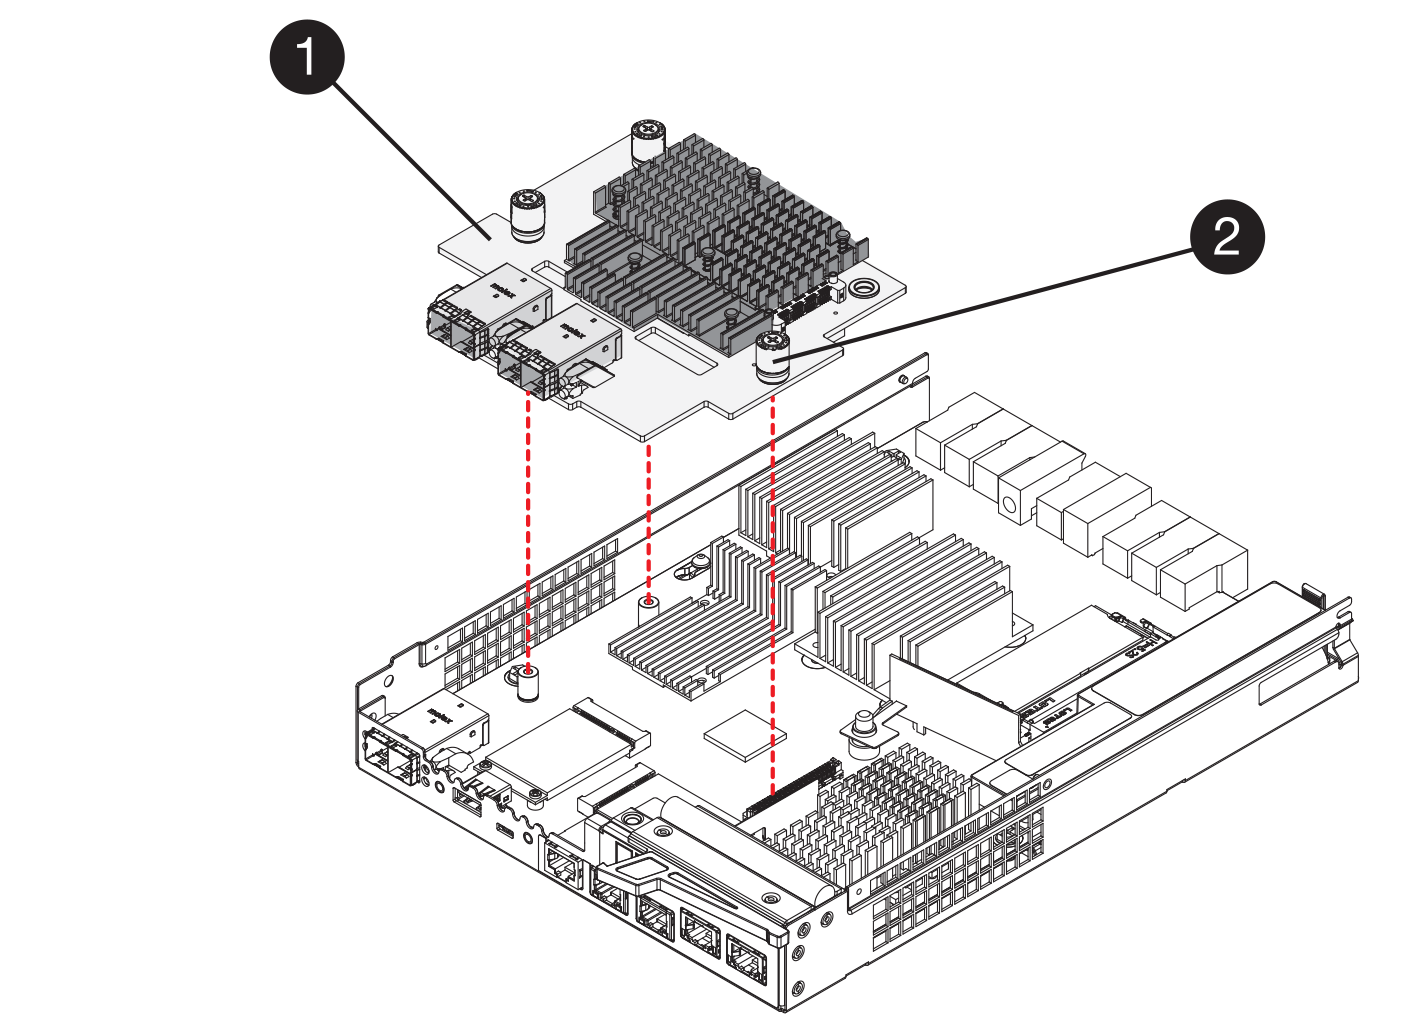
 Host interface card (HIC)
 Thumbscrews
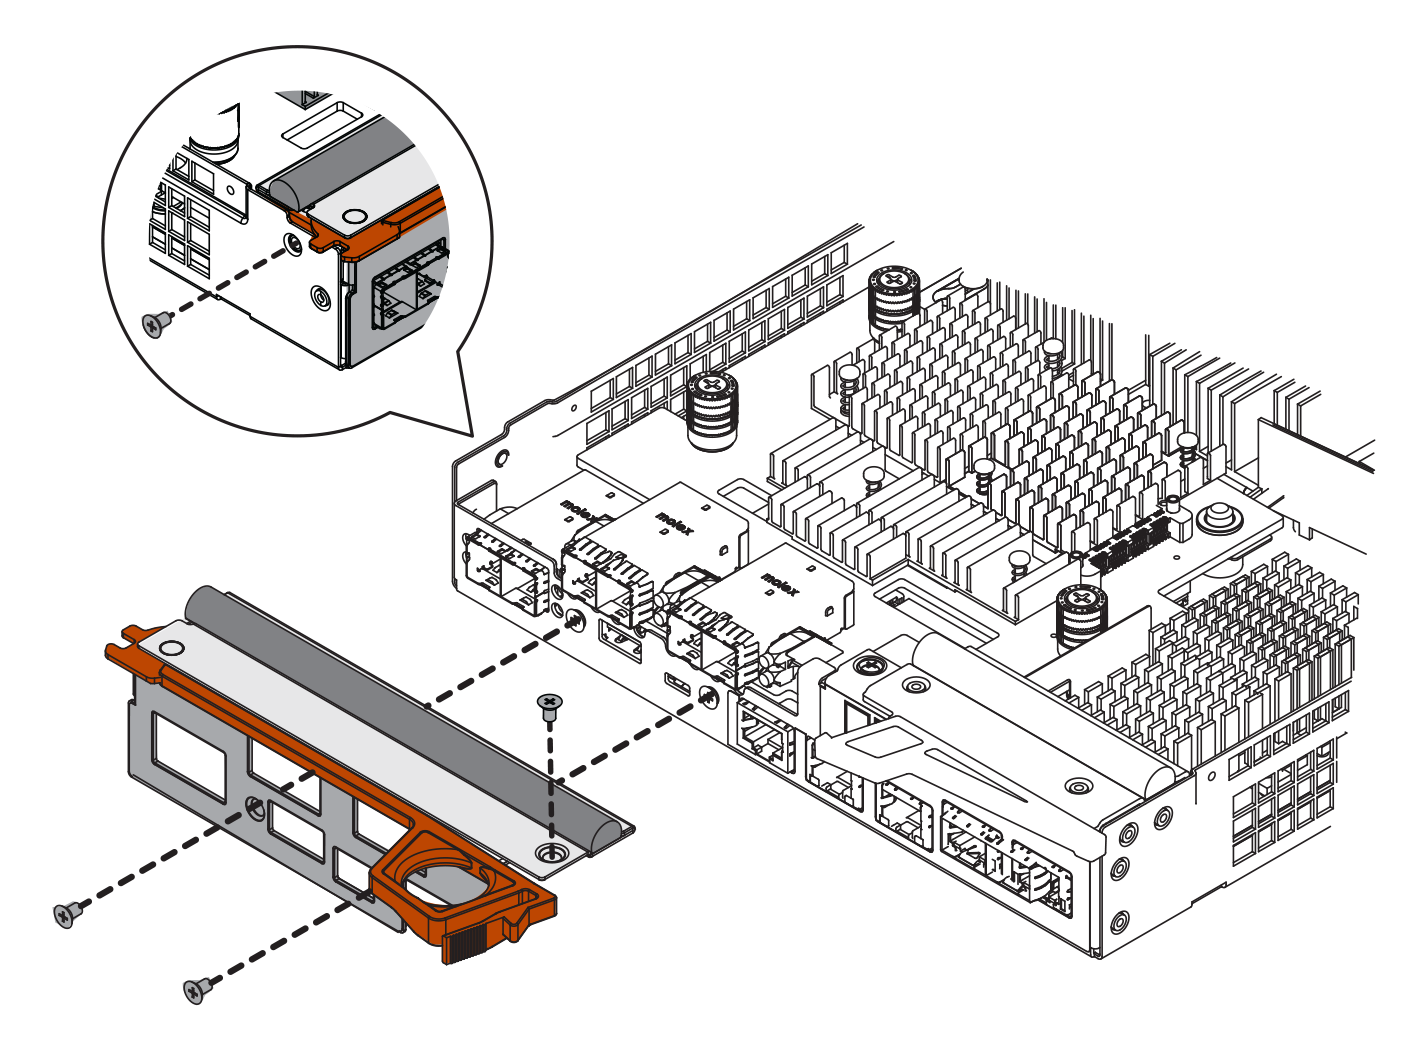
 - Using a #1 Phillips screwdriver, attach the HIC faceplate you removed from the original controller canister to the new controller canister with four screws.
Give documentation feedback