
Replacing the SATADOM

Use this information to replace the SATADOM boot drive.

To install the SATADOM, complete the following steps:

  1. Read the safety information that begins on Safety and Removing and replacing guidelines.
  2. Turn off the server and peripheral devices and disconnect the power cords and all external cables.
  3. Remove the top cover (see Removing the top cover).
  4. Touch the static-protective package that contains the SATADOM and bracket to any unpainted metal surface on the server; then, remove the SATADOM and bracket from the package.
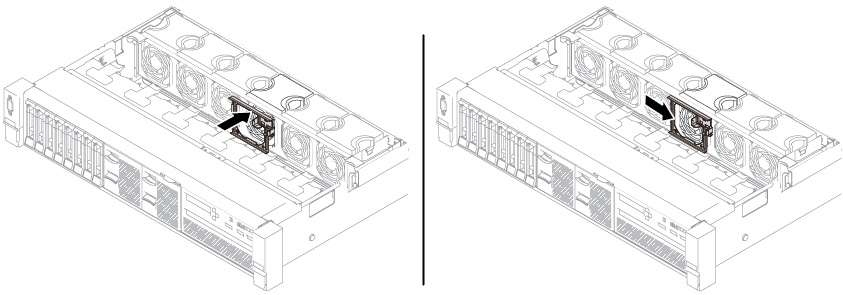
  5. Align the bracket with the fan cage and press the bracket onto the fan cage surface (fan 2 location). Then slide the bracket to the right until it snaps into position.
    Figure 1. SATADOM bracket installation
    SATADOM bracket installation
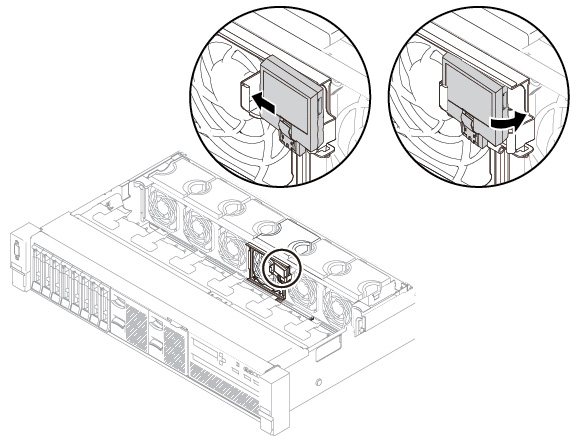
  6. Insert the SATADOM into the bracket and press the SATADOM as shown until it is secured by the bracket.
    Figure 2. SATADOM installation
    SATADOM installation
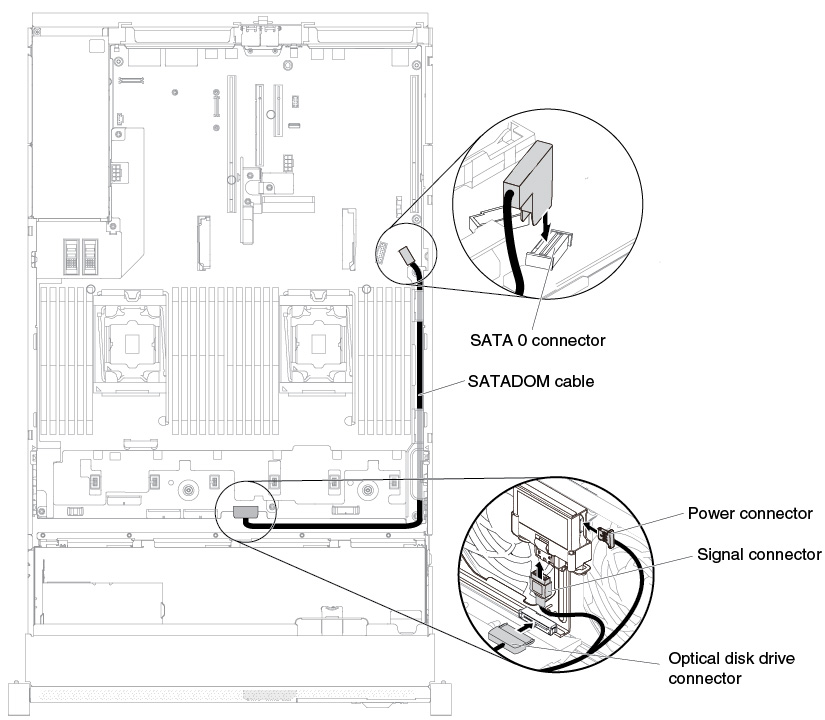
  7. Connect the SATADOM cable to the SATADOM and the system board. Remove the air baffle if necessary (see Removing the air baffle).
    Figure 3. SATADOM cable routing
    SATADOM cable routing
  8. Install the air baffle if it is removed (see Replacing the air baffle).
  9. Install the top cover (see Replacing the top cover).
  10. Slide the server into the rack.
  11. Reconnect the power cords and any cables that you removed.
  12. Turn on the peripheral devices and the server.