Removing the controller module
You must remove the controller module from the chassis when you replace a component inside the controller module.
Make sure that you label the cables so that you know where they came from.
A video for this task is available at:
- Insert your forefinger into the latching mechanism on either side of the controller module, press the lever with your thumb, and gently pull the controller a few inches out of the chassis.NoteIf you have difficulty removing the controller module, place your index fingers through the finger holes from the inside (by crossing your arms)
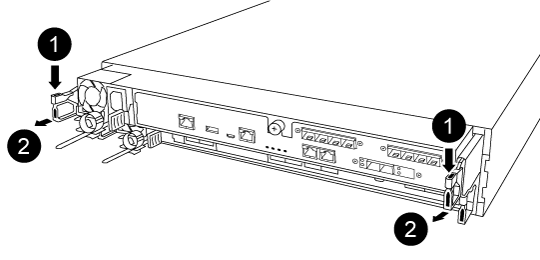

Lever 
Latching mechanism - Turn the thumbscrew on the front of the controller module anti-clockwise and open the controller module cover.
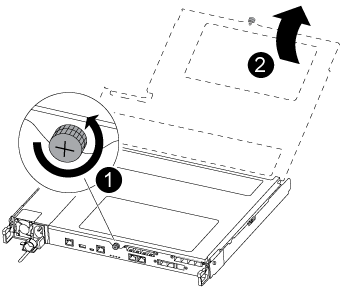
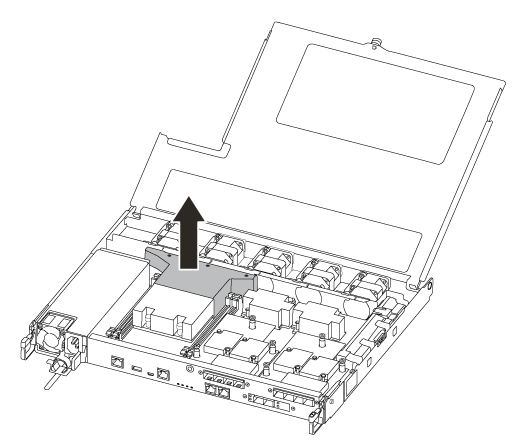
Thumbscrew Controller module cover - Lift out the air duct cover.
Give documentation feedback