The replacement boot media that you installed is without a boot image so you need to transfer a boot image using a USB flash drive.
- You must have a USB flash drive, formatted to MBR/FAT32, with at least 4GB capacity
- A copy of the same image version of ONTAP as what the impaired controller was running. You can download the appropriate image from the Downloads section on the Lenovo Data Center Support Site
- If NVE is enabled, download the image with Lenovo Volume Encryption, as indicated in the download button.
- If NVE is not enabled, download the image without Lenovo Volume Encryption, as indicated in the download button.
- If your system is an HA pair, you must have a network connection.
- If your system is a stand-alone system you do not need a network connection, but you must perform an additional reboot when restoring the var file system.
- Download and copy the appropriate service image from the Lenovo Data Center Support Site to the USB flash drive.
- Download the service image to your work space on your laptop.
- Unzip the service image.
If you are extracting the contents using Windows, do not use winzip to extract the netboot image. Use another extraction tool, such as 7-Zip or WinRAR.
There are two folders in the unzipped service image file:
- Copy the efi folder to the top directory on the USB flash drive.
The USB flash drive should have the efi folder and the same image version of ONTAP as what the impaired controller was running.
- Remove the USB flash drive from your laptop.
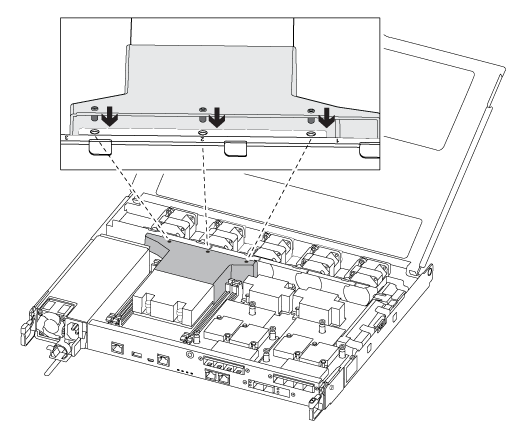
- If you have not already done so, close the air duct.
- Close the controller module cover and tighten the thumbscrew.
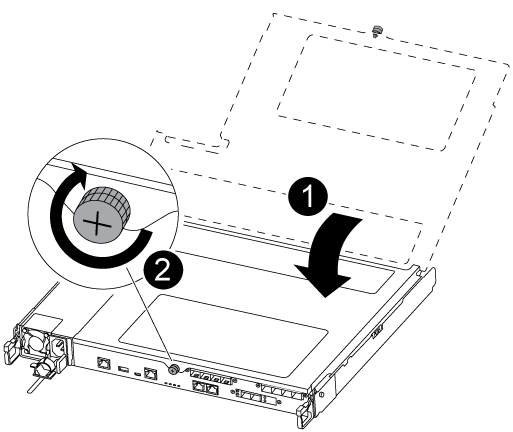
 | Controller module cover |
 | Thumbscrew |
- Align the end of the controller module with the opening in the chassis, and then gently push the controller module halfway into the system.
- Reattach the storage and networking cables.
- Plug the power cable into the power supply and reinstall the power cable retainer.
- Insert the USB flash drive into the USB slot on the controller module.
Make sure that you install the USB flash drive in the slot labeled for USB devices, and not in the USB console port.
- Push the controller module all the way into the chassis:
- Cross your arms and place your index fingers through the finger holes from the inside of the latching mechanism.
- Press your thumbs down on the orange tabs on top of the latching mechanism and gently push the controller module over the stop.
- Release your thumbs from the top of the latching mechanisms and continue pushing until the latching mechanisms snap into place.
The controller module begins to boot as soon as it is fully seated in the chassis. Be prepared to interrupt the boot process.
The controller module should be fully inserted and flush with the edges of the chassis.
- Check that all required boot environment variables and bootargs are properly set for your system type and configuration using the printenv bootarg name command and correct any errors using the setenv variable-name <value> command.
- Check the boot environment variables:
- bootarg.init.boot_clustered
- partner-sysid
- bootarg.init.flash_optimize for DG5000
- bootarg.init.switchless_cluster.enable
- If External Key Manager is enabled, check the bootarg values, listed in the kenv ASUP output:
- bootarg.storageencryption.support <value>
- bootarg.keymanager.support <value>
- kmip.init.interface <value>
- kmip.init.ipaddr <value>
- kmip.init.netmask <value>
- kmip.init.gateway <value>
- If Onboard Key Manager is enabled, check the bootarg values, listed in the kenv ASUP output:
- bootarg.storageencryption.support <value>
- bootarg.keymanager.support <value>
- bootarg.onboard_keymanager <value>
- Save the environment variables you changed with the savenv command
- Confirm your changes using the printenv variable-name command.