Install a DWC PSU
Use this information to install a DWC PSU.

To avoid a shock hazard:
- Connect all power cords to a properly wired and grounded electrical outlet/source.
- Connect any equipment that will be attached to this product to properly wired outlets/sources.
- When possible, use one hand only to connect or disconnect signal cables.
- Never turn on any equipment when there is evidence of fire, water, or structural damage.
- The device might have more than one power cord, to remove all electrical current from the device, ensure that all power cords are disconnected from the power source.
Never remove the cover on a power supply or any part that has this label attached. Hazardous voltage, current, and energy levels are present inside any component that has this label attached. There are no serviceable parts inside these components. If you suspect a problem with one of these parts, contact a service technician.
High touch current. Connect to earth before connecting to supply.
Read Installation Guidelines and Safety inspection checklist to ensure that you work safely.
- The following notes describe the type of power supply that the enclosure supports and other information that you must consider when you install a power supply:
Make sure you follow the guidelines in PSU configuration.
- For redundancy support, you must install an additional hot-swap power supply or DWC PSU, if one is not installed in your model.
- Make sure that the devices that you are installing are supported. For a list of supported optional devices for the enclosure, see Lenovo ServerProven website.
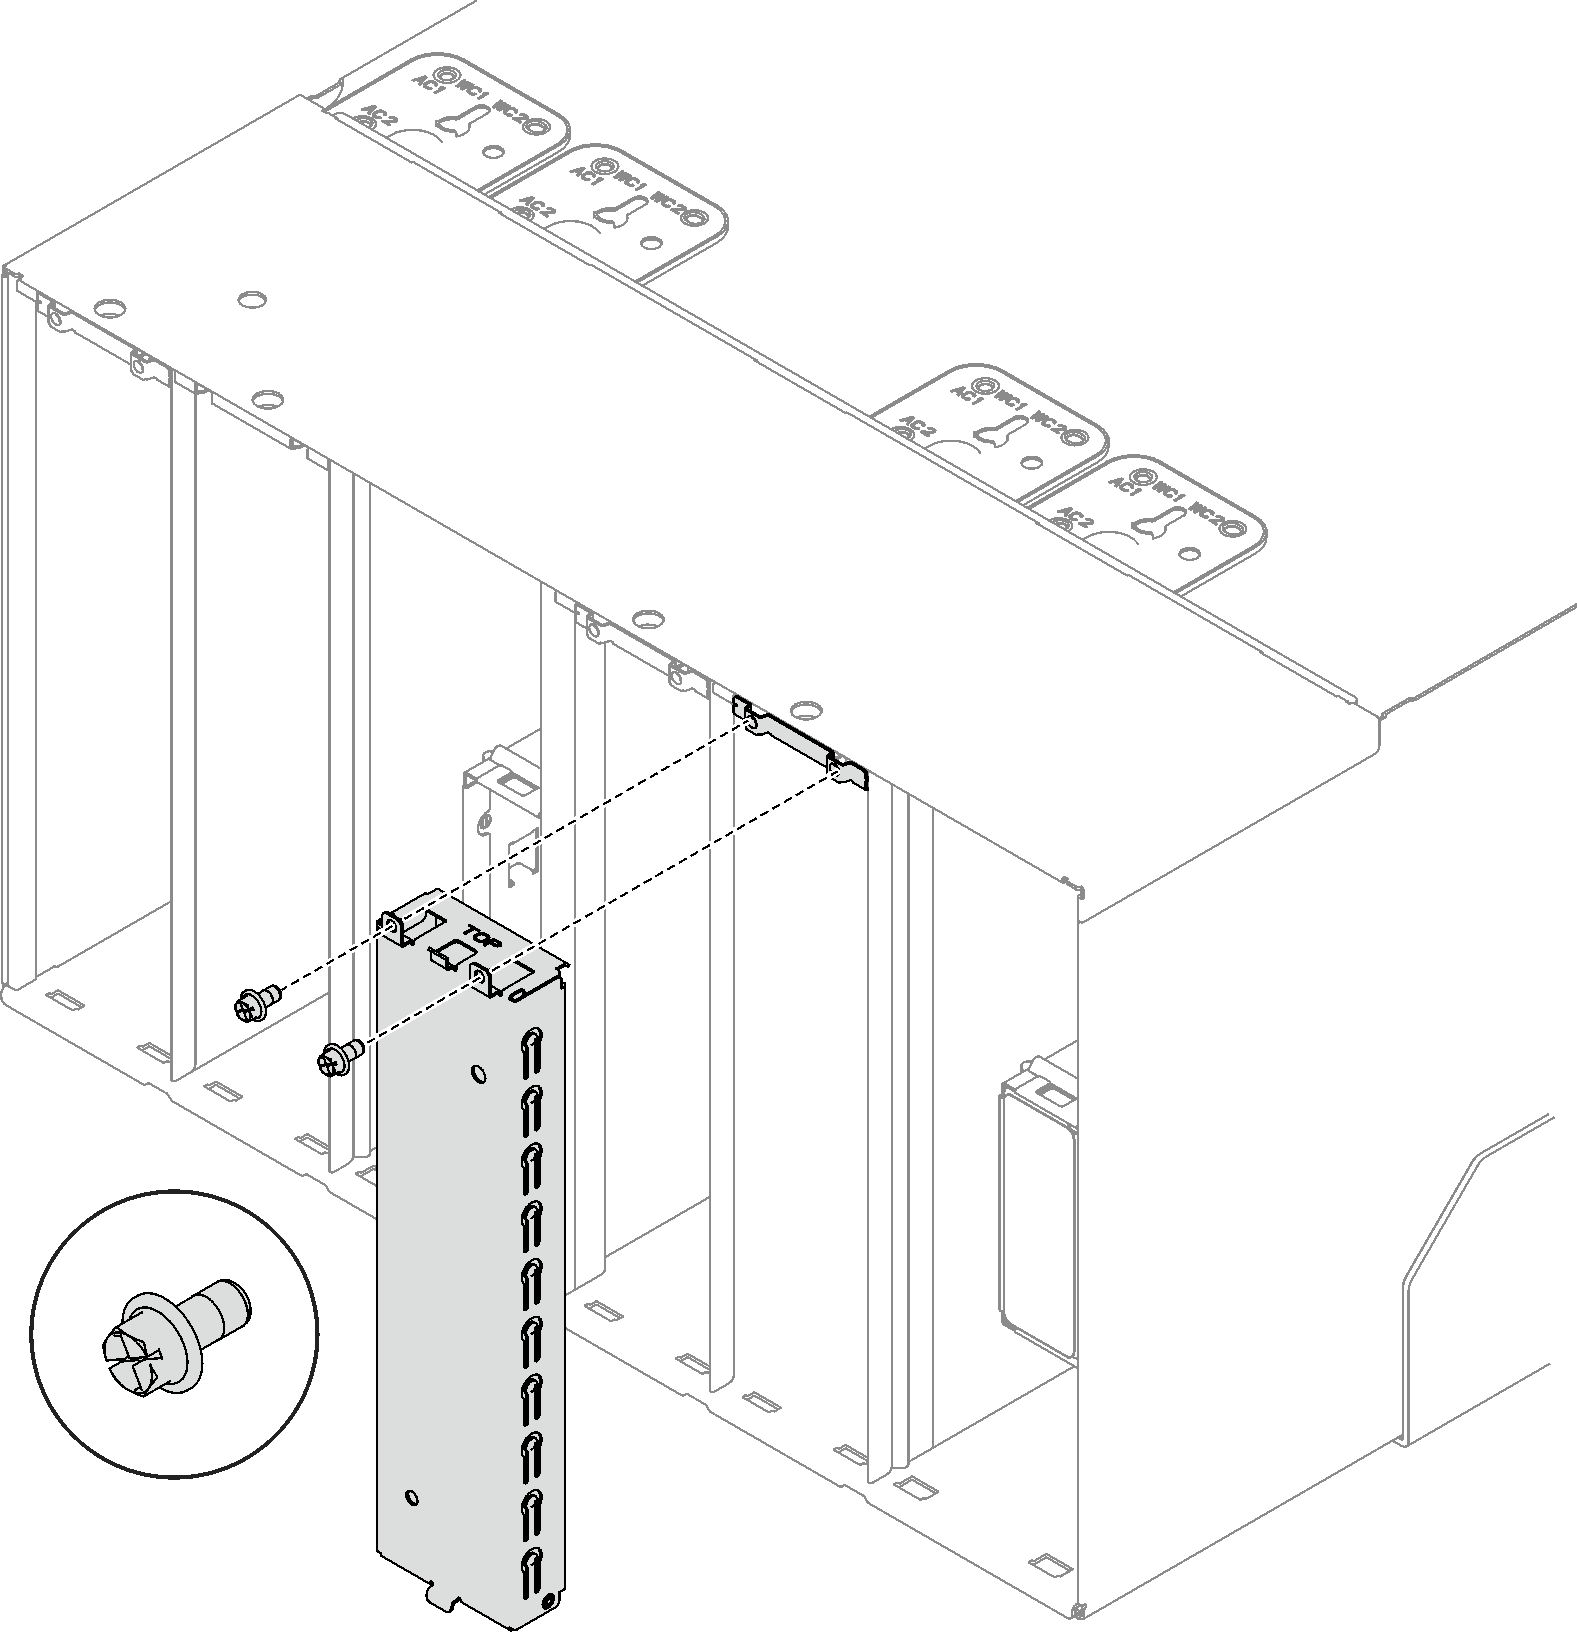
- If a DWC PSU filler is installed, remove the two screws; then, remove the DWC PSU filler.Figure 1. DWC PSU filler removal
Go to Drivers and Software download website for ThinkSystem DW612S Enclosure to see the latest firmware and driver updates for your server.
Go to Update the firmware for more information on firmware updating tools.
Procedure
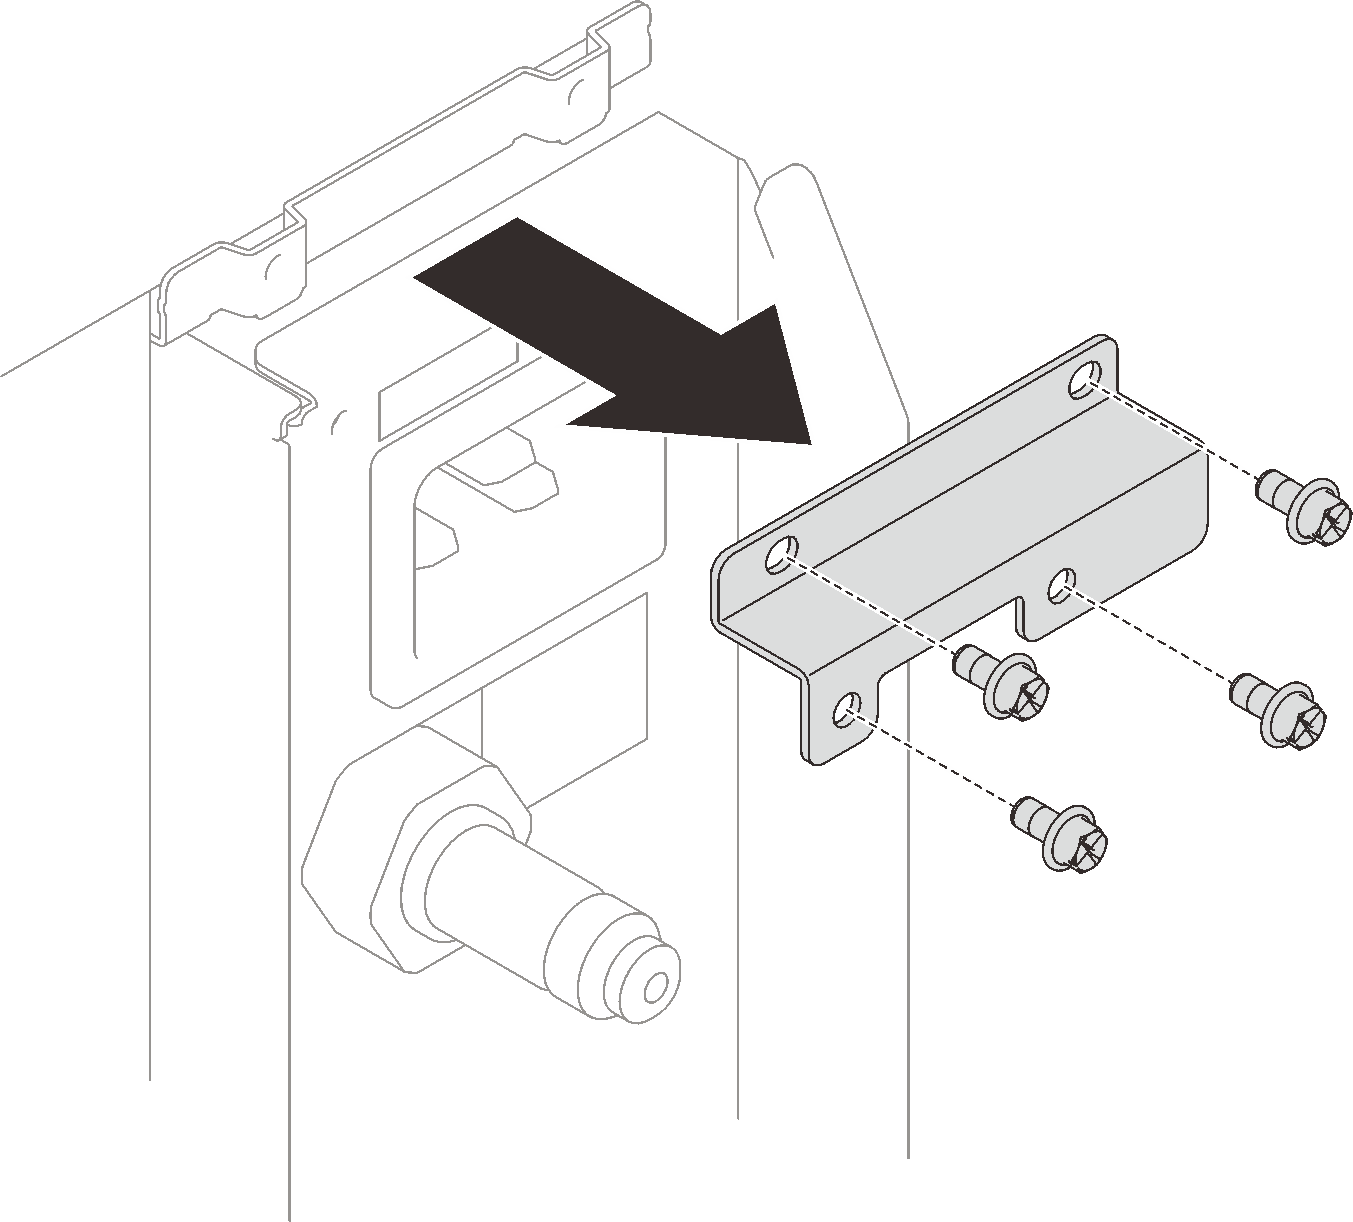
- If a DWC PSU shipping bracket is installed; after final rack placement, remove the four screws and remove the DWC PSU shipping bracket.Figure 2. DWC PSU shipping bracket removal
- Install the DWC power supply.
 Slide the DWC power supply into the bay until it stops.
 Rotate the cam handles inwards to secure the DWC power supply in place.
ImportantDuring normal operation, each power-supply bay must contain either a power supply or power-supply filler panel for proper cooling.Figure 3. DWC power supply installation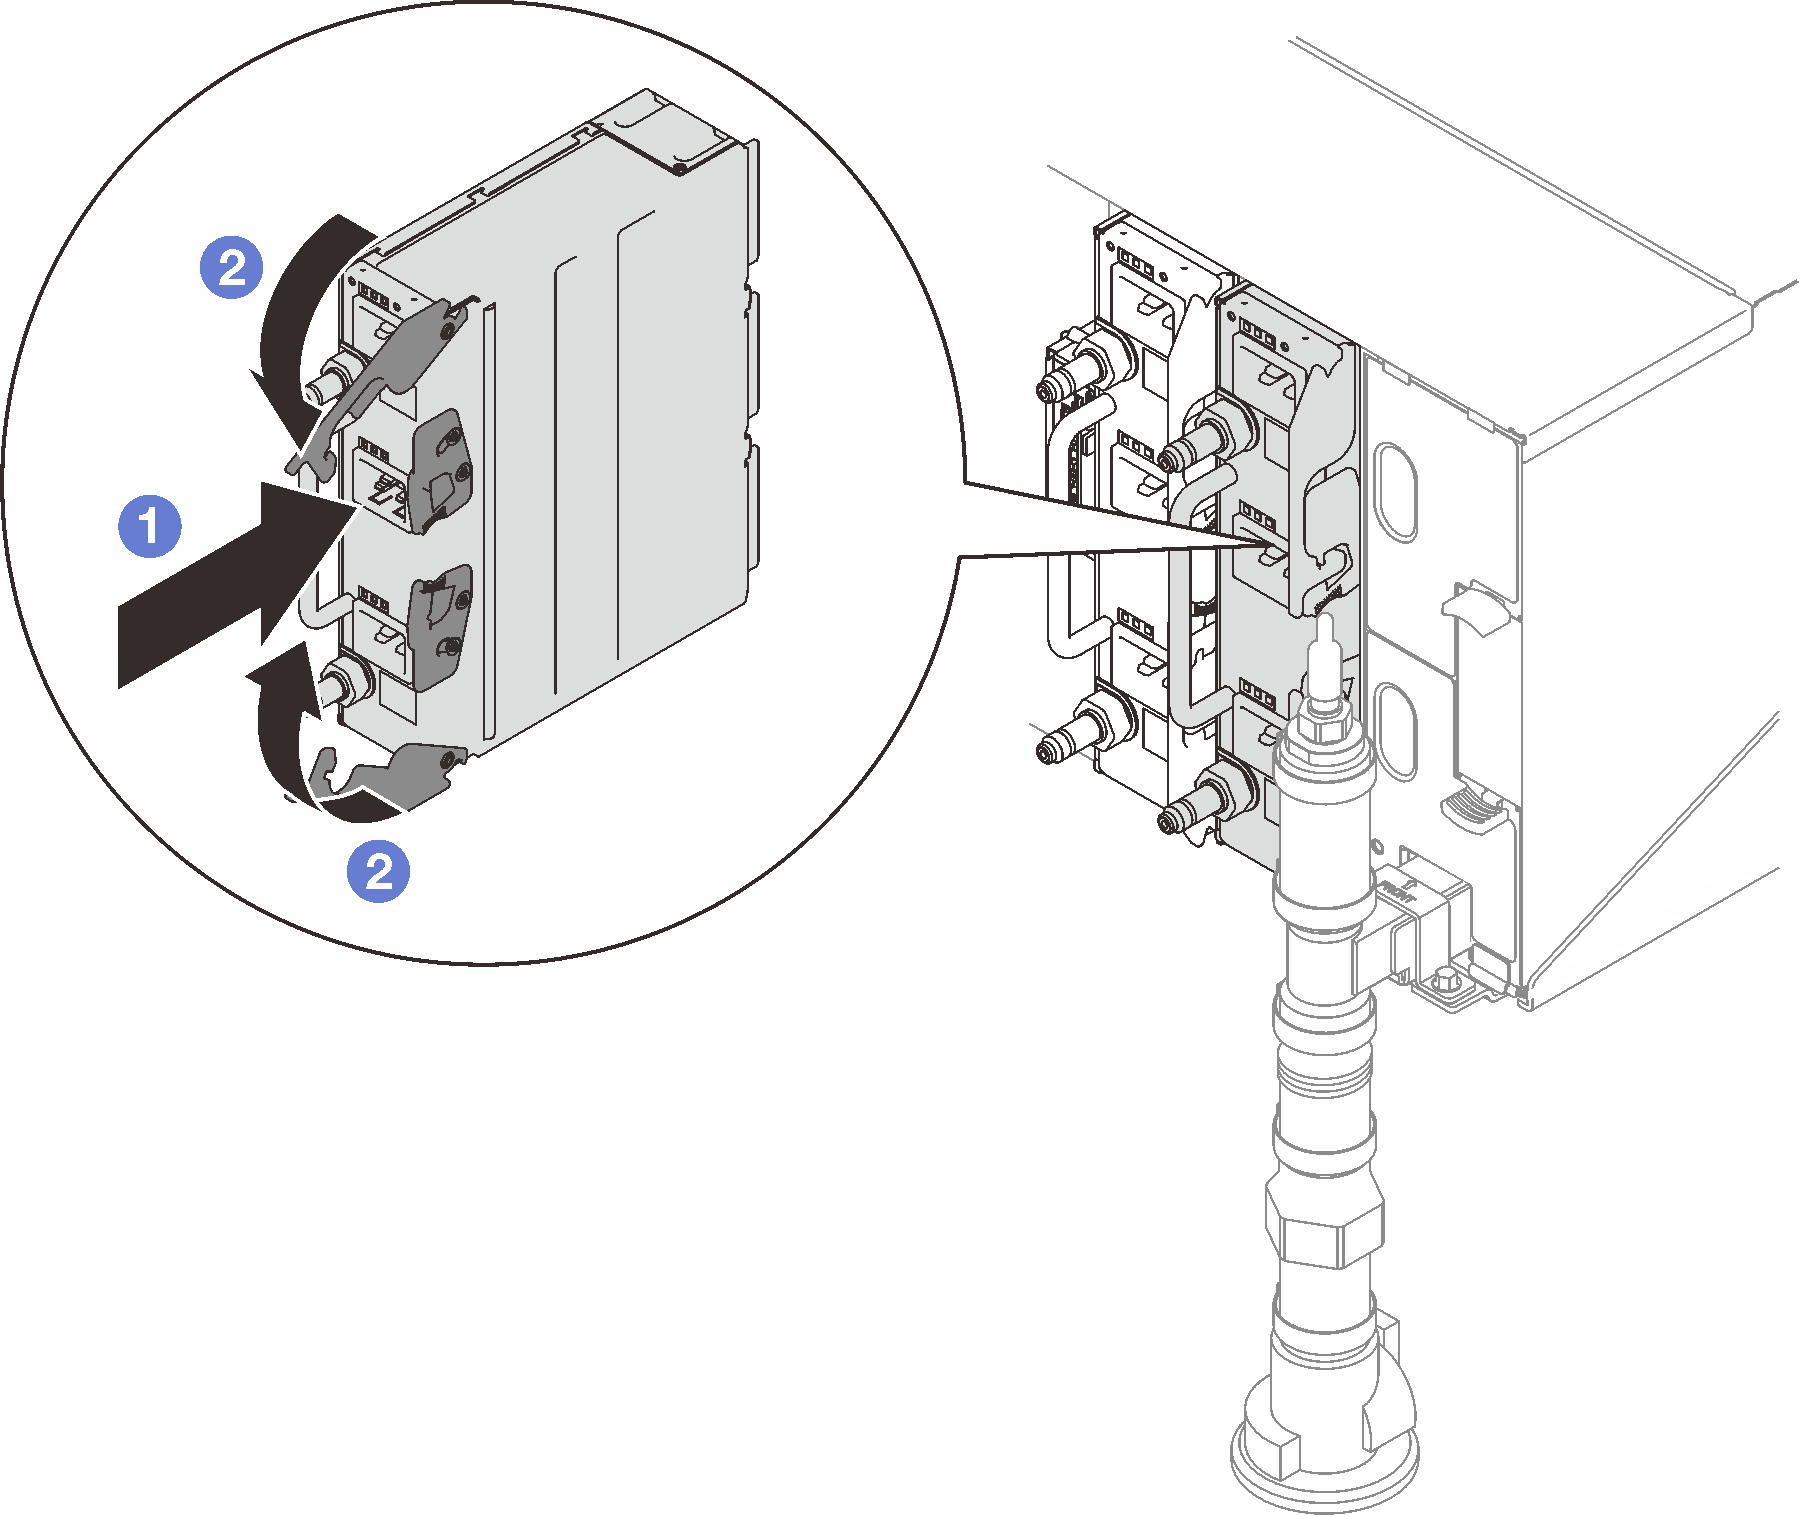
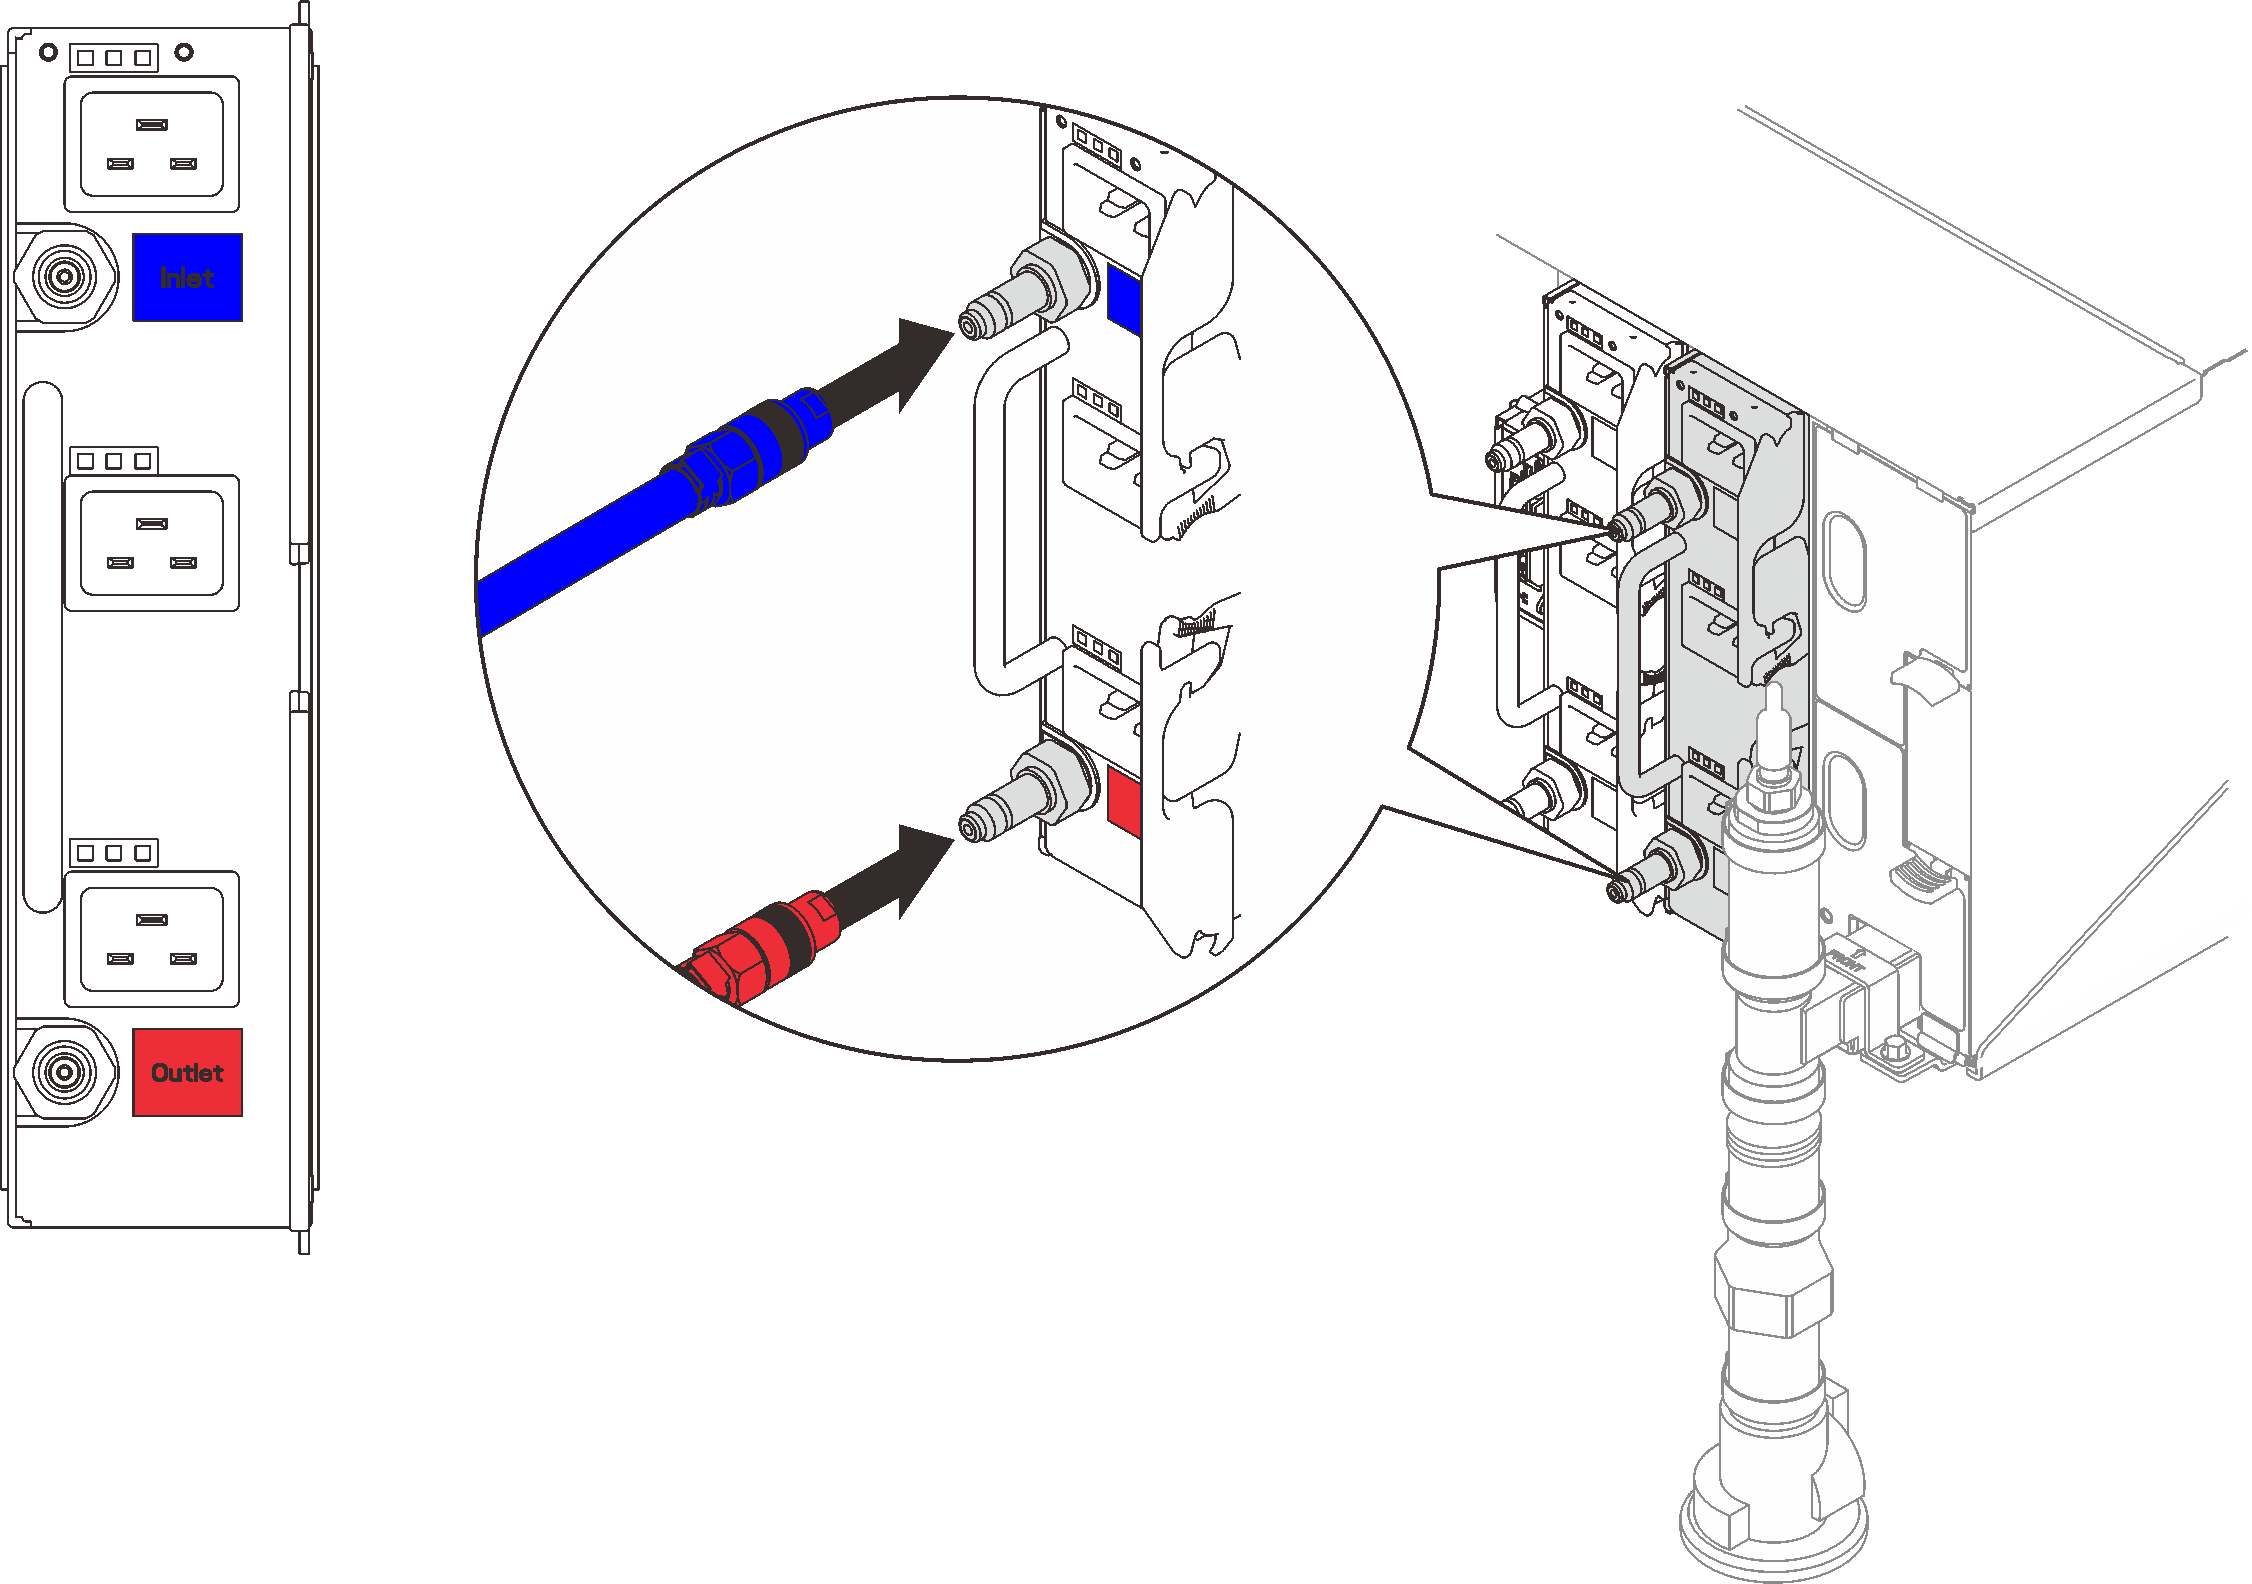
- Connect the DWC PSU manifold hose assembly to the DWC power supply quick connect.Figure 4. DWC PSU hose assembly installation
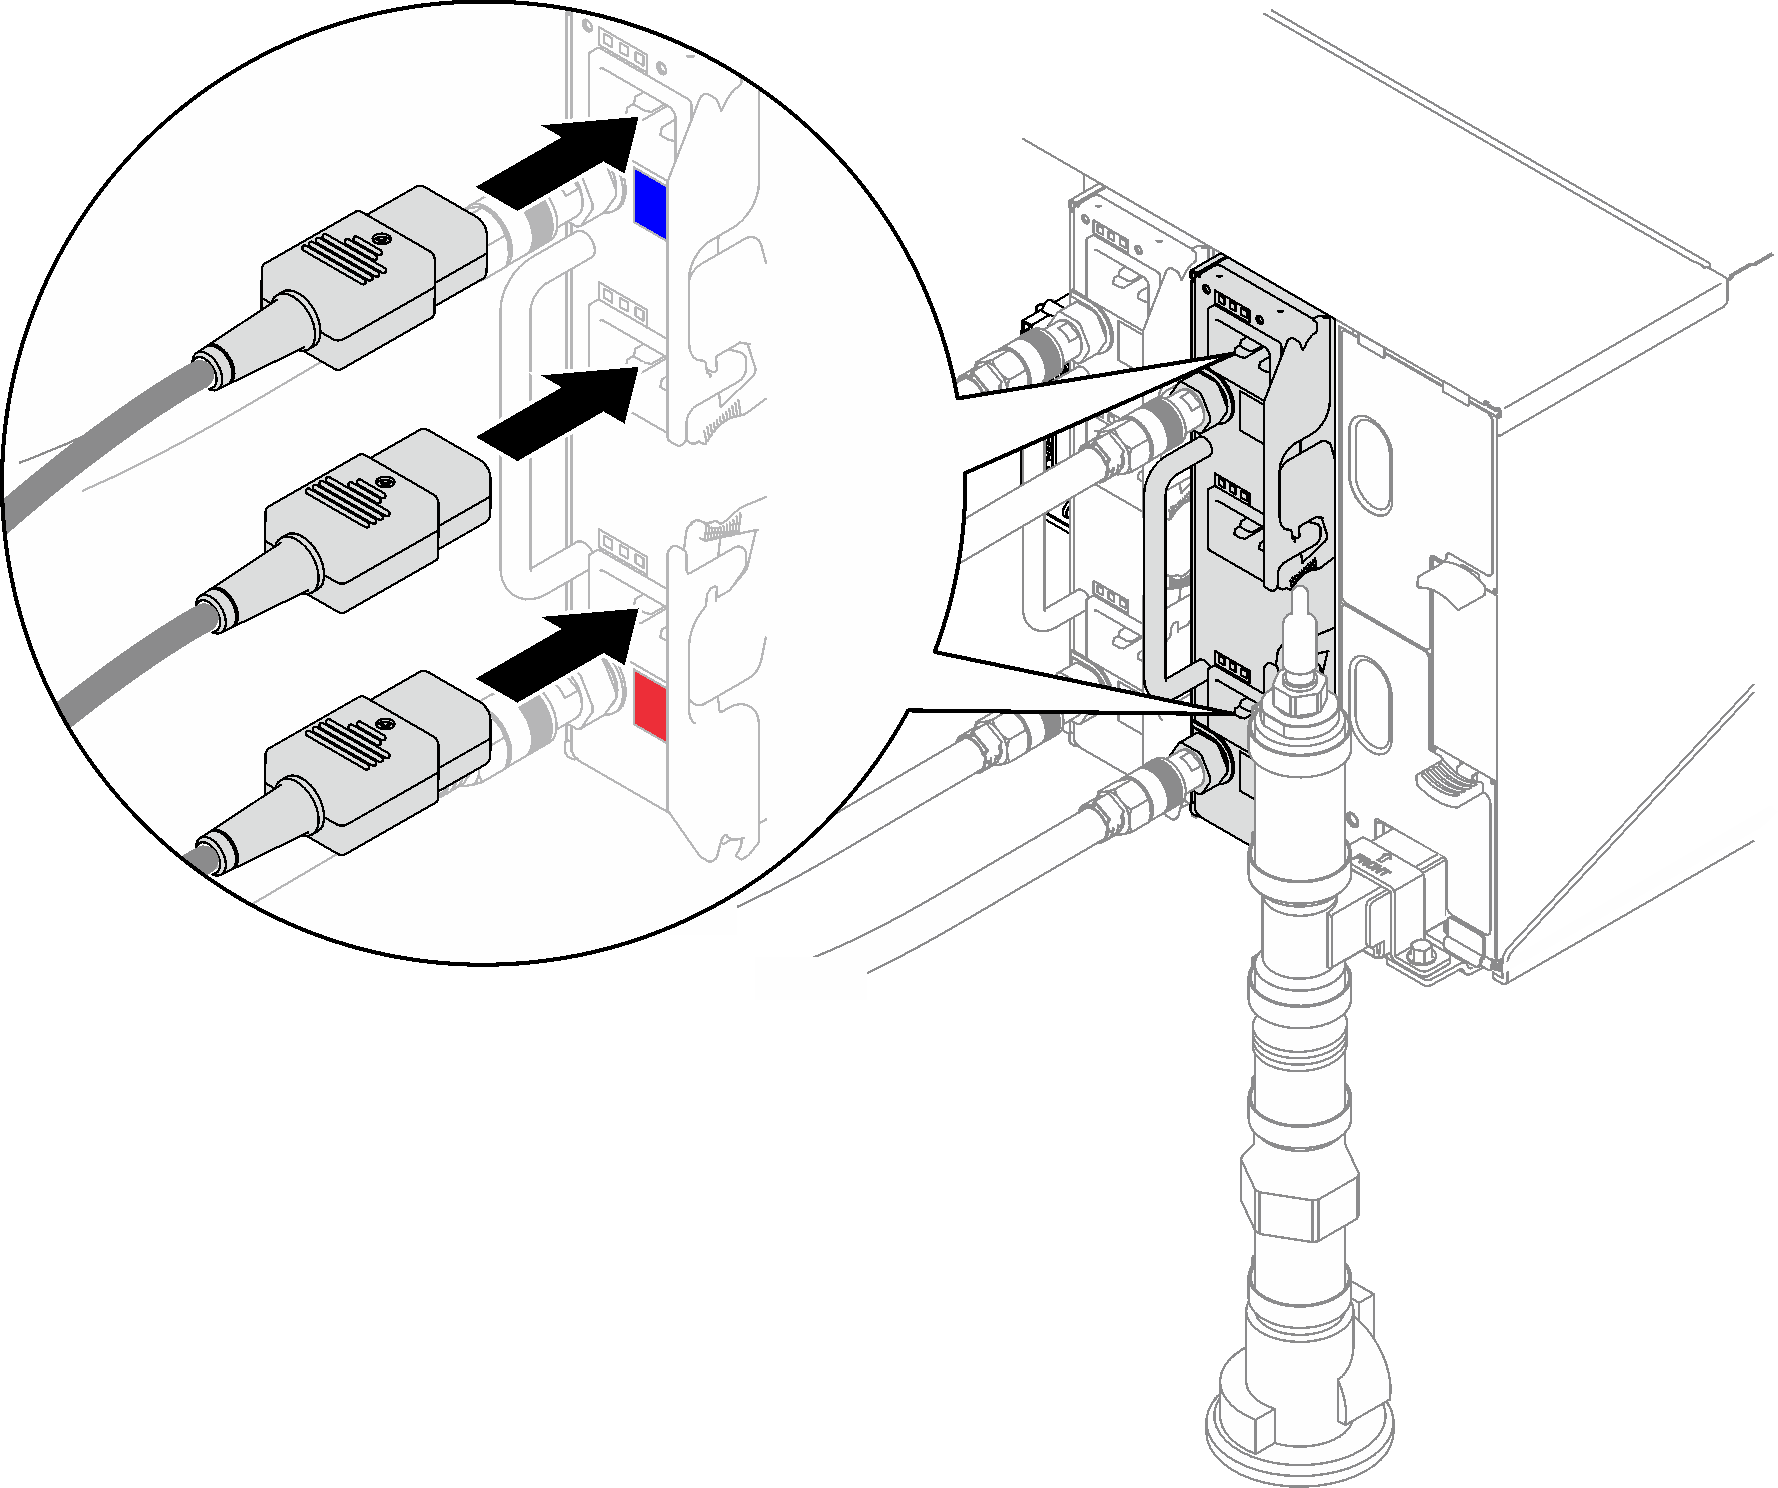
- Connect one end of the power cords for the power supply into the AC connector on the back of the power supply; then, connect the other end of the power cords into a properly grounded electrical outlet.Figure 5. DWC PSU power cords installation
Reconnect the power cords and any cables that you removed.
Turn on all compute nodes.
Demo video