Remove a DWC PSU
Use this information to remove a DWC PSU.
About this task
To avoid a shock hazard:
- Connect all power cords to a properly wired and grounded electrical outlet/source.
- Connect any equipment that will be attached to this product to properly wired outlets/sources.
- When possible, use one hand only to connect or disconnect signal cables.
- Never turn on any equipment when there is evidence of fire, water, or structural damage.
- The device might have more than one power cord, to remove all electrical current from the device, ensure that all power cords are disconnected from the power source.
Never remove the cover on a power supply or any part that has this label attached. Hazardous voltage, current, and energy levels are present inside any component that has this label attached. There are no serviceable parts inside these components. If you suspect a problem with one of these parts, contact a service technician.
High touch current. Connect to earth before connecting to supply.
Read Installation Guidelines and Safety inspection checklist to ensure that you work safely.
Disconnect the power cord from the connector on the back of the power supply.
If only one DWC PSU is installed in the solution, you must turn off the solution before removing the power supply.
Before removing the DWC PSU, it is strongly suggested to reduce the power loading of each node installed in the enclosure by turning the node into idle state or power off state.
When removing the DWC PSU, the following SMM2 event messages may appear. These SMM2 event messages can be ignored before a replacement DWC PSU is installed. For more information, see Messages.
| SMM2 messages | Value of ## (The value variation of ## indicates different DWC PSU detected by the SMM.) | |
|---|---|---|
| These events were asserted due to insufficient power bank, and can be ignored. | ||
| 180701F1 | PSoC Throttle O | N/A |
| 180702F9 | Encl PMax Exceed | N/A |
| 180702FA | Encl PMin Exceed | N/A |
| On PSU removed from the chassis, these events can be treated as normal. | ||
| 080707## | PSU # EPOW | 92, 93, 94, 95, 96, 97, 98, 99, or 9A, representing PSU 1~9 |
| 080800## | PSU #: Device Absent | 80, 81, 82, 83, 84, 85, 86, 87, or 88, representing PSU 1~9 |
| 086F01## | PSU #: Failure detected | 80, 81, 82, 83, 84, 85, 86, 87, or 88, representing PSU 1~9 |
| 086F01## | PSU # Vin UV | A4, A5, A6, A7, A8, A9, AA, AB, or AC, representing PSU 1~9 |
| 086F03## | PSU #: input lost | 80, 81, 82, 83, 84, 85, 86, 87, or 88, representing PSU 1~9 |
| On PSU which stays in the chassis, these events might happen depending on the system loading. | ||
| 080701## | PSU # Throttle | 9B, 9C, 9D, 9E, 9F, A0, A1, A2, or A3, representing PSU 1~9 |
| 086F01## | PSU # Iout OC | AD, AE, AF, B0, B1, B2, B3, B4, or B5, representing PSU 1~9 |
| 086F01## | PSU # Over Temp | C8, C9, CA, CB, CC, CD, CE, CF, or D0, representing PSU 1~9 |
Procedure
- Disconnect the power cords from the electrical outlet; then, disconnect the other end of the power cords from the back of the power supply.Figure 1. DWC PSU power cords removal

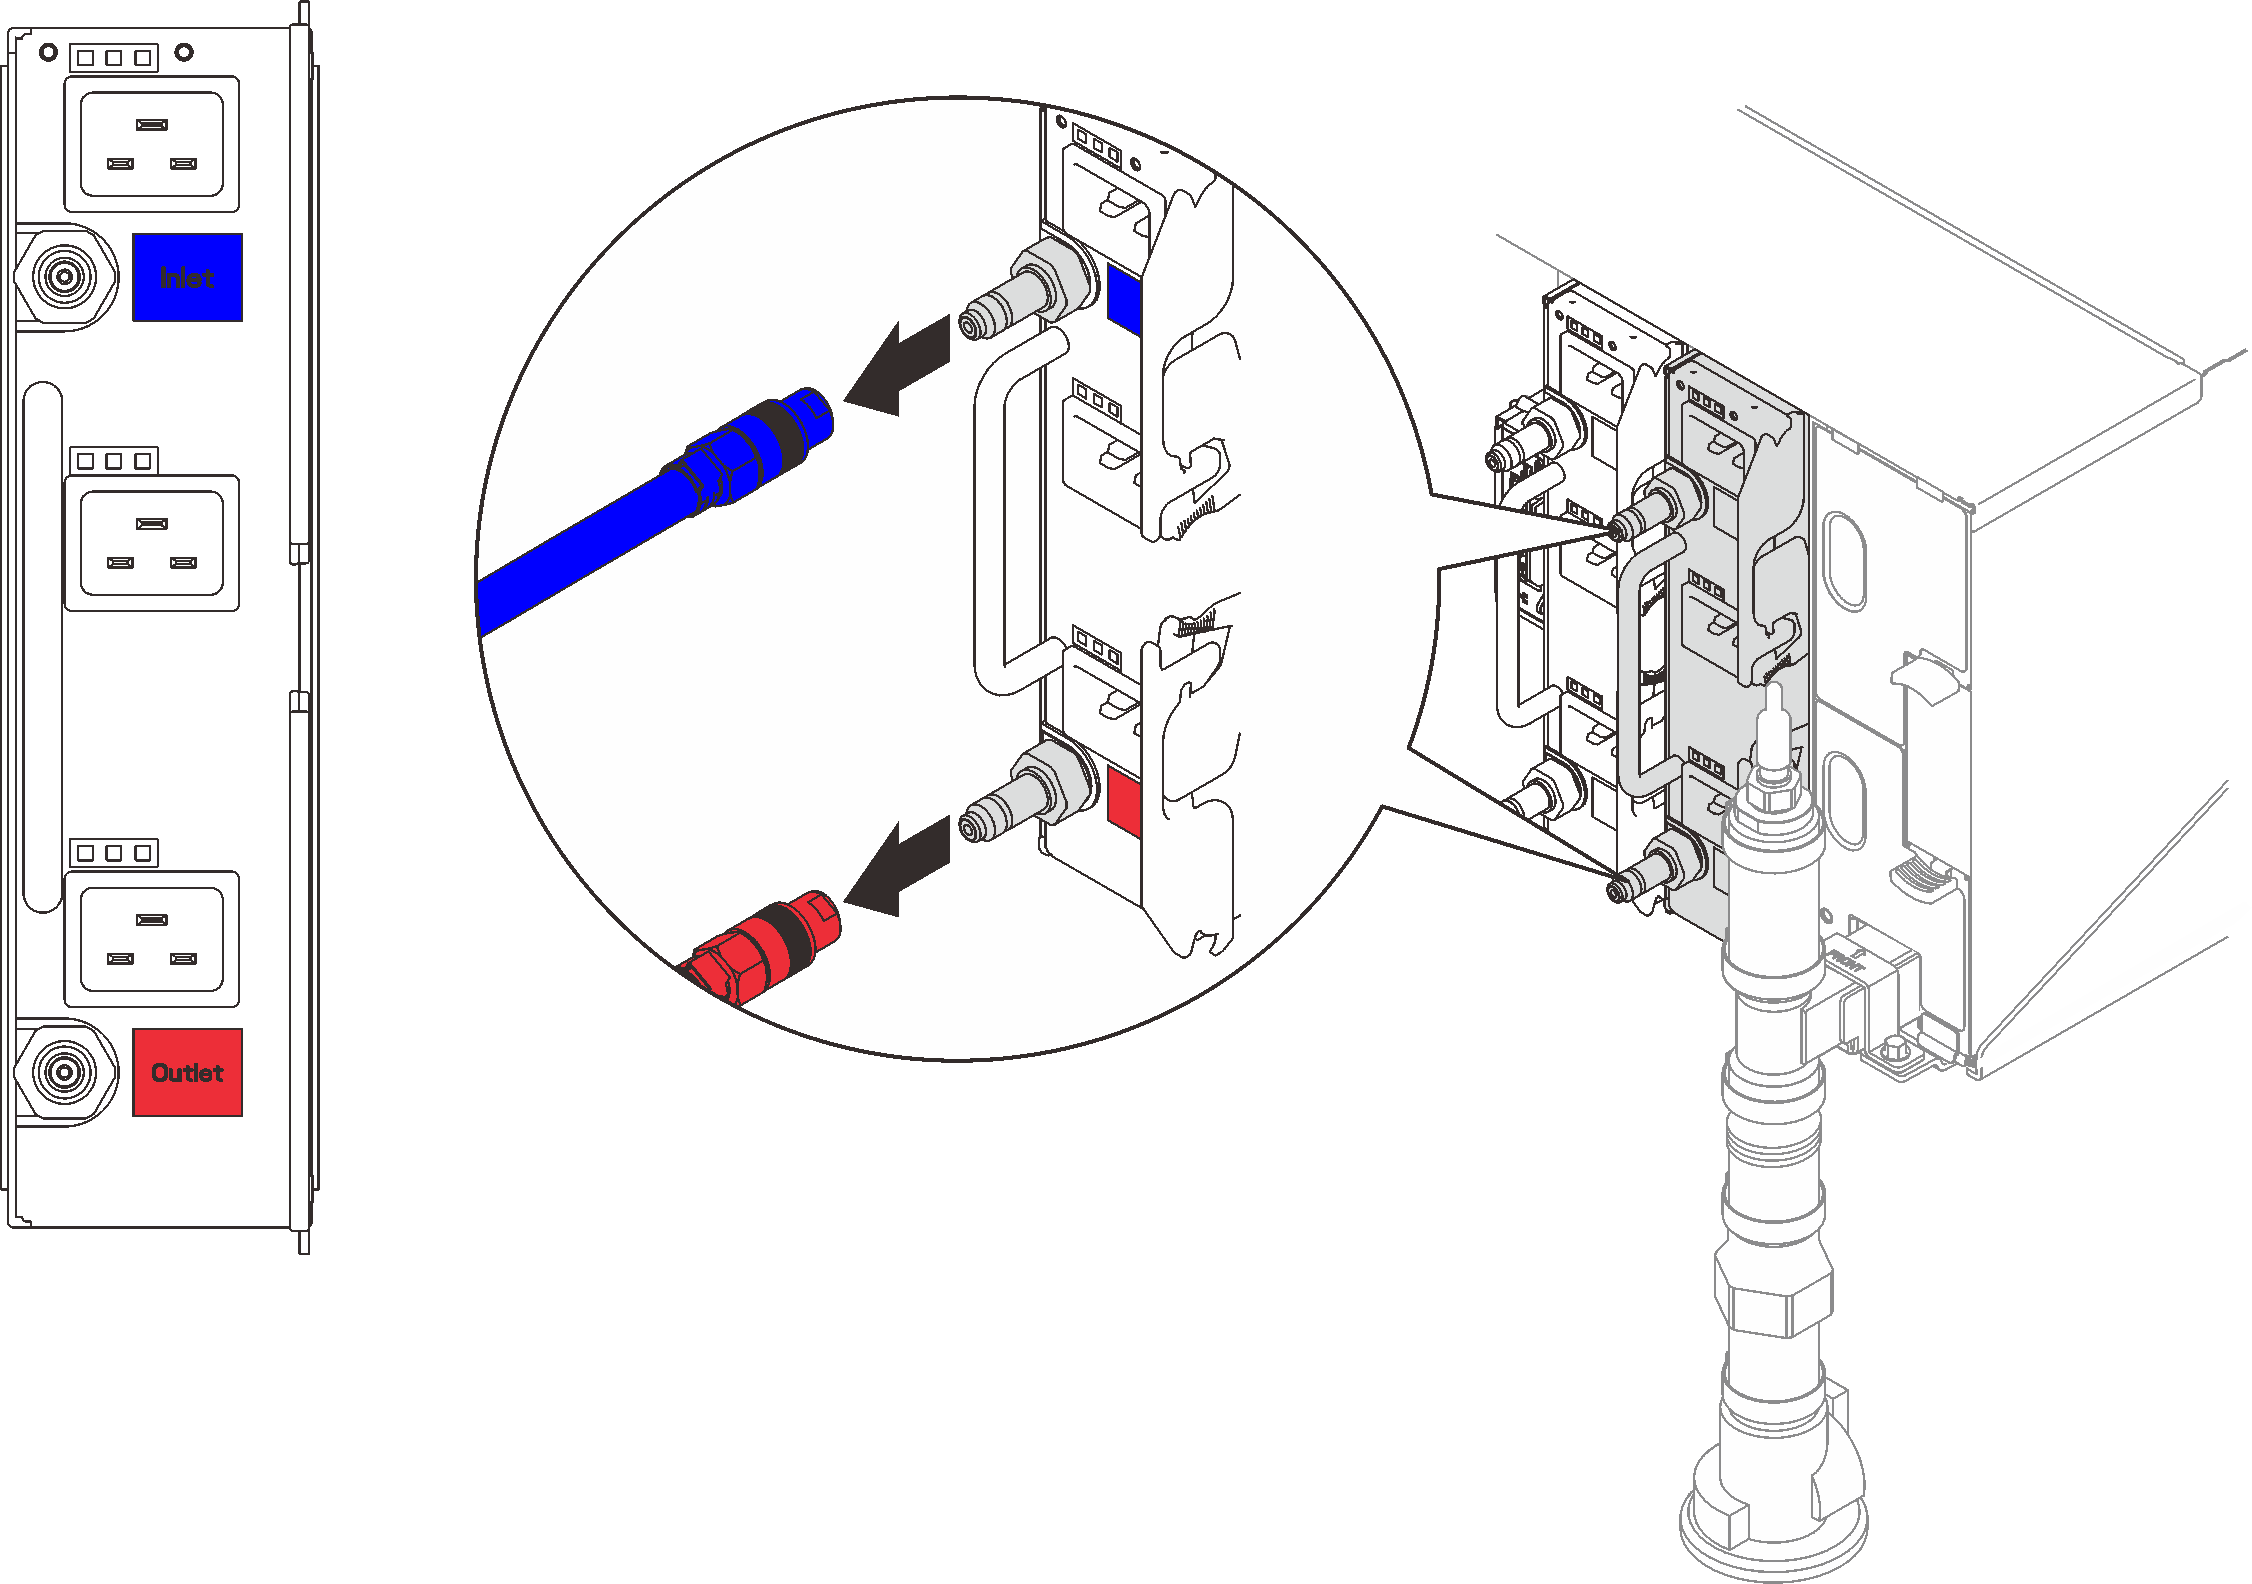
- Disconnect the DWC PSU manifold hose assembly from the DWC power supply quick connect.Figure 2. DWC PSU hose assembly removal
- Remove the DWC power supply.
 Rotate the cam handles outwards, the DWC PSU will move slightly out of the bay.
 Grasp the handle and pull the DWC power supply out of the bay.
Figure 3. DWC power supply removal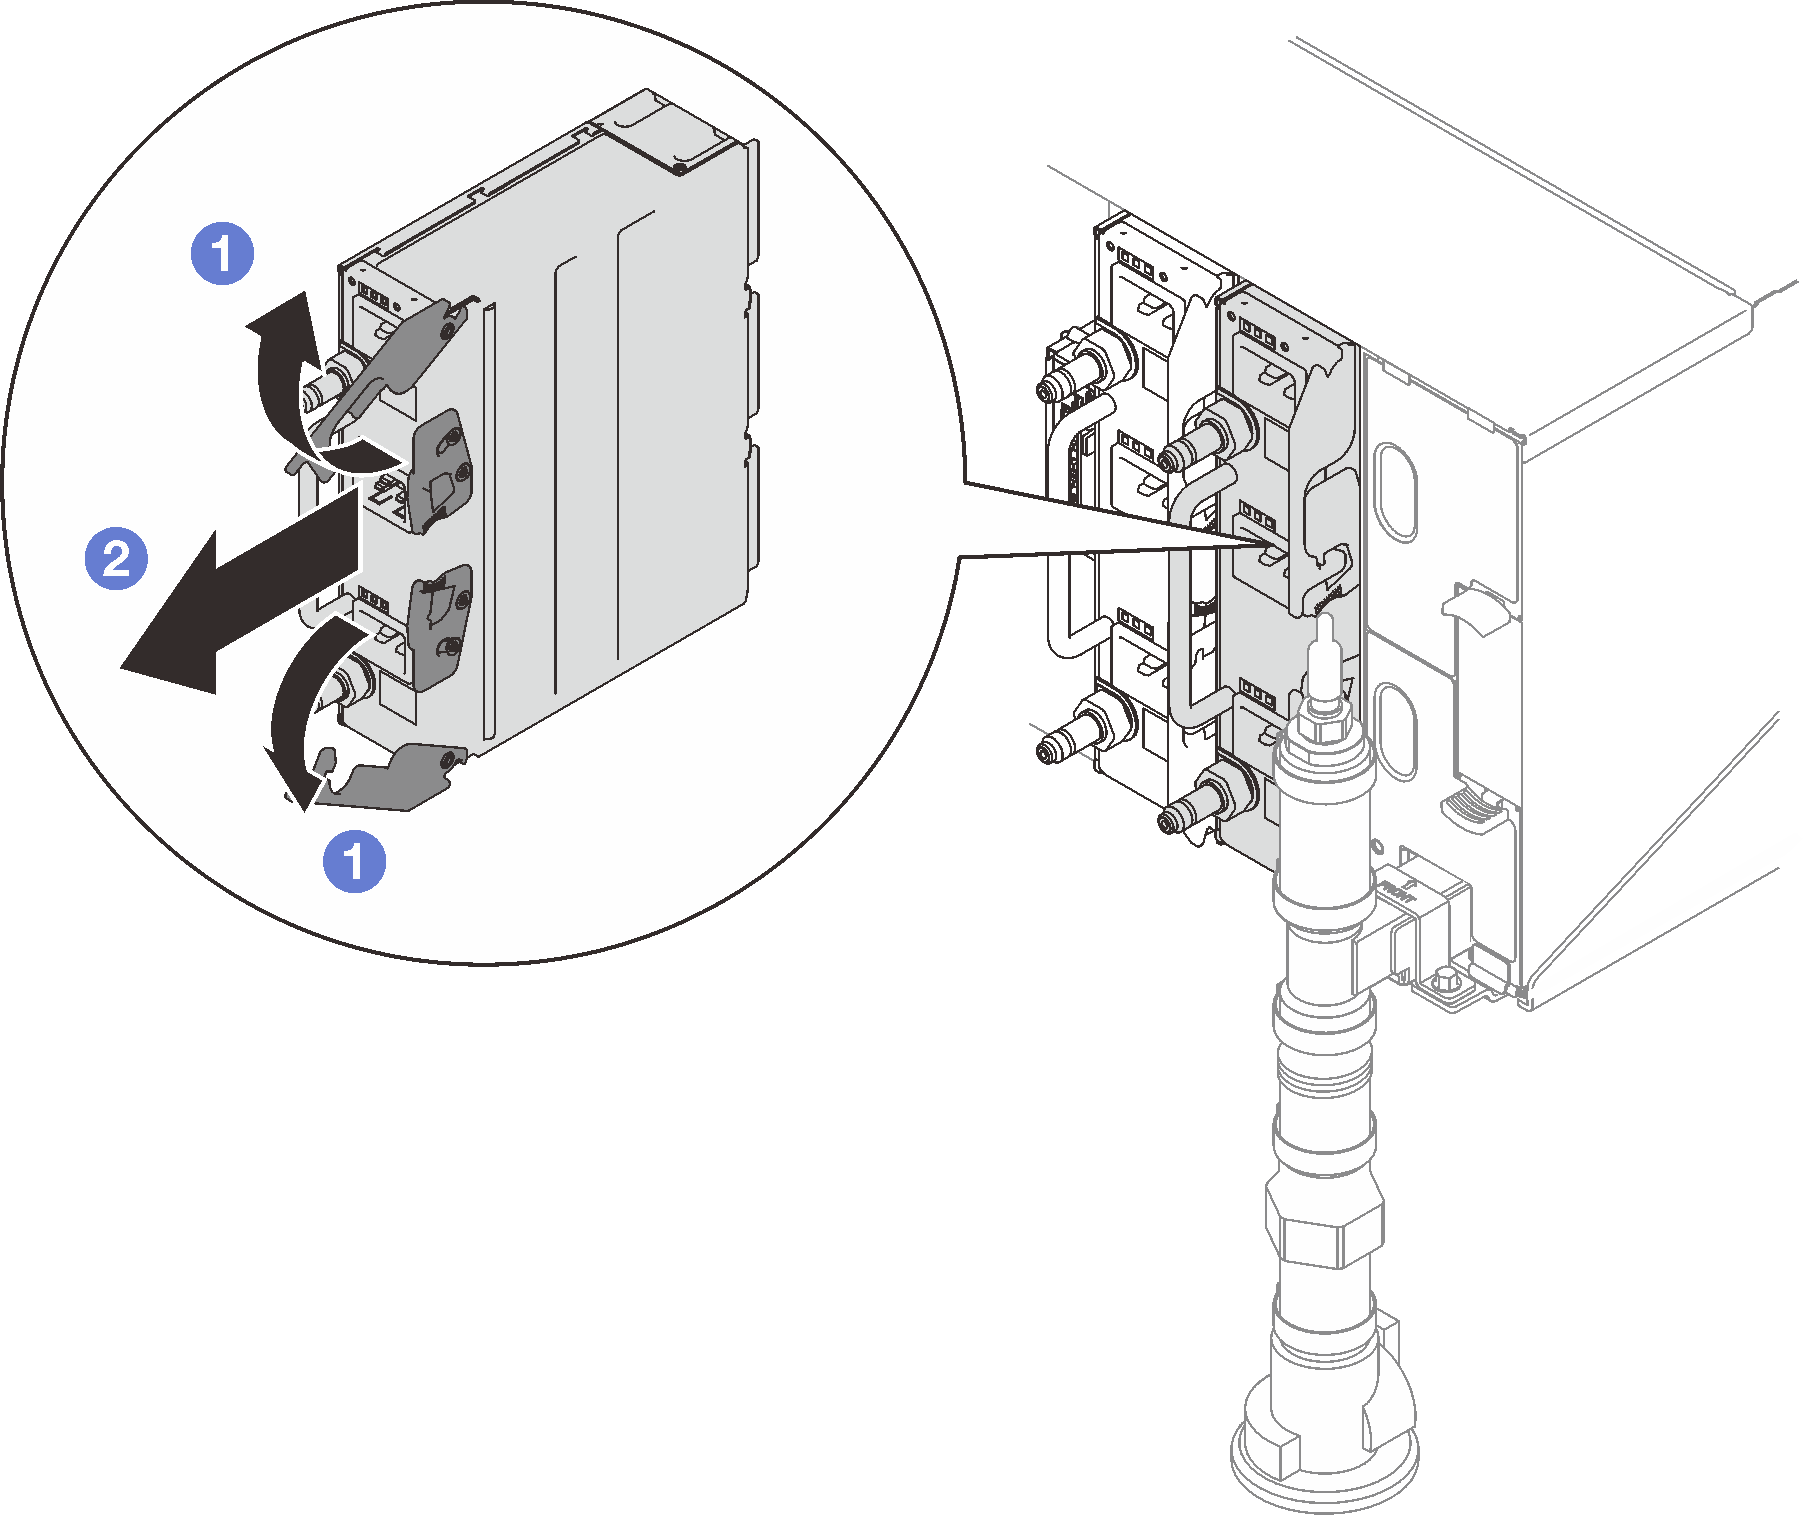
If you are instructed to return the component or optional device, follow all packaging instructions, and use any packaging materials for shipping that are supplied to you.
Place the DWC power supply standing upright (Inlet top, Outlet bottom) on an elevated flat surface.
Make sure the valve on the hose assembly (supplied to customer installation site) is closed (valve handle perpendicular to the hose); then, connect the hose to Outlet quick connect and place the other end in the bucket. Slowly open the hose valve to allow water to flow out of the hose. Close the hose valve once water stops flowing.
Figure 5. DWC power supply removal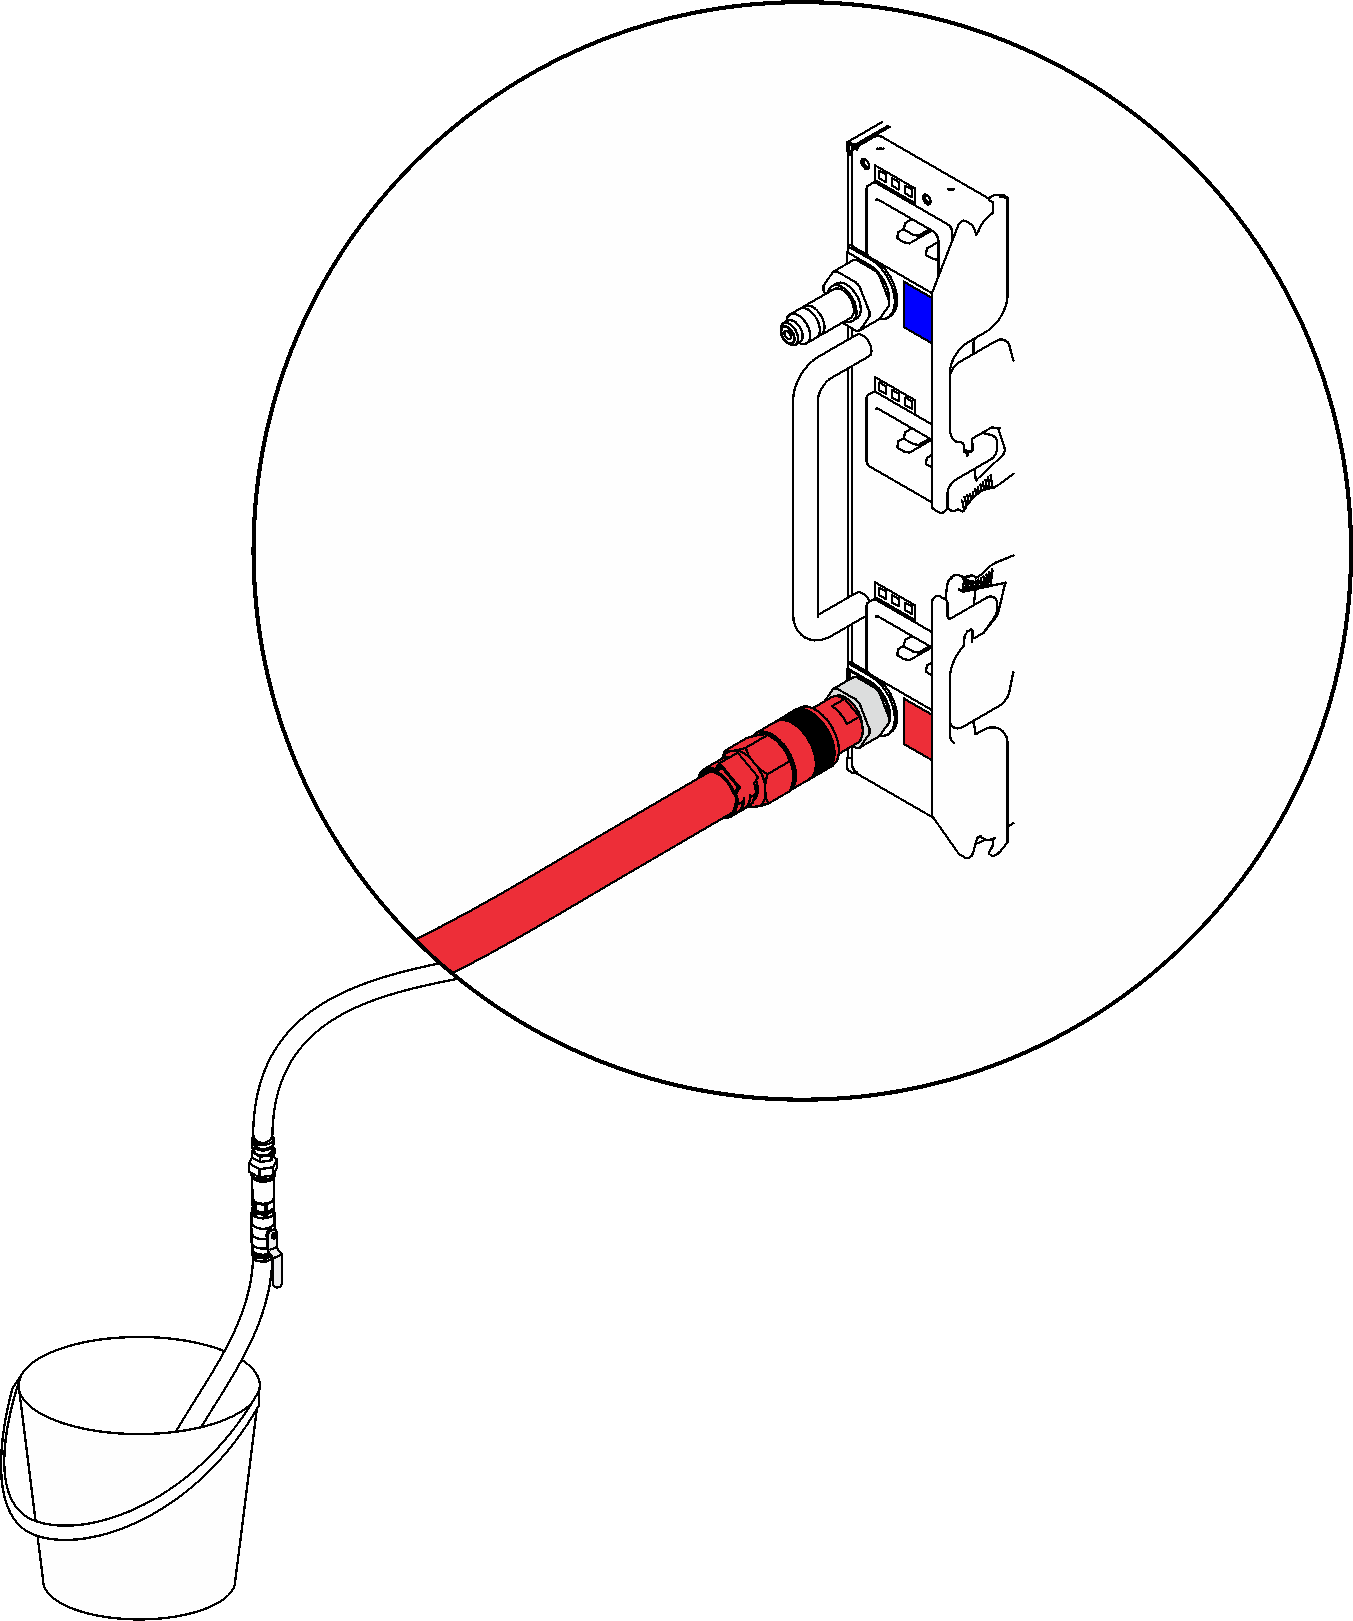
Disconnect the hose assembly from Outlet quick connect and connect it to Inlet quick connect; then, turn the DWC power supply upside down (Outlet top, Inlet bottom). Slowly open the hose valve to allow water to flow out of the hose. Close the hose valve once water stops flowing.
Figure 6. DWC power supply removal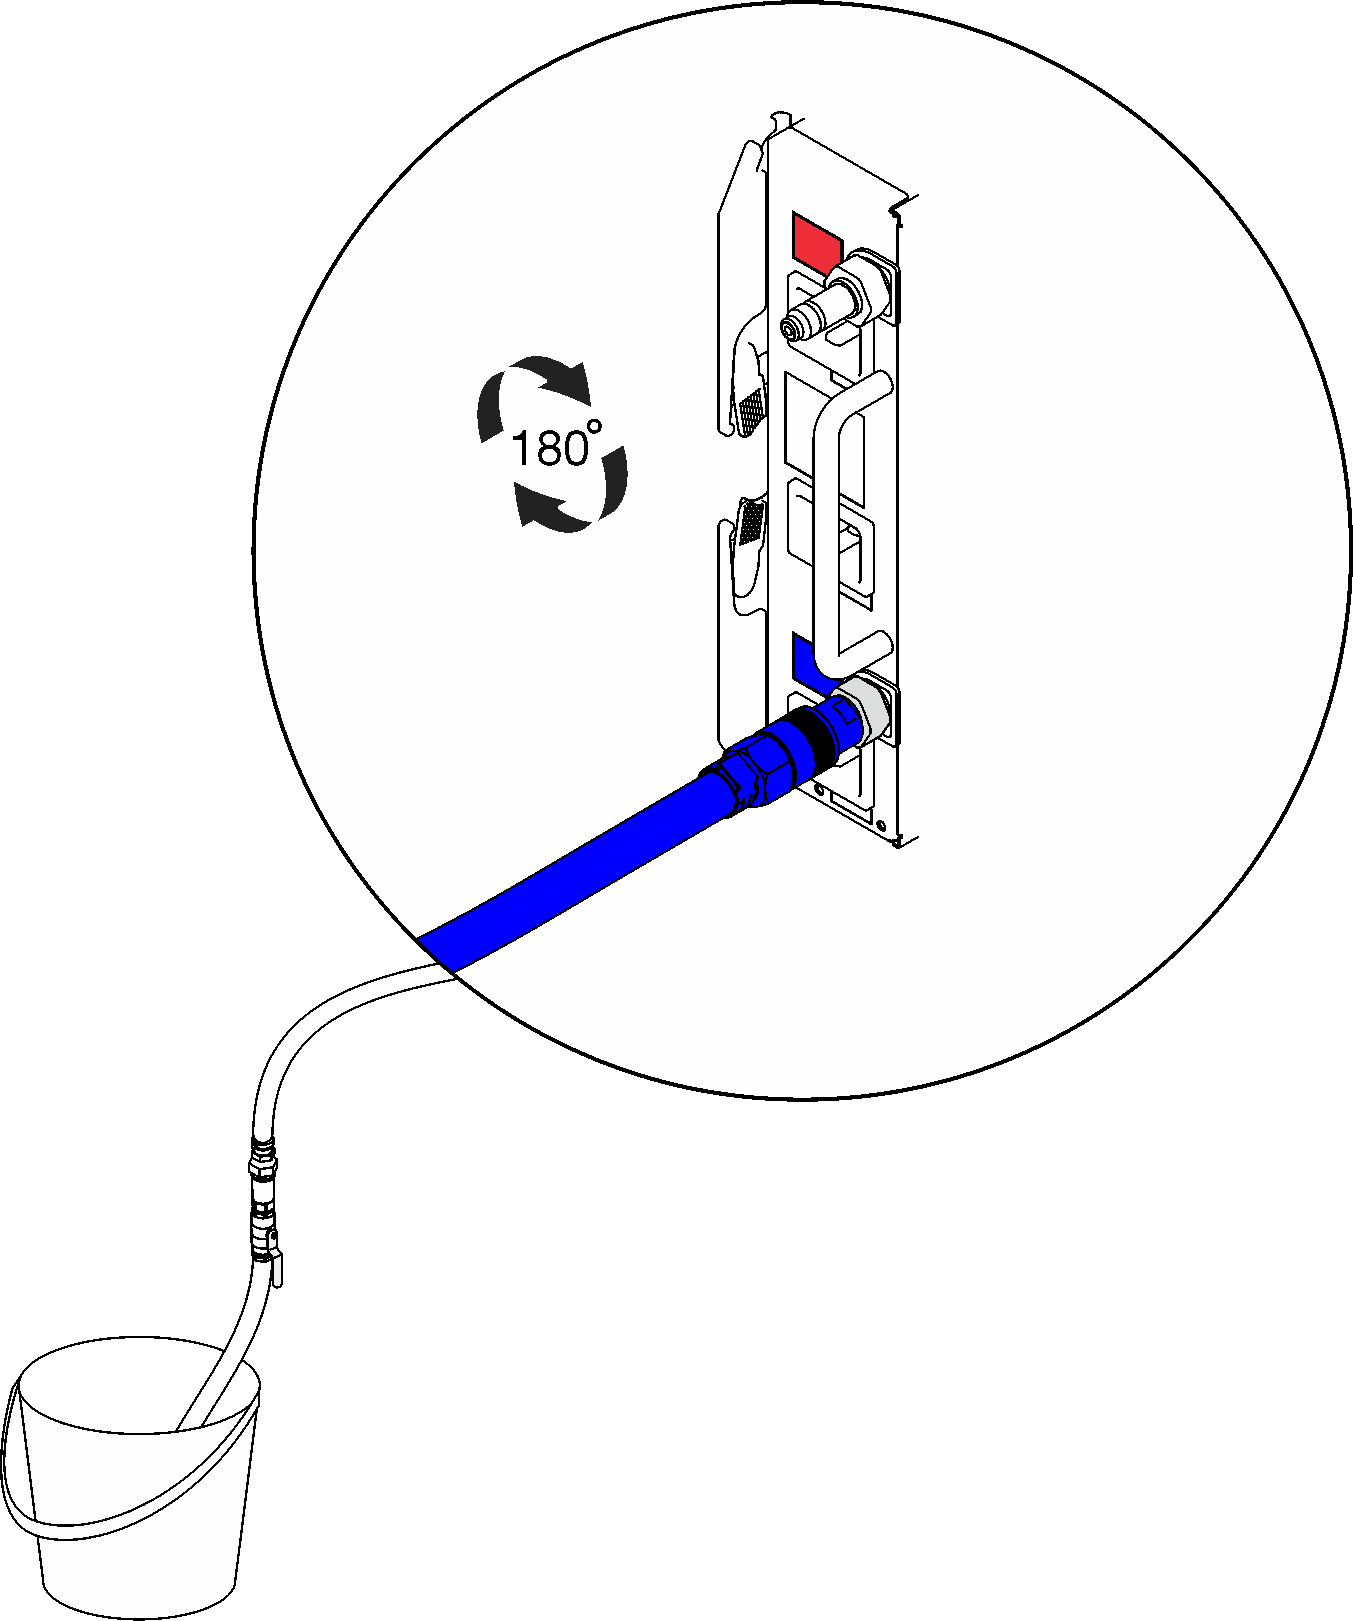
Disconnect the hose assembly.
Demo video