Install the SMM2

Use this information to install the SMM2.

About this task

S002
disconnect all power
CAUTION
The power-control button on the device and the power switch on the power supply do not turn off the electrical current supplied to the device. The device also might have more than one power cord. To remove all electrical current from the device, ensure that all power cords are disconnected from the power source.
S038
Use eye protection
CAUTION
Eye protection should be worn for this procedure.
Attention
Firmware and driver download: You might need to update the firmware or driver after replacing a component.

Procedure

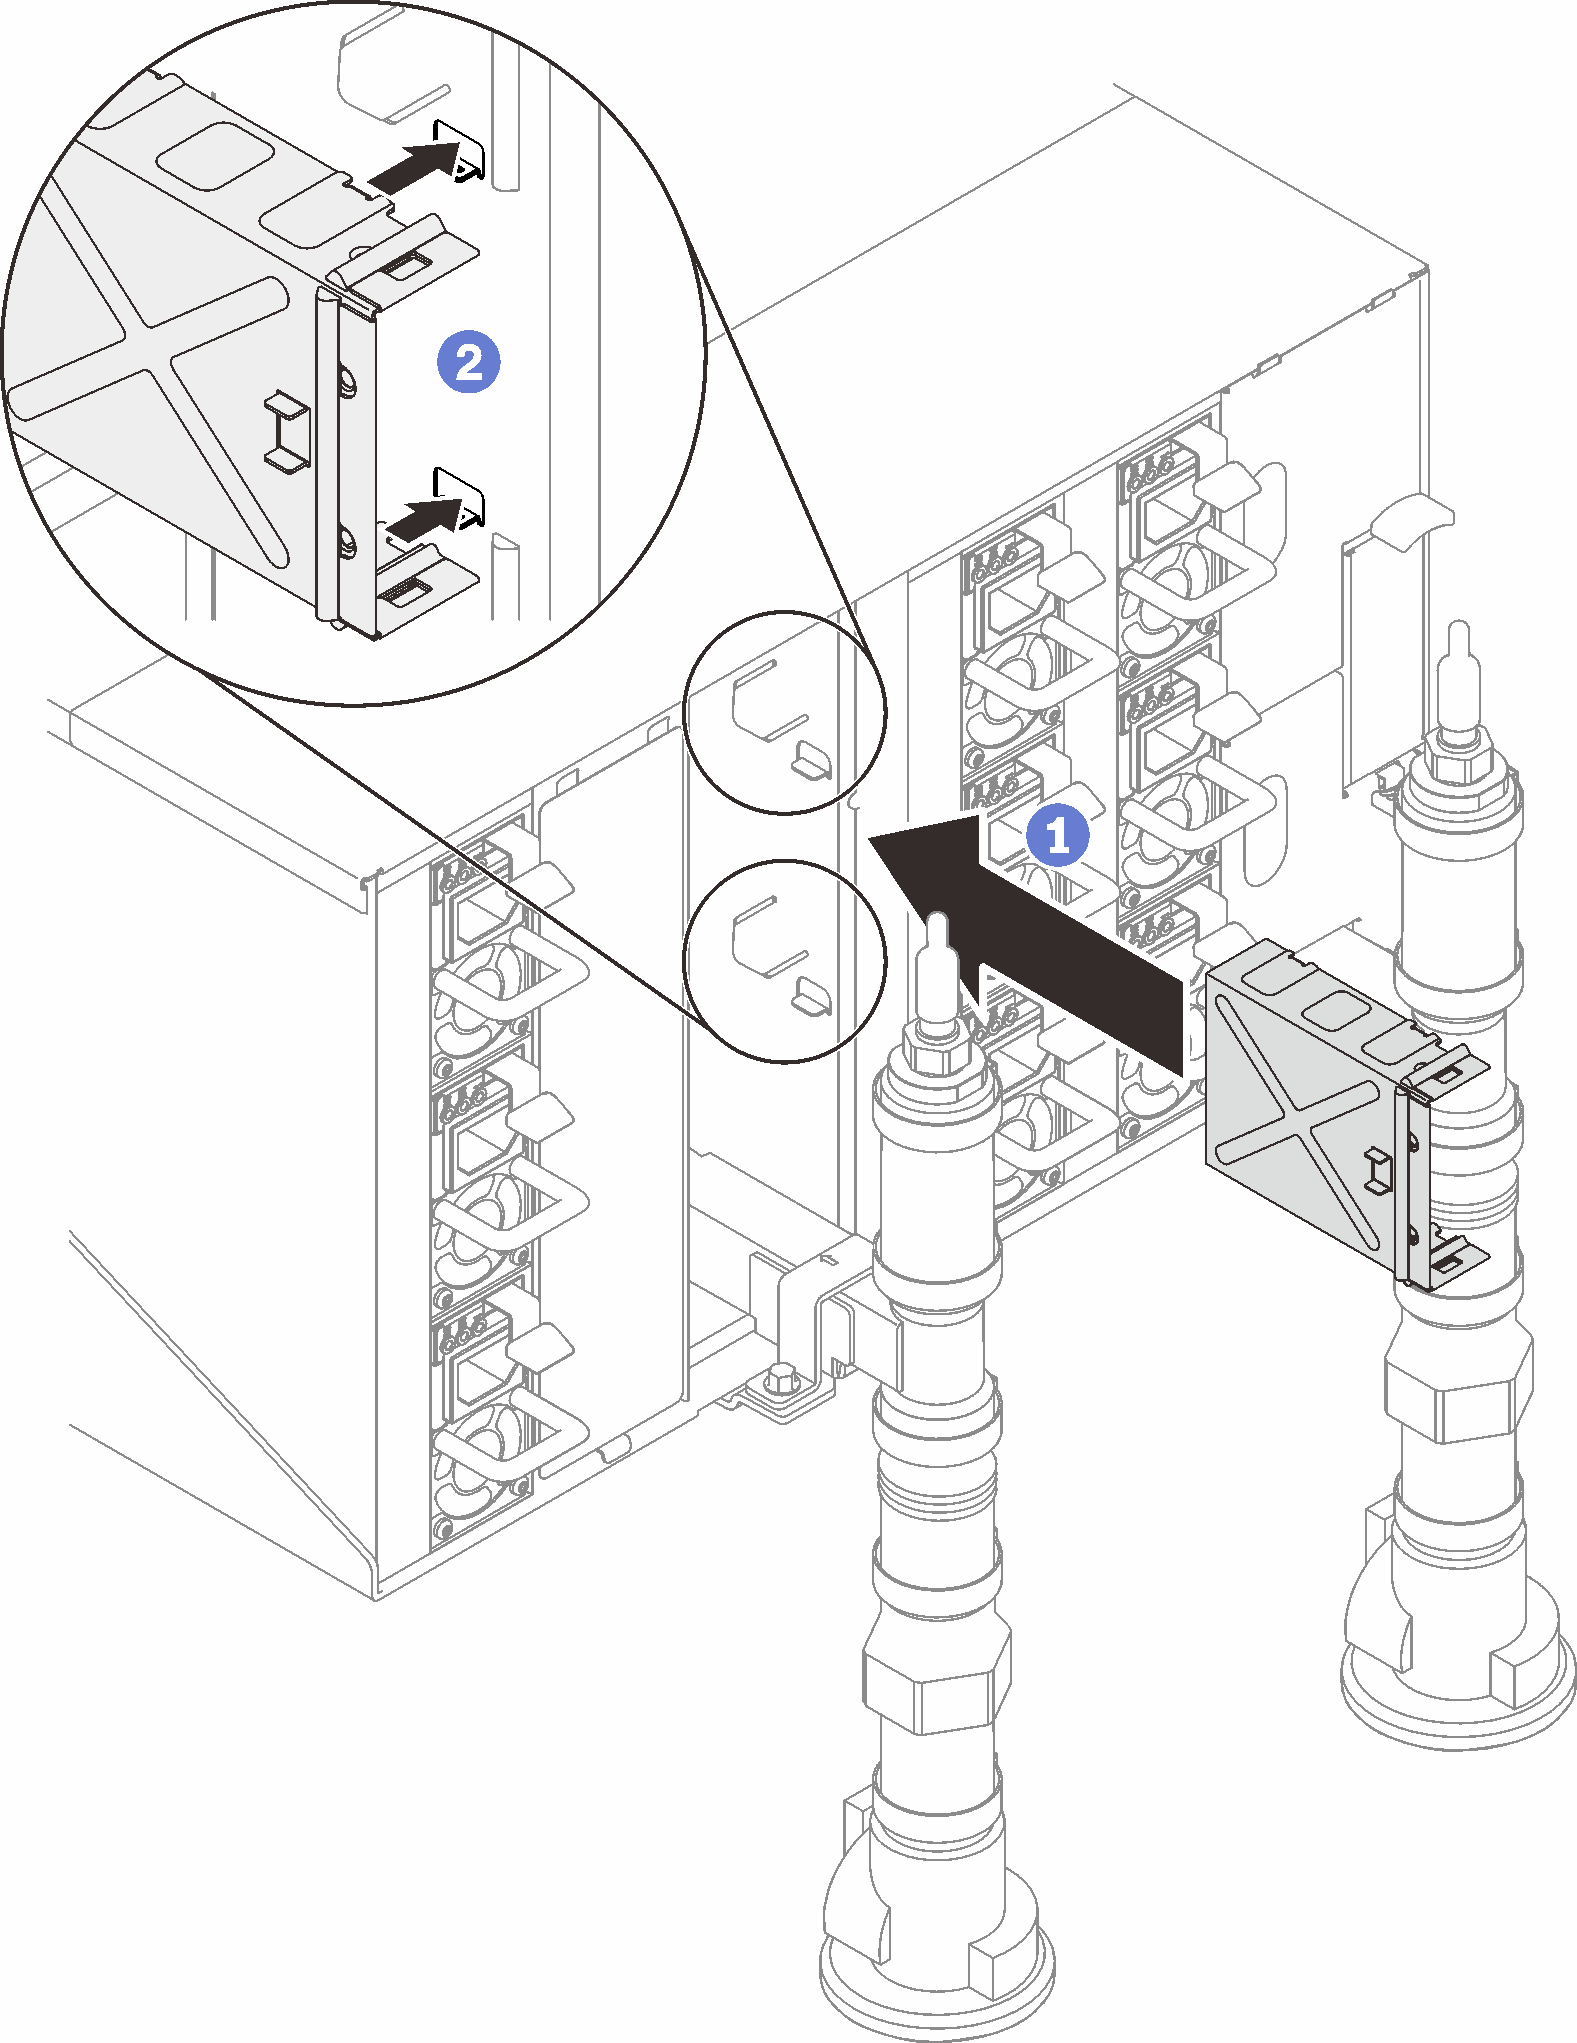
  1. Install the SMM2 module support bracket.
    1. Slide the support bracket into the enclosure.
    2. Align and insert the support bracket into the enclosure wall until it engages.
    Figure 1. Support bracket installation
    Support bracket installation
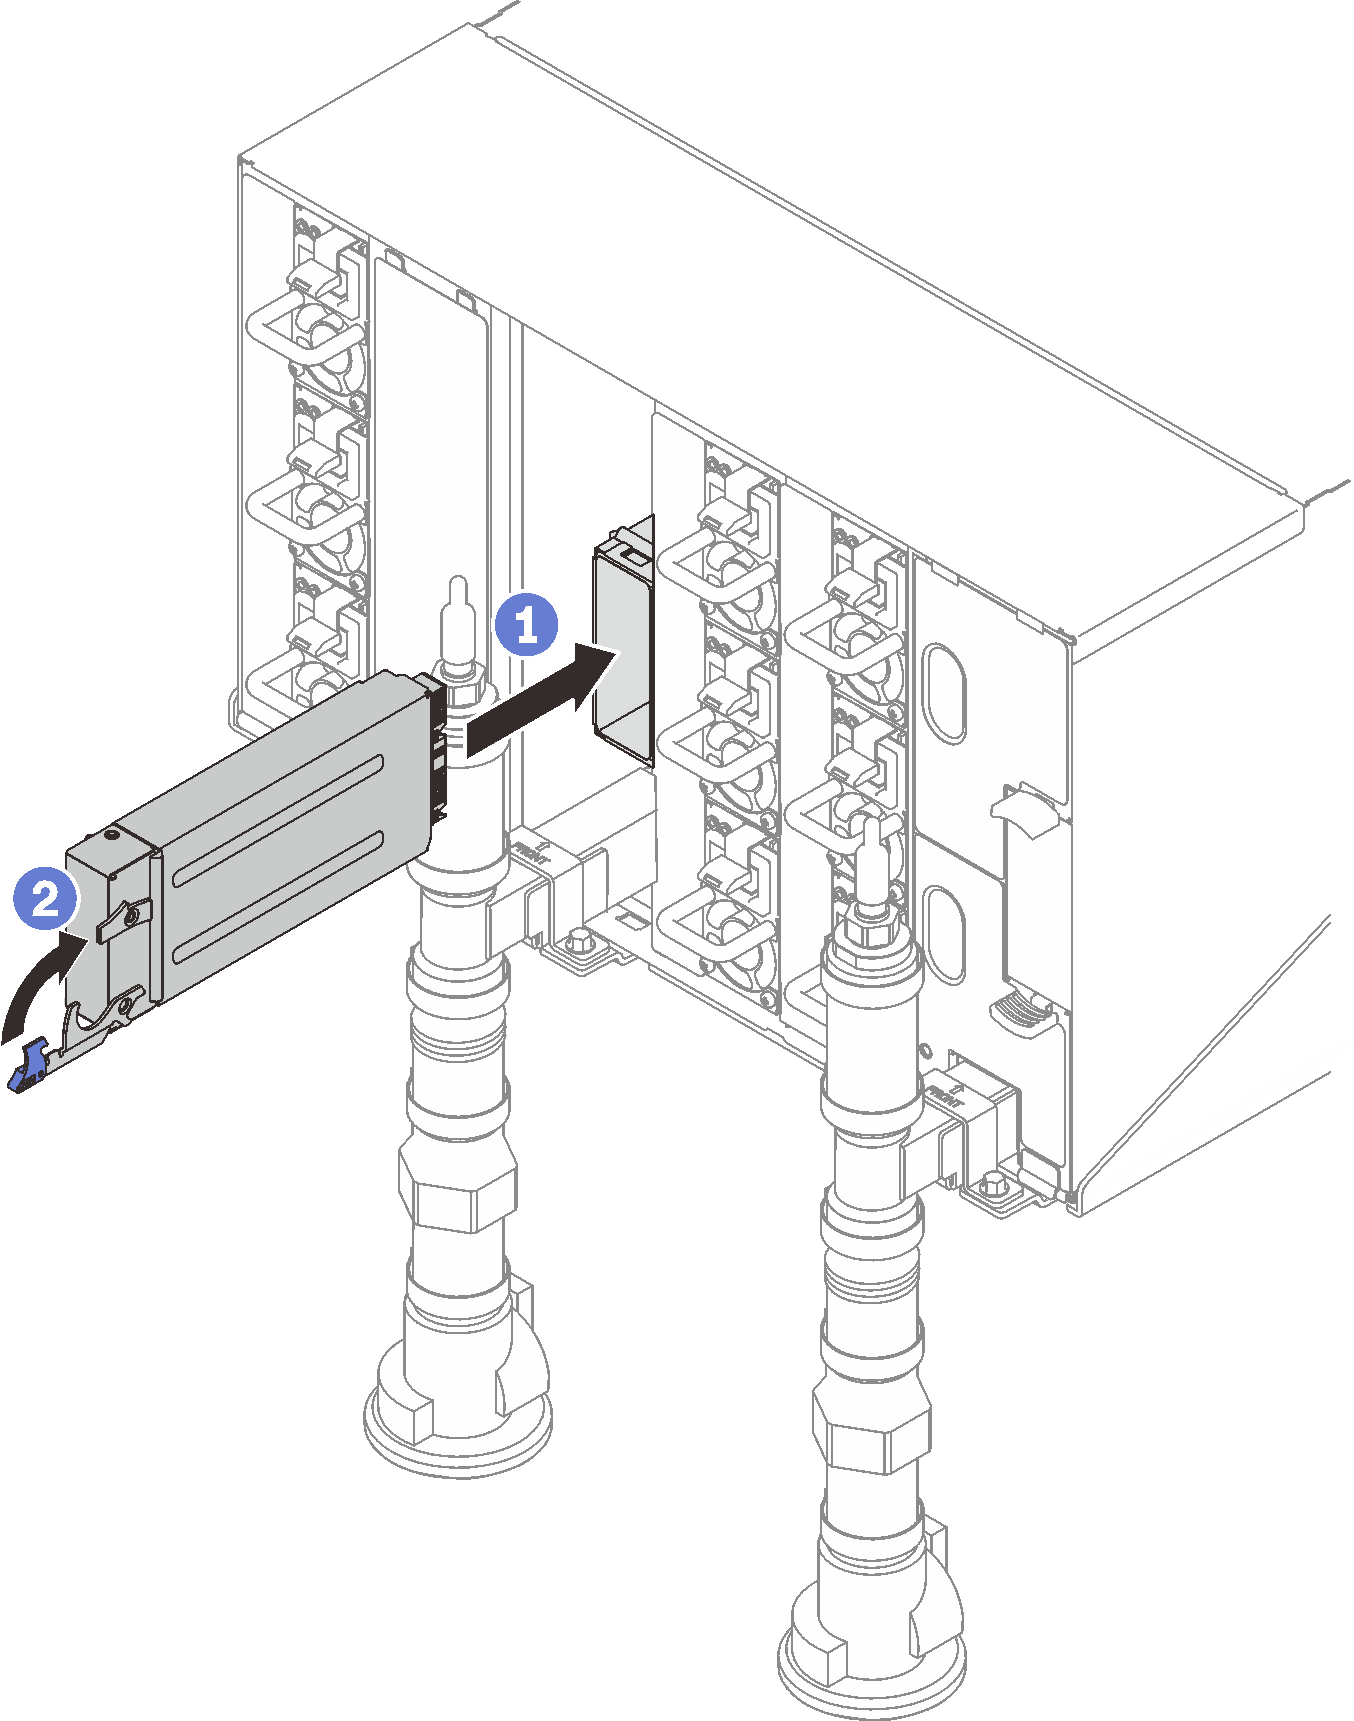
  2. Install the SMM2 module.
    1. Align and slide the SMM2module into the support bracket.
    2. Rotate the latch inwards to secure the SMM2module.
    Figure 2. SMM2 installation
    SMM2 installation
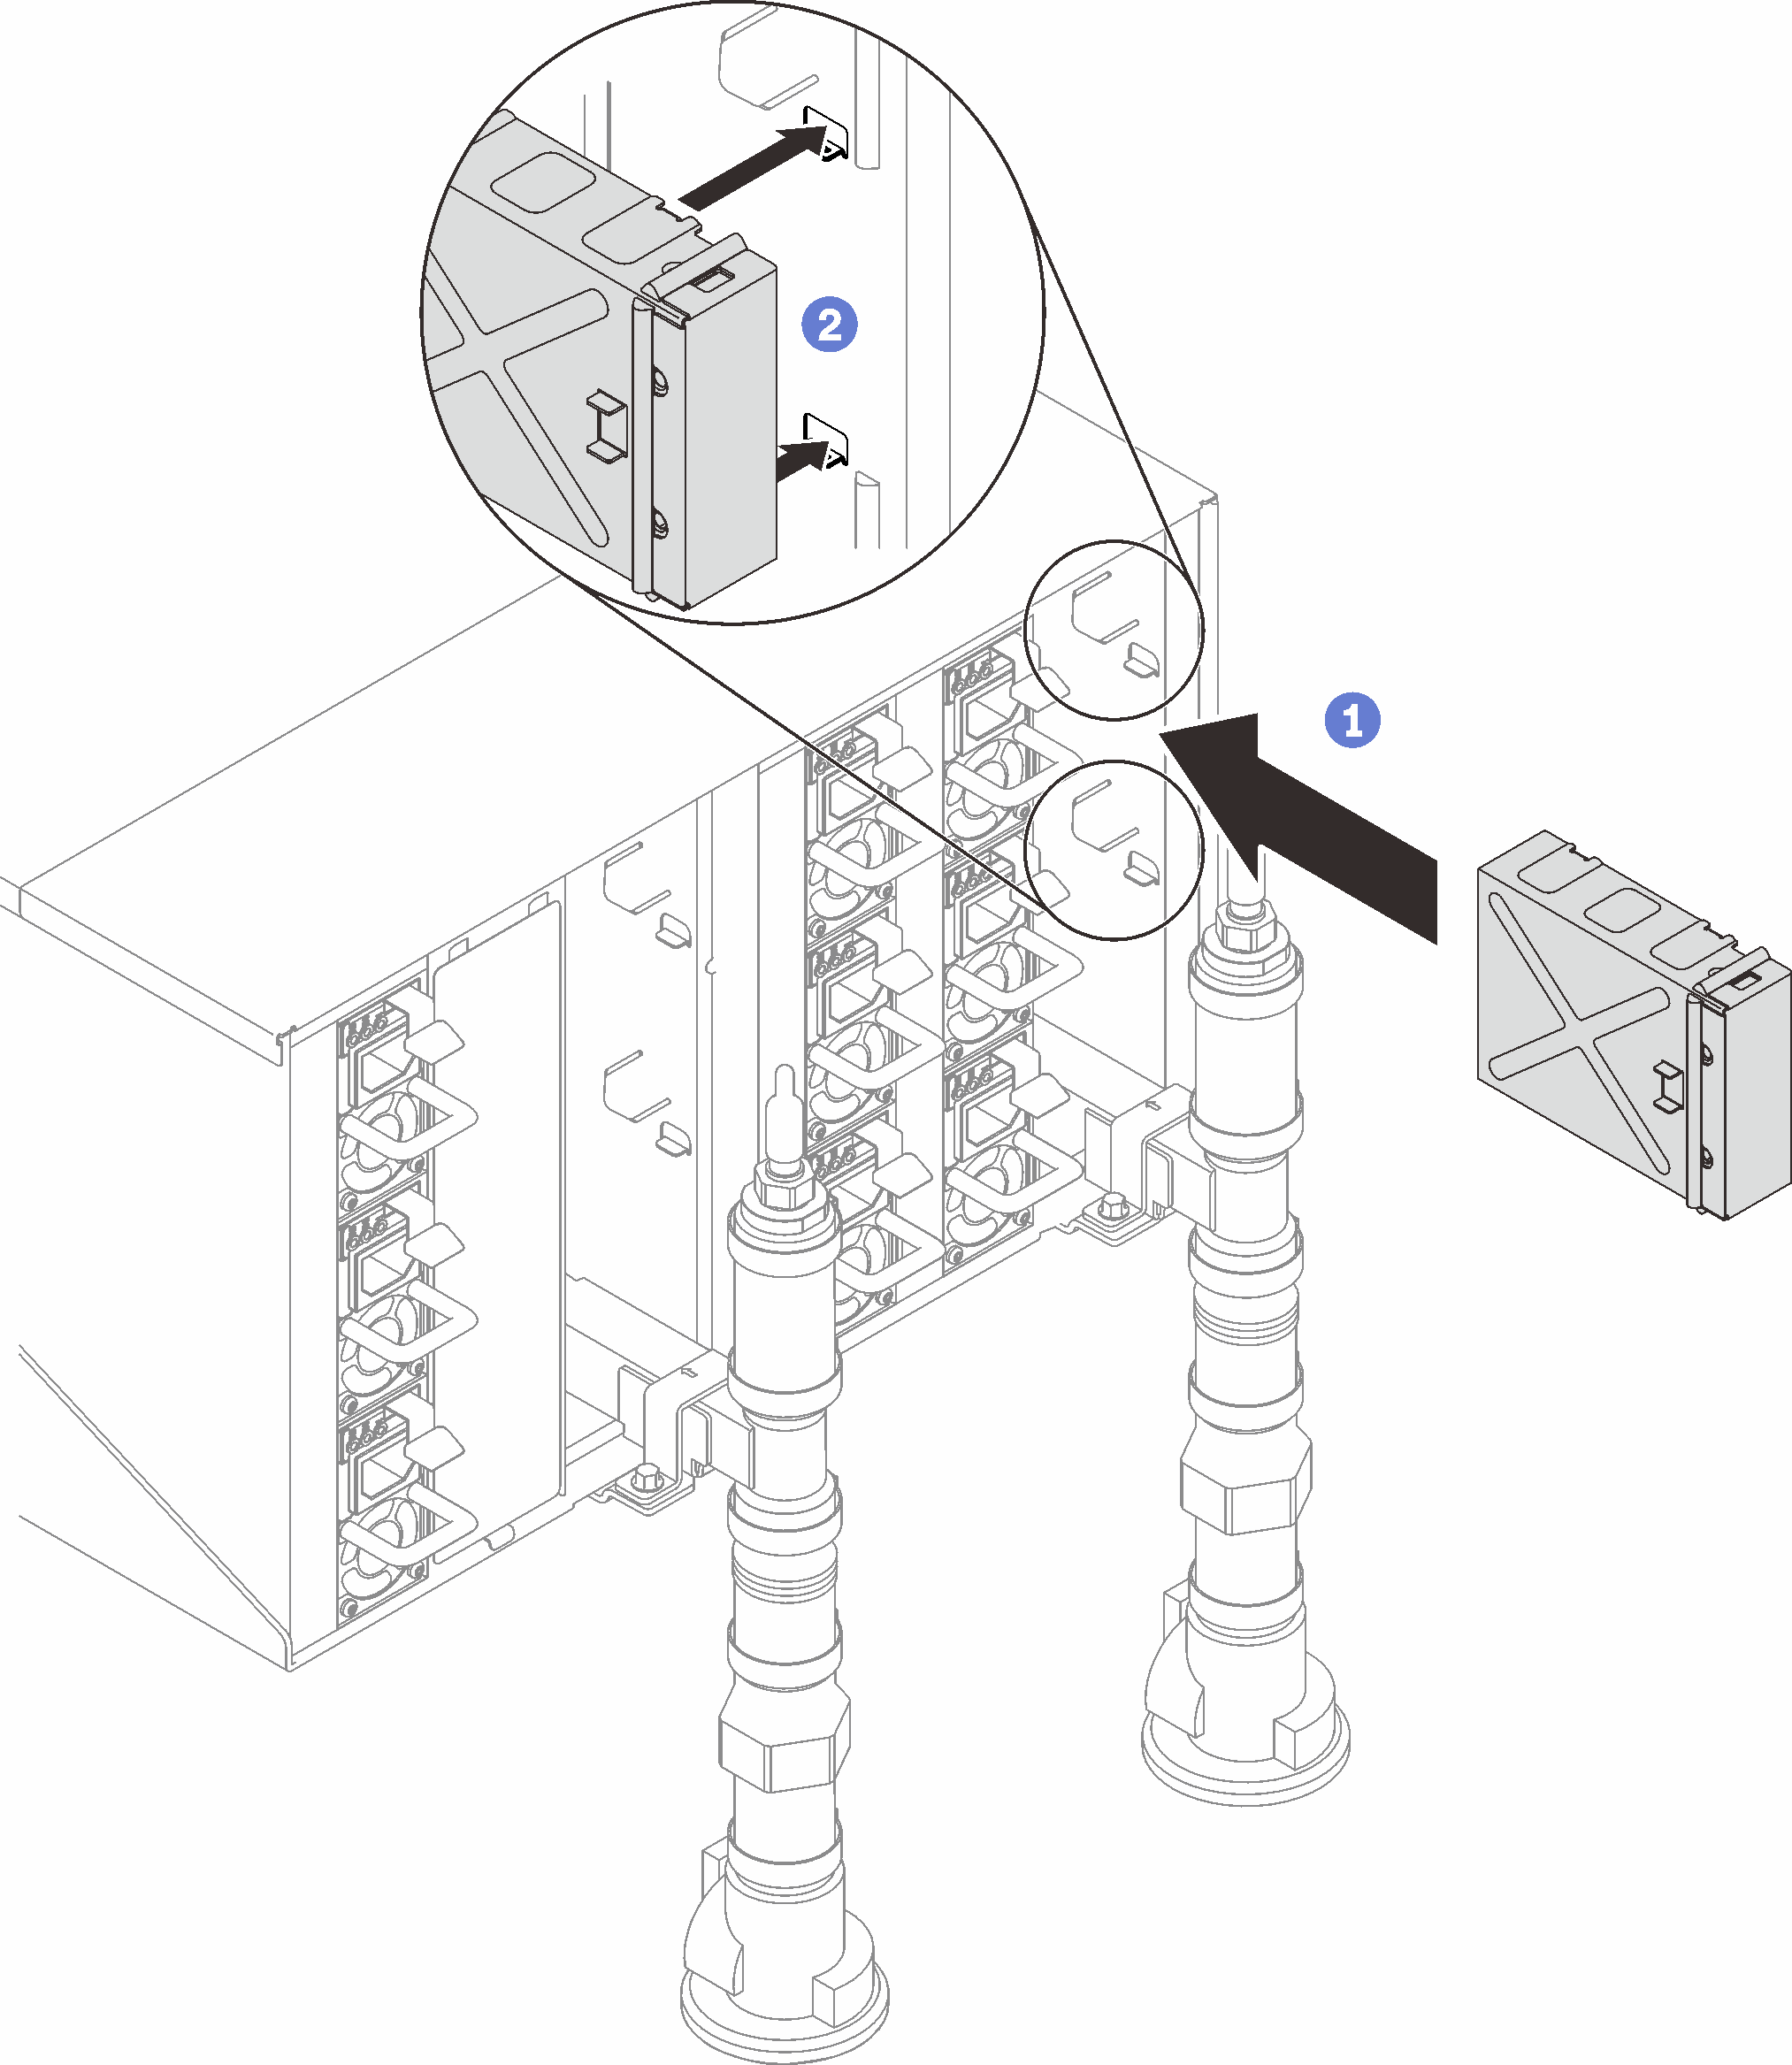
  3. If necessary, install the blank filler.
    1. Slide the blank filler into the enclosure.
    2. Align and insert the blank filler into the enclosure wall until it engages.
    Figure 3. Blank filler installation
    Blank filler installation

After you finish

  1. When the status LED on the SMM2 goes from fast blinking to slow blinking, it indicates the SMM2 is ready. Meanwhile, if the status LED is off or continuously lit, it indicates the SMM2 has encountered one or more problems.

  2. Check the power LED on each node to make sure it changes from fast blink to slow blink to indicate all nodes are ready to be powered on.

Demo video

Watch the procedure on YouTube