Install and remove the outriggers
Outriggers enhance stability of a single unit of rack cabinet. See this topic to learn how to install and remove the outriggers.
Remove the outriggers
About this task
Note
To maintain balance of the rack cabinet, do not remove the outriggers except the following situations:
- when two or more rack cabinets are connected with the baying kit.
- when the rack cabinet is secured to the floor with stabilizer.
Procedure
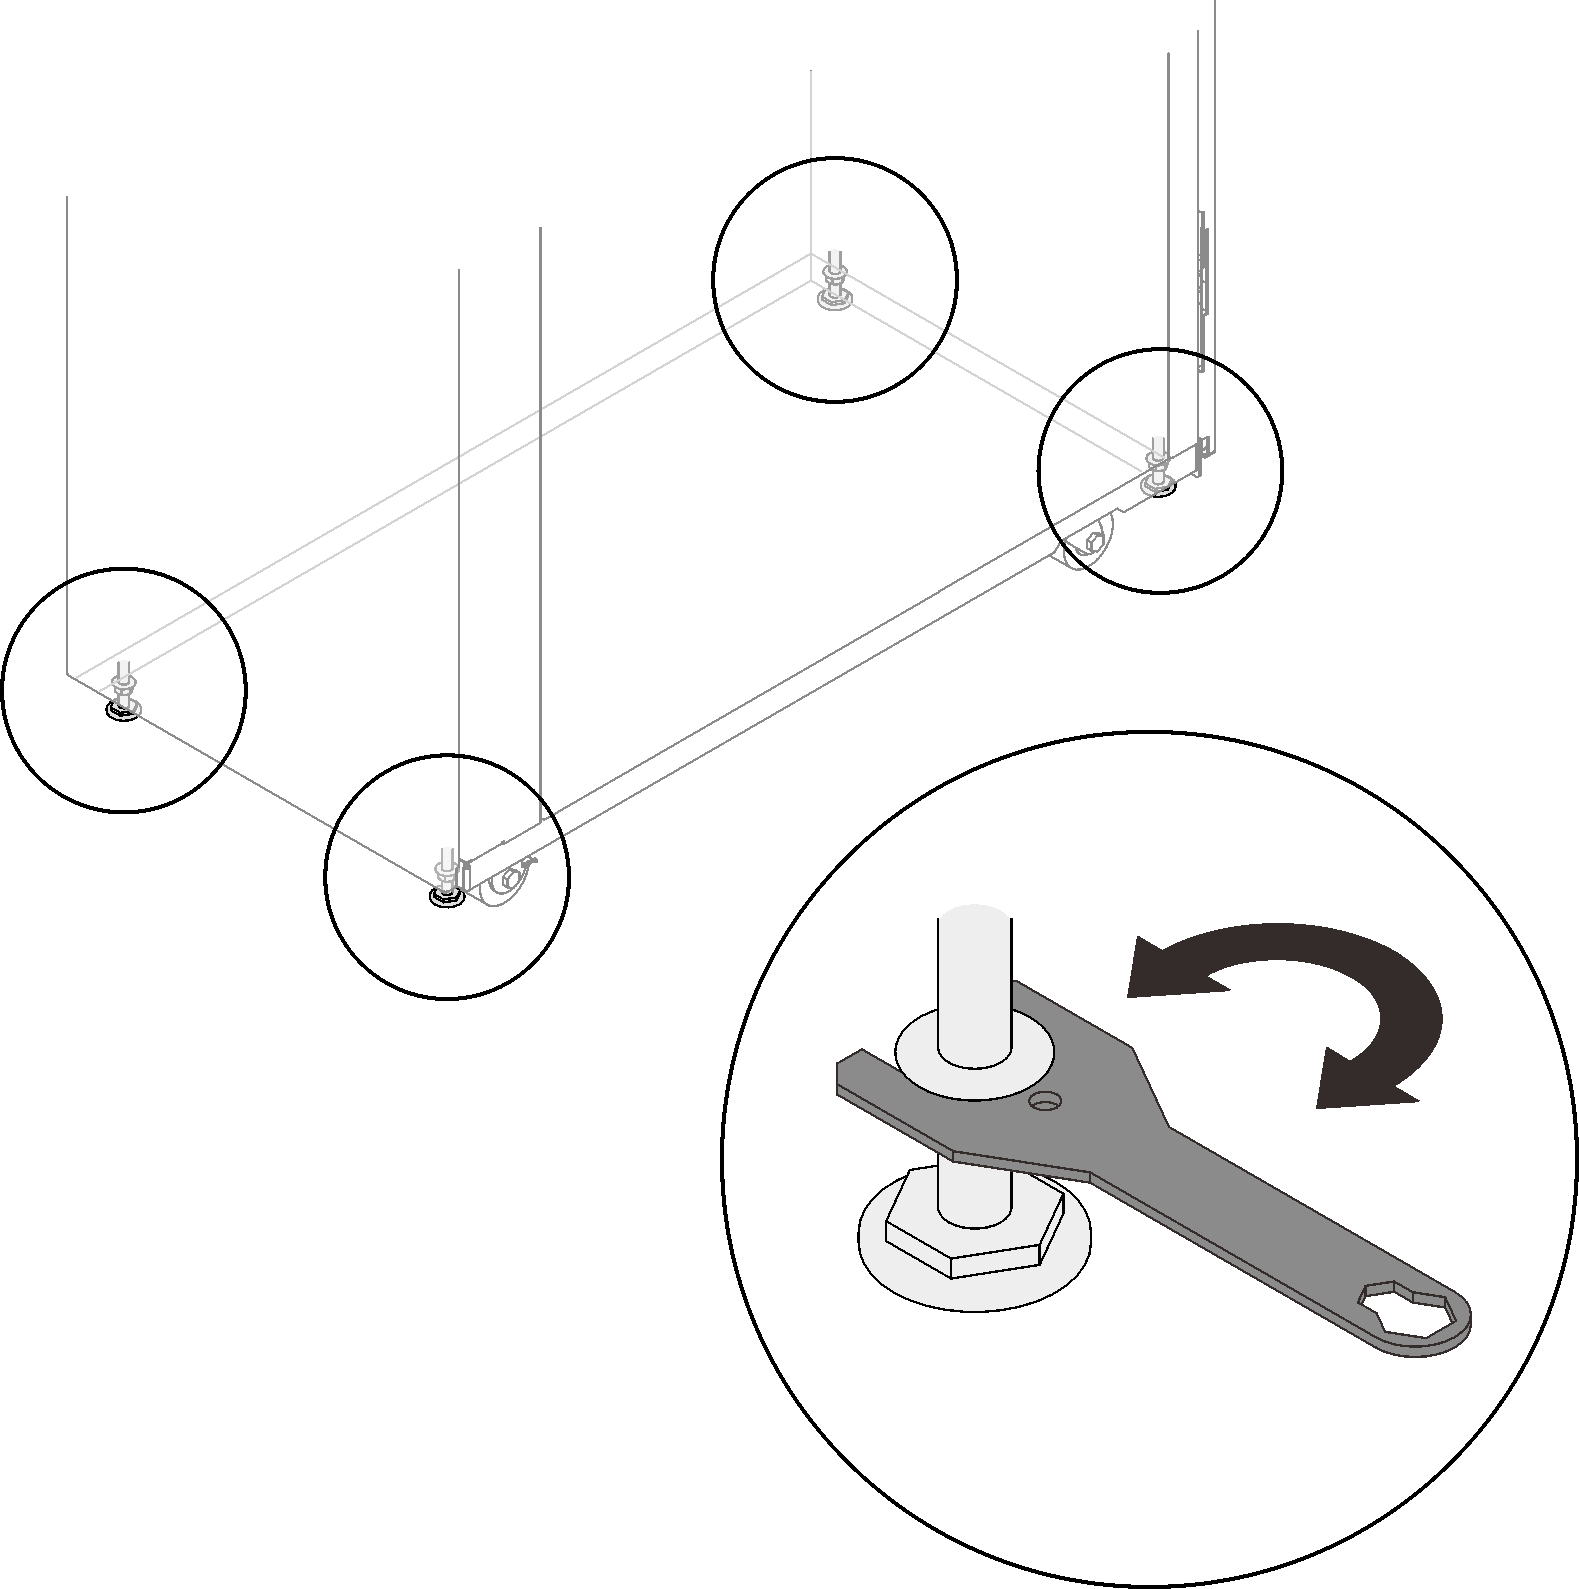
- Extend each of the four leveling pads in turns until they firmly contact the floor and support the rack cabinet. Make sure the cabinet is balanced by gently pushing the cabinet. If it tilts, adjust the length of the leveling pads until the cabinet is well balanced.Figure 1. Lowering the leveling pads
- Remove the outrigger stabilizing bars, and remove them.Figure 2. Removing the outrigger stabilizing bars
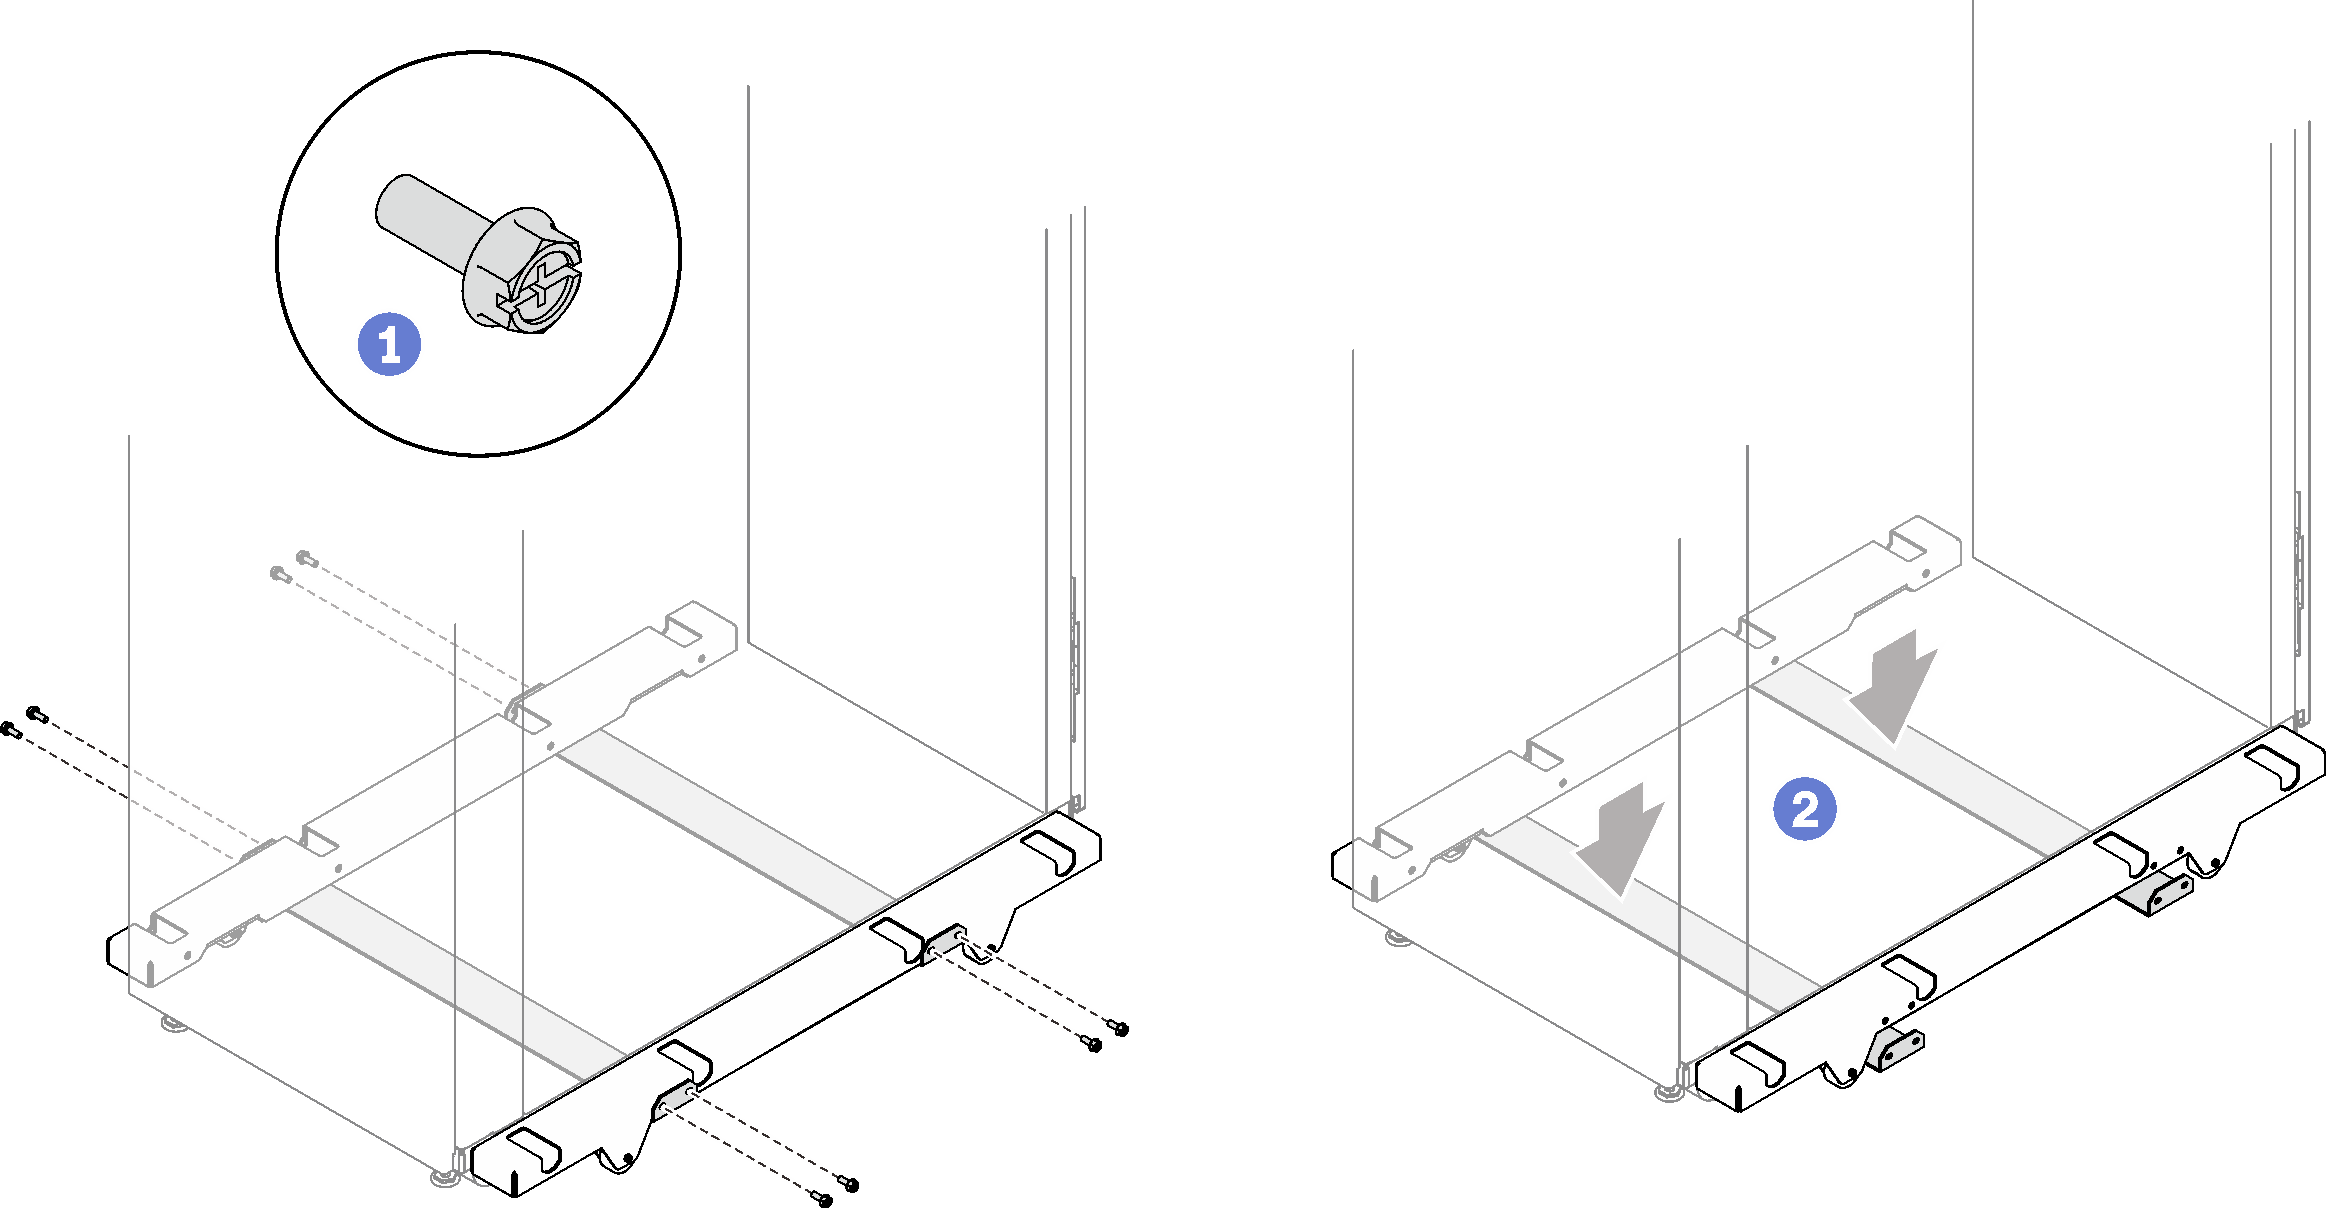
 Remove the eight screws that secure the two bars to the rack cabinet.
 Place the two stabilizing bars on the ground, and remove the bars.
- Remove the four screws that secure each of the outriggers, and remove the outriggers.Figure 3. Removing the outriggers
Install the outriggers
Procedure
- Extend each of the four leveling pads in turns until they firmly contact the floor and support the rack cabinet. Make sure the cabinet is balanced by gently pushing the cabinet. If it tilts, adjust the length of the leveling pads until the cabinet is well balanced.Figure 4. Lowering the leveling pads
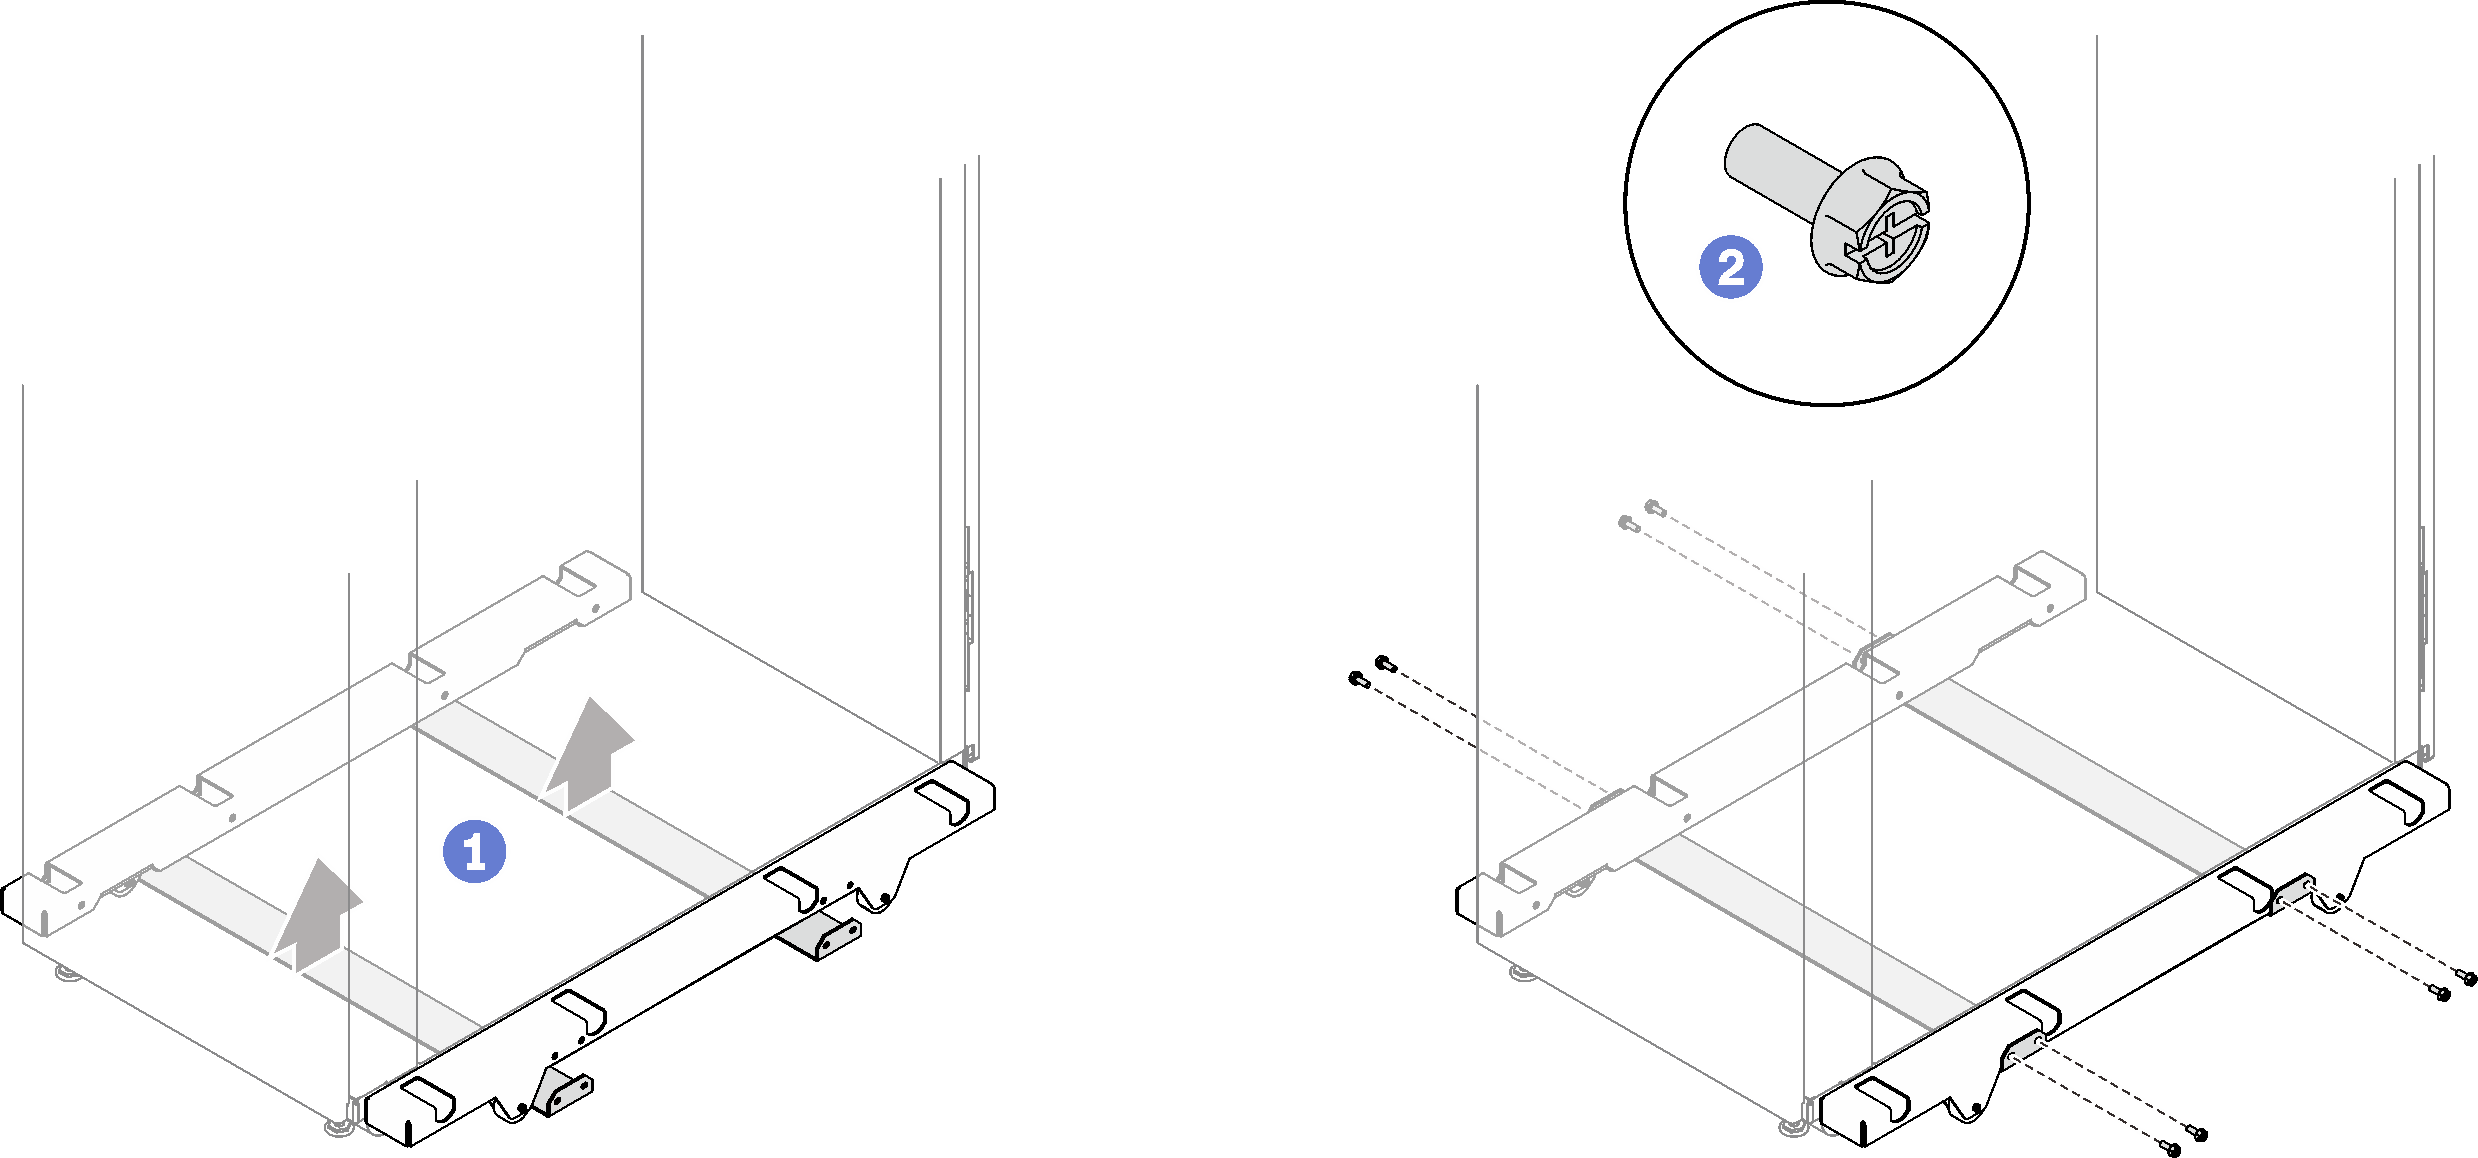
- Secure each of the outriggers with four screws.Figure 5. Installing the outriggers
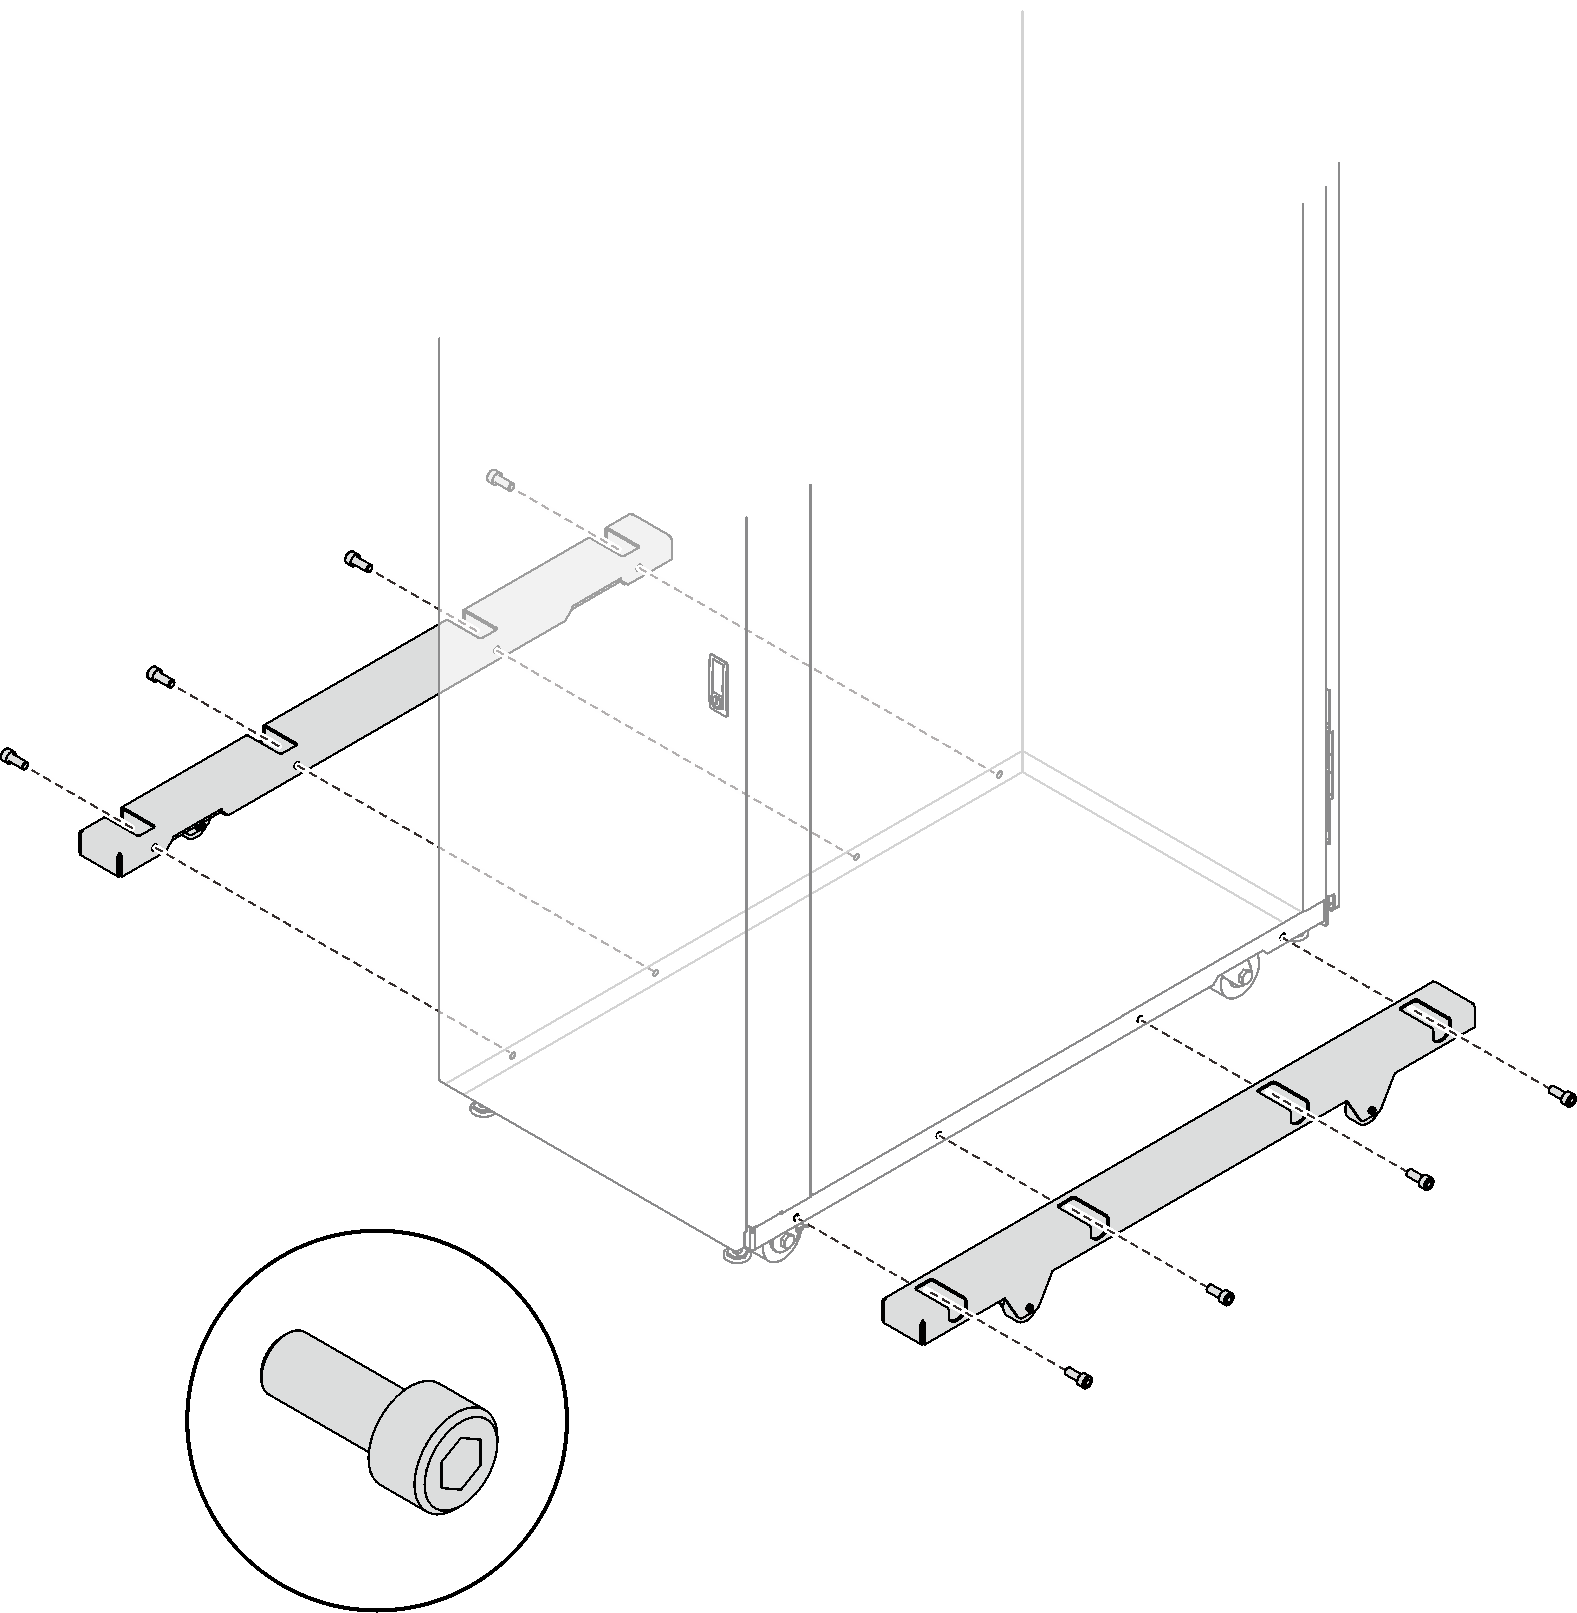
- Install the outrigger stabilizing bars.Figure 6. Installing the outrigger stabilizing bars
- Align the two stabilizing bars with the bottom of the rack cabinet.
- Secure the two stabilizing bars with eight screws.
- If you intend to move the rack cabinet, shorten the leveling pads until the cabinet weight is solely on the outriggers.Figure 7. Shortening the leveling pads
Give documentation feedback