Creating an SVM and server for S3
Although S3 can coexist in an SVM with other NAS protocols, you might want to create a new SVM to isolate the namespace and workload.
Our example will be using a dedicated S3 SVM.
You should first ensure that you have configured DNS for both your local and remote DM Series systems. Go to the Storage Manager for DM Series and select .
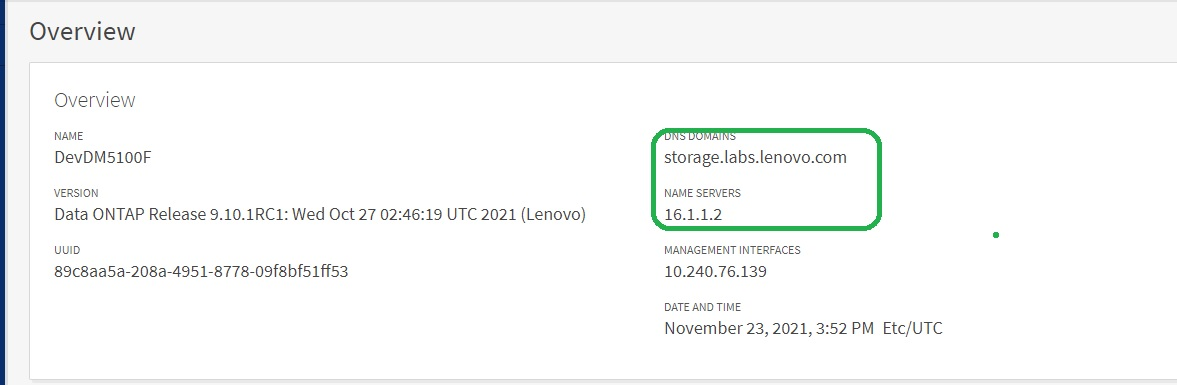
To add a DNS domain, click More under DNS DOMAINS and select .
To add name server(s), click More under NAME SERVERS and select .
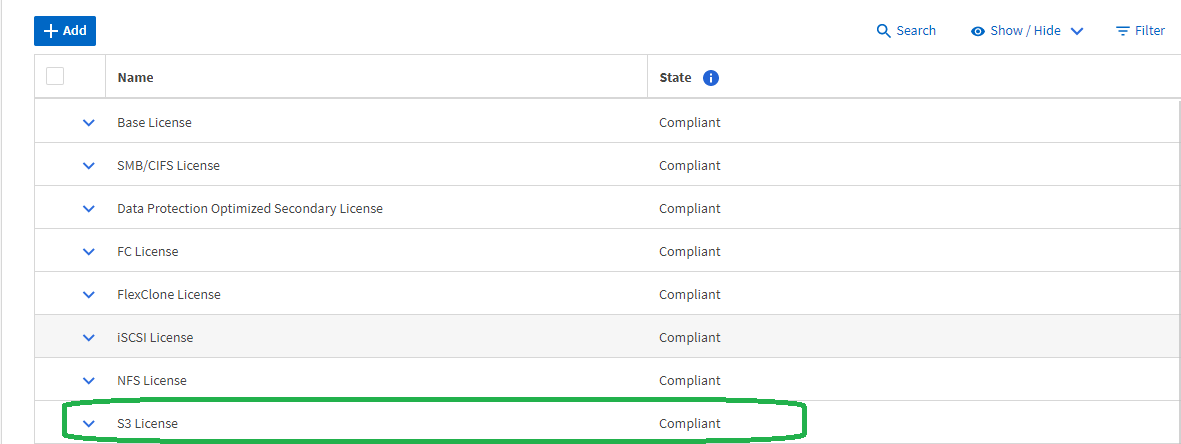
- Verify that S3 is licensed on your cluster: Go to the Storage Manager for DM Series and select
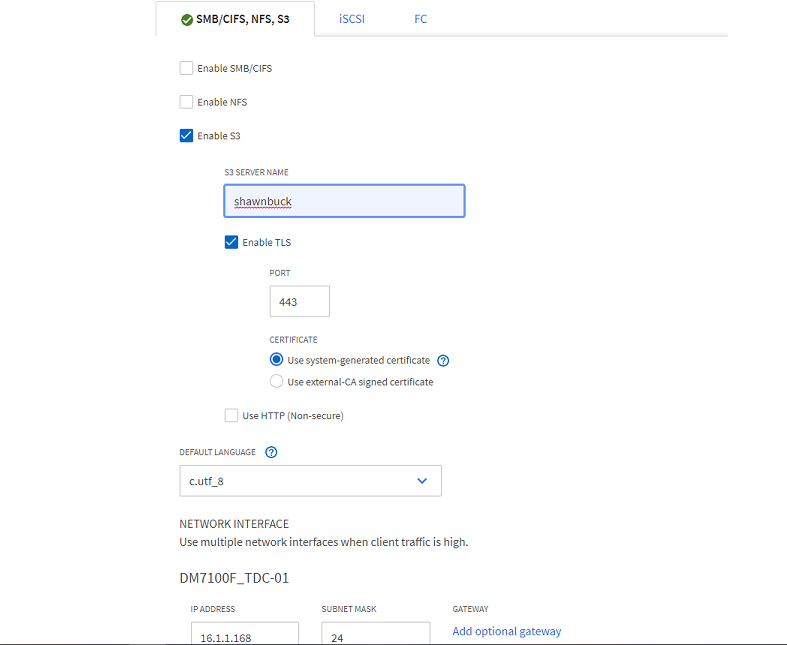
- Create your S3 enabled SVM.
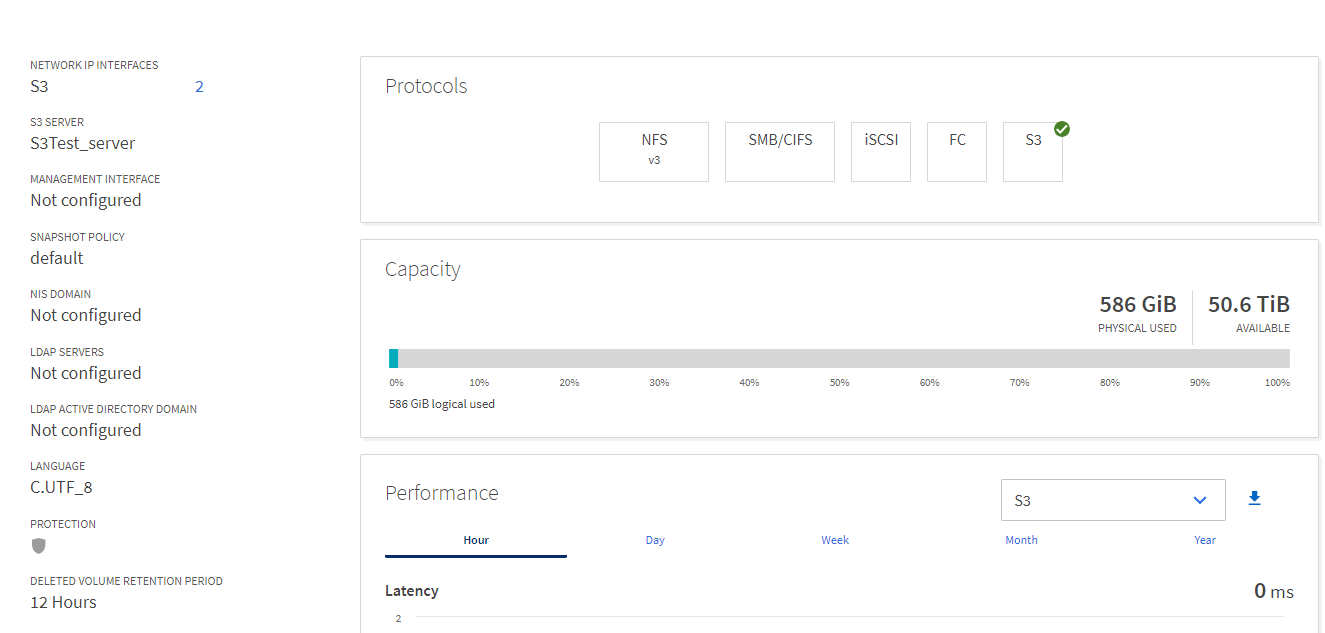
- Verify the configuration and status of the newly created SVM:
- Go to the Storage Manager for DM Series and select .
- Select the SVM that you have created by clicking the name.
- Verify that the protocol is enabled and the interfaces are created.
Give documentation feedback