After running the installation wizard, you must import the Lenovo XClarity Integrator Deployment Pack into SCCM. This task is considered a post-installation procedure.
Before you begin
Close the
SCCM administrative console before running the import wizard.
Procedure
- Start the wizard by clicking .
Figure 1. Lenovo XClarity Integrator Deployment Pack Import Wizard Welcome page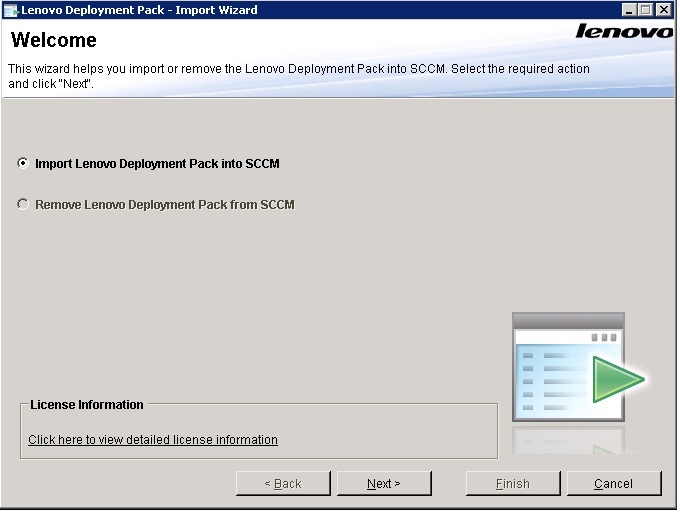
- On the Welcome page, select Import Lenovo Deployment Pack to SCCM, and click Next.
The
Boot Image page opens.
Figure 2. Boot Image page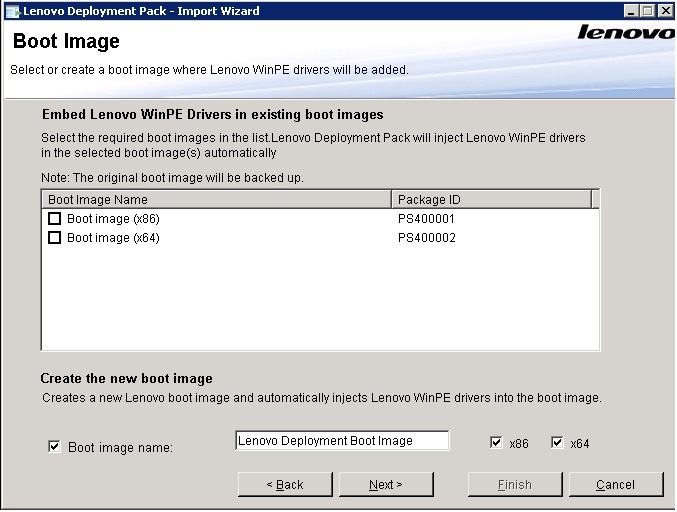
- Click Next to proceed with the import. The Progress page is displayed with the status of the selected items.
Figure 3. Progress page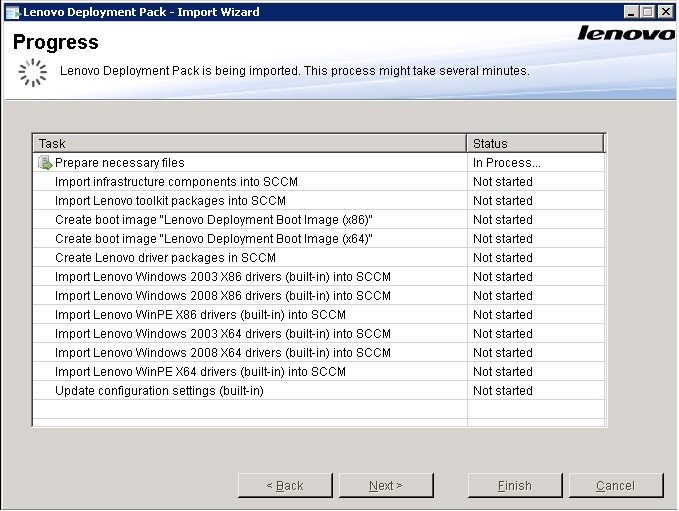
The tasks take a few minutes. Do not interrupt the import process.
After all tasks have been performed, the Completed page is displayed.
Figure 4. Completed page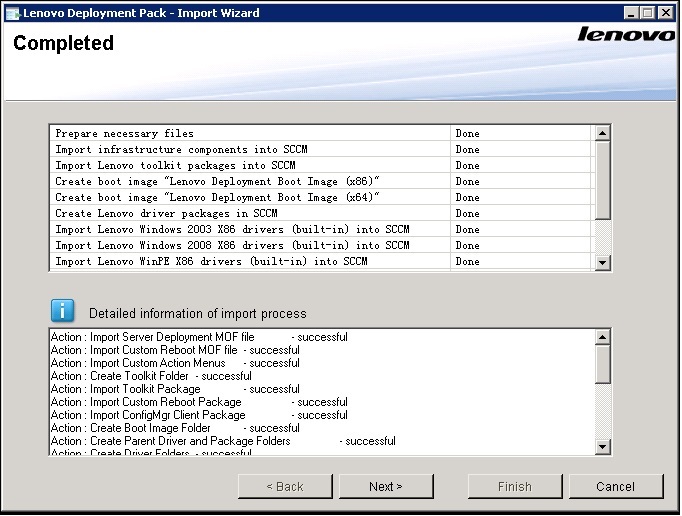
You also can use this wizard to remove the built-in and SEP packages from the SCCM server.
Before using the wizard, ensure that the SCCM administrative console is closed.
- Click Next. The Post Import Instruction page is displayed.
Figure 5. Post Import Instruction page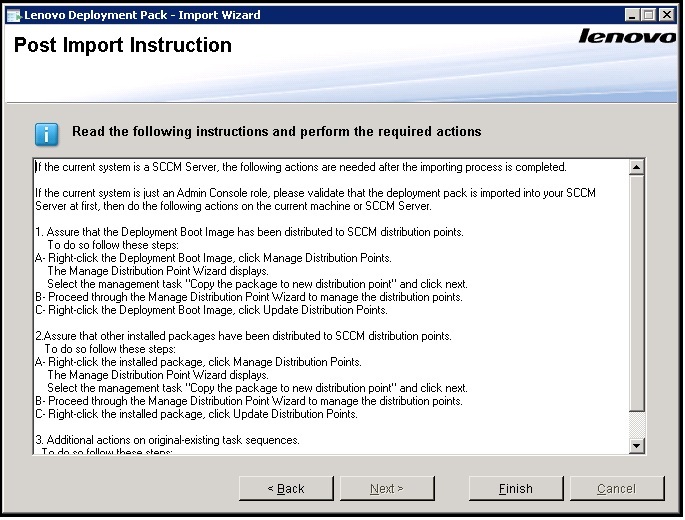
- After the import procedure is finished, ensure that all components are installed on the SCCM server. The image below shows components that were added to the SCCM site server after importing.
Figure 6. Items added to the SCCM console after installing the Lenovo XClarity Integrator Deployment Pack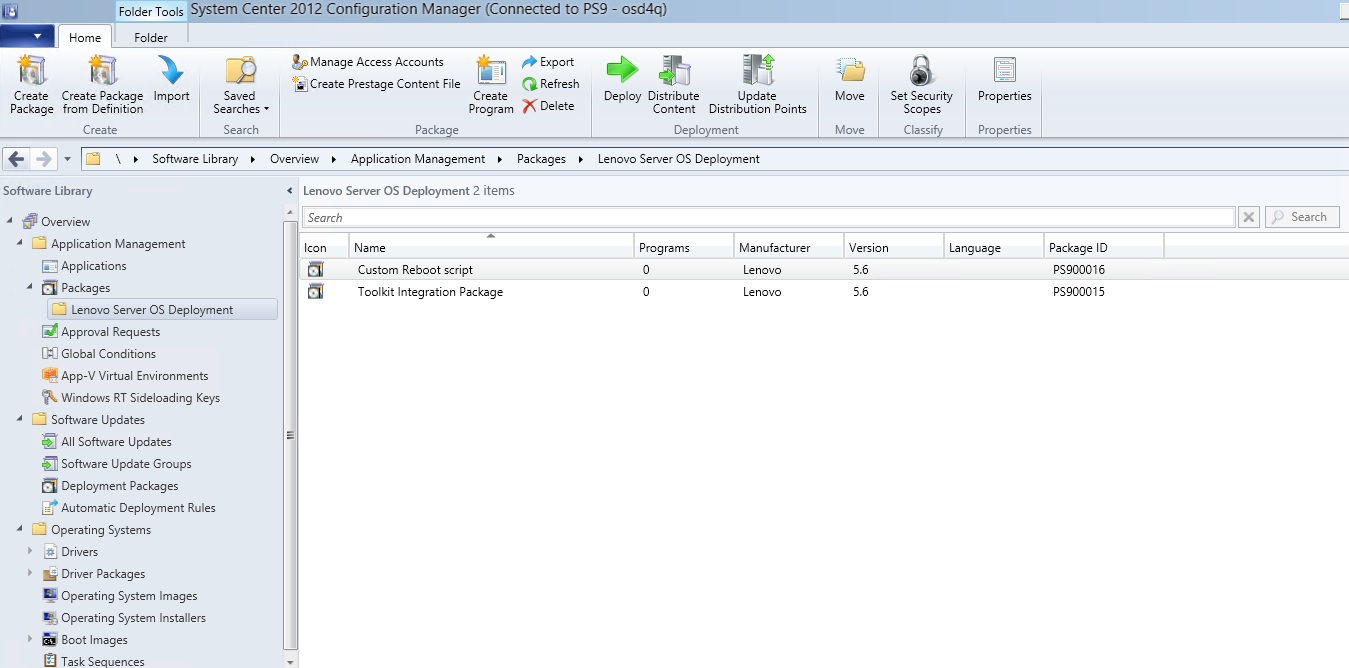
- Ensure that a Lenovo XClarity Integrator Deployment Pack task sequence has been added to the task sequence Bare Metal Server Deployment menu. The image below shows the new options.
Figure 7. New Bare Metal Deployment option added in SCCM 2012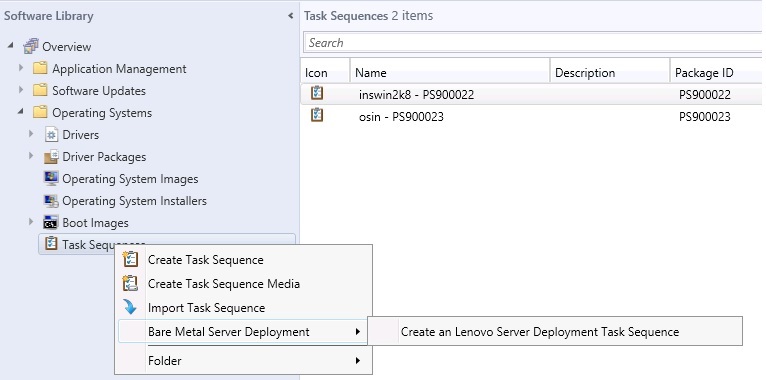
Figure 8. New action in Task Sequence Editor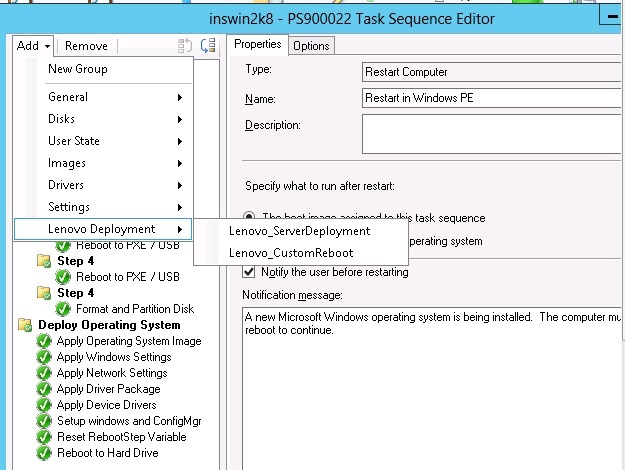
To import the Lenovo XClarity Integrator Deployment Pack into SCCM on a console-only server, choose Import Lenovo Deployment Pack into SCCM and accept the default configuration on the import wizard to complete the process.
What to do next
To remove the
Lenovo XClarity Integrator Deployment Pack from
SCCM, select
Remove Lenovo Deployment Pack from SCCM on the welcome page. Follow the prompts in the wizard to completely remove the files.


