Installing a Linux operating system
The wizard provides a step by step guidance for installing an operating system. Follow the instructions on the screen and the tips listed below to install a Linux operating system.
The CentOS Linux operating systems can be installed on the server successfully. However, Lenovo servers provide only hardware-level support for CentOS. For more information about CentOS compatibility with Lenovo servers, go to: https://lenovopress.com/osig
For SUSE Linux Enterprise Server 15 and 15.1 operating system, two image files are included: Installer DVD and Packages DVD. For example, if your operating system is SUSE Linux Enterprise Server 15, the image files are: SLE-15-Installer-DVD-x86_64-GM-DVD1.iso and SLE-15-Packages-x86_64-GM-DVD1.iso.
Two discs (physical or virtual)
Two USB storage drives
One disc (physical or virtual) and one USB storage drive
One USB storage drive including both image files
To create a USB storage device including both image files, do the following:Prepare a USB storage drive with an FAT32 partition and a minimum of 8 GB of free storage space.
Extract the Installer DVD image file to the root folder of the USB storage drive.
Create a packages sub folder in the root folder.
Extract the Package DVD image file to the packages sub folder.
Drive Selection
Figure 1. Drive Selection step (for Linux)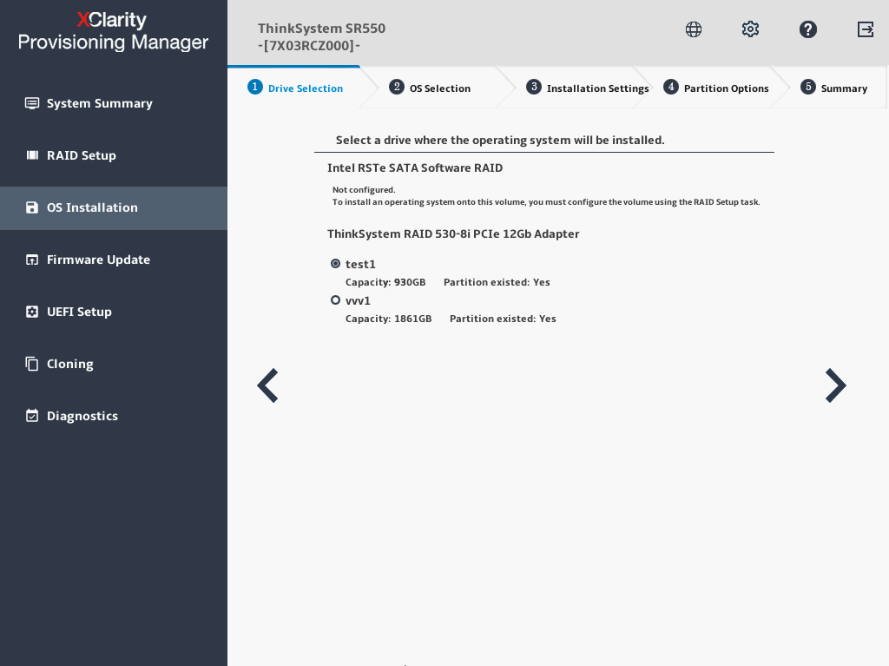 AttentionThe selected drive will be formatted during the installation. Back up all data on it before the installation.NoteThe drivers will be installed automatically after the OS installation. It is recommended to restart your server to ensure that all installed drivers take effect.
OS Selection
Figure 2. OS Selection step (for Linux)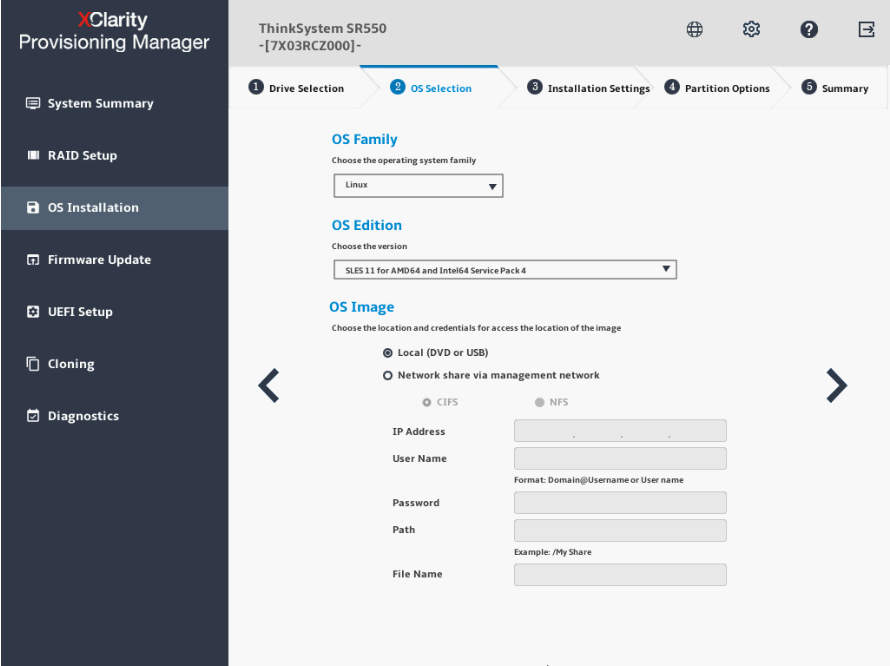
The IP address is made up of four parts separated by dots. The following table lists the valid value range for each part.
IP Address Part 1 Part 2 Part 3 Part 4 Valid values 1 – 223 0 – 255 0 – 255 0 – 255 Installation Settings
Figure 3. Installation Settings step – 1 (for Linux)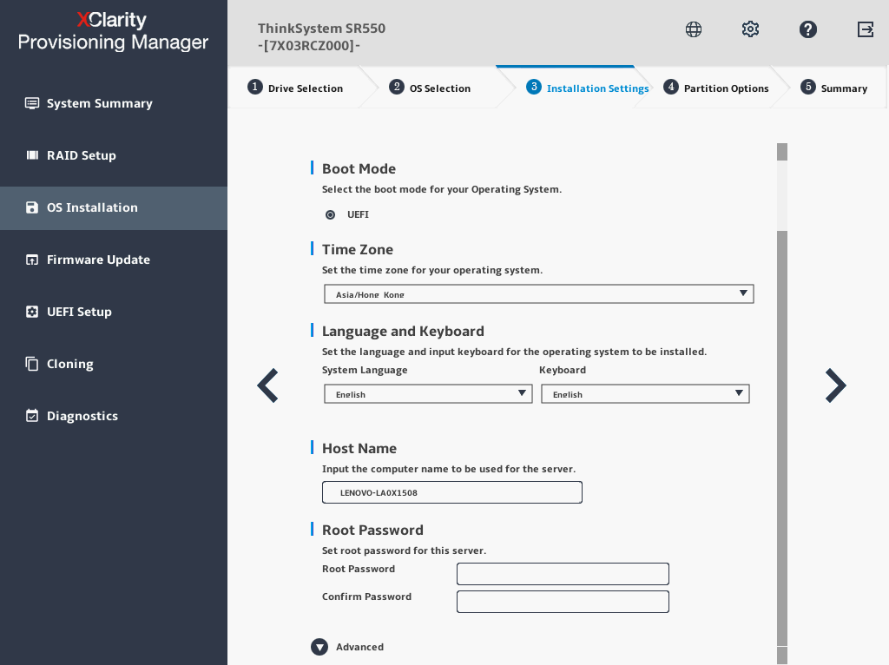
Root Password: You can change your root password later from the operating system.
If you want to do advanced configurations, expand the list by clicking the arrow icon next to Advanced.
Figure 4. Installation Settings step – 2 (for Linux)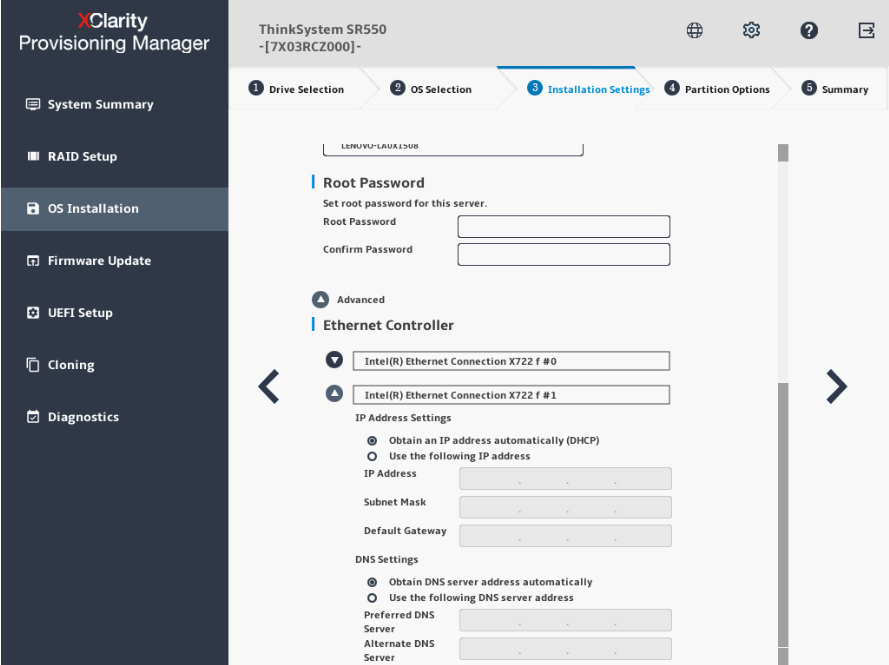
Refer to the following table for the valid values when you type the required address information.
Address Part 1 Part 2 Part 3 Part 4 IP Address 1 – 126; 128 – 223 0 – 255 0 – 255 1 – 254 Subnet Mask 0 – 255 0 – 255 0 – 255 0 – 255 Default Gateway 0 – 255 0 – 255 0 – 255 0 – 255 Preferred DNS Server 1 – 126; 128 – 223 0 – 255 0 – 255 0 – 255 Alternate DNS Server 1 – 126; 128 – 223 0 – 255 0 – 255 0 – 255 Partition Options
Figure 5. Partition Options step (for Linux)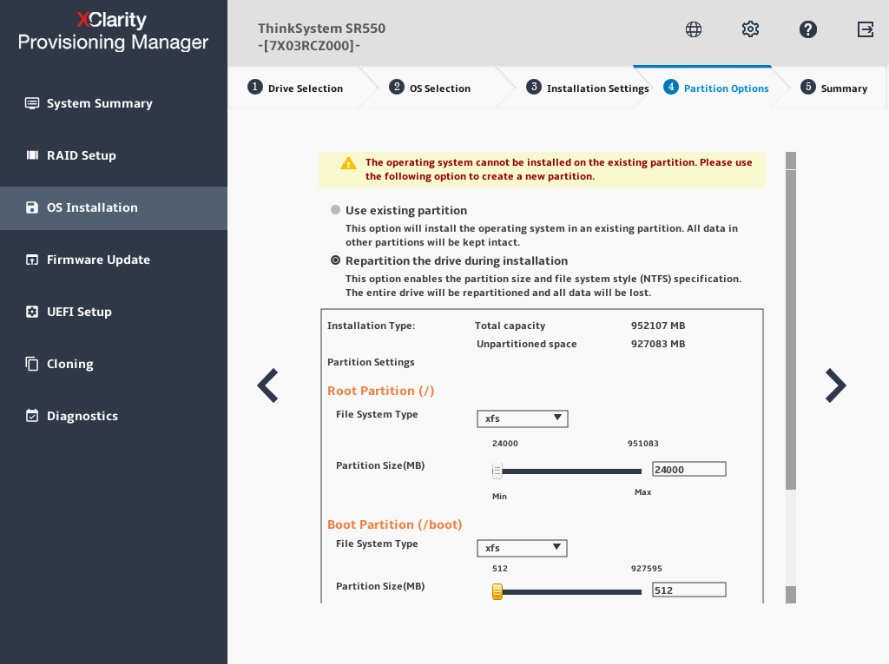
If no existing partition is detected on the drive, select Repartition the drive during installation.
Root Partition: The root partition size depends on the space required for the operating system and applications.
Boot Partition: This partition contains files required to start the operating system.
Swap Partition: Swap partition is the virtual memory in Linux. When the Random Access Memory (RAM) is full, data will be stored on the swap partition temporarily. Although swap partition can be used to store data, it should not be considered as a replacement for RAM. It is located on hard disk drives, and has slower access speed than RAM.
Summary
Figure 6. Summary step (for Linux)
If you want to change some settings, click
 until you return to the page where you can make the changes.
If you want to export the operating system installation settings to a response file, refer to Exporting an operating-system-installation response file.
Click
 . The installation process starts. Wait until the installation finishes.