Installing a Windows operating system
Drive Selection
Figure 1. Drive Selection step (for Windows)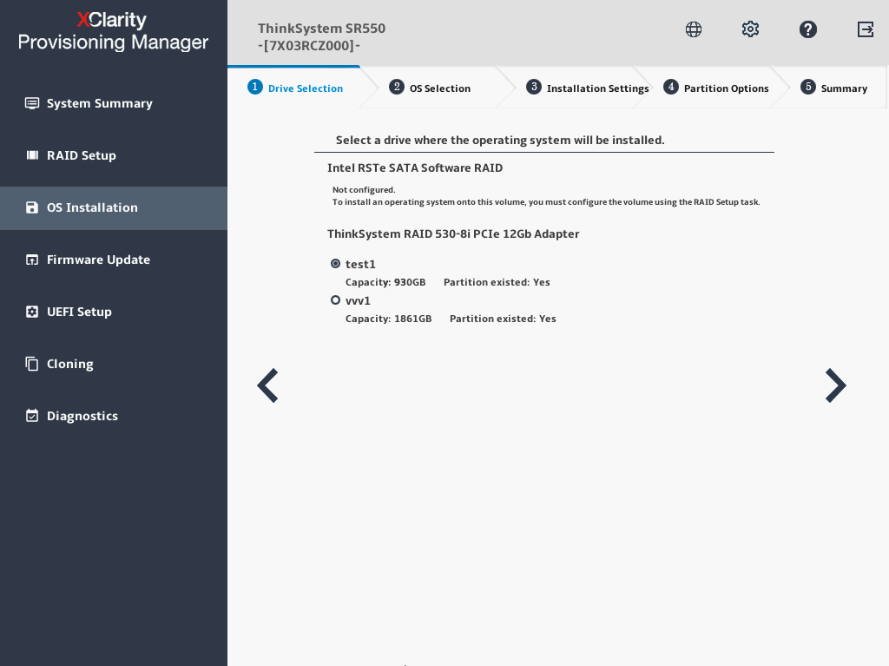 AttentionThe selected drive will be formatted during the installation. Back up all data on it before the installation.NoteThe drivers will be installed automatically after the OS installation. It is recommended to restart your server to ensure that all installed drivers take effect.
OS Selection
Figure 2. OS Selection step (for Windows)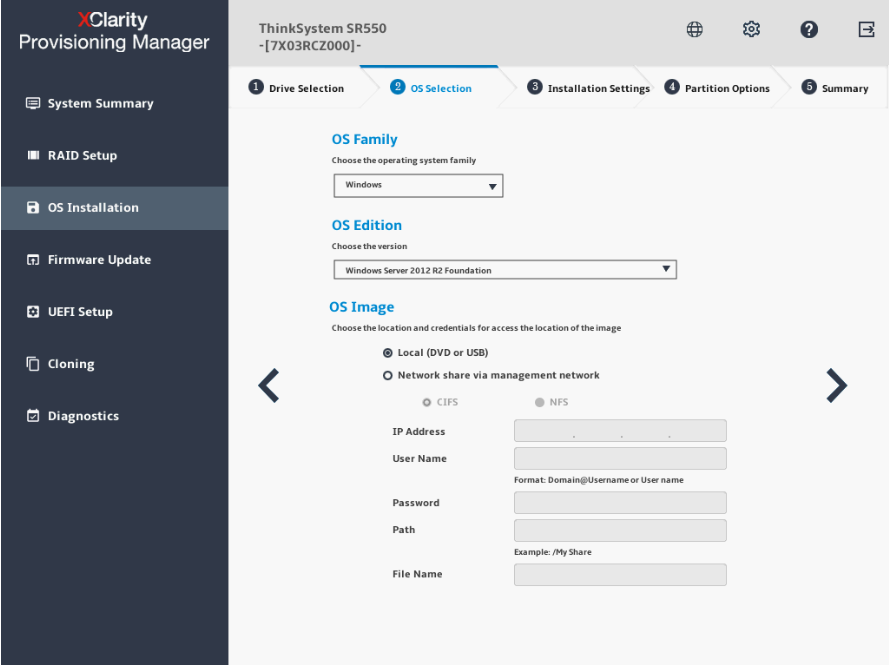
The IP address is made up of four parts separated by dots. The following table lists the valid value range for each part.
IP Address Part 1 Part 2 Part 3 Part 4 Valid values 1 – 223 0 – 255 0 – 255 0 – 255 Installation Settings
Figure 3. Installation Settings step – 1 (for Windows)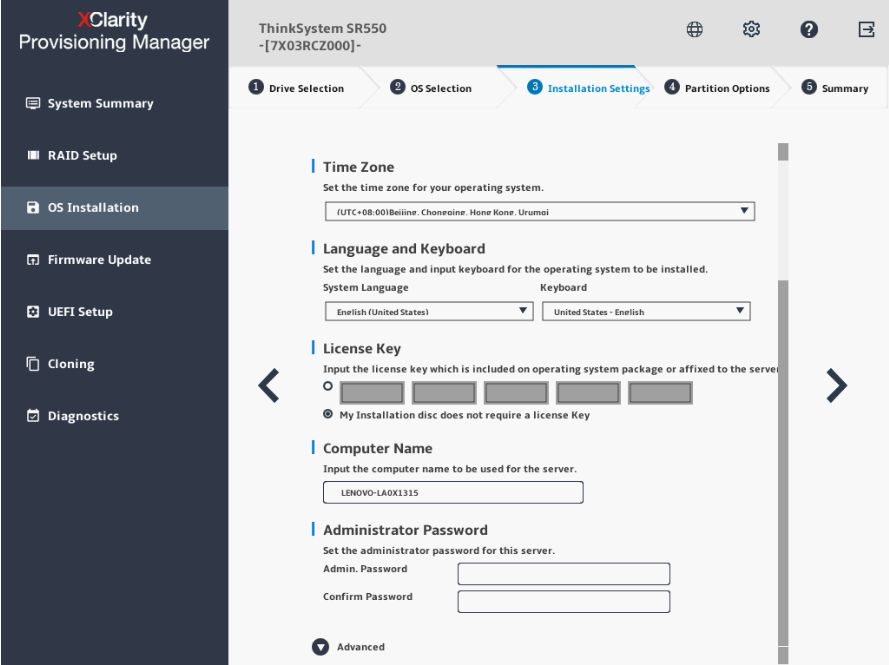
Administrator Password: You can change your administrator password later from the operating system.
If you want to do advanced configurations, expand the list by clicking the arrow icon next to Advanced.
Figure 4. Installation Settings step – 2 (for Windows)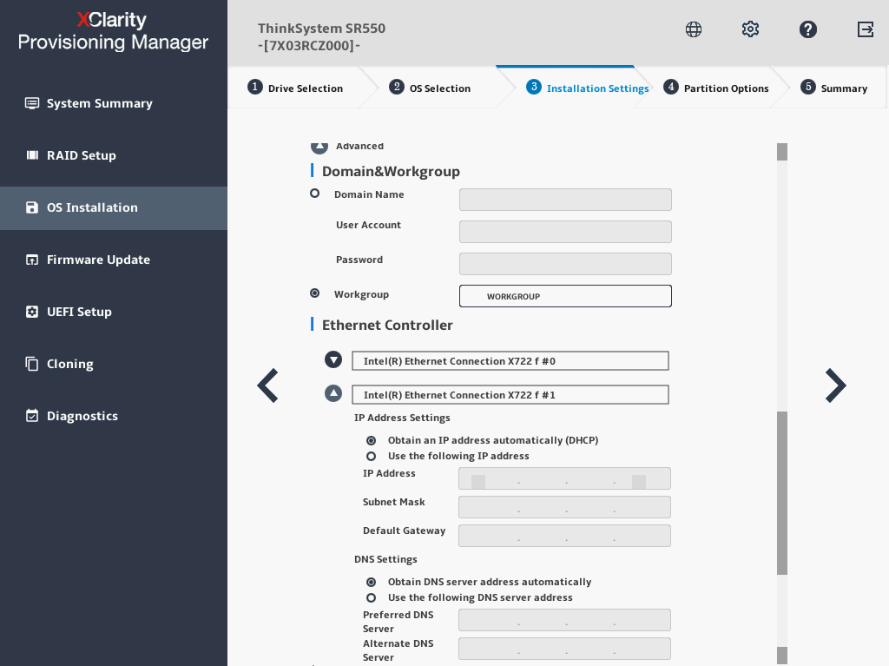
Refer to the following table for the valid values when you type the required address information.
Address Part 1 Part 2 Part 3 Part 4 IP Address 1 – 126; 128 – 223 0 – 255 0 – 255 1 – 254 Subnet Mask 0 – 255 0 – 255 0 – 255 0 – 255 Default Gateway 0 – 255 0 – 255 0 – 255 0 – 255 Preferred DNS Server 1 – 126; 128 – 223 0 – 255 0 – 255 0 – 255 Alternate DNS Server 1 – 126; 128 – 223 0 – 255 0 – 255 0 – 255 Figure 5. Installation Settings step – 3 (for Windows)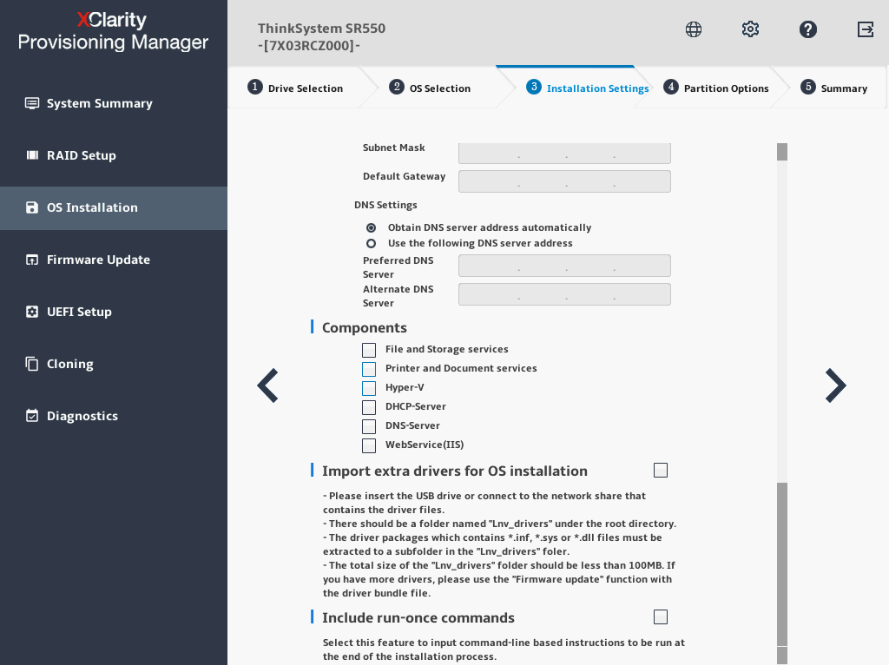
Components: You can select one or more components for installation according to your requirements.
Include run-once commands: If you want to run specified commands at the end of the installation process, select the check box. A command-type area is displayed. Type one command and click Add. The command is added to the command list. You can add five commands at most. If you want to remove a certain command, select it and click Remove. The commands in the command list will be run one time only and in the order you type them.
Partition Options
Figure 6. Partition Options step (for Windows)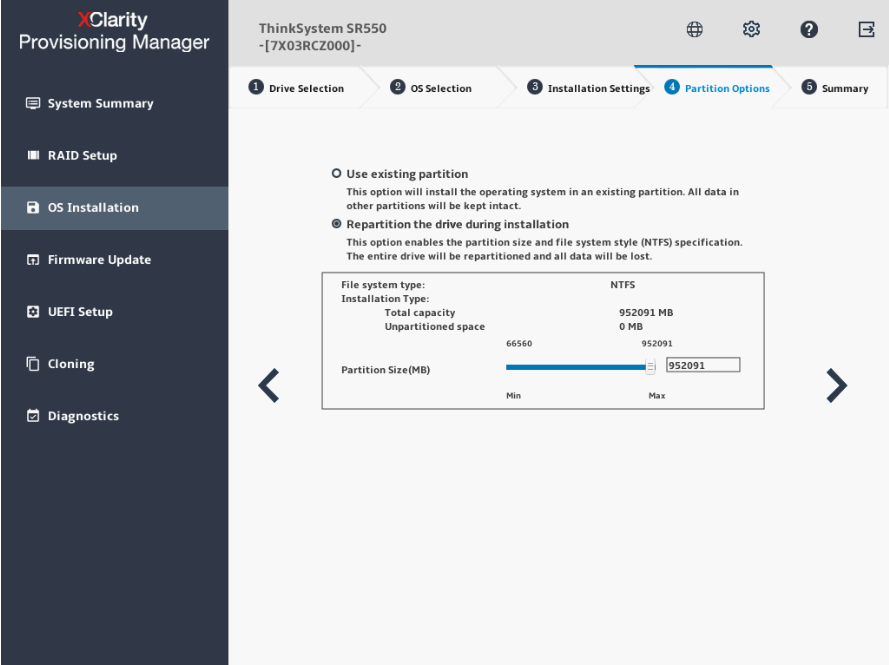
If no existing partition is detected on the drive, select Repartition the drive during installation.
Summary
Figure 7. Summary step (for Windows)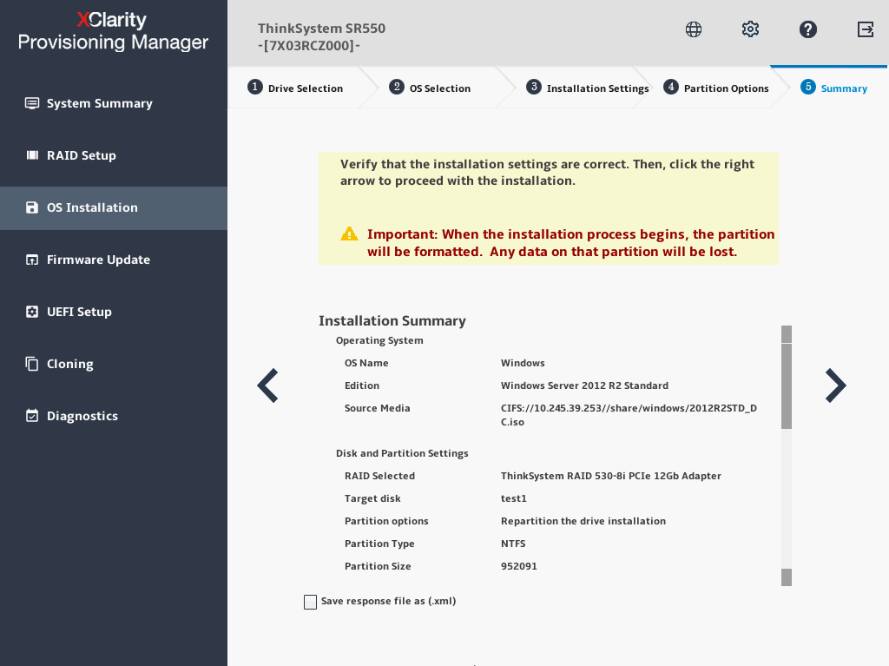
If you want to change some settings, click
 until you return to the page where you can make the changes.
If you want to export the operating system installation settings to a response file, refer to Exporting an operating-system-installation response file.
Click
 . The license agreement page for the operating system is displayed. Read and accept the license agreement. Click Next. The installation process starts. Wait until the installation finishes.